Table of Contents
Advertisement
Quick Links
Advertisement
Table of Contents

Related Manuals for Rocktron XCHANGE


Summary of Contents for Rocktron XCHANGE
- Page 2 This will help insure compliance with the Directive(s). For more information about other Rocktron products, please see your local dealer or one of our importers closest to you (listed on the Rocktron website - www.rocktron.com). Precautions Read all instructions contained in this manual.
- Page 3 Precautions Continued..Do not block any ventilation openings (if applicable). Install in accordance with the manufacturer’s instructions. Do not install near any heat sources such as radiators, heat registers, stoves or other apparatus (including amplifiers) that produce heat. This product is not equipped with a plug or cable. This pedal runs on a 9 Volt Battery, if a 9Volt DC adapter is the used please follow adapter manufacturer’s operation instructions.
- Page 4 Rocktron HEX expression/volume controllers for continuous controlling of all sorts of parameters. A fantastic feature of the MIDI XChange is that it runs on a 9-volt battery as well as external power. Thus, if you are doing a gig where it is hard to run power out to your floor pedals - you won’t have any problem with the MIDI...
- Page 5 Basic Connection with an effect processor...
- Page 6 Connection using a Rocktron Xpression and Phantom Power...
- Page 7 Connection when using a rack system from midi out/thru to midi in of second effects processor from midi out...
- Page 8 Connection using a Rocktron Xpression with a Bass amplifier...
- Page 9 Connection using a Rocktron HEX Pedal and Xpression Processor...
- Page 10 Connection using a Rocktron HEX pedal and a non-Rocktron effects processor back panel of processor to midi in...
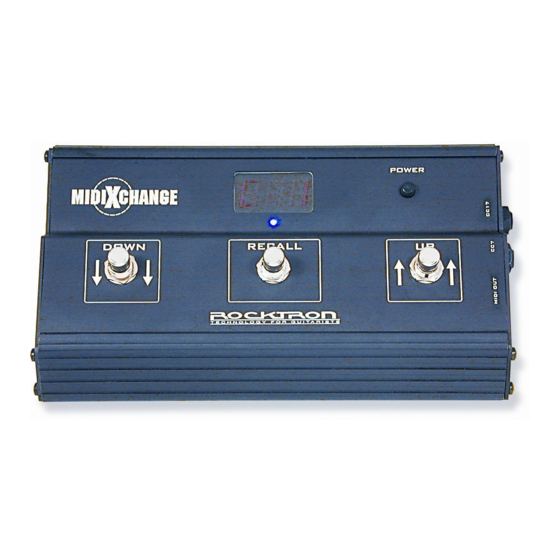
- Page 11 Functions and Control Layout...
- Page 12 Functions and Control Layout continued..
- Page 13 CALL button to choose the selected preset. CC17 Jack (CONTINUOUS CONTROLLER 17 Jack) This jack will allow you to plug in a Rocktron HEX Volume/ Expression pedal to control various parameters via MIDI (see HOW TO USE THE CC17 AND CC7 PORTS for details on how to operate this simple to use function).
- Page 14 MIDI OUT Jack - This Jack is used to connect to various MIDI devices. Using a standard 5-Pin MIDI Cable or the Rocktron RMM900 7-Pin MIDI Cable connect from this jack to the “MIDI IN” on the receiving MIDI device. (See the CONNECTIONS sections for details on how to connect up to various MIDI devices).
- Page 15 UP Switch - This switch will allow you to scroll up to the desired preset. You may scroll up in two ways: 1) By depressing the switch and releasing it after the click will allow you to scroll one preset at a time. 2) By depressing the switch and holding it down the preset numbers will automatically start scrolling up.
- Page 16 (not included) plugged into the back of select Rocktron products (see connection diagrams for more detail). Power is then supplied to the MIDI XChange through pins 6 and 7 of the RMM900 MIDI Cord. This is a great set up to minimize adapters and cables out in...
- Page 17 SELECTING AND RECALLING PRESETS When power is applied using the Power switch (see point 2), the MIDI XChange’s display a blue LED will begin to flash. The number that appears in the display will look like this: Now you are ready to select a preset. To select preset number 1 at...
- Page 18 Depressing and holding the switch down will engage the automatic increment feature of the MIDI XChange. The MIDI XChange will now begin scrolling up through the preset numbers. After 4 increments the increment speed will increase allowing faster preset navigation.
- Page 19 35: At this point - if you step on the RECALL switch again the MIDI XChange will toggle back to the last preset - in this case preset number 1. This function allows you to switch back and forth...
- Page 20 Also auto enable of these controller messages are detected when any of the two ports have a pedal attached to them. Everthing is handled by the MIDI XChange for ease of use. An example of this would be - when you had reduce the volume of...
- Page 21 HOW TO USE THE CC17 and CC7 PORTS: Connections - when using the Rocktron HEX Volume/Expression pedal use a stereo to stereo 1/4 jack cable (not included). When using a pedal other than the HEX you wil need two mono 1/4 male...
- Page 22 CC17 Port - This controller port is the default volume controller for all Rocktron products. Thus, all you need to do to control the volume of each preset is plug an expression pedal into this port and it will control the volume on all Rocktron products.
- Page 23 3) While holding down the DOWN switch press the UP Switch and release both. The display of the MIDI XChange should be flashing C01 and the blue LED will be flashing as shown in the diagram below. Using the UP and DOWN switches you may now select the MIDI Channel you would like to use.
- Page 24 1 or use the UP or DOWN switches to scroll to the desired preset. MIDI CHANNEL CONFIRMATION If you want to confirm this simply turn off the MIDI XChange and wait 10 seconds then turn it back on a again. The display will indicate the current MIDI Channel.
- Page 25 MIDI MESSAGE MIDI CHANNEL = 1- 16 [0H-FH] PROGRAM CHANGE MESSAGE: [PC COMMAND || MIDI CHANNEL] = 0C0H [VALUE] = 1-128 [000H-07FH] COMPLETE MESSAGE = 0C0 07F CONTINUOUS CONTROLLER MESSAGE [CC COMMAND || MIDI CHANNEL] = 0B0H [CC NUMBER] = 7 or 17 [007H or 011H] [EOX] = 0F7H COMPLETE MESSAGE = 0B0 007 0F7...
- Page 26 Other Rocktron Products Rack Gear: Gainiac (preamp w/12ax7 tube) Chameleon 2000 (preamp w/multi-effects) RepliTone MP(modelling preamp w/multi-effects) Xpression (multi-effects processor) Blue Thunder (bass preamp w/multi-effects) Voodu Valve (preamp w/12ax7 tube and multi-effects) Prophesy (our top of the line preamp with multi-effects) ...
-
Page 27: Foot Controllers
Foot Controllers: MIDI Mate (Midi Foot Controller) All Access (Midi Foot Controller ) HEX (Expression Pedal) RMM900(7-pin Din MIDI Cable) RM4 (MIDI Controller for Vendetta amps) RFS1 and RFS2 (Single and Double Latching Footswitches for Rampage Amps) Electric Guitar - Acoustic Guitar and Bass Amplifiers: Vendetta Head(100 W Head 4-Channels All Tube - MIDI Switchable) Vendetta Combo (100W 2x12 Combo Celestion 90s all Tube4-Channel MIDI Switchable) R80DSP (80W 1x12 Amp w/Digital Effects) - Page 28 Rocktron - A Division of GHS Corporation 2813 Wilber Ave Battle Creek MI 49015 Rocktron Phone: 1-(269)-968-3351 Email: info@rocktron.com www.rocktron.com 2003-0001 Rev. 02/01/03...
Need help?
Do you have a question about the XCHANGE and is the answer not in the manual?
Questions and answers