Table of Contents

Related Manuals for Radio Shack 2100989


Summary of Contents for Radio Shack 2100989
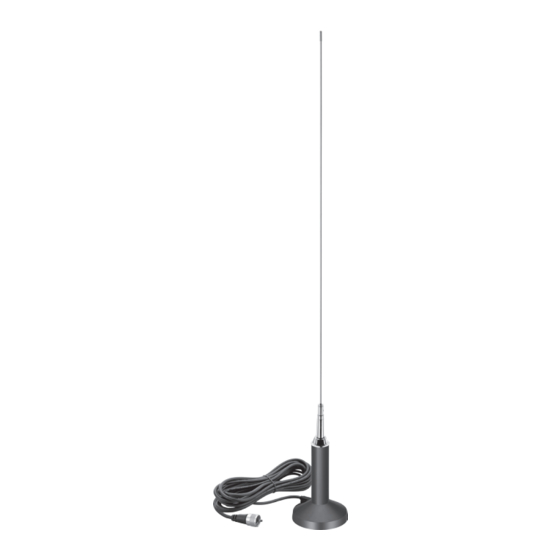
- Page 1 2100989 User’s Guide Magnetic-Mount • Stainless Steel 41.3” (105 cm) CB Antenna Thank you for purchasing your Magnetic-Mount Stainless Steel CB Antenna from RadioShack. Please read this user’s guide before installing, setting up, and using your new antenna.
-
Page 2: Package Contents
Package contents Magnet Base Loading Coil Hex Screwdriver Stainless Steel Whip Quick Start Features • Attaches onto your car’s trunk lid or any flat metal surface • No drilling required... - Page 3 Select Location 1. Select a convenient flat surface location for the antenna base. Make sure the antenna: • does not block the driver’s view. • does not interfere with windshield wiper operation. 2. Clean the surface to remove dirt. Install Antenna 1. Screw the loading coil section of the antenna onto the thread of the mounting magnet base. 2. Place the magnet base onto your car. 3. Route the coax cable into the car, preferably through a window. If routed through the trunk or a door opening, tape the cable securely to the door frame using a cloth-backed tape. Cable will normally not be harmed by opening and closing the window, door, or trunk. Ensure that the cable is not crushed or deformed. 4. Run the cable to your CB transceiver and connect the coax plug to the transceiver antenna connector (see your transceiver’s instructions). Notes: • Do not remove the foil covering the bottom of the magnet structure.
- Page 4 Adjust Antenna The length of the whip has been set for best performance of most receivers operating on the 27MHz band. If an SWR (standing wave ratio) meter is available, you can further optimize the overall efficiency of the system by following the antenna adjustment instructions. 1. Follow the SWR meter’s instructions to connect it to your antenna cable. 2. Set the selector to channel 20.
- Page 5 3. Loosen the collet holding the whip. Use the included hex screwdriver to turn the allen head set screw at the top of the whip base counterclockwise. 4. Adjust the whip element until it is approximately halfway down in the whip base. 5. Press the transmit switch and observe the meter reading (refer to your SWR meter’s user’s guide for more details on using the meter). 6. Raise the whip element by approximately 1/8” increments to see if the meter reading can be reduced. Repeat the procedure starting from the center position and lowering the element. Different SWR readings may be found when the antenna is located at different points. Determine experimentally, by trial and error, just where the antenna must be mounted to provide the lowest SWR reading. Readings below 2 are acceptable for most installations. Allen Head Set Screw 1/8” SWR Meter 10W FWD PWR WATT 100W REF SWR 2 4 6 8 10...
-
Page 6: Specifications
(every 3 to 6 months) with a wire brush to maintain low SWR readings. Specifications Frequency range ........CB: 26.965 - 27.405Mhz Impedance ................. 50 ohms VSWR limitation ............2.0:1 or less Max power................50 watts Cable ..........16.4 ft (5m) RG58U coax cable Connectors ............PL259 connector Whip height............. 35.25 inch (89.5 cm) Overall Height ............. 41.3 inch (105cm) Specifications are subject to change and improvement without notice. Actual product may vary from the images found in this document. Limited Warranty RadioShack warrants this product against defects in materials and workmanship under normal use by the original purchaser for ninety (90) days after the date of purchase from a RadioShack-owned store or an authorized RadioShack franchisee or dealer. RADIOSHACK MAKES NO OTHER EXPRESS WARRANTIES. This warranty does not cover: (a) damage or failure caused by or attributable to abuse, misuse, failure to follow instructions, improper installation or maintenance, alteration, acci-... - Page 7 RadioShack sales receipt as proof of purchase date to any RadioShack store in the U.S. RadioShack will, at its option, unless otherwise provided by law: (a) repair the product without charge for parts and labor; (b) replace the product with the same or a comparable product; or (c) refund the purchase price. All replaced parts and products, and products on which a refund is made, become the property of RadioShack. New or reconditioned parts and products may be used in the performance of warranty service. Repaired or replaced parts and products are warranted for the remainder of the original warranty period. You will be charged for repair or replacement of the product made after the expiration of the warranty period. RADIOSHACK EXPRESSLY DISCLAIMS ALL WARRANTIES AND CONDITIONS NOT STATED IN THIS LIMITED WARRANTY. ANY IMPLIED WARRANTIES THAT MAY BE IMPOSED BY LAW, INCLUDING THE IMPLIED WARRANTY OF MERCHANTABILITY AND, IF APPLICABLE, THE IMPLIED WARRANTY OF FITNESS FOR A PARTICULAR PURPOSE, SHALL EXPIRE ON THE EXPIRATION OF THE STATED WARRANTY PERIOD. EXCEPT AS DESCRIBED ABOVE, RADIOSHACK SHALL HAVE NO LIABILITY OR RESPONSIBILITY TO THE PURCHASER OF THE PRODUCT OR ANY OTHER PERSON OR ENTITY WITH RESPECT TO ANY LIABILITY, LOSS OR DAMAGE CAUSED DIRECTLY OR INDIRECTLY BY USE OR PERFORMANCE OF THE PRODUCT OR ARISING OUT OF ANY BREACH OF THIS WARRANTY, INCLUDING, BUT NOT LIMITED TO, ANY DAMAGES RESULTING FROM INCONVENIENCE AND ANY LOSS OF TIME, DATA, PROPERTY, REVENUE, OR PROFIT AND ANY INDIRECT, SPECIAL, INCIDENTAL, OR CONSEQUEN- TIAL DAMAGES, EVEN IF RADIOSHACK HAS BEEN ADVISED OF THE POSSIBILITY OF SUCH DAMAGES. Some States do not allow limitations on how long an implied warranty lasts or the exclusion or limitation of incidental or consequential damages, so the above limitations or exclusions may not apply to you. This warranty gives you specific legal rights, and you may also have other rights which vary from State to State. You may contact RadioShack at: RadioShack Customer Relations 300 RadioShack Circle, Fort Worth, TX 76102 04/08 www.RadioShack.com Protect the environment by recycling used electronics. Go to E-CyclingCentral.com to find a recycle location near you. ©2010. RadioShack Corporation. Printed 06B10 All rights reserved. RadioShack and RadioShack.com in Taiwan 2100989 are trademarks used by RadioShack Corporation.
Need help?
Do you have a question about the 2100989 and is the answer not in the manual?
Questions and answers