HP StorageWorks DAT 72 User Manual
Dat tape drives
Hide thumbs
Also See for StorageWorks DAT 72:
- Quickspecs (15 pages) ,
- Brochure (2 pages) ,
- Troubleshooting manual (65 pages)

Related Manuals for HP StorageWorks DAT 72


Summary of Contents for HP StorageWorks DAT 72
- Page 1 HP StorageWorks DAT Tape Drives User Guide Installation, Operating and Troubleshooting information for DAT USB tape drives Part number: DW022-90904 First edition: April 2005...
- Page 2 Hewlett-Packard. The information is provided “as is” without warranty of any kind and is subject to change without notice. The only warranties for HP products and services are set forth in the express warranty statements accompanying such products and services.
-
Page 3: Table Of Contents
Mounting bay ..........8 Using the HP StorageWorks Tape CD-ROM ......8 2 Drivers and backup software . - Page 4 A USB Configuration Guide ....... . 49 USB in HP StorageWorks DAT devices ....... . 49 USB terminology .
-
Page 5: About This Guide
Registering your tape drive Once you have installed and tested your HP StorageWorks DAT tape drive, please take a few minutes to register your product. You can register via the web (www.register.hp.com). To ensure your registration is complete, there are a number of questions on the electronic form that are mandatory. -
Page 6: Hp-Authorized Reseller
For the name of your nearest HP-authorized reseller: • In the United States, call 1-800-345-1518. • Elsewhere, visit the HP web site: http://www.hp.com. Then click Contact HP to find locations and telephone numbers. Helpful web sites For third-party product information, see the following HP web sites: •... -
Page 7: Before You Start
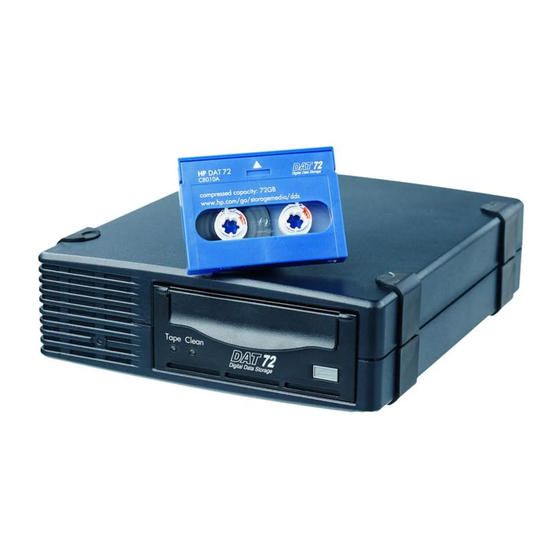
Before you start HP StorageWorks DAT models This guide describes how to install and operate the following HP StorageWorks DAT USB tape drive models: • HP StorageWorks DAT 72 • HP StorageWorks DAT 40 • HP StorageWorks DAT 24 www.hp.com... -
Page 8: How Do I Connect The Drive To My Server
Using the HP StorageWorks Tape CD-ROM The HP StorageWorks Tape CD-ROM is a central source of information about your tape drive with utilities for getting the best performance from your tape drive. Use the HP StorageWorks Tape CD-ROM to check installation, as described in this guide, and to verify and troubleshoot performance after installation. -
Page 9: Drivers And Backup Software
Two drivers are required in order to use HP StorageWorks DAT USB tape drives. • hpdat: This is the tape driver that works with all HP DAT products. It is regularly updated and is available on the HP StorageWorks CD-ROM or on the HP Support web site. -
Page 10: Upgrade Backup Software
This will also tell you whether your configuration is compatible with HP One-Button Disaster Recovery, HP OBDR. (All HP StorageWorks DAT tape drives support HP OBDR. However, you can only use this feature if your system configuration and backup application also support it. See ”Using HP... -
Page 11: Installing An Internal Dat Tape Drive
As you work inside the server, you may have to disconnect other signal cables or power cables from other devices to maneuver the new drive into place. If you have to do this, make a note of their position and connections so you can put them back correctly later. HP StorageWorks DAT Tape Drives User Guide... - Page 12 Figure 2 Removing cover from typical ProLiant server Figure 3 Removing cover from typical AlphaServer Remove the filler panel from a spare 5¼-inch bay of your server, as described in your server’s documentation. Keep any screws for use in ”Secure the drive”...
-
Page 13: Attach Mounting Hardware
See ”Secure the drive” on page 21. Please check your HP ProLiant server documentation to ascertain the correct method of mounting, and to check whether mounting hardware is provided with the server. HP StorageWorks DAT Tape Drives User Guide... -
Page 14: Mounting Rails
Ensure you do use the M3 screws provided. The rails may be attached to the filler panel by screws of a different thread/size type and these should not be used. If in doubt, refer to your HP ProLiant server documentation. -
Page 15: Other Servers
M3 mounting screws M3 offset mounting screws • HP ProLiant ML350: Use M3 mounting screws. These have a thicker head than the standard M3 screws. • HP ProLiant ML370: Use M3 offset mounting screws. These have a thick offset piece and a thicker head than the standard M3 screws. -
Page 16: Install Drive
Install drive Slide the tape drive into the open bay, aligning the tray or rails with the slots in the bay, as shown in Figure Figure 6 Installing tape drive If your server does not use mounting hardware, check that the holes in the chassis are aligned with the holes in the side of the tape drive. -
Page 17: Attach Usb Cable
To an internal 4-pin USB port on your server’s system board; this option uses the special, 4-pin USB cable and is appropriate for many HP ProLiant servers To an internal standard USB port, possibly on your server’s system board or on an internal USB •... -
Page 18: To Connect To An Internal Usb 2.0 Port (As In Many Proliant Servers)
To connect to an internal USB 2.0 port (as in many ProLiant servers) Use the schematic on the inside of the server panel to check whether your server has an internal USB 2.0 port and locate its position. Use the cable supplied with the tape drive to connect to the server. •... - Page 19 Type B connector, to tape drive Attach the Type B connector on the cable to the tape drive and the Type A connector to the server’s external USB port, as illustrated in Figure HP StorageWorks DAT Tape Drives User Guide...
-
Page 20: Attach Power Cable
Attach power cable NOTE: The drive is not powered from the USB bus. It must be connected to the server's power supply. Attach a spare power cable from the server's internal power supply to the power connector. Figure 10 Attaching power cable 1 and 5 USB cable, to server’s external USB port 2 and 4... -
Page 21: Secure The Drive
Push the server latch down to lock the tape drive into position, as shown in Figure Figure 11 Securing drive, mounting hardware used plastic rail server latch Ensure blanking plates are in place over empty bays and replace the cover on the server. HP StorageWorks DAT Tape Drives User Guide... -
Page 22: No Mounting Hardware Used
No mounting hardware used Use the M3 screws provided with the tape drive. Check that the holes in the chassis are aligned with the holes in the sides of the drive and use a regular Phillips screwdriver to secure the M3 screws, as shown in Figure Figure 12... -
Page 23: Installing An External Dat Tape Drive
An external HP StorageWorks DAT drive will operate using any voltage in the range 100–240 volts (0.7 A, 50-60 Hz). No adjustment is needed. A power cable is provided with your HP StorageWorks DAT tape drive. The USB 2.0 cable is already fitted to the tape drive, you cannot remove it. - Page 24 Plug the USB cable into the USB connector on the server. NOTE: It is important to ensure that you connect your drive to a USB 2.0 port. The drive will work on a USB 1.1 port but performance will be severely degraded. See also ”Verifying USB installation for optimum performance”...
-
Page 25: Verify Installation
”Check drivers (Linux)” on page 43. Verify that the tape drive installation was successful. For many operating systems you can run HP Library & Tape Tools from the HP StorageWorks CD-ROM. See also ”Diagnostic Tools and Performance” on page 39 for more information about HP Library &... - Page 26 Verify installation...
-
Page 27: Operating Your Tape Drive
Operating your tape drive Front panel Figure 14 Front panel, external drive cartridge door eject button clean LED tape LED power LED (external drives only) HP StorageWorks DAT Tape Drives User Guide... - Page 28 HP StorageWorks DAT drives perform a comprehensive self-test during power-up. If a hard error causes the self-test to fail, the clean light changes to steady amber. Run HP Library & Tape Tools to help diagnose the problem. off or flashing This is the Media Caution Signal.
-
Page 29: Loading And Unloading
Insert a cartridge into the slot on the front panel. As the cartridge is inserted, the drive takes it and performs a load sequence. The Tape light flashes green while the drive performs its load sequence. When the cartridge is loaded, the Tape light shows steady green. HP StorageWorks DAT Tape Drives User Guide... -
Page 30: Removing Cartridges
Removing cartridges CAUTION: Never try to remove a cartridge before it is fully ejected. Press the Eject button on the front panel. Figure 16 Ejecting a cartridge, external drive eject button The drive completes any task it is currently performing, winds the tape to the beginning, and ejects the cartridge. -
Page 31: Use The Correct Media
HP’s DDS-3 and DDS-2 cartridges with DAT 24 tape drives Although HP StorageWorks DAT tape drives are fully backward compatible, old tape formats are more abrasive than later generations and using older tape formats can reduce the life expectancy of the tape drive. -
Page 32: Write-Protecting Cartridges
Write-protection will not protect your cartridges against magnets (or bulk erasers). Cleaning cartridges HP recommends weekly cleaning of the tape drive using an HP cleaning cartridge (part number C5709A). Do not use swabs or other means of cleaning the heads. The cleaning cartridge uses a special tape to clean the tape heads. -
Page 33: Handling Cartridges
At the end of the cleaning cycle, the drive ejects the cartridge. The cleaning cycle takes approximately 30-60 seconds. HP StorageWorks DAT 40 and 24 drives: If the cleaning cartridge ejects in less than 20 seconds, it has probably expired. In this case, discard the cleaning cartridge and repeat the operation with a new one. - Page 34 Use the correct media...
-
Page 35: Using Hp Obdr
What does HP OBDR do? Using just the tape drive and the most recent backup cartridge HP OBDR allows you to recover from the following types of system disaster: •... -
Page 36: Testing For Compatibility
Running HP OBDR HP OBDR can only be used with backup applications that support one-button disaster recovery and methods of operating OBDR will vary between different software companies. Check our World Wide Web site (www.hp.com/go/obdr) for the latest information about software compatibility, firmware upgrades and troubleshooting before you use HP OBDR. -
Page 37: If Restore Fails
Follow the normal process for your restore application. If restore fails If the restore fails for any reason, refer to our World Wide Web site (www.hp.com/go/obdr) and do a search on OBDR for detailed troubleshooting information. - Page 38 Using HP OBDR...
-
Page 39: Diagnostic Tools And Performance
Library & Tape Tools should you need to contact them in the future, so it is a good idea to have it installed. When Library & Tape Tools is first run, it will scan for HP tape drives and libraries on your system and ask you to select the one to work with. -
Page 40: Performance Assessment Tools
20 rules forming a comprehensive analysis of the health of your drive. These rules may give advice such as cleaning the head or trying a different tape if issues are found. The support ticket can be sent to HP Support for further analysis. -
Page 41: 10Troubleshooting
10 Troubleshooting Many users can use HP Library & Tape Tools to help them diagnose problems, see ”Diagnostic tools” on page 39. We also recommend the detailed troubleshooting guide at www.hp.com/go/support for comprehensive troubleshooting information. General Procedure If a problem occurs, the first step is to try to establish whether the problem lies with the cartridge, the drive, the host computer and connections, or the way the system is being operated. -
Page 42: Verifying Usb Installation For Optimum Performance
“root hub”. Connecting multiple devices to one root hub may degrade tape drive performance degradation. USB Mass Storage devices like HP DAT tape drives have the lowest priority of all device types on the USB bus, so devices such as webcams should never be connected to the same root hub. -
Page 43: Check Drivers (Linux)
Expand Universal Serial Bus controllers and locate the tape drive. If the tape drive is connected to the HP USB Mass Storage Device, it is configured correctly. See Figure Figure 20 Windows Device Manager, USB controllers Check drivers (Linux) Use the following procedure to check that both drivers are present: usb_storage driver •... -
Page 44: Frequently Asked Questions About Usb Drivers
Frequently asked questions about USB drivers I installed my HP USB tape drive then powered on my server. Windows didn’t run the Found New Hardware wizard and the drive appears to work OK. Is there anything I need to do to make my... -
Page 45: The Drive Will Not Accept The Cartridge (Or Ejects It Immediately)
Check if another DAT drive of the same model will accept the cartridge. If it does, the original drive may be faulty. Before calling customer service, please check that the tape drive is responding. Use HP Library & Tape Tools, see page 39. HP StorageWorks DAT Tape Drives User Guide... - Page 46 Troubleshooting...
-
Page 47: 11Replacing An Internal Tape Drive
Disconnect the drive from the server’s power and USB cables and slide it carefully out of the mounting bay. Put the drive into the packaging that contained the replacement drive. Return the faulty drive to your local HP Service Center. Instructions on where to return faulty drives will be shipped with the replacement drive. NOTE: If you are not replacing the drive immediately, you should insert a blanking plate into the empty bay. - Page 48 Replacing an internal tape drive...
-
Page 49: Ausb Configuration Guide
USB in HP StorageWorks DAT devices The HP StorageWorks DAT tape drive is a USB 2.0 logo certified device. It supports the high-speed USB transfer rate with a theoretical maximum transfer of over 50 MB/s. (The actual backup rate will be less. -
Page 50: Setting Up A Usb Network
The transfer speed capabilities of a device are often referred to by the USB specification revision in which the transfer rate was defined. Therefore a USB 2.0 Hub will support high, full and low speed, but a USB 1.1 hub will only support full and low speed. The USB specification was developed and is maintained by the USB organization.
Need help?
Do you have a question about the StorageWorks DAT 72 and is the answer not in the manual?
Questions and answers