SkyCaddie SGX User Manual
Hide thumbs
Also See for SkyCaddie SGX:
- User manual (30 pages) ,
- Player's manual (18 pages) ,
- Quick start manual (2 pages)
Table of Contents
Advertisement
Advertisement
Table of Contents

Related Manuals for SkyCaddie SkyCaddie SGX


Summary of Contents for SkyCaddie SkyCaddie SGX
- Page 1 SkyCaddie SGX User Guide ®...
-
Page 2: Table Of Contents
® informational use only, is subject to change without notice, and should not be construed as a commitment by SkyHawke Technologies, LLC. SkyHawke assumes no responsibility or liability for any errors or inaccuracies that may appear in the informational content contained in this guide. SkyGolf ® , SkyCaddie ® , SGX™, ClubSG™, TrueGround™, TruePoint™ GPS, SkyCourse ® , IntelliGreen ® , IntelliGreen ® Pro, HoleVue™, CaddieSync™, XTarget™, XMark™ and Nothing Else Comes Close™ are trademarks of SkyHawke Technologies, LLC. SkyHawke Technologies, LLC, Ridgeland Technology Center, 274 Commerce Park Drive, Suite M, Ridgeland, Mississippi 39157 USA. Register your SGX at www.SkyGolf.com using CaddieSync within 30 days of purchase to activate your Consumer Limited Warranty and complementary 30-Day Course Preload Trial. Version SGX.5.03022011... -
Page 3: Chapter 1: Getting Started
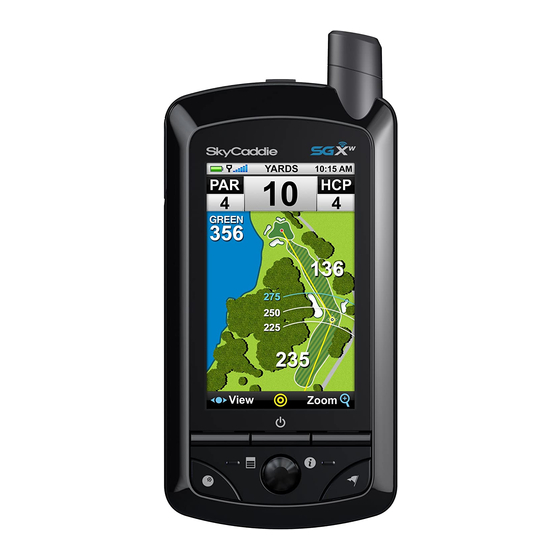
C H A P T E R 1 Getting Started 1.1 SkyCaddie Overview 1.1.1 Button Layout Omni-Directional, High Performance GPS Antenna Satellite Signal Indicator Digital Clock Battery Gauge Micro-USB Port Hole in Play (for charging and connecting to your computer) Left Key Right Key Note Hole Button... -
Page 4: On-Screen Indicators
PC and Mac • 512 MB of RAM (1 GB of RAM recommended) ® or Mac (within the last year or so), • 25 MB of available hard disk space it should be compatible with the • Available USB 1.1 or 2.0 port SkyCaddie SGX system. • Internet access (High-speed recommended) • Microsoft Internet Explorer 7.0 or later (recommended) ® ®... -
Page 5: Downloading And Installing The Caddiesync ® Desktop Software
You can browse the SkyCourse worldwide network of experienced SkyCaddie Mappers. We’re moving beyond rangefinders to become the library anytime through the public ultimate destination for golf knowledge, connecting you to your game, your equipment, your course, your area of www.SkyGolf.com. However, PGA Teaching Professional, and other golfers. in order to obtain the courses for use with your SGX, you MUST During registration, you’ll be given the option to select an annual Membership plan, providing you with a host... - Page 6 BETA to see if the answer to your question is already available! ClubSG homepage at http://clubsg.skygolf.com. ClubSG delivers timely golf articles, equipment BETA BETA reviews, community leaderboards, forums, golf course ratings, and much more! SkyCaddie Members automatically receive free ClubSG Premium access, with the ability to upload round data from the SGX...
-
Page 7: Chapter 2: Ground-Mapped Courses For Your Sgx
SGX™ requires the use of maps to provide distance ® information on the device (also known as SkyCourses ). SkyCaddie uses ® Since SkyGolf started back in 2001, the only method that Tour caddies use to provide distances to their Pros: until the release of the SGX, our we walk the course. With a course library approaching 30,000 maps, Mappers have walked approximately SkyCaddie maintains the largest ground-mapped course database in 290,850 miles —... -
Page 8: Overview Of Advanced Course Management Features
IntelliGreen Pro, while growing weekly, is limited; please go to www.SkyGolf.com and search our course database to see if your course has IntelliGreen Pro. Not all courses have significant green contours that require this feature. -
Page 9: Chapter 3: Playing Golf With Your Sgx
C H A P T E R 3 Playing Golf With Your SGX 3.1 Acquiring Signals While standing outside prior to play, power on the SGX by pressing and holding down the Center Key for 1-2 seconds. After boot-up, the SGX will display the Main Menu. Choose “Play Golf” to begin. The SGX will search for satellite signals, Note keeping you informed of its status using the progress bar. If you have the Scoring option turned Once satellite signals have been acquired, the Satellite Signal on under “Settings > Scoring”, Indicator will show the signal strength, represented by a series then when you select “Play Golf” or of bars. The SGX will then automatically advance to the next “Courses”, the SGX will ask you if you screen (or you may choose to manually advance to the next... -
Page 10: Target Views (Available On Advanced Feature Courses Through Membership Only)
HoleVue offers a ground-rectified graphic of every golf hole. With HoleVue, you’ll see the ideal line of The number of course maps with play for that hole, real-time distances for the tee shot and approach shot, plus you can re-position the HoleVue, while growing weekly, is line of play to know the distance to any point on a hole in order to play with fewer strokes. Additionally, limited; please go to www.SkyGolf. HoleVue includes a patented zoom function to dial into the exact area you need to see. com and search our course database to see if your course is HoleVue-ready. • Know Your Location: Indicated by a red “X”, XMark™ displays your actual position on HoleVue, automatically updating as you move. Powered by SkyGolf’s proprietary TruePoint™ GPS Precision... -
Page 11: Quickvue
Interactive HoleVue Zoomed in 1x Zoomed in 2x Zoomed in 3x • To Zoom In or Out: Selecting “Zoom” above the Right Key allows you to zoom three levels of the HoleVue graphic. The first level of zoom provides a closer look at the fairway, the second level shows Note a closer view of the hazards that will affect your approach shot, and the third level zooms directly to On Par 4s and 5s, a yellow line IntelliGreen. Press the Right Key to get back to HoleVue. appears by default from the fairway • Tracking Shot Distance Within HoleVue: Using the Mark Ball button, mark your location prior to target to the green. -
Page 12: Intelligreen
The number of course maps with displays the “Leaves” distance to the Center of Green from the highlighted target. IntelliGreen Pro, while growing weekly, is limited; please go to www. If you marked your previous shot using the Mark button, the distance from that last SkyGolf.com and search our course mark (labeled “Last Mark”) will be displayed in the center of the Target List screen. database to see if your course has IntelliGreen Pro. List of Hazards, Carries 3.3.6 Big Number and Center Only... -
Page 13: Determining Shot Distance Using Mark Ball
3.4 Determining Shot Distance Using Mark Ball Simply press the Mark Ball button at the location where you are going to take your shot. The “Mark New Ball Location?” screen will display. Select “Mark” by pressing the Right Key to record your current location and then take your shot. Note The SGX will only hold scoring data When you get to the location where your ball came to for the round you are playing while rest, press the Mark Ball button again to record and the device is one, unless you have display the distance. You may return to your previous signed up for a Membership plan. -
Page 14: Viewing The Digital Scorecard
If you want to track additional stats including Putts and Fairways Hit, select the hole using the Joystick. To enter additional stats: M ove downward on the Joystick, then left/right to adjust the number of Putts. No putts will be recorded until you scroll to highlight “Putts”. When you highlight “Putts”, it will default to 2. Move downward again, then left/right to select whether your shot hit the fairway or missed it (i.e. missed left or missed right). Edit Scorecard Press the Right Key under “OK” when done. You can also edit your Digital Tracking Stats Scorecard during or after your round The SGX will display a summary of how many holes have been played to that point on your SkyCaddie. Simply highlight in your round, how much over or under par you are, your total score, and number the hole you want to edit from the of putts. You have one of two options: Scorecard Summary page and use the Joystick to select. -
Page 15: Optional Scoring Information
To Customize Your Handicap or MyPar Target From The Main Menu: 1. Using the Joystick, select “Settings” at the bottom center of the Main Menu. 2. Scroll down one on the Settings menu and select “Scoring”. 3. Make sure that Scoring is turned ON, or you won’t be able to track your scores using your Handicap or MyPar settings. 4. Using the Joystick, scroll down to HCP / My Par. If this option is selected, there will be a checkmark next to it. Either press the Joystick to select, or the Right Key under “Set”. 5. Choose which you prefer the SGX to use: Handicap or MyPar. a. If you want to use Handicap, make sure “Select HCP” is highlighted and a selection dial is displayed. Then move the Joystick up/down to your Handicap value and press the Right Key (“OK”). b. If you prefer to use MyPar, press right on the Joystick to highlight “or MyPar”, then move the Joystick up/down to select a value. Remember, the MyPar value correspond to the target score for the particular golf course you are about to play. When you have selected your target score, press the Right Key under “OK”. 6. Press “Exit” a couple of times to leave the Settings menu in order to return to the Main Menu (or press the Menu Button). 3.6.5 Optional Scoring Information If you are using the Digital Scorecard to score your round, you can track Total Score, Putts, Fairways Hit and Tee Shot Distance. -
Page 16: Autoview Technology
3.7 AutoView Technology Note AutoView is designed to provide golfers with a hands-free way of switching between multiple It’s OK to rotate the SkyCaddie with play screens including HoleVue, IntelliGreen and AutoView; however, to maintain their Digital Scorecard, with just a simple turn optimal GPS accuracy, the device of the wrist. AutoView Technology is controlled needs to be oriented at a 45° or by the SGX’s built-in accelerometer to provide 90° angle. After you obtain your three viewing positions – one “portrait position” distance information or enter/check and two additional “landscape positions”. By your scorecard, please rotate the... -
Page 17: Chapter 4: Skycaddie Menu Items
C H A P T E R 4 SkyCaddie Menu Items 4.1 Main Menu • Play Golf: To begin a round of golf using your SGX, highlight Play Golf and choose “OK” to open it. When a Main Menu item is highlighted, it will appear blue. Upon opening Play Golf, the SGX will display the Searching For Satellites screen. The SkyCaddie will advance to the next screen automatically upon acquiring satellite signals. To cancel the satellite search and return to the Main Menu, press the Left Key under “Exit”. Within Play Golf, a listing of downloaded courses and detailed information about each course will appear. If satellite signals are acquired, the SGX will attempt to determine your location and auto-select the closest installed course. You may choose to select a course manually by using the Joystick to scroll through the list of courses. Upon selecting a course, choose the Main Menu hole to begin on and choose “OK” to begin. • Courses: To quickly view a listing of all courses installed on your SGX, scroll to the Courses menu item and choose “OK” to open. The course list, along with detailed information about each course, will appear. Using the Joystick, move up or down the listing to view each course. -
Page 18: Member
• Auto Backlight: The SGX includes a light sensor designed to activate the LCD display’s backlight when it is needed. This functionality is controlled by the Auto Backlight setting. When set to ON, the Auto Backlight feature will turn on the backlight when a low light condition is detected (tree cover, indoors, etc). The preferred setting for this feature is ON. When set to OFF, the backlight sensor is disabled and the backlight will remain on at all times (even outdoors). To get the most battery life on a single charge, it is recommended to leave the Auto Backlight ON. To turn ON Auto Backlight, scroll to the menu item to highlight it. Move the Joystick left or right to toggle between ON and OFF. Auto Backlight setting • Auto Hole: Enable the Auto Hole feature to automatically advance to the next hole during play. To turn ON Auto Hole, scroll to the menu item to highlight it. Move the joystick left or right to toggle between ON and OFF. • Auto Off: Set the interval of time to automatically power off your SkyCaddie after no activity. Intervals are 30/60/90 minutes or “Never”. Within Preferences, scroll to “Auto Off” and choose “Set” to open the setting. Using the Joystick, scroll up or down to the desired time interval and choose “OK” to save your selection. 4.2.2 Member Note The Member section contains detail regarding your The Demo Course will be included in SkyCaddie Membership Plan, Serial Number, and the total course count stored on your... -
Page 19: System
When set to “ON”, you can press the Joystick to select on-screen options. When set to “OFF”, you must use the Left and Right Keys to System settings GPS reset Clear Data select options on the SGX. • Clear Data: Erases Courses, Scoring and Membership data attached to the SGX. If you clear the data, you will need to sync your SGX to restore your membership details on the device. 4.2.7 GPS Selecting the GPS icon on the Settings Menu will take you to a GPS Reset screen. The reset option will reset the GPS receiver. This function may be used while troubleshooting with SkyGolf Customer Support or if you notice that your satellite signal appears to be poor. Press the Right Key under “Yes” to proceed with the reset, or the Left Key under “No” to exit without a reset. 4.2.8 Diagnostics Should you encounter any issues with the SGX, a SkyGolf Customer Support representative may ask you to run the Diagnostics tool. The Diagnostics tool will automatically perform three tests: a LCD Test, a Backlight Test, and a Button Test. • The LCD Test determines whether the SGX’s high- resolution TFT-LCD display has dead pixels, a blank screen, or other problems. The test will cause the screen to display all black, then all white. Backlight Test Button Test • The Backlight Test checks the display’s backlight by... -
Page 20: Chapter 5: Recording Your Own Course
C H A P T E R 5 Recording Your Own Course The SkyCaddie allows you to record three green targets (Front, Center, and Back per hole) for up to five personal courses that are stored on your SGX. If you have purchased a SkyCaddie Membership Plan, you can backup and store courses in your own online membership account using CaddieSync. Your personal recorded courses will be stored in CaddieSync under Courses > “Courses I’ve Mapped”. 5.1 Naming Personal SkyCaddie Courses To record a course, select Courses from the Menu screen then scroll up to New Course and select “OK”. If scoring is on, you will be prompted to make a selection. Joystick Selection It does not matter if you select scoring or not. The Joystick will select even if you Create a name for your course (up to 16 characters) using the on-screen keyboard have turned the Joystick Selection OFF in your settings. using the Joystick to move and to select. To clear a letter, highlight and select the “Backwards” key (botton right above “Enter” key). If you select “OK” (Right Key) or select the “Enter” key before choosing any letters, the course name will default to “MYCOURSE#” and sequentially add a number for each course. -
Page 21: Renaming Or Deleting Personal Skycaddie Courses
Member-Mapped Course processing to save the changes. is currently in a major backlog. We still encourage members to submit 5.7 Publishing Personal SkyCaddie Courses their courses to SkyGolf, but please be aware that the turnaround time for You have the option to publish your personal recorded courses so other SkyCaddie users can take these courses will take a great deal advantage of the information you recorded. Simply click the “Publish” button within the “Courses I’ve of time. Please contact Customer Mapped” area in CaddieSync to begin the process. You will be asked to complete a form to document... -
Page 22: Appendices
A P P E N D I X A Helpful Hints • DO turn the SGX on outside, away from buildings and other obstructions. The SGX needs to warm up approximately 5-10 minutes prior to play. For optimal performance while playing, ensure that the SGX has a clear view of the sky at all times. While the omni-directional, high-performance GPS antenna has been designed to lock quickly to more satellites and stay locked to maintain performance in all terrains, it is still a good idea to avoid being around buildings, obstructions, heavy foliage, low areas with adjacent obstructions, or reflective objects (such as metal/glass structures) while using the SGX. • DO sync your SGX with CaddieSync regularly. Syncing regularly allows the SGX to keep running at peak performance. Syncing allows you to check alerts for new features and software updates; automatically upload your latest scorecard to ClubSG; and download new courses and change your Favorites list. • DO perform a Soft Reset if the SGX appears to be unresponsive. To perform a soft reset on the SGX, press and hold the center Power Button and the Joystick for several seconds until the SGX reboots. • DO watch your signal strength indicator. The higher the signal strength, the more accurate the system will be. The best signal strength is obtained in open areas, with the antenna pointing toward the sky at a 45° to 90° angle. Holding the SGX away from your body may improve signal strength in weak areas. It is normal for the satellite signal strength indicator to fluctuate as you move around the golf course. • DO make sure that the SGX’s battery is fully-charged before play. • DO NOT press the Joystick when you want to move the on-screen cursor or crosshairs. The Joystick on the SGX is multi-directional and sensitive to to the slightest finger movements. Pressing the Joystick will select options on the screen, while gently sliding the Joystick up, down, right left, etc. will move the on-screen cursor or crosshairs. You do not need to press down on the Joystick to move it. • DO NOT use AC chargers or USB cables that did not come with or are not authorized for use with your SGX. The wrong adapters or cables may damage the SGX. •... -
Page 23: Appendix B: Target Icons And Target Descriptors
A P P E N D I X B Target Icons and Target Descriptors Back of Green Zone Hazard Marker Center of Green Lay Up To Ditch Water Carry Front of Green Fairway Target Mound Water Green End of Fairway To Creek Bunker Right Carry Bunker Upslope... -
Page 24: Appendix C: Battery Information And Safety Requirements
Reduce battery performance • Read this manual completely before using your SGX. • The SGX battery has been rigorously tested, and is in fully in compliance with applicable UN, ITC, IATA, and other regulatory requirements for batteries of this type. • The SGX with battery installed has been further tested and is in full compliance with MIL-STD 810F standards for surviving high and low air pressure environments; storage and operation at extremes of temperature and humidity; rapid changes in temperature; extended periods of vibration; repeated drops onto a hard surface on each side, edge, and corner; blowing dust and sand; and drenching, torrential rain. • The SGX battery life will be maximized if it is recharged at a moderate temperature, between 32°F and 104°F (0°C to 40°C). • The SGX operates normally between 14°F and 140°F (-10°C to 60°C). • The SGX battery will safely survive temperatures between -40°F to 167°F (-40°C to 75°C). Avoid allowing the temperature of the SGX or its battery to exceed 167°F / 75°C. • Use only a SkyGolf-supplied charger with your SGX. • Do not leave your SGX attached to a charger or a USB port for over 24 hours. Under the recommended conditions, a completely discharged SGX battery should completely re-charge in about 4 to 4.5 hours when on the charging screen. • Do not charge the SGX in a place where it could become over heated by direct sunlight, a stove, a fire, or other source of extreme heat. • CAUTION: Do not replace the SGX battery with an incorrect battery type. • Keep the SGX away from sources of high voltage or static discharge. • If your SGX will be stored for an extended period, allow the battery to discharge to approximately one half capacity before storage. • Store the SGX in a place where it will not experience temperatures or absolute humidity over 85%. • Do not put the SGX into a microwave oven. • Do not allow the SGX to be crushed. - Page 25 Battery Information and Safety Requirements (cont.) • Do not allow water to touch the battery. • Do not wrap the battery with conductive material. • Properly dispose of the battery. • Do not incinerate or burn the battery. • Do not leave or discard the battery where it could get wet or become submerged in water. • Do not damage the battery. • Do not weld or solder anything to the battery, the attached wires, or the connector. • Do not use this battery in any device other than a SkyCaddie SGX. • Do not touch a leaking battery. Avoid leaked-out materials. Do not allow it to touch your skin or clothes. If touched, immediately rinse affected areas thoroughly with water. Leaked materials may cause skin irritation. Seek medical attention if irritation persists. If it contacts your eyes, do not rub your eyes. Rinse the eyes thoroughly with water, and see a doctor immediately. • Use of this battery in other devices could result in unsafe conditions. Do not use this battery in any device other than your SkyCaddie SGX.
-
Page 26: 2011 Skyhawke Technologies, Llc. All Rights Reserved
Canadian Regulatory Agency Compliance This digital apparatus does not exceed the Class B limits for radio noise emissions from digital apparatus as set out in the interference causing equipment standard entitled: “Digital Apparatus”, ICES-003 of Industry Canada © 2011 SkyHawke Technologies, LLC. All Rights Reserved. U.S. Patent Numbers 7,118,498; 6,456,938; 5,740,077; 5,507,485 & Patent Pending. SkyCaddie ® User’s Guide. All content within is copyrighted by SkyHawke Technologies, LLC and may not be reprinted without permission. The content of this guide is furnished for informational use only, is subject to change without notice, and should not be construed as a commitment by SkyHawke Technologies, LLC. SkyHawke assumes no responsibility or liability for any errors or inaccuracies that may appear in the informational content contained in this guide. SkyGolf , SkyCaddie , SGX™, ClubSG™, TrueGround™, TruePoint™ GPS, SkyCourse , IntelliGreen , IntelliGreen ® ® ® ® ® Pro, HoleVue™, CaddieSync™, and Nothing Else Comes Close™ are trademarks of SkyHawke Technologies, LLC. SkyHawke Technologies, LLC, Ridgeland Technology Center, 274 Commerce Park Drive, Suite M, Ridgeland, Mississippi 39157 USA.
Need help?
Do you have a question about the SkyCaddie SGX and is the answer not in the manual?
Questions and answers