Hasselblad H2 User Manual
Hasselblad user manual digital camera h2
Hide thumbs
Also See for H2:
- User manual (141 pages) ,
- Datasheet (4 pages) ,
- User manual addendum (6 pages)
Table of Contents
Advertisement
Quick Links
Advertisement
Table of Contents

Related Manuals for Hasselblad H2


Summary of Contents for Hasselblad H2
- Page 1 User Manual (Manual (V1/English) for camera firmware version 9.1.0 or later.)
-
Page 2: Table Of Contents
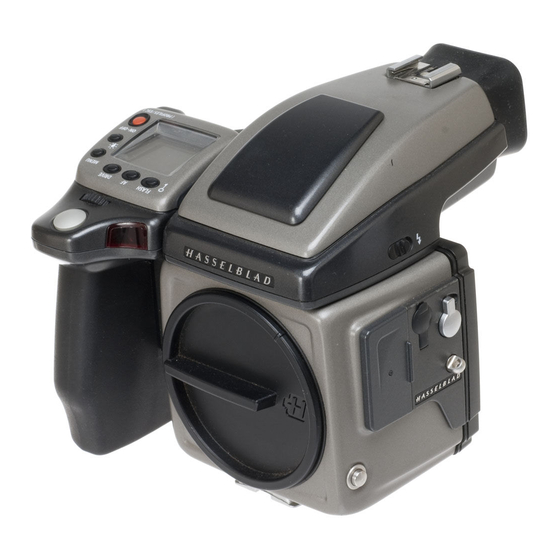
Introduction Parts & Components Quick Start Function Control & Display Grip LCD View f inder LCD Camera Body Carr ying strap Bat teries Rechargeable bat ter y grip View f inder screen Accessor y connec tion PC-connec tor View finder Par ts &... - Page 3 Congratulations! Welcome to the flagship of the H System. The H2 builds on the H1, adding the ability to utilize the latest advancements in digital backs, increased mobility, integrated power, and improved image quality. The H2 is the most advanced digital or film medium format photography plat- form on the market today, and a worthy addition to the famed Hasselblad line.
- Page 4 Take your time to learn the intricacies and potentials of the H2. Go at your own pace and ex- plore the possibilities when you feel ready for the next step. Results will be good from the word go, that’s guaranteed, but when you want to make improvements or work more efficiently per-...
-
Page 5: Parts & Components
What’s in the box Your new Hasselblad camera may have been supplied in kit form or as separate items. There are a number of possible combi- nations depending on factors such as offers, bundles etc. Please ensure that all the items noted on the accompanying packing information have been supplied and are correct. - Page 6 1. Flash unit hot-shoe 2. Rubber eyecup 3. Exposure mode and metering method selector button 4. Exposure compensation button 5. Eyepiece adjustment dial 6. Magazine LCD 7. Magazine LCD illumination button 8. Magazine control buttons 9. Magazine settings lock 10. AE-L button 11.
-
Page 7: Quick Start
Quick Start This section is a quick start guide to assembling and preparing your new. From separate items, the assem- bly process should take no more than several min- utes to complete and you will be able to take simple and straightforward photographs immediately. - Page 8 H2-Kit only / H2- Separate items If your new H2 was supplied in kit form, you will only need to insert the camera batteries to make it useable immediately. After completing steps straight to 9-10 (marked in red) and then directly to the section after step 17 to activate the camera.
- Page 9 If the camera enters STANDBY mode (the LCD screen will show the H2 symbol only), reactivate it by press- ing the shutter release button ON.OFF button). You can now explore the menus, buttons, control wheels, etc observing the changes on the LCD on the grip as well as the LCD in the viewfinder.
- Page 10 23. Pull 8–10 cm (3–4 in) of paper backing from the film roll and insert the tongue of the backing paper into the slot in the take-up spool. 24. Turn the take-up spool one complete turn to ensure the tongue is firmly held in place by the overlying paper back- ing.
- Page 11 33. From the inactive mode, press the ON.OFF button until you see the H2 logo on the grip LCD. The LCD then in turn dis- plays the ‘main’ screen. If the camera is already in ‘standby’ mode (the H2 logo will be visible on the grip LCD) click on either the shutter release button or the ON.OFF button to...
- Page 12 Familiarize yourself with the H2 Take a few minutes to familiarize yourself with the H2 and its various controls. Note the difference be- tween a long press, a short press and a ’click’ with some buttons. For example from the main screen a click of the ON.OFF button will take you to Profiles while a longer press will turn the camera off.
-
Page 13: Function Control
■ Rapidly accessible menu ■ Interactive display ■ Customizable functions All functions and settings on the H2 are accessed and altered by the control buttons and wheels on and around the grip aided visually by the LCD user- interface. The information on the LCD is in menu format and has a great deal in common with those found in modern computers, cell phones, etc. - Page 14 Below is an overview of the primary functions of the control wheels and buttons. Some controls have dual or triple func- tions according to the state of the menu or setting. A full description can be found further on in this manual. M.UP button Raises and lowers mirror.
-
Page 15: Grip Lcd
Grip LCD Typical camera grip display. (The information in brackets describes this particular example). Flash condition indication (No exposure compensation, normal flash synchronisation) Aperture setting (f/5.6) Exposure Value display (EV 9.3) Exposure mode indication (Aperture priority setting) Typical camera grip display when changing settings. Focus setting (Autofocus setting, single shot mode) - Page 16 Examples Remember the following groupings of ‘saved’ and ‘not-saved’ actions when making settings changes: SAVED ‘Quick save’ - half-press shutter release button Save - press save button (DRIVE button) The basic principle behind making changes is that the appropriate button is first pressed to access the menu and then settings altered by way of the control wheels.
-
Page 17: Viewfinder Lcd
Viewfinder LCD Typical viewfinder display. Note the LEDs will only be visible when activated (by the camera or a setting). (The information in brackets describes this particular example). Exposure method indication (‘aperture priority’ mode) Flash LED Warning triangle Exposure compensation setting (+0.7 EV) Some examples of various viewfinder LCD screens visible with standard settings and when specific control buttons are pressed. - Page 18 �� (by pressing AF button on grip) �� The H2 features the advantage of multiple customization of settings. This means that your personal choice of settings, and thereby appearance of various combinations of symbols on the LCD at any time, will not necessarily be the same as many of the screens illustrated in this manual.
-
Page 19: Drive Button
Press to illuminate the LCD. Remains active until camera enters standby mode. ON.OFF (PROFILES/ESC) button Press the button for a half second to activate the camera. The H2 start-up logo will ap- pear and then the main screen. After a few seconds (customizable) the camera will enter Standby mode. - Page 20 Can be reassigned in Custom Settings to another function. Remote release cord port For attaching a remote release cord (electrical). The Hasselblad accessory jack plug socket is protected by a captive rubber plug. STOP DOWN button Press this button to make a visual check of the depth-of-field on the viewfinder screen at the chosen aperture.
- Page 21 There are also two control buttons on the viewfinder, as well as the eyesight cor- rection adjustment wheel: Eyesight correction adjustment wheel The personal eyesight adjustment facility has a diopter range of -4 – +2.5, to suit most users. EV correction adjustment button Press this button to access the EV compensation screen.
-
Page 22: Camera Body
■ Integral ergonomic grip ■ Pixel based LCD user interface The H2 camera body is a robust construction of cast aluminium with a stainless steel shell for extreme durability. The workings of the camera are controlled by silicon technology that provides tre- mendous opportunities for sophisticated operation. -
Page 23: Rechargeable Bat Ter Y Grip
Batteries The H2 requires batteries for all actions. There is no mechanical reserve facility so it is advisable to always have a spare set of bat- teries or exchange set if using a rechargeable battery pack. As is the case with most batteries, problems might be encountered when used in very low temperatures. -
Page 24: The Battery Charger
The battery charger The battery charger unit is supplied with five plug attachments to suit various types of domestic electrical sockets available worldwide. Other types of socket will require a domestic socket converter. Attach the chosen plug (fig 2, A) by sliding into position, ensur- ing that the two electrical contact prongs on the charger correctly enter the two contact sockets on the plug attachment. -
Page 25: Rechargeable Battery Grip - Precautions
Keep the protective cover in place when not in use. (Short-circuiting across keys in a pocket, for example, could cause a fire risk). • Do not use the battery grip for anything other than the H1/H2 camera. • Do not immerse the battery grip in liquids. -
Page 26: Accessor Y Connec Tion
Accessory connection 11, 12 On the left hand side of the camera body are two accessory retain- ing screw threads (M5), as well as a databus connector, protected beneath a cover. The screw threads are a future-safe design feature for new products while the connector is for service only at this point in development. -
Page 27: View F Inder Screen
Viewfinder ■ Multi-mode light metering ■ Full exposure information ■ 100% image ■ 90° viewing angle for eye-line composition ■ Full image for spectacle wearers ■ Integral dioptre adjustment ■ Integral flash unit The 90° viewfinder provides a laterally corrected 100% image at eye-line level. -
Page 28: Par Ts & Components
Rubber eye cup Two rubber eye cups are available for the H2. The one supplied is suitable for users who do not intend to use eyeglasses when photographing. The second shorter eye cup is for those who either prefer to position their eye further from the viewfinder and those who wish to wear eyeglasses. -
Page 29: Lenses
Protective filters (UV / Sky) should also be considered at least when working outdoors in harsh conditions. (See Accessories section for information about the CF Adapter that allows the use of C type lenses from the Hasselblad V-system). -
Page 30: At Taching A Lens
Parts and components A. Lens shade index B. Manual focus ring C. Focusing distance scales D. Depth-of-field scales E. Lens index Attaching a lens Remove the front protective cover on the camera body by depressing the lens release button and keeping it depressed while turning the cover counter-clockwise. -
Page 31: Infrared Focus Set Tings
Focus aid As well as the conventional view on the focusing screen to ensure a sharp image, the H2 also features LED focus aid appearing as two arrowheads to the right of the viewfinder display (except for lenses with a maximum aperture of f/6.7 or smaller). The arrowheads provide confirmation of a precision focus setting and are a useful... -
Page 32: Cf Adapter
is incorrect if only one arrowhead is visible. If the focus cannot be established, then both arrowheads flash. CF Adapter The CF adapter is an optional accessory that allows virtually all C type lenses from the V-system to be used on H-system camera bodies. -
Page 33: Film Magazines
Film Magazines ■ Automatic 120/220 compatibility ■ Automatic wind on / wind off ■ Automatic film advance ■ LCD information panel ■ Integral dark slide ■ Customizable data imprinting ■ Illuminated LCD ■ Barcode recognition ■ Count-up or count-down film frame reminder choice The film magazine is a sophisticated semi-independent unit within the modular system. -
Page 35: Magazine Set Tings Lock
a time-out of five seconds of non-activity, the display returns to the main screen. Changes can only be made when the settings lock switch is in the unlocked position. Film plane index Provides a measuring point for the actual position of the film plane in the magazine. -
Page 37: Battery
Film speed Film length Data Frame counter Magazine settings Press the function selector ( access: Film speed (ISO / Bar Code) Film length (120/220/ Number of frames) Data (on/off ) Frame counter (count down / count up) Low-battery warning symbol Film speed setting / Barcode The film speed (ISO / ASA) can be set automatically or manu- ally. -
Page 38: Frame Counter Set Ting
220 film length setting. Manual film speed setting. Data imprinting setting. ‘Frames remaining’ counter setting. Data imprint setting Data imprinting can be activated or deactivated through the maga- zine menu. To access data setting: 1) Ensure the magazine settings lock is in the unlocked position. 2) Press the button until the Data symbol appears. -
Page 39: Film Loading
Film loading The film magazine can be loaded either on or off the camera. Regularly check the interior of the magazine and remove dust, particles or any scraps of paper from previous rolls of film. Load and unload film magazines away from direct light sources. 1) Fold out the film holder key and turn it counter-clockwise 90°. -
Page 40: Digital Photography
HC lenses were also formulated to meet the very high de- mands made by digital sensors, which they do with ease. H system cameras are suited for both Hasselblad and third- party digital backs, with Hasselblad digital backs producing the optimum in convenience and capabilities. - Page 41 The H2 grip LCD is pixel based to take advantage of interpreting sig- nals from a digital back, resulting in digital display on the camera and not just on the back or host computer screen. A histogram can be displayed for immediate checking, for example.
-
Page 42: Instant Approval Architecture
Instant Approval Architecture As an integral part of Hasselblad’s digital solutions the H2 is front- ing the Instant Approval Architecture from the split second of capture: Limitless digital image capture loses some of its potential if the photographer cannot quickly review and select the best im- ages to present to the client. - Page 43 CFH units, it nevertheless will still provide tremendous quality and ease of use. As a medium format digital platform for any digital back, the H2 is second to none in the world today. It is still a requirement for 3rd party product manufacturers to work under a Hasselblad license agreement to get access to the Hasselblad patented hot-plug interface of the H System.
-
Page 44: Exposure Control
Light Metering & Exposure Control ■ Three metering methods ■ Five exposure methods ■ Extremely accurate light metering The light metering system is capable of selective sensitiv- ity producing three reflective metering methods: Average, Centre weighted and Spot. All methods are measured in in- crements of 1/12 EV. -
Page 45: Metering Method
If you are not sure about choice, please check in other general photographic literature for a fuller explanation. Also check our website occasionally – www.hasselblad.com – for articles and discussions concerning such matters. -
Page 46: E Xposure Method
Selecting metering method Proceed as follows with the camera in active mode: 1. Press the EXP button on the viewfinder. 2. Turn the rear control wheel (in either direction 2a) to succes- sively access the three choices: Average, Centre Weighted, and Spot 2b. - Page 47 A ‘+ 0.3’ above the scale in the display, as in illustration 4 for ex- ample, would indicate a ‘0.3 EV overexposure’ setting. Conversely, a ‘-2’ , for example, would indicate a ‘2EV underexposure’ set- ting. Note that the appearance of a +/- symbol on the grip and viewfinder LCDs in manual mode means that a change has been made to the exposure compensation setting.
-
Page 48: Ae-L Button
New metered area is 1.8 EV lower than the area metered when the AE-L button was pressed. AE-L button pressed to call the metered area ‘Zone 5’. Metered area reads ‘Zone 8’. Metered area beyond film range. AE- L button This button has two main functions that can be incorporated in various working methods involving exposure locking. -
Page 49: E Xposure Compensation
Alternatively, you can also pre-set the initial zone reading in order to save time and effort where there is no freely available ‘zone 5’ subject for light measuring. For example, you might be on a sandy beach where you know that sand is normally classified as zone 6. You can pre-programme the zone placement by holding down the AE-L button while choosing the new zone value and turning the front control wheel until zone 6 appears. -
Page 50: General Functions
General Functions ■ Manual and autofocus modes ■ Three drive modes ■ Quick adjust wheel ■ Profiles This section describes the basic and general functions used in most situations. By understanding the capabilities of the H system you will be able to gain a great deal of control of how you work in the future. -
Page 51: Manual Focus
Custom Options. Settings can only be made when the camera is in the ON mode. To activate the camera press the red ON.OFF button until you see the start-up H2 logo appear on the grip LCD. The logo is automatically followed by the main screen. The camera is now in ON mode. -
Page 52: Autofocus Override In Manual Mode
����� ���� Manual focus mode The Manual focus mode is set by the front control wheel on the grip in the following manner: In camera active mode: 1) Press the AF button on the grip. 2) Turn the front control wheel to: Manual 3) Press Save to store the setting. -
Page 53: Manual Override In Autofocus Mode
Continuous At Continuous setting (AF C), the shutter can be released rapidly before the lens is focused in order to capture a split-second shot (in Single Shot, an exposure cannot be made until the camera has had time to focus). However, the camera will continue to focus if a moving subject is within the focusing zone or if you recompose, even though the shutter release button is half pressed. -
Page 54: Multi Exposure
����� ����� ����� ����� Drive There are three drive modes: Single, Continuous and when a film mag- azine is attached, Multi exposure. They are all accessed by pressing the DRIVE button on the grip. Single In Single mode, an exposure is made when the shutter release button is pressed, the film is advanced to the next frame and the camera is made ready for the next exposure. -
Page 55: Prof Iles
����� ���� ����� ���� ����� ���� Profiles The profiles feature allows rapid access to pre-determined combinations of settings that increase the speed and security of workflow. One exam- ple might be in a social situation where there might be a need for formal ON.OFF outdoor portraiture followed by informal indoor handheld flash-assisted wide-angle shots, both situations requiring very different settings in a... -
Page 56: Using Profiles
ON.OFF (PROFILES/ESC) ����� Load ���� ON.OFF (PROFILES/ESC) ����� Load ���� ����� ���� you want and then press the Load (AF) button. All the saved set- tings will then be automatically implemented. If you decided to change the settings but nevertheless keep the Profile name on the list, the new set of parameters will be retained under that name. -
Page 57: Advanced Features
Advanced Features ■ Programmable self timer ■ Programmable bracketing ■ Programmable interval setting ■ More than 25 custom options ■ Data and text imprinting This section describes the features that might not need to be ac- cessed everyday but should be exploited wisely to obtain the opti- mum from the system. -
Page 58: General Over View Of Camera Menu
General overview of camera menu Bracketing options Self timer options Custom Settings ���� Interval options Date & Time settings Imprint options and settings The ‘Digital’ screen will only appear when a digital back is attached! Please see digital back user manual for menu continuation from this point. -
Page 59: Self Timer
There are a number of more advanced features that while not necessarily used every day still remain immediately accessible through the menu system. They provide the integral finesses that make the H2 a powerful and sophisticated tool to satisfy a variety of professional demands. There are four main functions: 1. -
Page 60: Self-Timer Setting
���� ����� ����� Mirror sequence highlighted. ‘Delay’ highlighted with drop ‘Delay first, then mirror raised’ shadow. 10 seconds chosen. chosen as option. Mirror down /up highlighted. ‘Mirror down after exposure’ chosen as option. ����� ���� ON.OFF (PROFILES/ESC) Self timer setting The Self timer function is set in the following manner: 1) Press the MENU button on the grip. -
Page 61: Bracketing
2 Bracketing The bracketing facility provides an automatic series of exposures; one at the standard exposure setting (Manual or Auto) and the others with pre-determined deviations in EV from the standard exposure. This is particularly useful when using transparency film with images containing a very wide tonal range, for example. -
Page 62: Bracketing Setting
���� ����� ����� Sequence highlighted. ‘Standard, Number of exposures highlighted. over, under’ chosen as option. 3 frames chosen as option. Step highlighted. 1/3 EV variation chosen as option. EXAMPLE EXAMPLE Screen after Bracketing setting acti- Viewfinder display indicating no vated indicating 3 frames remaining adjustment to next frame and three in a Standard, Over, Under, sequence frames left in the sequence. -
Page 63: Inter Val
���� ����� ����� Number of exposures high- Interval duration highlighted. lighted. 2 frames variation 5 seconds variation chosen as chosen as option. option. EXAMPLE ����� ���� ����� Screen after Interval setting activated indicating 3 shots re- ����� maining at 30 second intervals. ON.OFF (PROFILES/ESC) options available... -
Page 64: Custom Options
���� ����� ����� ����� ����� Settings / Custom Options options available 4 Settings From the Settings screen you can access four main sub-settings: Custom options, Image Info, Date & Time and System status by turning the front control wheel. From each of these four sub-settings you can access further screens. - Page 65 • 5s • • 15s • 30s Determines the amount of time the camera remains active before it automatically reverts to standby mode (indicated on the grip LCD by the H2 logo). Minimises battery consumption. EV increment • 1 Step •...
- Page 66 Normal makes the camera behave in the same fashion as when set to Average or Centre Weighted. Zone makes the camera behave in the same fashion as the Hasselblad 205FCC. That is, the central spot is placed over a particular area of the subject and the AE-L button is pressed.
-
Page 67: Manual Exposure Mode
AE lock / Quick adjust • Exp reset • Saved Allows either the AE-Lock or Quick adjust mode to remain active after an exposure or immediately return to standard setting. Exp Reset clears the settings and produces an automatic return to standard setting after an exposure. -
Page 68: Customizable But Ton Func Tion List
Customizable button function list The USER, AE-L, STOP DOWN and M.UP buttons can all be reassigned to different functions. The USER button has no function until specifically assigned one (default is ‘None’). The AE-L, STOP DOWN and M.UP buttons, however, by default are assigned the function appropriate to the name, until assigned otherwise. -
Page 69: Image Info
���� ����� ����� ����� ����� ����� ���� 4.2 Image Info (film magazines only!) The Imprint facility controls the text that will appear along the edge of each frame on a film. It is possible to imprint approximately 40 characters at one time. Imprint Type records technical information automatically created by the camera. -
Page 70: Imprint Tex T
���� ����� ����� ����� ����� 4.2.2 Text In Text you can compose your own combination of letters, words, sym- bols, etc for film edge information. The same procedure is also used to change a Profile name. Text setting / Profile name changing 1) Press the MENU button on the grip. - Page 71 ����� Sel. ���� 2) Find the character you want by scrolling with the rear control wheel until it appears on the screen. (The ‘space’ character is the ‘empty space’ to the left of the exclamation mark, top row furthest to the left). 3) Move the selector cursor with a combination of the front and rear control wheels until the desired character is highlighted.
-
Page 72: Date & Time
���� ����� ����� ����� ����� 4.3 Date & Time Adjust date and time settings by the following procedure: 1) Press the MENU button on the grip. 2) Turn the front control wheel until Settings appears. 3) Press the DRIVE (Enter) button on the grip. 4) Turn the front control wheel to access Date &... -
Page 73: System Status
���� ����� ����� ����� ����� ����� ����� System Status 4.4 System Status Check component usage for servicing reasons as follows: 1) Press the MENU button on the grip. 2) Turn the front control wheel until Settings appears. 3) Press the DRIVE (Enter) button on the grip. 4) Turn the front control wheel to access Info. -
Page 74: Flash
Flash ■ Sync at all shutter speeds to 1/800s ■ Integral fill-flash ■ SCA 3002 compatible ■ Flash measure capability ■ Rear sync capability The H system meets professional demands for a variety of situa- tions where flash is required. It includes an integral flash primarily intended for fill-flash use but strong enough for simple close work. - Page 75 The H2 can be used together with most flash units in manual mode. However, to make use of a TTL automatic function, you must ensure the flash unit is compatible with the SCA 3002 system. Connection is either by the PC socket or by the hot shoe (see warning note below).
-
Page 76: Integral Flash
FLASH ���� Example of viewfinder LCD display showing Flash set to Rear sync as well as ´- 1EV´ exposure compensation. Red warning triangle and green LED flash symbol to left of viewfinder LCD display. 1) Activate the camera and press the FLASH button once. 2) Turn the front control wheel to set the amount of compensation required: •... -
Page 77: Flash Measure Of Separate Flash Unit
FLASH ���� ����� ���� AE-L Separate flash unit connection and use Separate flash units can be electrically connected either by way of the hot shoe accessory holder (see previous warnings) on the top of the viewfinder or via a cord to the PC connection port on the left hand side of the camera body. -
Page 78: Optional Accessories
Optional Accessories ■ Instant film back ■ Converter ■ Extension tubes ■ Rechargeable battery grip ■ Release cord ■ Filters ■ Tripod quick coupling ■ Support strap ■ Grid focusing screen ■ CF adapter ■ Proshade Optional accessories provide the opportunity to extend the capa- bilities of your system or just to add extra convenience to suit your way of working. - Page 79 There are a number of optional accessories available for the H2 with more being developed to suit a variety of photographic situations and needs. Please see www. hasselblad.com for the latest information. The figures in brackets after the headings are the product codes.
-
Page 80: Appendix
Appendix ■ Glossary of Terms ■ P and Pv explanatory charts ■ Technical specifications ■ Equipment Care, Service & Guarantee This section provides an insight into the more technical aspects of the H system as well as some important reference information. -
Page 81: Glossary Of Terms
Off The Film - a literal description of the light measurement me- chanics regarding flash exposure measurement. Profile You can allow the H2 to be set according to ‘profiles’. These profiles are combinations of modes, methods and settings (custom or default) that suit specific photographic situations. By using a personal profile - which you can create, name and save - the camera is immediately configured for a specific purpose without any need to check through... -
Page 82: Main Screen
Roll film The H2 uses two sizes of roll film (120 and 220) that has different lengths. 120 film generally produces 16 exposures per film and 220 film produces 32 exposures per film. (‘Half-length 120’ film also exists that will produce 8 exposures per film. -
Page 83: True Exposure
True exposure Shutter position Open Closed T 3 = T 1 Exposure at max aperture (e.g. f/2,8) Exposure at aperture f/4 Exposure at aperture f/4 adjusted with true exposure True exposure The effective shutter speed for a central lens shutter is defined as the length of time between the opening and closing when measured at the half height position when expressed in diagram form (see diagram). -
Page 84: Automatic Exposure - P & Pv Mode
Automatic exposure — P & Pv Mode P Mode Shutter speed S hutters peed Pv-mode Light metering method sensitivity distribution Average (45x37mm) Average (45x37mm) Average (45x37mm) Centre weighted (23x19mm) Centre weighted (23x19mm) Centre weighted (23x19mm) Spot (diameter 7,5mm) Spot (diameter 7,5mm) Spot (diameter 7,5mm) 50-110 @ 50 50-110 @ 110... -
Page 85: Technical Specifications
Hasselblad HC lenses with built-in electronically controlled shutter and aperture. Automatic or manual focusing with instant manual focus override. All H2 lenses have been especially designed to meet the exacting requirements of digital photography. Lens shades can be mounted in reverse for transport. - Page 86 Bright Spherical Acute-Matte type D. Optional type with grid markings also available. Provided with two M5 threads and an electrical connector for accessories. A large number of the H2’s functions can be customized by the photographer to suit specific styles or situations through the built-in menu system.
-
Page 87: External Dimensions
External dimensions approx. 155 mm 6.1 ins H2 Data imprinting modes Type 1 Enhanced exposure information Type 2 Basic exposure information Type 3 Date & Time Type 4 Text & Date Type 5 Text & Info Type 6 Text approx. 207 mm (80 mm lens) 8.2 ins... -
Page 88: Default Setting
Interval & Selftimer AE-lock & Quick adjust Show EV Show ISO Bracket param. in Manual Aperture control in Manual Enhanced exposure information Hasselblad H2 Default setting Bar code setting 120 film, 16 frames Count up (Remain Off) 10 sec 0,5 EV... -
Page 89: Equipment Care, Ser Vice And Guarantee
Problems, Equipment Care, Service & Guarantee The H2 is a very sophisticated camera that relies on much information be- ing passed and processed to and from each modular unit to produce the correct behaviour. It is therefore essential that reasonable care is taken in attaching, detaching and storing the viewfinder, lenses, extension tubes,... -
Page 90: Technical Specif Ications
Victor Hasselblad AB and Hasselblad A/S reserve the right to make changes in descriptions, technical specifications and instructional information without prior notice and accepts no responsibility what- soever, financial or otherwise, for any damages or losses incurred in connection with Hasselblad equipment. - Page 91 Victor Hasselblad AB Box 220, SE - 401 23 Göteborg, Sweden Hasselblad A/S Hejrevej 30, DK - 2400 Copenhagen, Denmark...
Need help?
Do you have a question about the H2 and is the answer not in the manual?
Questions and answers