Table of Contents
Advertisement
Chapter 1 Assembly ............................................................................... 2
Assembly Instructions ......................................................................................................................... 3
Chapter 2 Batteries ................................................................................. 4
Standard Battery Holder ...................................................................................................................... 4
Using the Standard Battery Holder ..................................................................................................... 4
Rechargeable Battery (Opt.) ................................................................................................................ 5
Battery Check ...................................................................................................................................... 5
Chapter 3 M6 Quick Start .................................................................. 6-7
Chapter 4 Display .. ............................................................................8-9
Chapter 5 Controls ............................................................................... 11
®
...............................................................................................................................12-13
SENS (Sensitivity) ...................................................................................................................... 14-15
DISC (Discrimination) ................................................................................................................ 16-17
Chapter 6 Searching............................................................................. 18
Pinpoint Technique ............................................................................................................................ 18
Headphones ....................................................................................................................................... 19
Field Use & Tuning Tips ............................................................................................................. 20-21
Chapter 7 Information.......................................................................... 22
Proper Care ........................................................................................................................................ 22
Service ............................................................................................................................................... 23
Warranty ............................................................................................................................................ 24
Warranty Transfer .............................................................................................................................. 25
Owner Information ............................................................................................................................ 26
White's (UK)Ltd Warranty ................................................................................................................ 27
White's (UK)Ltd Warranty Transfer .................................................................................................. 28
M6 Table of Contents
M6 Table of Contents
1
Advertisement
Table of Contents

Related Manuals for Whites M6


Summary of Contents for Whites M6
-
Page 1: Table Of Contents
Standard Battery Holder ........................4 Using the Standard Battery Holder ..................... 4 Rechargeable Battery (Opt.) ........................ 5 Battery Check ............................5 Chapter 3 M6 Quick Start ..............6-7 Chapter 4 Display ................8-9 Chapter 5 Controls ................11 ® AUTO TRAC ..........................12-13... -
Page 2: Chapter 1 Assembly
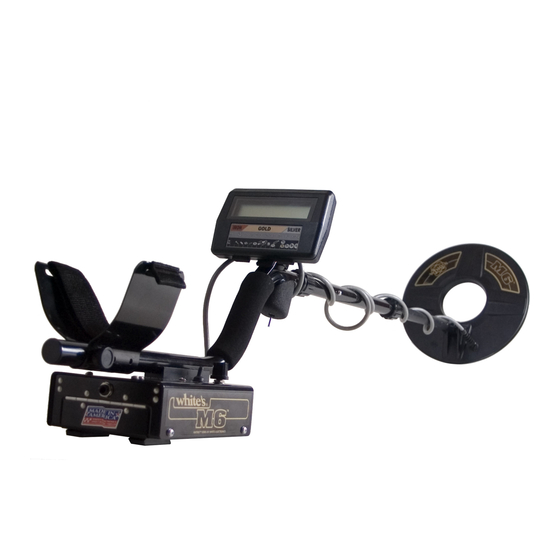
Chapter 1 M6 Assembly Assembly WASHERS Twist and insert each end of BETWEEN handle (provided) through top EACH LOOP of shipping carton into EAR & CLEVIS second flap. (CARRY CARTON) LOOP OR SEARCH COIL DISPLAY 1/ VDI Numbers CABLE RETAINER... -
Page 3: Assembly Instructions
Chapter 1 M6 Assembly Assembly Instructions 1. Remove all parts from shipping carton and readjust clevis/lower rod length with the spring check the assembly page to make sure the kit is clip buttons so that the search coil can be held near complete. -
Page 4: Chapter 2 Batteries
3. The battery voltage appears automatically on the display when the SENS knob is used to turn the M6 "ON". Once the batteries become weak (8 volts) "Lo Bat" will automatically appear on the display during searching. At that point the batteries should be replaced. -
Page 5: Rechargeable Battery (Opt.)
A rechargeable battery system is not standard steadily diminish in voltage until they die. The equipment with your M6, however, high quality Nicad rechargeable battery pack, however, will systems are available. -
Page 6: Chapter 3 M6 Quick Start
1. Forward (Tone I.D.). Search 2. Center (Search). 3. Squeezed and Held (Pinpoint/All Metal). P/P All Metal SENS Turns the M6 ON/OFF and adjusts the signal strength of targets, ground and electrical interference. DISC establishes the level of trash metal rejection (Discrimination). -
Page 7: Chapter 3 M6 Quick Start
* SPECIAL NOTICE * SPECIAL NOTICE "On" position. " " If you attempt to demonstrate or test the M6 by waving targets in the air in front of Set the Trigger Switch (under the hand ® the search coil, the Auto Trac toggle grip) to the center (Search) position. -
Page 8: Chapter 4 Display
The display will momentarily show a software version and battery voltage immediately after the SENS knob is turned "on". The M6 operates on a twelve volt battery system, new quality batteries will indicate 12 + volts. After 35 to 40 hours of operation, "Lo Bat"... -
Page 9: Chapter 4 Display
M6 has complete information for target identification. A half block indicates the M6 has partial information. A quarter block indicates the M6 has only a small amount of target informa- tion. 3. Labels - The most common metal target (or... -
Page 11: Chapter 5 Controls
Chapter 5 M6 Controls Controls Trigger Trigger Trigger Trigger Trigger (on hand grip) (on hand grip) (on hand grip) (on hand grip) (on hand grip) Center Position (Discrimination) "Search" The DISC control works like most traditional metal detectors. Metal items below the DISC control setting are rejected (quiet or broken) by the audio ... -
Page 12: Auto Trac
(ground type) are provided. The On position is used for normal or typical ground conditions. In this position the M6 will quickly compensate for ground minerals in a few pumps of the search coil over the ground being... - Page 13 Chapter 5 M6 Controls Chapter 5 MXT Controls Eliminating Hot Rocks: Summary - The On TRAC setting is recommended The "Lock" can be used to deal with rocks that for most searching conditions. Lock is used to hold contain much different minerals than the surround- a ground rejection setting that is first established in ing ground.
-
Page 14: Sens (Sensitivity)
The M6 will self correct after the message and you can continue to search as normal. SENS Adjustment 1. The SENS control knob turns the M6 ON and OFF and controls the SENS. Starting from the POWER OFF position and going clockwise, the... - Page 15 SENS counter- clockwise. 6. The trash I.D. capability of the M6 also func- tions more accurately when the SENS is set at a level which allows for smooth operation. Too much SENS can cause bad ground to distort the proper identification of iron and non-iron targets.
-
Page 16: Disc (Discrimination)
Finding the lowest (furthest counterclock- wise) position that eliminates the common trash metals in your area is important in order to find items of jewelry. The M6 provides two significantly different DISC (Discrimination) modes. 1. Traditional DISC Trigger control on... - Page 17 Chapter 5 MXT Controls Chapter 5 M6 Controls Some large trash metals, such as pieces of lead, pot metal, aluminum, tin, brass, copper, or significant grade iron will produce a good sound regardless of the DISC control position. An operator should dig these unusual scrap metals to be successful.
-
Page 18: Chapter 6 Searching
Chapter 6 M6 Searching Chapter 5 MXT Controls Pinpointing Pinpoint Technique Due to the wide scan nature of modern search coils it can be difficult to locate small targets under the physical center of the loop. Use an "X marks the spot"... -
Page 19: Headphones
Chapter 6 M6 Searching Chapter 5 MXT Controls Headphones The headphone jack on the M6 is located on the control box above the battery compartment. There is a dust cover on the headphone jack that needs to be removed before the stereo plug from the head- phone is inserted. -
Page 20: Field Use & Tuning Tips
B. For areas with an abundance of separation: decomposed man made iron (which may make the M6 appear unstable only during search coil sweeps), proceed exactly as above only once you pump the loop over the ground, then set the Trac control to Lock. - Page 21 Chapter 6 M6 Searching Chapter 6 MXT Searching The 3rd choice is the alternate MODE "Tone I.D." The M6 provides good general purpose searching accessed by pushing the Trigger (on the hand grip) for a wide variety of targets and environments.
-
Page 22: Chapter 7 Information
Chapter 7 M6 Information Chapter 7 MXT Information Information Proper care I. Cleaning III. Storage A. Both the coil and rod are waterproof and can A. When the instrument is not in use, make sure be cleaned with fresh water and mild soap. The it is turned OFF. -
Page 23: Service
Chapter 7 MXT Information Chapter 7 M6 Information Service White’s reputation has been built on quality products backed by quality service. Our Factory Authorized Service Centers are factory trained and equipped. They offer the same quality service as the factory. -
Page 24: Warranty
Chapter 7 MXT Information Chapter 7 M6 Information Warranty If within two years (24 months) from the original Duration of any implied warranty date of purchase, your White's detector fails due to (e.g., merchantability and fitness for a particular defects in either material or workmanship, White's... -
Page 25: Warranty Transfer
Chapter 7 MXT Information Chapter 7 M6 Information Warranty Transfer If for any reason you should sell your White's detector prior to the date the warranty expires, the remaining warranty is transferable. This transfer is authorized by calling 1- 800-547-6911, and getting an Authorization Number. -
Page 26: Owner Information
Chapter 7 M6 Information Chapter 7 MXT Information Owner Information Serial Number: __________________________ (inside of battery compartment) Purchase Date: __________________________ (The date on the sales receipt) Dealer Name: _____________________________________________________________________ Address: ___________________________________________________________________ Telephone #: ________________________________________________________________ Payment method: __________________________________________________________________ Personal markings: _________________________________________________________________... -
Page 27: White's (Uk)Ltd Warranty
Chapter 7 M6 Information WHITE'S ELECTRONICS (UK) Ltd. WHITE'S ELECTRONICS (UK) Ltd. WHITE'S ELECTRONICS (UK) Ltd. WHITE'S ELECTRONICS (UK) Ltd. WHITE'S ELECTRONICS (UK) Ltd. After Sales Service After Sales Service After Sales Service After Sales Service After Sales Service LIMITED WARRANTY STATEMENT... -
Page 28: White's (Uk)Ltd Warranty Transfer
Chapter 7 M6 Information WARRANTY TRANSFER WARRANTY TRANSFER WARRANTY TRANSFER WARRANTY TRANSFER WARRANTY TRANSFER If for any reason you should sell your White's Metal Detector prior to the date the warranty expires, the remaining warranty may be transferable. Simply fill out the Warranty Transfer form below, send it to White's Electronics (UK) Ltd, 35 Harbour Road, Inverness, Scotland, IV1 1UA.
Need help?
Do you have a question about the M6 and is the answer not in the manual?
Questions and answers