Table of Contents
Troubleshooting

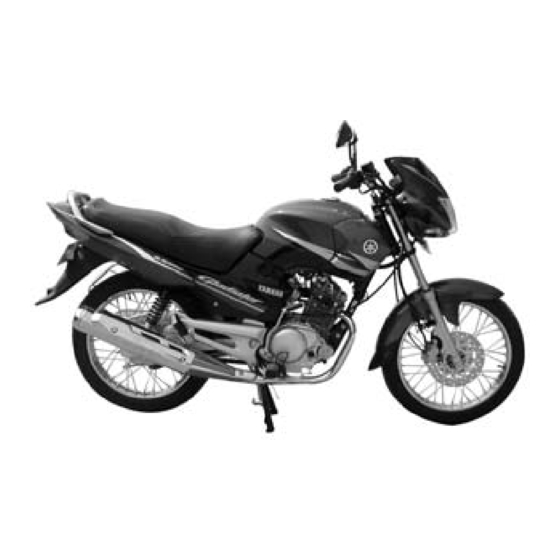
Related Manuals for Yamaha GLADIATOR


Summary of Contents for Yamaha GLADIATOR
- Page 1 TROKE MOTOR OIL 0W40 ger Engine Life er Maintenance Cost OWNER'S MANUAL er Exhaust Smoke uces Wear and Tear 5P4-F8199-E1 5P4-F8199-E1 Starter Motor & Disc Brake Starter Motor & Disc Brake PRINTED IN INDIA 2Y16(OM-01)-271-08-06-E...
- Page 2 WARNING PLEASE READ THIS MANUAL CAREFULLYAND COMPLETELY BEFORE OPERATING THIS MOTORCYCLE. OWNER'S MANUAL YAMAHA MOTOR INDIA PVT. LIMITED All rights reserved. Any reprinting or unauthorised use without the written permission of YAMAHA MOTOR INDIA PVT. LIMITED is expressly prohibited. TAKE NECESSARY PRECAUTIONS DURING RUNNING-IN PERIOD.
- Page 3 Owner/ User of the Motorcycle for keeping Environment Clean and Green. You are requested to please read the GREEN BOOK carefully. We Provide At Your Caring Service, YAMAHA MOTOR INDIA PVT. LTD. A-3, Industrial Area, Noida Dadri Road Surajpur - 201 306 UP (India)
-
Page 4: Important Manual Information
This manual should be considered a permanent part of this Motorcycle and should remain with it even if the Motorcycle is subsequently sold. • YAMAHA continually seeks advancements in product design and quality. Therefore, while this manual contains the most current product information available at the time of printing, there may be minor discrepancies between your Motorcycle and this manual. -
Page 5: Table Of Contents
TABLE OF CONTENTS ROAD SAFETY TIPS ........1-1 Seat ............... 3-8 Storage compartment ........3-9 DESCRIPTION ..........2-1 Rear shock absorber adjustment ....3-9 Left view ............2-1 Handle Seat, Stay Lock ......... 3-10 Right view ............2-2 Controls/Instruments ........2-3 PRE-OPERATION CHECKS ...... - Page 6 TABLE OF CONTENTS Air filter ............6-10 Fuse replacement ........6-27 Carburetor adjustment ......... 6-11 Headlight bulb replacement ......6-28 Idle speed adjustment ......... 6-12 Turn signal and taillight bulb Throttle cable free play adjustment ..... 6-12 replacement ..........6-29 Valve clearance adjustment ......
-
Page 7: Road Safety Tips
ROAD SAFETY TIPS SAFE RIDING 1. Before riding, you should learn to ride your motorcycle properly and all the control functions should be known to you. 2. Remember that there are no legal “rights” when it comes to survival as far as Motorcyclists are concerned. -
Page 8: Description
DESCRIPTION Left view 6 5 4 3 1. Fuel cock (page 3-6) 6. Toolkit (page 6-1) 2. Starter Lever (page 3-7) 7. Handle Seat (page 3-10) 3. Fuse (page 6-26) 8. Drive chain free play check window (page 6-19) 4. Battery (page 6-24) 9. -
Page 9: Right View
DESCRIPTION Right view Seat (page 3-8) Rear shock absorber (page 3-9) Engine oil filler cap (page 6-8) Air filter (page 6-10) Rear brake pedal (page 3-4,6-17) Kick starter (page 3-7) fazer5yy8.pmd 8/28/2006, 11:51 AM... -
Page 10: Controls/Instruments
DESCRIPTION Controls / Instruments 20 21 17. Clutch Lever (page 3-3, 6-16) 22. Front Brake Lever (page 3-4, 6-16) 18. Left Hand Switch (page 3-3) 23. Throttle Grip (page6-12) 19. Speedometer (page 3-2) 24. Fuel Tank Cap (page 3-5) 20. Main switch Cum Steering Lock (Page 3-1) 25. -
Page 11: Instrument And Control Functions
INSTRUMENT AND CONTROL FUNCTIONS WARNING Never turn the key to "LOCK" when the Motorcycle is moving. Push Main switch cum steering Release lock Turn LOCK: The main switch controls the ignition The steering is locked in this position and lighting systems. Its operation is and all electrical circuits are switched described below. -
Page 12: Speedometer
INSTRUMENT AND CONTROL FUNCTIONS Fuel Meter Turn indicator light “ ” Speedometer High beam indicator light “ ” Odometer Neutral indicator light “N” Fuel Meter Speedometer Indicator lights The fuel meter indicates the quantity The speedometer shows riding of the remaining petrol in the fuel tank. Turn indicator light "... -
Page 13: Starter Switch
INSTRUMENT AND CONTROL FUNCTIONS Turn signal switch To signal a right-hand turn, push the switch to " ". To signal a left- hand turn, push the switch to " ". Once the switch is released it will return to the center position. To cancel the signal, push the switch in Press after it has returned to the center... -
Page 14: Clutch Lever
INSTRUMENT AND CONTROL FUNCTIONS Shift pedal Front brake lever Clutch lever Clutch lever Shift pedal Front brake lever The shift pedal is located on the left The front brake lever is located on The clutch lever is located on the left handlebar. -
Page 15: Rear Brake Pedal
INSTRUMENT AND CONTROL FUNCTIONS NOTE : This tank cap cannot be closed unless the key is in the lock. The key cannot be removed if the cap is not locked properly. WARNING WARNING Be sure the cap is properly installed and locked in place Rear brake pedal Open before riding the Motorcycle. -
Page 16: Fuel Tank Cap
INSTRUMENT AND CONTROL FUNCTIONS WARNING Do not overfill the fuel tank. Avoid spilling fuel on the hot engine. Do not fill the fuel tank above the bottom of the filler tube to avoid Spillage CAUTION : Filler tube Arrow mark Always wipe off spilled fuel Fuel level Fuel cock... -
Page 17: Starter Lever
INSTRUMENT AND CONTROL FUNCTIONS 1. Arrow mark 1. Arrow mark 1. Starter lever ON: With the fuel cock in this RES: This indicates reserve. If you Starter lever position, fuel flows to the run out of fuel while riding, set Starting a cold engine requires a carburettor. -
Page 18: Kick Starter
INSTRUMENT AND CONTROL FUNCTIONS Kick starter Seat Holder Open (Bolt - 1 No.) Kick-starter Open (Bolt - 1 No.) Projection To install Raise the right Pillion footrest, and Opening of Seat rotate the kick starter away from the Insert the projection on the rear of To remove engine. -
Page 19: Storage Compartment
INSTRUMENT AND CONTROL FUNCTIONS Stan- Soft Hard dard Adjusting Position (Depends upon rider's requirement) WARNING A l w a y s a d j u s t e a c h s h o c k absorber to the same setting. 1. -
Page 20: Handle Seat, Stay Lock
INSTRUMENT AND CONTROL FUNCTIONS HandleSeat Stay Lock on Saree Guard Stay Lock For mounting Helmet Lock 3-10... -
Page 21: Pre-Operation Checks
• If necessry, add recommended brake fluid to specified level. 3-4, 6-18 Front brake • If soft or spongy, have YAMAHA dealer bleed hydraulic system. • Check fluid level in reservoir. • Check hydraulic system for leakage. • Check operation, condition and free play. - Page 22 PRE-OPERATION CHECKS ITEM CHECKS PAGE • Check for smooth operation. 6-22 Control and meter cable • Lubricate if necessary. • Check for smooth operation. Brake and shift pedal shafts 6-23 • Lubricate if necessary. • Check for smooth operation. Brake and clutch lever pivots 6-23 •...
-
Page 23: Operation And Important Riding Points
If the light does not come on, ask a are poisonous and can cause YAMAHA dealer to inspect it. l o s s o f c o n s c i o u s n e s s . A l w a y s... -
Page 24: Starting A Warm Engine
OPERATION AND IMPORTANT RIDING POINTS CAUTION : Starting a warm engine. • Do not ride downhill with The Starter Lever may not be required Ignition Switch in “OFF” when the engine is warm. Position & in Neutral Gear. • Always ride motor cycle with CAUTION : Ignition Switch in “ON”... -
Page 25: Tips For Reducing Fuel Consumption
OPERATION AND IMPORTANT RIDING POINTS 8. Avoid frequent braking. Tips for reducing fuel CAUTION : consumption 9. Always maintain your tyre Be sure to replace the engine oil as pressure as per recommendation per recommended schedule. Your Motorcycle's fuel consumption 10. -
Page 26: Parking
OPERATION AND IMPORTANT RIDING POINTS Parking When parking the Motorcycle, stop the engine and remove the ignition key. Turn the fuel cock to "OFF" whenever stopping the engine. WARNING The exhaust system is hot. Park the Motorcycle in a place where pedestrians or children are not likely to touch the Motorcycle. -
Page 27: Periodic Maintenance And Minor Repair
If you are not familiar with in the safest and most efficient Motorcycle service, this work condition possible. Safety is an should be done by a YAMAHA obligation of the Motorcycle owner. dealer. The maintenance and lubrication schedule chart should be considered... - Page 28 PERIODIC MAINTENANCE AND MINOR REPAIR NOTE : If you do not have necessary tools required during a service operation, take your Motorcycle to a YAMAHA dealer for service. WARNING Modifications to this Motorcycle not approved by YAMAHA may cause loss of performance, and render it unsafe for use.
-
Page 29: Preventive Maintenance Schedule
PERIODIC MAINTENANCE AND MINOR REPAIR PREVENTIVE MAINTENANCE SCHEDULE DURING SERVICE DAYS OR KMS AFTER WHICHEVE OCCURS FIRST ITEM OPERATION 90 DAYS OR 180 DAYS OR 30 DAYS OR 2000 KMS 4500~5000 KMS 500~700 KMS 2500~2700 KMS Check valve clearances, adjust if necessary. VALVES Check condition, gap;... - Page 30 PERIODIC MAINTENANCE AND MINOR REPAIR PREVENTIVE MAINTENANCE SCHEDULE DURING SERVICE DAYS OR KMS AFTER ITEM OPERATION WHICHEVE OCCURS FIRST S.NO 30 DAYS OR 90 DAYS OR 180 DAYS OR 2000 KMS 4500~5000 KMS 500~700 KMS 2500~2700 KMS Check alignment marks on Push Lever and CLUTCH Crankcase L.H.
-
Page 31: Panel Removal And Installation
PERIODIC MAINTENANCE AND MINOR REPAIR 1. Panel A 1. Lug 2. Panel B 2. Panel A Panel removal and installa- 3. Lug tion Removal of Panel A The panels illustrated need to be Unlock the panel. removed to perform some of the maintenance described in this Pull the lug 1 towards you to remove manual. - Page 32 PERIODIC MAINTENANCE AND MINOR REPAIR 1. Lug 1. Lug 1. Lug. 2. Lug 2. Lug 2. Lug 3. Lug 3. Lug Removal of Panel B Installation of Panel A Installation of Panel B Loosen screw completely and follow Slide the panel towards the Rear of Follow the same procedure as given t h e s a m e p r o c e d u r e a s f o r the motorcycle for inserting the lug...
-
Page 33: Spark Plug Inspection
Do not attempt to diagnose A.- Spark plug gap: 0.6-0.7 mm any problems yourself. Instead, take the Motorcycle to a YAMAHA dealer. When installing the plug, always You should periodically remove and clean the gasket surface and use a inspect the spark plug because heat new gasket. -
Page 34: Engine Oil
PERIODIC MAINTENANCE AND MINOR REPAIR 1. Engine oil filler cap 1. Dipstick Maximum level Minimum level 2. Engine oil replacement Engine oil a. Warm up the engine for a few 1. Oil level measurement NOTE : minutes. a. Place the Motorcycle on the Wait a few minutes until the oil level b. - Page 35 PERIODIC MAINTENANCE AND MINOR REPAIR Start the engine and warm up Tightening torque: for a few minutes. While Drain plug: warming up, check for oil leak- 14.5 It-lb (2.0 m-kg) age. If oil leakage is found, stop the engine immediately and e.
-
Page 36: Air Filter
PERIODIC MAINTENANCE AND MINOR REPAIR 1. Air filter element Air filter case cover Air filter element 2. Frame Screw(4 Nos) Lockable SpringWire 6. Dip the Air Filter Elements in Air filter recommended oil squeeze out the The air filter should be cleaned at 3. -
Page 37: Carburetor Adjustment
Most adjust- 7. Pull the air filter elements over • The engine should never be run ments should be left to a YAMAHA the frame and install the air filter without the air filter installed. dealer who has the professional in the case. -
Page 38: Idle Speed Adjustment
1. Do not Tamper/Adjust with TPS NOTE : (Throttle Position Sensor) If the specified idle speed cannot be 2. Do not Open BS (Butterfly Slide) obtained by performing the above Valve Screws. adjustment, consult a YAMAHA Please refer Page 6.3 dealer. 6-12... -
Page 39: Valve Clearance Adjustment
This adjustment however, should be left to a YAMAHA dealer. 1. Tread depth 1. Free play 2. - Page 40 Do not carry loosely or if the side wall is cracked, packed items that can shift. ed according to total weight of contact a YAMAHA dealer cargo, rider, passenger, and Securely pack your heaviest items immediately and have the tyre...
-
Page 41: Wheels
YAMAHA dealer replace 1. Always inspect the wheels before the tyre immediately. a ride. Check for cracks, bends or warpage of the wheel. -
Page 42: Clutch Lever Free Play Adjustment
If proper adjustment cannot be obtained or the clutch does not work correctly, ask a YAMAHA dealer to i n s p e c t t h e i n t e r n a l c l u t c h mechanism. -
Page 43: Rear Brake Adjustment
The rear brake light switch is acti- the proper adjustment, ask a (Instruction 2, a ) at the brake pedal vated by the brake pedal and is YAMAHA dealer. end. Turn the adjusting nut in properly adjusted when the brake •... -
Page 44: Checking Brake Fluid Level
If the brake fluid level is low, have a YAMAHA dealer replace the wear limit line, have a YAMAHA be sure to check the brake pads for brake pads as a set. -
Page 45: Drive Chain Slack Check
Have a YAMAHA dealer check the l e a k a g e a n d p o o r b r a k i n g brake fluid at the intervals specified in performance the periodic maintenance. -
Page 46: Drive Chain Slack Adjustment
PERIODIC MAINTENANCE AND MINOR REPAIR 1. Chain joint 1. Locknut Adjusting nut 2. Adjusting hex screw Cotter pin If the chain is disassembled, be sure Axle nut 4. Loosen the chain adjusting the chain lock is placed in the Drive chain slack adjust- locknuts on each chain puller. - Page 47 PERIODIC MAINTENANCE AND MINOR REPAIR Adjust the free play in the CAUTION : brake pedal. • Maintain chain slackness within specified limits as per specifications. WARNING Check the operation of the brake • To maintain correct axle light after adjusting the rear alignment, Ensure the notch brake.
-
Page 48: Drive Chain Lubrication
Then, take ask a YAMAHA dealer to replace it. the chain out of the solvent to dry it, and then dip the chain in oil of Recommended lubricant: 20W40. -
Page 49: Brake And Shift Pedal Lubrication
Lubricate the pivoting and mating Lubricate the pivoting parts. joints. Recommended Grease : Check to see that the center and MULTIPURPOSE sidestand move up and down smoothly. WARNING If the center and/or sidestand does not move smoothly, consult a YAMAHA dealer. 6-23... -
Page 50: Front Fork Inspection
Check for scratches or damage forward and backward. If any free on the inner tube and excessive play can be felt, ask a YAMAHA oil leakage from the front fork. dealer to inspect and adjust the steering. Inspection is easier if the front wheel is removed. -
Page 51: Wheel Bearings
If there is play in the front or rear so there is no danger of it falling wheel hub or if the wheel does not over. turn smoothly, have a YAMAHA dealer inspect the wheel bearings. 1. Maximum level mark 2. Minimum level mark... - Page 52 PERIODIC MAINTENANCE AND MINOR REPAIR CAUTION : Antidote: Replenishing the battery fluid EXTERNAL: Flush with water. A poorly maintained battery will When inspecting the battery, be corrode and discharge quickly. The sure the breather hose is routed INTERNAL: Drink large quantities battery fluid should be checked at correctly.
-
Page 53: Fuse Replacement
Install a new fuse of proper connected and is not damaged or amperage. Turn on the switches and obstructed. see if the electrical device operates. If the fuse immediately blows again, consult a YAMAHA dealer. 6-27... -
Page 54: Headlight Bulb Replacement
4. Remove the defective head light 7. If the headlight beam adjustment 3. Slide head light forward. bulb from the bulb holder, if is necessary, ask a YAMAHA fused. dealer to make adjustment. 5. Remove the parking bulb if fused. -
Page 55: Turn Signal And Taillight Bulb Replacement
PERIODIC MAINTENANCE AND MINOR REPAIR Front wheel removal WARNING • It is advisable to have a YAMAHA dealer service the wheel. • S e c u r e l y s u p p o r t t h e Motorcycle so there is no danger of it falling over. - Page 56 PERIODIC MAINTENANCE AND MINOR REPAIR 1. Cotter Pin 2. Axle Nut Speedometer Cable 3. Remove the cotter pin '1' and axle 1. Place the Motorcycle on the nut '2'. centerstand. 4. Remove the wheel, make sure 2. Loosen the Speedometer cable the Motorcycle is properly Nut '1', &...
-
Page 57: Front Wheel Installation
Rear wheel removal Always use a new cotter pin. WARNING • It is advisable to have a YAMAHA dealer service the Axle nut torque: wheel. 33 ft-lb (4.55 m-kg) • S e c u r e l y s u p p o r t t h e Motorcycle so there is no danger of it falling over. - Page 58 2. Remove the cotter pin and nut. lever. Then remove the tension bar 4. Remove the axle nut cotter pin from the brake shoe plate. and the axle nut. ALWAYS USE YAMAHA GENUINE SPARE PARTS 6-32...
-
Page 59: Rear Wheel Installation
If your Motorcycle requires tightening torque. any repair, bring it to a YAMAHA 5. Take the Motorcycle off the dealer. The skilled technicians at a centerstand. YAMAHA dealership have the tools, 6. -
Page 60: Troubleshooting Chart
2. Compression There is compression Go to Ignition check. Use kick starter. No compression. Ask YAMAHA dealer to inspect. 3. Ignition Wipe clean with dry cloth Open the throttle half-way and correct spark plug and start the engine. -
Page 61: Cleaning & Storage
CLEANING AND STORAGE A. CLEANING 1. Before cleaning the Motorcycle: CAUTION : a. Block off the end of the exhaust Direct excessive Hose Pressure Frequent, thorough cleaning of your pipe to prevent water entry; a may cause water Entry Into Wheel Motorcycle will not only enhance its plastic bag and strong rubber Bearing, Front Fork Brakes,... -
Page 62: Storage
CLEANING AND STORAGE 8. Clean the seat with a vinyl B. STORAGE solvent and lubricate it. Reinstall upholstery cleaner to keep the the chain or store it in a plastic bag Long term storage (60 days or more) cover pliable and glossy. (tied to frame for safe-keeping). -
Page 63: Specifications
SPECIFICATIONS Specifications EngineOil: Type: YAMALUBE 4-Stroke motor Model GLADIATOR oil (20W40 type SG) Dimensions Overall length 2065 mm CAUTION : Overall width 730 mm Be sure to use motor oils that do not contain Overall height 1100 mm antifriction modifiers. Passenger car motor oils (often... - Page 64 SPECIFICATIONS Spark plug : Type/Manufacturer CR7HSA (NGK) Tyre with Tube Spark plug gap 0.6-0.7 mm Size Clutch type : Wet, multiple-disc Front 2.75 x18” 4PR (RIBBED) Transmission : Primary reduction system Helical gear Rear 3.00 X18” 6PR (UNIVERSAL) Primary reduction ratio 3.4 (68/20) Air pressure (cold tyre ): Secondary reduction system...
- Page 65 SPECIFICATIONS Wheels: Wheel travel: Type: Front 120 mm Front Spoke wheel Rear: 90 mm Rear Spoke wheel Electrical: Size: Ignition system: DC-CDI (Digitally Timing Front 1.60 X 18 Advanced) Rear 1.60 X 18 Generator system: Brakes: Type Flywheel magneto Front : Standard output Type Single Disc Brake...
-
Page 66: Customer Information
CUSTOMER INFORMATION Key identification number Frame serial number Engine serial number Key identification number Frame serial number Engine serial number The key identification number is The frame serial number is stamped The engine serial number is stamped on the key. into the steering head pipe on right stamped into the right hand hand side. - Page 67 PRE-DELIVERY INSPECTION REPORT (To be filled in by the Dealer on receipt of the Motorcycle from YAMAHA) Frame Engine Odo-Meter Date of Date of Reading Inspection Sale 1. Check for any missing item(s), scratches in painted/plated part(s), saddle or other external visual damages and take corrective action.
- Page 68 PRE-DELIVERY INSPECTION REPORT f. Wheels Tyre Tyre pressure Solo Double (PSI) Front Rear Runout - Radial - 1.5 mm (Max) - Lateral - 1.5 mm (Max) Spokes No loosenes g. Locks Operation • Ignition • Steering • Fuel Tank Cap •...
- Page 69 PRE-DELIVERY INSPECTION REPORT b. Spark Plug Recommended No. (CR7HSA-NGK) 0.6-0.7 mm c. Valve Clearance (Cold condition) (If required) Inlet 0.08 ~ 0.12 mm Exhaust 0.10 ~ 0.14 mm (After matching of the mark on sprocket cam chain with mark on Cylinder Head Casting and ensuring the Piston at TDC of compression stroke.) d.
- Page 70 PRE-DELIVERY INSPECTION REPORT C. ELECTRICAL a. Ignition Switch Operation b. Left Hand Switch Operation & Pass Beam • Horn • Indicator • Head Light c. All Bulbs - Functioning d. Battery • Electrolyte Level • Specific Gravity • Routing of Breather Pipe •...
-
Page 71: Installation
INSTALLATION Procedures to be explained to the customer on delivery of the Motorcycle by the Dealer's Representative. Operation of all the locks (Ignition, Steering, Fuel Tank Cap, Side Cover L.H.). Fuel Cock Lever Operation and its reserve position; Fuel Tank Capacity including reserve. Operation and function of Starter Lever. - Page 72 INSTALLATION Location of Storage and Tool Kit compartments and their use. Procedure of opening and closing of L. H. Side Panel. Battery Maintenance : Checking of electrolyte level (To add only distilled water if required & to maintain its Specified Level) Correct Drive Chain Slackness (20 ~30 mm).
- Page 73 CONTENTS • DO’S & DON’TS for the Motorcycle • Procedure for measurement of ‘CO’ Emission Level. • List of Components impacting Emission greenbook.PMD 8/28/2006, 2:24 PM...
- Page 74 • 4T - 20W/40 SG grade - YAMALUBE 4T Always keep your engine well tuned. Save environment and also improve Fuel Efficiency • ALWAYS GET YOUR MOTORCYCLE REPAIRED AND MAINTAINED ONLY AT YAMAHA AUTHORISED DEALER. • YAMAHA serves you through a wide network of Authorised Dealers.
- Page 75 DO’S AND DON’TS FOR THE MOTORCYCLE 6 Always drive with Starter Lever in OFF position. 7 Use Starter Lever for minimum possible period (1 to 2 minutes) only to start and warm up Engine (may be required only in winter) 8 If misfiring, get your Motorcycle diagnosed &...
- Page 76 Insert the Sampling probe of the Exhaust Gas Analyser inside the Exhaust Muffler of the Motorcycle. • If the reading is within specified limits then it is acceptable. • If the reading exceeds the norm of 3.5% (by volume) have it adjusted by YAMAHA Authorised Dealer. 3. LIST OF COMPONENTS IMPACTING “EMISSION”...
- Page 77 • Longer Engine Life • Lower Maintenance Cost • Lower Exhaust Smoke • Reduces Wear and Tear 5P4-F8199-E1 YAMAHA MOTOR INDIA PRIVATE LIMITED A-3, SURAJPUR INDUSTRIAL AREA, NOIDA DADRI ROAD PRINTED IN INDIA SURAJPUR - 201 306 (UP) INDIA 2Y16(OM-01)-271-08-06-E...
Need help?
Do you have a question about the GLADIATOR and is the answer not in the manual?
Questions and answers