Table of Contents
Advertisement
Advertisement
Table of Contents

Related Manuals for Sitecom W-119


Summary of Contents for Sitecom W-119
- Page 1 ADSL2+ router 54G WL-118 / WL-119 (annex A) (annex B) Full Manual...
-
Page 2: Table Of Contents
Introduction ........................3 Features of the WL-118/119..................4 Package Contents ......................5 The Front LEDs........................6 The Rear Ports ........................7 Chapter 1 – Basic Installation ..................8 1.1 Before Configuration..................8 1.2 Configuring PC in Windows XP................ 9 1.3 Configuring PC in Windows 2000 ..............10 1.4 Configuring PC in Windows 98/Me .............. -
Page 3: Introduction
Introduction Your Sitecom router is an “all-in-one” unit, combining an ADSL2+ modem, router, Ethernet network switch, and wireless access point providing everything you need to get the machines on your network connected to the Internet over your ADSL2+ broadband connection. -
Page 4: Features Of The Wl-118/119
Features of the WL-118/119 ADSL Multi-Mode Standard supports downstream rates of up to 24 Mbps and upstream rates of up to 1 Mbps. It also supports rate management that allows ADSL subscribers to select an Internet access speed suiting their needs and budgets. It is compliant with Multi- Mode standard (ANSI T1.413, Issue 2;... -
Page 5: Package Contents
Telnet, WEB GUI, and SNMP through LAN or WAN ports to configure and manage the device. Package Contents Sitecom WL-118 ADSL2+ router 54G – annex A, Sitecom WL-119 ADSL2+ router 54G – annex B CD-ROM containing the full manual... -
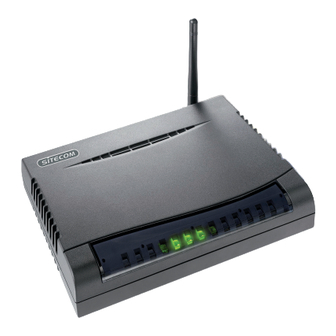
Page 6: The Front Leds
The Front LEDs Meaning PPP : Lit steady when there is a PPPoA / PPPoE connection. ADSL: Lit when successfully connected to an ADSL DSLAM (“linesync”). Lit when connected to an Ethernet device. LAN Port 1-4: Green for 100Mbps; Orange for 10Mbps. Blinking when data is Transmitted / Received. -
Page 7: The Rear Ports
The Rear Ports Port Meaning Connect the supplied power adapter to this jack. Press it to reset the device or restore to factory default settings. 0-3 seconds: reset the device. RESET 6 seconds above: restore to factory default settings (this is used when you can not login to the router, e.g. -
Page 8: Chapter 1 - Basic Installation
Chapter 1 – Basic Installation The router can be configured with your web browser. A web browser is included as a standard application in the following operating systems: Windows 98/NT/2000/XP/Me, MAC, Linux, etc. The product provides a very easy and user-friendly interface for configuration. -
Page 9: Configuring Pc In Windows Xp
1.2 Configuring PC in Windows XP 1. Go to Start / Control Panel (in Classic View). In the Control Panel, double-click on Network Connections 2. Right-mouse-click on your Local Area Connection. 3. Select Properties 4. Select Internet Protocol (TCP/IP) and click Properties. 5. -
Page 10: Configuring Pc In Windows 2000
1.3 Configuring PC in Windows 2000 1. Go to Start / Settings / Control Panel. In the Control Panel, double-click on Network and Dial-up Connections. 2. Double-click Local Area Connection. 3. In the Local Area Connection Status window click Properties. 4. -
Page 11: Configuring Pc In Windows 98/Me
1.4 Configuring PC in Windows 98/Me 1.Go to Start / Settings / Control Panel. In the Control Panel, double-click on Network and choose the Configuration tab. 2.Select TCP/IP ->, and the name of your Network Interface Card (NIC) in your PC. 3.Select the Obtain an IP address automatically radio button. -
Page 12: Chapter 2 - Default Settings
Chapter 2 - Default Settings Below, the default settings for your router are shown. Web Interface: Username: admin Password: admin LAN Device IP Settings: IP Address: 192.168.0.1 Subnet Mask: 255.255.255.0 ISP setting in WAN site: 1483 Bridged IP LLC VPI/VCI: 0/34 DHCP server: DHCP server is enabled. -
Page 13: Chapter 3 - Configuring With Your Web Browser
Chapter 3 - Configuring with your Web Browser Open your web browser, enter the IP address of your router, which by default is 192.168.0.1, and click “Go”, a user name and password window prompt will appear. The default username and password are “admin” and “admin”. -
Page 14: Chapter 4 - Configuration
Maintenance (Administration, Time Zone, Firmware, SysRestart, Diagnositics) Status Please see the relevant sections of this manual for detailed instructions on how to configure your Sitecom router. 4.1 Quick Start For detailed instructions on configuring WAN settings, see the Interface Setup section of this manual. - Page 15 The following is the Quick Start step, please follow according to the instruction step by step. Step1. Set your new password. Step2. Choose your time zone.
- Page 16 Step3. Set your Internet connection. Step4. Input the data supplied by your ISP. Step5. Click Next, and click close when the settings are saved.
-
Page 17: Interface Setup
4.2 Interface Setup Click this item to access the following sub-items that configure the ADSL router: Internet, LAN, and Wireless. These functions are described in the following sections. 4.2.1 Internet... - Page 18 ATM VC Virtual Circuit: VPI (Virtual Path Identifier) and VCI (Virtual Channel Identifier) define a virtual circuit. VPI: The valid range for the VPI is 0 to 255. Enter the VPI assigned to you. This field may already be configured. VCI: The valid range for the VCI is 32 to 65535.
-
Page 19: Lan
DHCP (Dynamic Host Configuration Protocol, RFC 2131 and RFC 2132) allows individual clients to obtain TCP/IP configuration at start-up from a server. DHCP: If set to Enable, your Sitecom WL-118/WL-119 can assign IP addresses, an IP default gateway and DNS servers to Windows and other systems that support the DHCP client. -
Page 20: Wireless
When DHCP is used, the following items need to be set. Starting IP Address: This field specifies the first of the contiguous addresses in the IP address pool. IP Pool Count: This field specifies the size or count of the IP address pool. Lease Time: The current lease time of client. - Page 21 SSID: The SSID is the unique name of a wireless access point (AP) to be distinguished from another. For security propose, change the default Sitecom to a unique ID name to the AP which is already built-in to the router’s wireless interface.
- Page 22 Action: Define the filter action for the list of MAC addresses in the MAC address filter table. Select Deny Association to block access to the router, MAC addresses not listed will be allowed to access the router. Select Allow Association to permit access to the router, MAC addresses not listed will be denied access to the router.
-
Page 23: Advanced Setup
4.3 Advanced Setup 4.3.1 Routing If you have another router with a LAN-to-LAN connection, you may create a static routing on the router that is the gateway to Internet. #: Item number Dest IP: IP address of the destination network Mask: The destination mask address. -
Page 24: Nat
Metric It represents the cost of transmission for routing purposes. The number need not be precise, but it must be between 1 and 15. Announced in RIP: This parameter determines if the Prestige will include the route to the remote node in its RIP broadcasts. Set “Yes”, it is kept private and is not included in RIP broadcasts. - Page 25 DMZ: Disabled: As set in default setting, it disables the DMZ function. Enabled: It activates your DMZ function. DMZ Host Address: Give a static IP address to the DMZ Host when Enabled radio button is checked. Be aware that this IP will be exposed to the WAN/Internet.
- Page 26 Rule Index: Choose the rule number. Start Port Number: Enter a port number in this field. End Port Number: Enter a port number in this field. Local IP Address: Enter your server IP address in this field. If you have disabled the NAT option in the WAN-ISP section, the Virtual Server function will hence be invalid.
-
Page 27: Adsl
4.3.3 ADSL ADSL Mode: The default setting is Auto Sync-UP. This mode will automatically detect your ADSL, ADSL2+, ADSL2, G.dmt, G.lite, and T1.413. But in some area, multimode cannot detect the ADSL line code well. If it is the case, please adjust the ADSL line code to G.dmt or T1.413 first. -
Page 28: Ip Filter
ACL Rule Index: This is item number Secure IP Address: The default 0.0.0.0 allows any client to use this service to remotely manage the WL-118/WL-119. Type an IP address to restrict access to a client with a matching IP address. Application: Choose a service that you may use to remotely manage the WL- 118/WL-119. - Page 29 IP Filter Set Editing IP filter Set Index: This is item number Interface: Select which channel (PVC) to configure. Direction: Select the access to the Internet (“Outgoing”) or from the Internet (“Incoming”).or Both. IP Filter Rule Editing IP Filter Rule Index: This is item number Active: Select Yes from the drop down list box to enable IP filter rule.
-
Page 30: Snmp
Simple Network Management Protocol (SNMP) is a protocol used for exchanging management information between network devices. SNMP is a member of the TCP/IP protocol suite. The Sitecom WL-118/WL-119 supports SNMP agent functionality which allows a manager station to manage and monitor the router through the network. -
Page 31: Upnp
4.4.4 UPnP UPnP offers peer-to-peer network connectivity for PCs and other network devices, along with control and data transfer between devices. UPnP offers many advantages for users running NAT routers through UPnP NAT Traversal, and on supported systems makes tasks such as port forwarding much easier by letting the application control the required settings, removing the need for the user to control advanced configuration of their device. -
Page 32: Maintenance
Dynamic DNS: Select this check box to use dynamic DNS. Service Provider: Select the name of your Dynamic DNS service provider. My Host Name: Type the domain name assigned to your WL-118/WL-119 by your Dynamic DNS provider. E-mail Address: Type your e-mail address. Username: Type your user name. -
Page 33: Time Zone
4.5.2 Time Zone The router does not have a real time clock on board; instead, it uses the Simple Network Time Protocol (SNTP) to get the current time from an SNTP server outside your network. Choose your local time zone. After a successful connection to the Internet, the router will retrieve the correct local time from the SNTP server you have specified. - Page 34 New Firmware Location: Type in the location of the file you want to upload in this field or click Browse to find it. Browse: Click Browse... to find the .ras file you want to upload. Remember that you must decompress compressed (.zip) files before you can upload them. UPGRADE: Click UPGRADE to begin the upload process.
-
Page 35: Sysrestart
4.5.4 SysRestart Click SysRestart with option Current Settings to reboot your router (and restore your last saved configuration). If you wish to restart the router using the factory default settings (for example, after a firmware upgrade or if you have saved an incorrect configuration), select Factory Default Settings to reset to factory default settings. -
Page 36: Status
4.6 Status 4.6.1 Device Info Device Information Firmware version: This is the Firmware version MAC Address: This is the MAC Address IP Address: LAN port IP address. Subnet Mask: LAN port IP subnet mask. DHCP Server: LAN port DHCP role - Enabled, Relay or disabled Status: “Not connected”... -
Page 37: System Log
Subnet mask: WAN port IP subnet mask. Default Gateway: The IP address of the default gateway. DNS Server: WAN port DHCP role - Enabled, Relay or disabled ADSL ADSL firmware ver: This is the DSL firmware version associated with your router Line State: This is the status of your ADSL link. -
Page 38: Statistics
4.6.3 Statistics Read-only information here includes port status and packet specific statistics. Also provided are "Transmit Statistics" and "Receive Statistics". Ethernet Interface: This field displays the type of port Transmit Frames: This field displays the number of frames transmitted in the last second.
Need help?
Do you have a question about the W-119 and is the answer not in the manual?
Questions and answers