Table of Contents
Advertisement
Advertisement
Table of Contents

Subscribe to Our Youtube Channel
Related Manuals for EFI POWER TOWER


Summary of Contents for EFI POWER TOWER
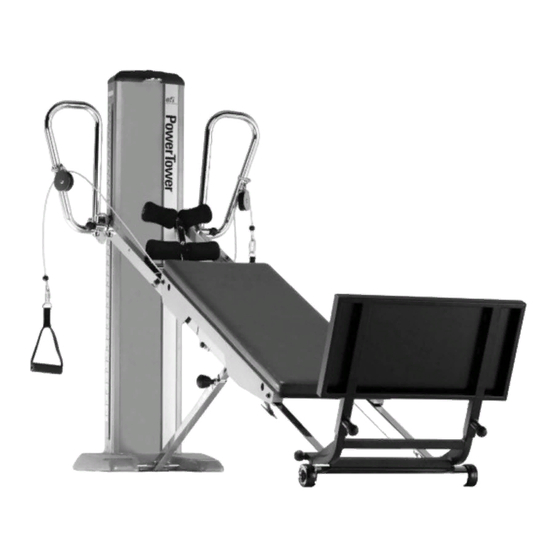
- Page 1 TOTAL GYM ® POWER TOWER OWNER’S GUIDE...
- Page 2 Your Guide also Functional exercise equipment from efi Sports Medicine has set the standard for includes warranty information. Please save this Owner's Guide and physical rehabilitation, athletic training and sports performance training for more refer to it in the future.
-
Page 3: Table Of Contents
TOTAL GYM POWER TOWER OWNER’S GUIDE ® TOTAL GYM POWER TOWER OWNER’S GUIDE ® TABLE OF CONTENTS Parts Identifier......................................2 Box and Hardware Packet Contents ................................3 Warnings ..........................................4 Fuse Replacement ......................................4 Grounding Instructions ....................................5 FCC Rules ..........................................6 Specifications ......................................6 Parts Assembly......................................7-8 Installing LAT Bars ....................................9-13... -
Page 4: Parts Identifier
PARTS IDENTIFIER - POWER TOWER (see INSET 8) (see INSET 8) INSET 1. INSET 2. When parts are referenced throughout this guide, corresponding letters from this PARTS IDENTIFIER page are also listed. For example, when “Tower” appears within (see INSET 1) INSET 3. -
Page 5: Box And Hardware Packet Contents
TOTAL GYM POWER TOWER OWNER’S GUIDE ® PARTS ASSEMBLY - POWER TOWER Your PowerTower arrives with some assembly required. Enclosed in your PowerTower boxes you will find: BB. LAT Bars & Arm Pulley CC. Folding Platform DD. Telescoping Squat Stand... -
Page 6: Warnings
READ ALL INSTRUCTIONS BEFORE USING - Use a flathead screwdriver to pull out recommended by the manufacturer. THE POWER TOWER the fuse assembly. 7. Never operate the PowerTower if it has a DANGER – to reduce the risk of electric shock, damaged Power Cord (S) or plug, if it is - There are (2) 5A fuses in the fuse assembly. -
Page 7: Grounding Instructions
TOTAL GYM POWER TOWER OWNER’S GUIDE ® NOTE: Letters in (parentheses) refer to the PARTS IDENTIFIER on page 2 and/or the PARTS ASSEMBLY on page 3. Use as needed for clarification. IMPORTANT NOTICE ABOUT Figure 1 Figure 2 PROPER GROUNDING... -
Page 8: Fcc Rules
NOTE: Letters in (parentheses) refer to the PARTS IDENTIFIER on page 2 and/or the PARTS ASSEMBLY on page 3. Use as needed for clarification. SPECIFICATIONS FCC RULES Warning: Changes or modifications to this unit not expressly approved by Power: 115 Volts and 5 Amps or the party responsible for compliance could void the user’s authority to 230 Volts and 3 Amps operate the equipment. -
Page 9: Parts Assembly
NOTE: Letters in (parentheses) refer to the PARTS IDENTIFIER on page 2 and/or the PARTS ASSEMBLY on page 3. Use as needed for clarification. PARTS ASSEMBLY PUTTING YOUR POWER TOWER INTO OPERATION IS EASY. To begin assembly, remove your PowerTower from the box. -
Page 10: Parts Assembly
NOTE: Letters in (parentheses) refer to the PARTS IDENTIFIER on page 2 and/or the PARTS ASSEMBLY on page 3. Use as needed for clarification. PARTS ASSEMBLY (CONTINUED) Engage and tighten the Support Strut Knob (M). You need to lean the tower backward slightly to engage the pin. IMPORTANT SAFETY NOTICE: The Support Strut Knob (M) must be engaged and tightened during PowerTower... - Page 11 TOTAL GYM POWER TOWER OWNER’S GUIDE ® NOTE: Letters in (parentheses) refer to the PARTS IDENTIFIER on page 2 and/or the PARTS ASSEMBLY on page 3. Use as needed for clarification. INSTALLING LAT BARS Raise the Rails (K, X) to Tower (A) to 20 degrees for ease of assembly, as shown.
- Page 12 NOTE: Letters in (parentheses) refer to the PARTS IDENTIFIER on page 2 and/or the PARTS ASSEMBLY on page 3. Use as needed for clarification. INSTALLING LAT BARS (CONTINUED) Apply one Wrench (GG) to the nyloc nut on one side of the Tower Crossbar (Y). Use the other Wrench (GG) to loosen the nyloc nut on the other side of the Tower Crossbar (Y) by turning counterclockwise.
-
Page 13: Installing Lat Bars
TOTAL GYM POWER TOWER OWNER’S GUIDE ® NOTE: Letters in (parentheses) refer to the PARTS IDENTIFIER on page 2 and/or the PARTS ASSEMBLY on page 3. Use as needed for clarification. INSTALLING LAT BARS (CONTINUED) Use the other Wrench (GG) to loosen the remaining nyloc nut by turning it counterclockwise. - Page 14 NOTE: Letters in (parentheses) refer to the PARTS IDENTIFIER on page 2 and/or the PARTS ASSEMBLY on page 3. Use as needed for clarification. INSTALLING LAT BARS: POSITIONING THE LAT BARS - PHASE 2 (CONTINUED) Rotate the LAT Bar (B) upside-down until the other LAT Bar (B) is installed, and both nyloc nuts on the Tower Crossbar (Y) have been tightened.
- Page 15 TOTAL GYM POWER TOWER OWNER’S GUIDE ® NOTE: Letters in (parentheses) refer to the PARTS IDENTIFIER on page 2 and/or the PARTS ASSEMBLY on page 3. Use as needed for clarification. INSTALLING LAT BARS: ATTACHING THE LAT BAR BRACKET - PHASE 3 (CONTINUED) Place a Chrome Washer (II) followed by a Bronze Washer (HH) on a Socket Head Screw (JJ).
-
Page 16: Adjusting Lat Bars
NOTE: Letters in (parentheses) refer to the PARTS IDENTIFIER on page 2 and/or the PARTS ASSEMBLY on page 3. Use as needed for clarification. ADJUSTING THE LAT BARS To adjust the LAT Bars (B), pull the retractable knob on the LAT Bar to disengage the Lat Bar from the Upper Rail (X) and rotate LAT Bars to the desired position. -
Page 17: Folding Platform
TOTAL GYM POWER TOWER OWNER’S GUIDE ® NOTE: Letters in (parentheses) refer to the PARTS IDENTIFIER on page 2 and/or the PARTS ASSEMBLY on page 3. Use as needed for clarification. FOLDING PLATFORM Align the bottom of the Folding Platform (H) with the Lower Rails (K) just above the Lower Rail Base (J). -
Page 18: Telescoping Squat Stand
NOTE: Letters in (parentheses) refer to the PARTS IDENTIFIER on page 2 and/or the PARTS ASSEMBLY on page 3. Use as needed for clarification. TELESCOPING SQUAT STAND Align the Telescoping Squat Stand (H) over the Folding Platform (I) struts until the Telescoping Squat Stand (H) pins contact the top of the Folding Platform (I) struts. -
Page 19: Folding Foot Holder
TOTAL GYM POWER TOWER OWNER’S GUIDE ® NOTE: Letters in (parentheses) refer to the PARTS IDENTIFIER on page 2 and/or the PARTS ASSEMBLY on page 3. Use as needed for clarification. FOLDING FOOT HOLDER Your PowerTower arrives with the Folding Foot Holder (E) in the down position. -
Page 20: Adjusting The Rail Handle
NOTE: Letters in (parentheses) refer to the PARTS IDENTIFIER on page 2 and/or the PARTS ASSEMBLY on page 3. Use as needed for clarification. ADJUSTING THE RAIL ANGLE To raise or lower the Rail (K, X) angle, stand alongside the Tower (A). Reach on top of the Tower (A) to the Up/Down Switch (ZY). - Page 21 TOTAL GYM POWER TOWER OWNER’S GUIDE ® NOTE: Letters in (parentheses) refer to the PARTS IDENTIFIER on page 2 and/or the PARTS ASSEMBLY on page 3. Use as needed for clarification. FOLDING AND STORAGE FOR STORAGE, POWERTOWER FOLDS EASILY. Press the Up/Down Switch (ZY) to raise or lower the Rails (K, X). Stop about halfway up the Tower (A).
- Page 22 NOTE: Letters in (parentheses) refer to the PARTS IDENTIFIER on page 2 and/or the PARTS ASSEMBLY on page 3. Use as needed for clarification. FOLDING AND STORAGE (CONTINUED) Attach the center pulley to the Glideboard “D” Ring (F). Lower the Folding Foot Holder (E) to the down position. 61-62.
-
Page 23: Folding And Storage
TOTAL GYM POWER TOWER OWNER’S GUIDE ® NOTE: Letters in (parentheses) refer to the PARTS IDENTIFIER on page 2 and/or the PARTS ASSEMBLY on page 3. Use as needed for clarification. FOLDING AND STORAGE (CONTINUED) Press the Up/Down Switch (ZY) until the Rails (K, X) descend to the lowest possible position and automatically stop. - Page 24 NOTE: Letters in (parentheses) refer to the PARTS IDENTIFIER on page 2 and/or the PARTS ASSEMBLY on page 3. Use as needed for clarification. FOLDING AND STORAGE (CONTINUED) Pull the rails into A-frame position, making sure the Support Strut Knob (M) remains disengaged.
-
Page 25: Getting Started
TOTAL GYM POWER TOWER OWNER’S GUIDE ® NOTE: Letters in (parentheses) refer to the PARTS IDENTIFIER on page 2 and/or the PARTS ASSEMBLY on page 3. Use as needed for clarification. GETTING STARTED When using PowerTower , wear athletic shoes and comfortable lightweight clothing. Tie long hair back to avoid contact with the center pulley. - Page 26 NOTE: Letters in (parentheses) refer to the PARTS IDENTIFIER on page 2 and/or the PARTS ASSEMBLY on page 3. Use as needed for clarification. When lying on your back, be sure your head is supported on the Glideboard (G). If the Glideboard (G) travels all the way to the top or bottom of its rolling distance during the exercise, adjust your body up or down on the Glideboard (G).
-
Page 27: Safety Precautions
PowerTower if it is not completely assembled or has been damaged in any manner. Contact efi Sports Medicine Customer Service for replacement parts or repairs. WARNING Failure to read and follow the safety instructions in this manual may result in serious injury or death. Hazards include falling, overexertion, strained muscles, pinched fingers or pulled hair. -
Page 28: Troubleshooting
3. Fuse. If the red light indicator on the Tower’s (A) On/Off Switch (T) is not glowing, check the fuse located near the power outlet on the back of the Tower (A). Follow 5A fuse replacement instructions in the IMPORTANT INFORMATION ABOUT YOUR POWER TOWER section (page 4) of this guide. -
Page 29: Maintenance And Care
When figuring exercises that window cleaner. HOW TO READ THE RESISTANCE CHART incorporate both Dynamic Arm Pulley System FOR POWER TOWER (D) cables, use 50% of the charted numbers. CAUTION: DO NOT use any lubricants or (SEE NEXT PAGE TO VIEW CHART) silicone based products on the rails or rollers. -
Page 30: Resistance Chart
RESISTANCE CHARTS FOR TOTAL GYM POWER TOWER BODY WT - Lbs. LEVEL SLOPE % WT. % WT. % WT. % WT. % WT. % WT. % WT. % WT. % WT. % WT. % WT. % WT. % WT. % WT. -
Page 31: Warranty Information
Shipping Damage: FOB origin, unless otherwise _______________________________________________________________________________ specified. efi Sports Medicine accepts no _______________________________________________________________________________ responsibility for damage in shipping. _______________________________________________________________________________ efi Sports Medicine does, however, make every effort to facilitate the satisfactory resolution of claims _______________________________________________________________________________ made against delivery agents for damage during shipping. _______________________________________________________________________________... - Page 32 Sports Medicine 7755 Arjons Drive San Diego, CA 92126 efisportsmedicine.com FCC ID: UHJPOWERTOWER ETL #3100548 ©2003/2007, efi Corp./93223. All rights reserved. Patents Pending. Also covered by one or more of the following patents: D405,132; 4,004,801; 5,169,363; 5,967,955; D493,853; 6,921,355...
- Page 33 United States, which are accompanied by this written warranty. efi, at its option, will repair, replace or refund the purchase price of any product that does not conform to this warranty. Repairs or replacement will be made at no charge to the customer for parts or labor, provided that the customer shall be responsible for any transportation and shipping costs.
- Page 34 WHETHER RESULTING FROM THE USE, MISUSE OR INABILITY TO USE THE PRODUCT OR FROM DEFECTS IN THE PRODUCT. efi retains the exclusive right to repair or replace the product or offer a full refund of the purchase price at its sole discretion. SUCH REMEDY SHALL BE YOUR SOLE AND EXCLUSIVE REMEDY FOR ANY BREACH OF WARRANTY.
Need help?
Do you have a question about the POWER TOWER and is the answer not in the manual?
Questions and answers