Table of Contents
Advertisement
Advertisement
Table of Contents

Related Manuals for SKY-WATCHER EQ1


Summary of Contents for SKY-WATCHER EQ1
- Page 1 INSTRUCTION MANUAL Telescopes with EQ1 & EQ2 Mount 060103V1...
- Page 2 REFRACTOR Dust Cap/Mask Dust Cap/Mask (Remove before Viewing) (Remove before Viewing) Dew Cap/Sun Shade Dew Cap/Sun Shade Objective Lens Objective Lens Telescope Main Tube Telescope Main Tube Piggyback Bracket Piggyback Bracket Finderscope Finderscope Finderscope Bracket Finderscope Bracket Finderscope Alignment Finderscope Alignment Screws Screws Focus Locking Screw...
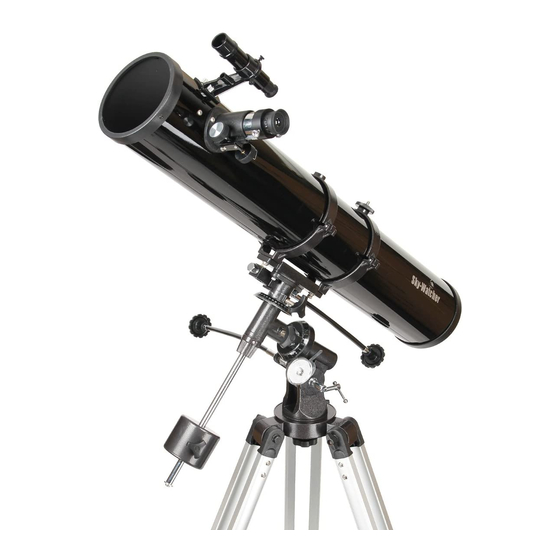
- Page 3 REFLECTOR/MAKSUTOV Secondary Mirror Position Secondary Mirror Position Dust Cap / Mask Dust Cap / Mask (Remove before Viewing) (Remove before Viewing) Focus Tube Focus Tube Finderscope Bracket Finderscope Bracket Finderscope Finderscope Finderscope Alignment Finderscope Alignment Screws Screws Eyepiece Eyepiece Focus Knob Focus Knob Piggyback Bracket Piggyback Bracket...
-
Page 4: Table Of Contents
9/10 Finderscope/Red dot finder assembly Eyepiece assembly Operating Your Telescope Aligning the finderscope/Using the red dot finder Balancing the telescope Operating the EQ1 Mount Operating the EQ2 Mount Using the Barlow Lens Focusing Polar Alignment Tracking celestial objects Using the setting circles... -
Page 5: For Eq1
FOR EQ1 MOUNT TRIPOD SET UP Fig. 1 ADJUSTING TRIPOD LEGS (Fig.1) 1) Slowly loosen the height adjustment clamp and gently pull out the lower section of each tripod leg. Tighten the clamps to hold the legs in place. 2) Spread the tripod legs apart to stand the tripod upright. -
Page 6: Telescope Assembly
TELESCOPE ASSEMBLY INSTALLING COUNTERWEIGHT (Fig.5) Fig.6 1) Slide counterweight halfway onto rod. Hold the Fig.5 counterweight with one hand and insert counter- weight rod into threaded hole on mount with the (long) other hand. Tighten counterweight rod onto mount. 2) Tighten thumbscrew to lock counterweight in place. INSTALLING CONTROL CABLES (Fig.6) (short) 1) Slide the sleeve end of the cable over the... -
Page 7: Finderscope Assembly
FINDERSCOPE ASSEMBLY ATTACHING THE FINDERSCOPE (Fig.10, 11) Fig.10 Fig.11 1) Locate the finderscope optical assembly. 2) Remove the two knurled thumbscrews near the end of the telescope main body. (near the front of the telescope main body for the reflector) 3) Position the finderscope bracket over the screws in the telescope main body. -
Page 8: For Eq2
FOR EQ2 MOUNT TRIPOD SET UP Fig. 15 ADJUSTING TRIPOD LEGS (Fig.15) 1) Slowly loosen the height adjustment clamp and gently pull out the lower section of each tripod leg. Tighten the clamps to hold the legs in place. 2) Spread the tripod legs apart to stand the Fig.17 tripod upright. - Page 9 TELESCOPE ASSEMBLY Fig.20 ATTACHING THE TUBE RINGS TO MOUNT (Fig.20) 1) Remove the tube rings from telescope by releasing their thumb nuts and opening their hinges. 2) Place the tube rings on top of the tube ring mounting plate and bolt the tube rings to the mount using the wench provided. Fig.21 ATTACHING THE TELESCOPE MAIN TUBE TO TUBE RINGS (Fig.21)
-
Page 10: Eyepiece Assembly
RED DOT FINDER ASSEMBLY Fig.25 ATTACHING THE RED DOT FINDER (Fig.25) Slide the red dot finder bracket into the rectangular slot and tighten the screw to hold the red dot finder in place. EYEPIECE ASSEMBLY (reflector) (refractor and Maksutov) INSERTING EYEPIECE (Fig.26) INSERTING EYEPIECE (Fig.27) 1) Loosen the thumbscrew on the end of 1) Unscrew the thumbscrews on the... -
Page 11: Operating Your Telescope
OPERATING YOUR TELESCOPE These fixed magnification scopes mounted on the optical tube are very useful accessories. When they are correctly aligned with the telescope, objects can be quickly located and brought Fig.a1 Fig.a to the centre of the field. Alignment is best done outdoors in day light when it's easier to locate objects. - Page 12 Once the telescope no longer rotates from its parallel starting position, re-tighten tube rings and the Dec. lock knob. Reset altitude axis to your local latitude. Fig.d The EQ1 mount has controls for both conventional altitude (up-down) and azimuth (left-right) directions of motion. These two adjustments are suggested for large direction changes and for terrestrial viewing.
- Page 13 Fig.d1 Dec. lock knob Dec. scale R.A. scale The EQ2 mount has controls for both conventional altitude (up-down) and azimuth (left-right) directions of motion. These two adjustments are suggested for large direction changes and for terrestrial viewing. Use the large knurled knob located underneath for azimuth adjustments.
- Page 14 NCP, toward Cassiopeia and away from the end of the handle of the Big Dipper (Fig.i). Big Dipper EQ1: Unlock the DEC lock knob and rotate the telescope tube until the pointer on the setting circle reads 90°. Retighten the DEC lock knob.
- Page 15 alpha Fig.j beta Southern Hemisphere Centauri Centauri In the Southern Hemisphere you must align the mount to the SCP by locating it's position with star patterns, without the convenience of a nearby bright star. The closest star is the faint 5.5-mag.
- Page 16 Finding objects using the setting circles Example: Finding the faint planetary nebula M57; "The Ring" From a star chart, we know the coordinates of the Rings are Dec. 33º and R.A. 18h52m. Unlock the DEC lock knob and rotate your telescope in DEC until the pointer on the DEC setting circle reads 33º. Re-tighten the DEC lock knob.
-
Page 17: Polar Alignment
Celestial Pole Pointing to the NCP For the following examples, it is Fig.m assumed that the observing site is in the Northern Hemisphere. In the first case (Fig.m2), the optical tube is pointing to the NCP. This is its probable position following the polar-alignment step. - Page 18 Fig.o Pointing to directions other than due North Pointing in any direction other than due North Examples of the telescope moved in R.A. and Dec requires a combination of R.A. and Dec positions (Fig.o). This can be visualized as a series of Dec arcs, each resulting from the Fig.p position of rotation of the R.A.
- Page 19 Telescopes with long focal lengths often have a "blind spot" when pointing near the Fig.q zenith, because the eyepiece-end of the optical tube bumps into the mount's legs (Fig. q1). To adapt for this, the optical tube can be very carefully slipped up inside the tube rings (Fig.
- Page 20 Calculating the magnification (power) The magnification produced by a telescope is determined by the focal length of the eyepiece that is used with it. To determine a magnification for your telescope, divide its focal length by the focal length of the eyepieces you are going to use.
-
Page 21: Observing The Sky
OBSERVING THE SKY Sky conditions are usually defined by two atmospheric characteristics, seeing, or the steadiness of the air, and transparency, light scattering due to the amount of water vapour and particulate material in the air. When you observe the Moon and the planets, and they appear as though water is running over them, you probably have bad "seeing"... -
Page 22: Proper Care For Your Telescope
PROPER CARE FOR YOUR TELESCOPE Fig.r Collimation is the process of aligning the mirrors of your telescope so that they work in concert with each other to deliver properly focused light to your eyepiece. By observing out-of-focus star images, you can test whether your telescope's optics are aligned. - Page 23 Aligning the primary mirror Find the three locking screws at the back of your telescope and loosen them by a few turns. Locking screw Adjusting screw Locking screw Adjusting screw If you see 3 large nuts protruding If you see 6 Phillip's-head from the back of your telescope screws but 3 protruding from and 3 small Phillip's-head screws...
- Page 24 CAUTION! NEVER USE YOUR TELESCOPE TO LOOK DIRECTLY AT THE SUN. PERMANENT EYE DAMAGE WILL RESULT. USE A PROPER SOLAR FILTER FIRMLY MOUNTED ON THE FRONT OF THE TELESCOPE FOR VIEWING THE SUN. WHEN OBSERVING THE SUN, PLACE A DUST CAP OVER YOUR FINDERSCOPE OR REMOVE IT TO PROTECT YOU FROM ACCIDENTAL EXPOSURE.
Need help?
Do you have a question about the EQ1 and is the answer not in the manual?
Questions and answers