JVC KD-G126 Instructions Manual
Cd receiver
Hide thumbs
Also See for KD-G126:
- Instructions manual (26 pages) ,
- Service manual (63 pages) ,
- Schematic diagrams (14 pages)

Related Manuals for JVC KD-G126


Summary of Contents for JVC KD-G126
- Page 1 CD RECEIVER KD-G126/KD-G125 KD-G126/KD-G125 KD-G126 KD-G126 KD-G125 KD-G125 For canceling the display demonstration, see page 5. For installation and connections, refer to the separate manual. INSTRUCTIONS GET0331-001A [U/UH]...
-
Page 2: To Reset Unit
Thank you for purchasing a JVC product. Please read all instructions carefully before operation, to ensure your complete understanding and to obtain the best possible performance from the unit. IMPORTANT FOR LASER PRODUCTS 1. CLASS 1 LASER PRODUCT 2. CAUTION: Do not open the top cover. There are no user serviceable parts inside the unit; leave all servicing to qualified service personnel. -
Page 3: Table Of Contents
Control panel — ..4 • is used to indicate an indicator is KD-G126 and KD-G125 displayed for the corresponding operation. Getting started ......... 5 • Some related tips and notes are explained in Basic operations ............ 5 “More about this unit”... -
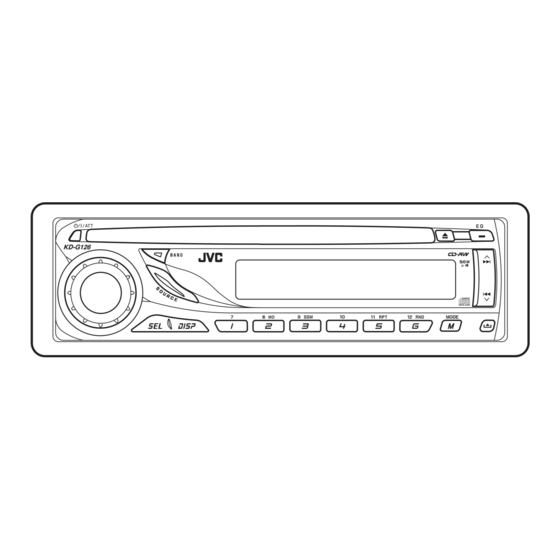
Page 4: Control Panel
Control panel — KD-G126 and KD-G125 Parts identification Display window (standby/on/attenuator) button Display window 2 SOURCE button o DISC indicator 3 BAND button ; RND (disc random) indicator 4 Loading slot a RPT (repeat) indicator 5 Display window s S. BASS (super bass) indicator... -
Page 5: Getting Started
Getting started Basic settings • See also “General settings — PSM” on page 9. Basic operations Turn on the power. Ÿ 1 Canceling the display * You cannot select “DISC” as the playback source if there is no disc in the demonstrations loading slot. -
Page 6: Radio Operations
When an FM stereo broadcast is hard to Radio operations receive Ÿ Lights up when monaural mode is activated. Reception improves, but stereo effect will be Lights up when receiving an FM stereo lost. broadcast with sufficient signal strength. To restore the stereo effect, repeat the same procedure “MONO OFF”... -
Page 7: Disc Operations
Manual presetting Disc operations Ex.: Storing FM station of 92.5 MHz into preset number 4 of the FM1 band. Playing a disc in the unit All tracks will be played repeatedly until you change the source or eject the disc. To stop play and eject the disc To fast-forward or reverse... -
Page 8: Sound Adjustments
Selecting the playback modes Adjusting the sound You can adjust the sound characteristics to your You can use only one of the following playback preference. modes at a time. Select your desired playback mode. 7 Repeat play Displayed only when “L/O MODE” is set to “WOOFER”... -
Page 9: General Settings - Psm
General settings — PSM You can change PSM (Preferred Setting Mode) Adjust the PSM item selected. items listed in the table that follows. Repeat steps to adjust other Select a PSM item. PSM items if necessary. Finish the procedure. Indications Selectable settings, [reference page] DEMO DEMO ON : [Initial];... -
Page 10: Maintenance
Maintenance How to clean the connectors To play new discs Frequent detachment will deteriorate the New discs may have some rough connectors.To minimize this possibility, spots around the inner and outer periodically wipe the connectors with a cotton edges. If such a disc is used, this swab or cloth moistened with alcohol, being unit may reject the disc. -
Page 11: More About This Unit
More about this unit Basic operations Inserting a disc Turning on the power • When a disc is inserted upside down, the disc automatically ejects. • By pressing SOURCE on the unit, you can • Do not insert 8 cm discs (single CD) and also turn on the power. -
Page 12: Troubleshooting
Ejecting a disc General settings—PSM • If the ejected disc is not removed within • If you change the “AMP GAIN” setting from 15 seconds, the disc is automatically inserted “HIGH PWR” to “LOW PWR” while the again into the loading slot to protect it from volume level is set higher than “VOL 30,”... -
Page 13: Specifications
Specifications AUDIO AMPLIFIER SECTION CD PLAYER SECTION Maximum Power Output: Type: Compact disc player Front: 50 W per channel Signal Detection System: Non-contact optical Rear: 50 W per channel pickup (semiconductor laser) Continuous Power Output (RMS): Number of channels: 2 channels (stereo) Front: 19 W per channel into 4 Ω, 40 Hz Frequency Response: 5 Hz to 20 000 Hz to 20 000 Hz at no more than 0.8%... - Page 14 Having TROUBLE with operation? Please reset your unit Refer to page of How to reset your unit EN, TH © 2005 Victor Company of Japan, Limited 1005DTSMDTJEIN...
- Page 15 (∑— È ß ¥È “ πÀπÈ “ ·≈–¥È “ πÀ≈— ß ¡’ § Ë “ §«“¡μÈ “ π∑“π ∂÷ ß • Replace the fuse with one of the specified rating. If the fuse blows frequently, consult your JVC car audio 4 Ω...
-
Page 16: Installation (In-Dash Mounting)
¿“æμ— « Õ¬Ë “ ßμË Õ ‰ªπ’ È · ¥ß∂÷ ß °“√μ‘ ¥ μ— È ß ·∫∫∑— Ë « ‰ª À“°§ÿ ≥ ¡’ ª — ≠ À“À√◊ Õ μÈ Õ ß°“√¢È Õ ¡Ÿ ≈ ‡°’ Ë ¬ «°— ∫ ™ÿ ¥ μ‘ ¥ μ— È ß °√ÿ ≥ “ª√÷ ° …“°— ∫ ºŸ È ¢ “¬‡§√◊ Ë Õ ß‡ ’ regarding installation kits, consult your JVC car audio dealer or a company supplying kits. -
Page 17: Electrical Connections
‰∑¬ ENGLISH °“√‡™◊ Ë Õ ¡‚¥¬„™È ‰øøÈ “ ELECTRICAL CONNECTIONS °“√‡™◊ Ë Õ ¡μË Õ ·∫∫ª°μ Typical connections / °Ë Õ •∑”°“•‡™•Ë Õ ¡μË Õ : μ•«®†Õ•°“•‡¥‘ • †“¬‰ø„•••¬•μÏ Õ ¬Ë “ ß•–¡— ¥ •–«— Õ ¬Ë “ „ÀÈ º ‘ ¥ æ•“¥„•°“•‡™•Ë Õ ¡μË Õ ™ÿ ¥ ª•–°Õ•™ÿ ¥ •’ Before connecting: Check the wiring in the vehicle carefully. - Page 18 μË Õ “¬°— ∫ Õÿ ª °√≥Ï Õ ◊ Ë π À√◊ Õ ‡ “Õ“°“»Õ— μ ‚π¡— μ ‘ ∂ È “ ¡’ You can connect a power amplifier for rear speakers. ∑Ë “ π “¡“√∂μË Õ ‡§√◊ Ë Õ ß¢¬“¬‡ ’ ¬ ߇ª Á π≈”‚æßÀ≈— ß ‰¥È JVC Amplifier KD-G126 ...