Panasonic NV-VP31 Operating Instructions Manual
Dvd/cd player / video cassette recorder
Hide thumbs
Also See for NV-VP31:
- Operating instructions manual (50 pages) ,
- Operating instructions manual (52 pages)
Table of Contents
Advertisement
DVD/CD Player / Video Cassette Recorder
NV-VP31 / NV-VP26 / NV-VP21
Operating Instructions
EJECT
PULL-OPEN
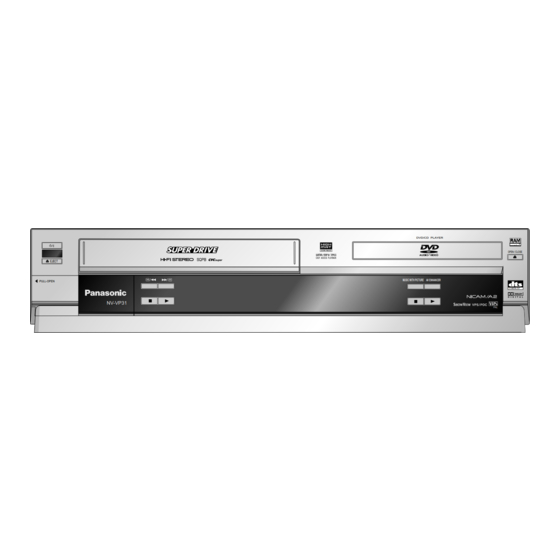
NV-VP31
Before connecting the device, operating it or adjusting settings please read these operating instructions
completely; especially the safety precautions on pages 2 and 3.
Contents
DVD/CD PLAYER
OPEN / CLOSE
MUSIC WITH PICTURE
AV ENHANCER
2.0 DIGITAL OUT
PAL
Index / Country codes
Page
2
3
4
5-7
8-9
9
10
11
12
13
14
15
16
16
17
17
18
19
20
21-22
23
24
25
26
27-28
29
30-32
33
34-35
36
37-39
40-41
42
43-45
46
47
Last page
Advertisement
Table of Contents

Related Manuals for Panasonic NV-VP31


Summary of Contents for Panasonic NV-VP31
-
Page 1: Table Of Contents
Safety Precautions Front Panel Remote control Connecting with RF Coaxial cable DVD/CD Player / Video Cassette Recorder Setting Time and Date NV-VP31 / NV-VP26 / NV-VP21 Connecting with a 21-pin Scart cable Connecting with Audio-Videocable External Devices Operating Instructions onnectors... -
Page 2: Inserting Batteries
WARNING TO REDUCE THE RISK OF FIRE, ELECTRIC SHOCK OR PRODUCT DAMAGE, Thank you for your trust and your decision to purchase this top-quality device. Panasonic is DO NOT EXPOSE THIS APPARATUS TO RAIN, MOISTURE, DRIPPING OR one of the leading manufacturers of entertainment electronics devices. We are sure that you SPLASHING AND THAT NO OBJECTS FILLED WITH LIQUIDS, SUCH AS will be completely satisfied with this device. -
Page 3: Safety Precautions
Safety Precautions NORSK SUOMI Install this device in a horizontal position. ADVARSEL: VAROITUS: Do not place anything heavy on it. FOR Å REDUSERE FAREN FOR BRANN, ELEKTRISK TULIPALO-, SÄHKÖISKUVAARAN TAI TUOTETTA STØT ELLER SKADER PÅ PRODUKTET, MÅ DETTE KOHTAAVAN MUUN VAHINGON VÄHENTÄMISEKSI EI APPARATET IKKE UTSETTES FOR REGN, FUKTIGHET, LAITETTA SAA ALTISTAA SATEELLE, KOSTEUDELLE, Keep this... -
Page 4: Front Panel
TIMER REC PULL-OPEN JET REW ERASE 2.0 DIGITAL OUT VIDEO L/MONO AUDIO Detailed information AV3 IN NV-VP31 NV-VP31 Page is available on the specified pages. VCR display DVD display Device control MUSIC WITH PICTURE MUSIC WITH PICTURE Stand-by/on switch /I... -
Page 5: Remote Control
Remote control General functions Stand-by/on switch /I Press to switch the unit from on to stand-by mode or TV functions vice versa. TV set On/Off switch. In stand-by mode, the unit is still consuming a small amount of power. VHS/ TV set AV input selection. - Page 6 Remote control VCR functions VHS/ Tape counter The tape counter will be automatically reset to [0:00:00] VOLUME Tracking control of disturbed images during AUDIO playback when you insert a video cassette. VHS/DVD Or you can press the CANCEL/RESET button on the OUTPUT ShowView menu TRACKING/V-LOCK...
-
Page 7: Remote Control
Remote control Repeat DVD functions For some disc formats Press REPEAT during playback. not all of the described There is no mode for repeatedly playing back entire Skip chapters, titles or frames DVD functions are discs. Press SKIP during playback or in pause mode. available. -
Page 8: Connecting With Rf Coaxial Cable
Connecting with RF Coaxial cable VCR Auto Setup with RF Coaxial cable (Automatic tuning) Follow the steps described below. Country If the Country menu does not You can connect the VCR/DVD to your appear after turning the device on, TV set by using a RF coaxial cable. Belgien Italia Sverige... -
Page 9: Setting Time And Date
Channel tuning / Correcting interferences Setting Time and Date If you decide to just use the RF coaxial cable to connect the TV set you must adjust the Menu Press MENU, video output channel with the TV set’s input channel. Timer recording the Menu screen appears. -
Page 10: Connecting With A 21-Pin Scart Cable
Connecting with a 21-pin Scart cable VCR Auto Setup with 21-pin Scart cable (Automatic tuning) Follow the steps described below. If the Country menu does not Country Aerial appear after turning the device Belgien Italia Sverige 21-pin Scart socket on, you may reset the device to Belgique Nederland Schweiz... -
Page 11: Connecting With Audio-Videocable
Connecting with Audio-Videocable VCR Auto Setup with Audio-Videocable Aerial Automatic tuning Follow the steps described below. AUDIO (R/L) / VIDEO If the Country menu does not AC IN RF IN Country Audio / Videooutput Antenna input VCR/DVD AC IN~ appear after turning the device Belgien Italia Sverige... -
Page 12: External Devices
External Devices Connecting a Set Top Box, satellite receiver, decoder or a second recorder. You can connect a Set Top Box to receive digital broadcast by antenna (DVB-T) signals, a satellite receiver (digital/analogue) or a decoder to decrypt encrypted programmes. VCR/DVD Aerial Others... -
Page 13: Connectors
VIDEO L/MONO AUDIO Connect your external unit (e.g. a video camcorder) with the front panel input. AV3 IN NV-VP31 Just seize the L/Mono port for mono recording of the audio signal. INPUT REPEAT Use INPUT to select A3. Video Audio... -
Page 14: Vcr Menu Control
VCR menu control Timer recording The cursor buttons on the remote control Date Start Stop unit allow you to navigate through menus ENTER -- ---- -- / -- --:-- --:-- -- ---- -- / -- --:-- --:-- and change selected entries. 21 22 -- ---- -- / --... -
Page 15: Manual Setup
Manual Setup Tuning Creating a new station table Pos Name Pos Name Ch Press MENU, the Menu screen appears. Select the Tuning menu by pressing and confirming with ENTER. 1 ARD 6 VOX 2 ZDF 7 - - - - - - - Confirm Manual by pressing ENTER. -
Page 16: Changing The Name Of Tv Stations
Manual Setup Changing the name of TV stations Tuning Press MENU, the Menu screen appears. Pos Name Pos Name Ch With select the Tuning menu, confirm with ENTER. 6 VOX 1 ARD 7 PRO7 2 ZDF Confirm Manual with ENTER 3 N3 8 RTL2 9 KABE... -
Page 17: Creating A New Station Table
Manual Setup Creating a new station table Tuning Press MENU, the Menu screen appears. Manual With select the Tuning menu, confirm with ENTER. Auto Setup Shipping condition With select Auto Setup, confirm with ENTER. Press ENTER to confirm. The Country menu appears. ENTER ENTER ENTER... -
Page 18: Menu Others
Manual Setup Sets the tape length of the cassette you use. Tape length AUTO E - 240 E - 195, E - 260, E - 300 Selects the type of external unit connected to the VCR/DVD's socket. Menu Others DECODER : If a decoder is connected. -
Page 19: Menu Language/Nicam Sound System
Manual Setup Menu language Menu The language set for the Video menu does not depend on the DVD SETUP menu Timer recording language Tuning Press MENU Clock set Others Select Language Language : English Select Language Press EXIT to quit the Menu screen. NICAM sound system This unit can receive programmes transmitted together with NICAM sound. -
Page 20: Recording
Recording Set the TV set to the video channel and insert a cassette into the VCR; Recording functions make sure that the cassette’s protection tab is intact. INPUT Select channel to record from. REPEAT When recording from an external device, select from Scart inputs AV1, AV2, or the front panel input AV3. -
Page 21: Timer Recording
Timer recording The Timer recording allows you to programme the recording time of TV programmes up to 1 month in advance. Use the on-screen menu to programme a maximum of 16 recordings. PROG/CHECK Press PROG/CHECK and select a free storage position Timer recording Timer recording 1 / 3... - Page 22 Timer recording Automatic SP/LP selection Checking the timer programme A: If there is not enough tape left at the beginning of a timer Press PROG/CHECK, programme to complete it, the SP/LP function will automatically the Timer recording menu appears. run the tape at LP speed. Press PROG/CHECK again or EXIT This ensures that the entire programme will be recorded.
-
Page 23: Recording With Intelligent Timer
Recording with INTELLIGENT TIMER The INTELLIGENT TIMER allows you to easily time the recording of programmes broadcasted by the same TV station at the same daytime at different days. To use the INTELLIGENT TIMER function, at least one recording session must be programmed in the Timer recording menu (page 21). -
Page 24: Recording With Showview
Recording with ShowView (not for VP21) Programming recordings with the ShowView function ShowView The ShowView code simplifies entering programme information to record TV and SAT programmes. 8 3 5 4 2 - - - - ShowView Press ShowView. Enter the ShowView number ( to correct entry). Confirm entry with ENTER. -
Page 25: Recording With External Recording Controls
Recording with external VCR/DVD recording controls Aerial Press MENU, the Menu screen appears. With select menu Others V R D D OU (T ) V A D O VI E A D O D GI M B T D D OU and confirm with ENTER. -
Page 26: Playback
Playback Normal playback Optimising the playback picture quality Turn on the VCR. Normally the VCR automatically adjusts the playback Be sure the TV set is turned on and tuned to the video picture to the highest possible quality. Sometimes it playback channel. -
Page 27: General Convenient Functions
General convenient functions Auto-Start Quick search for a beginning of a recording When inserting a cassette the VCR will automatically While playing back or in stop-mode. switch on. INDEX tape winds forward / INDEX tape rewinds. Every time you press the button (max. 20 times) the Automatic rewinding VCR will find the start of the next recording. - Page 28 • The quality of the picture will be that of a VHS recording. • You cannot make S-VHS recordings on this VCR. Playing back NTSC video cassettes (NV-VP31) You can play NTSC video cassettes for viewing on a PAL-type TV set (PAL 60).
-
Page 29: Dvd-Quick Setup
DVD-QUICK SETUP DVD QUICK SETUP may follow VCR Auto Setup. Use VHS/DVD on the remote control to select DVD. Setup Press SETUP to display the QUICK SETUP menu. QUICK SETUP Use the navigator keys to select a menu language, Select the menu language. then press ENTER to confirm. -
Page 30: Playback Functions
Playback functions DVD-Video Video CD DVD-A JPEG Playback OPEN / CLOSE Press OPEN/CLOSE to open the disc tray. Place the disc on the disc tray. Press PLAY . The disc tray closes and disc playback starts automatically. The label must The player may take some time to read all of the disc information! face up. - Page 31 Playback functions DVD-Video DVD-A Video CD DVD-Video Random Playback Chapter review JPEG All chapters/tracks are played This function lets you browse back through the chapters of a once each in a random order. DVD-V by playing the first couple of seconds of every chapter. Press PLAY MODE while the disc is stopped.
-
Page 32: Playback Functions
Playback functions DVD-Video Video CD JPEG DVD-A Program Play You can programme up to 32 chapters/tracks to be played in any order. Program Play Press PLAY MODE while the disc is stopped. The Program Play screen appears. Choose a title and chapter. Use the numeric keys to specify the Group/Title (not with CDs) and the Title Chapter Time... -
Page 33: Vcr-Dvd Functions
VCR-DVD functions DVD-Video Video CD JPEG DVD-A Synchronous recording How to copy a non copy-protected disc to VHS type cassette. Select DVD on the remote control. Use PLAY to select the disc's starting position. Press to select Pause playback. INPUT Select VCR on the remote control. -
Page 34: Navigation Menu
Navigation Menu Playback Menu JPEG The Playback Menu appears on the screen when you insert a JPEG, WMA, MP3 or HighMAT disc. Playback Menu Press to select the contents you wish to play, then press ENTER or PLAY to confirm. Total 260 To display the Navigation Menu for HighMAT Discs, change in the Setup menu in the Audio... -
Page 35: Navigation Menu
Navigation Menu JPEG JPEG Thumbnail Menu Thumbnail Menu 1 JPEG --:-- Pick DISPLAY from the Navigation Menu and press to select Thumbnail. Press ENTER to confirm. The Thumbnail Menu is displayed. P1000001 Press to select a picture. Press to page up or down. When you have browsed the pictures of a group, the pictures of the next group are shown. -
Page 36: Highmat / Cd-Text
HighMAT Page 1/1 HighMAT (High Performance Media Access Technology) is a joint Panasonic and Microsoft technology development. Diverse HighMAT-level2 format data (WMA, MP3 and/or JPEG) stored on a disc by a PC can be quickly played back by the appliance with the additional help of a menu. -
Page 37: Display Menu
DISPLAY menu Playback status indicator 0 : 03 : 10 Press DISPLAY twice to activate the playback status indicator. Press to change the playback speed. Press to display the current and the remaining playback time. Press DISPLAY again to hide the status indicator. To display the DISPLAY menu. - Page 38 DISPLAY menu Menu DVD-Video Title/Track Search: Allows you direct access to a title/track if the disc hosts several. Title 1/36 Chapter 1/27 Program Search: Allows you direct access to a program if the disc hosts several. Time --:--:-- Audio - --- Chapter Search: Allows you direct access to a chapter if the disc hosts several.
- Page 39 DISPLAY menu Play Speed: Select a factor by which to change the playback speed. These settings are not available The audio output switches to PCM (2-channel). for every disc. AV ENHANCER AV-Enhancer: Automatically optimises and adapts the audio and video settings to the disc used. Other Settings The Picture and Audio menus are not available when this function is enabled.
-
Page 40: Setup Menus
SETUP menus Menu Disc To display the Setup menu Disc’s Audio language / Subtitle language / Menu language. Audio Press SETUP to display the Setup menu. Select the preferred language of either of the items. If the language you want Subtitle Press to select a sub-menu, then press... -
Page 41: Setup Menus
SETUP menus Menu Audio Dolby Digital / DTS Digital PCM Digital Output PCM is the standard method used to record digital music signals on Audio CDs. For Surround / MPEG: reasons of copyright protection the digital output of PCM audio signals may be limited Please choose the correct settings to 48 kHz/16 bit. -
Page 42: Information
Information Playing DVDs and VCDs Region codes The producer of the programme material can define the way in which the disc is played. Consequently, you may sometimes find that, you cannot control the playback the way you wish This player accesses the regional codes stored on DVDs. using all of the functions and operations described in these operating instructions. -
Page 43: Before Requesting Service
Before requesting service GENERAL DISTORTIONS There is no audio output and the sound Check the connections. is distorted: Deactivate the Advanced Surround effect. The VCR display is not lit: Check AC mains connection. The VCR display is lit, the device does Device is set to recording stand-by or timer mode. - Page 44 Before requesting service VCR DISTORTIONS If you notice interference or a shift of the picture during normal, still, or slow motion playback, press the TRACKING / V-LOCK button towards + or - to correct the picture. Manual correction of a bad picture: Press + and - together to activate automatic correction.
- Page 45 Before requesting service DVD DISTORTIONS Go to the Setup screen and check the Audio menu settings of Dolby Digital, DTS Digital Surround The loudspeakers emit loud noise: and MPEG. The player cannot play discs of the current format. The message "NO PLAY" appears: The disc contains no recorded material.
-
Page 46: Remote Control Codes
Problem caused by a disc Do not stick labels on the disc (this might render the disc useless). We recommend to use branded, e.g. Panasonic, cassettes of superior quality. Whenever not in use, remove the cassettes from the recorder and keep them in a Only use a suitable pen for writing on the disc. -
Page 47: Specifications
Depending on the disc type and the conditions of recording, the appliance may sometimes fail to play the listed discs. DVD-RAM with JPEG: Recorded with Panasonic DVD-Video recorders. To play JPEG files, select [Play as Data Disc] in DISPLAY menu (page 39). -
Page 48: Country Codes
Index Page Page Page Page A-B Repeat 39 Erasure protection 30,34,35,38 Scart cable 46 MP3 18 MPEG 13,41,42,45 Slideshow Advanced Surround 39,43 EXT LINK 18,25 MUSIC WITH PICTURE SP/LP selection Angle SQPB Audio 34,41 ield 40 NICAM Still Mode 7,26,27,30,34,40,44 AUDIO IN/OUT 11,13 Frame...
Need help?
Do you have a question about the NV-VP31 and is the answer not in the manual?
Questions and answers