Table of Contents
Advertisement
Advertisement
Table of Contents

Related Manuals for Packard Bell GPS 400


Summary of Contents for Packard Bell GPS 400
- Page 1 PACKARD BELL GPS 400 USER'S GUIDE...
- Page 2 Notices & Disclaimers Copyright Notice Packard Bell GPS 400 User's Guide. Copyright © 2006 Packard Bell B.V. All Rights Reserved. No part of this manual may be reproduced or transmitted, in any form or by any means, whether electronic, chemical, manual or otherwise, including but not limited to photocopying, recording, or information storage and retrieval systems, for any purpose without prior written permission of Packard Bell B.V.
-
Page 3: Table Of Contents
3.1 Resetting the device ......................9 3.2 Technical Support......................9 Chapter 4 - Installing the Packard Bell GPS 400 in your car .......... 10 Setting up the device ......................10 Chapter 5 - Destinator ND for the Packard Bell GPS 400..........13 5.1 Introduction........................ - Page 4 13.3 Basic Operation ......................48 Chapter 14 - Photo Viewer ....................49 14.1 Overview........................49 14.2 Basic Operation ......................49 Chapter 15 - Packard Bell GPS Settings................50 15.1 Volume Settings ......................50 15.2 Power Settings ......................51 15.3 Backlight Settings ......................51 15.4 Date-Time Settings ......................
-
Page 5: Chapter 1 - Introducing The Packard Bell Gps 400
Chapter 1 - Introducing the Packard Bell GPS 400 1.1 Contents of the box • 12V cigarette lighter adapter + DC power lead • AC adapter • Socket adapter (Europe or UK) • Car holder kit • USB cable •... - Page 6 Use to position your device in the car holder kit. To make the most of your Packard Bell GPS 400, download extra maps, get the latest firmware and purchase accessories, make sure you visit the Packard Bell Website regularly on...
-
Page 7: Chapter 2 - Getting Started
You will need to connect to your computer to get the latest maps, points of interest or software updates (Internet connection required). 1. Connect the small end of the supplied USB cable to your GPS 400 and the other to one of your computer's USB ports. -
Page 8: Disconnecting From Your Computer
Connect the AC adapter to the power connector. The device will automatically charge. Full charge in power-off mode requires about 4 hours. Charging with the cigarette lighter adapter: You can plug in the cigarette lighter adapter to charge the GPS 400 in your car. -
Page 9: Chapter 3 - Troubleshooting & Upgrading The Gps 400
GPS 400 3.1 Resetting the device Reset Button: Should the GPS 400 freeze or become unstable, insert a straightened paper clip into the Reset switch located on the right side of the device. The device will then restart. Cold Boot: Insert a straightened paper clip into the reset switch and press the standby button simultaneously. -
Page 10: Chapter 4 - Installing The Packard Bell Gps 400 In Your Car
3. Push the clip back into place to fix the suction-mount gooseneck firmly to the windscreen. 4. Attach the GPS 400 to the car holder kit: position the bottom of the GPS 400 first, then tilt the top of the GPS 400 back into position. Pull the top clip until it clicks into place. Twist the gooseneck to adjust the position of the GPS 400 so that you can see the screen comfortably. -
Page 13: Chapter 5 - Destinator Nd For The Packard Bell Gps 400
Turn by Turn, Voice and Visual instructions. In addition to Destinator ND, the Packard Bell GPS 400 has an MP3 function that can download and play your favourite songs, as well as a Photo View function that can display your photos. -
Page 14: Tutorial
Destinator Guide Tour program. The Guided Tour is an excellent way of becoming familiar with the different navigation features available. Chapter 6 - Getting to know your GPS 400 6.1 What’s on the map? When you first turn on your... -
Page 15: Gps Not Found
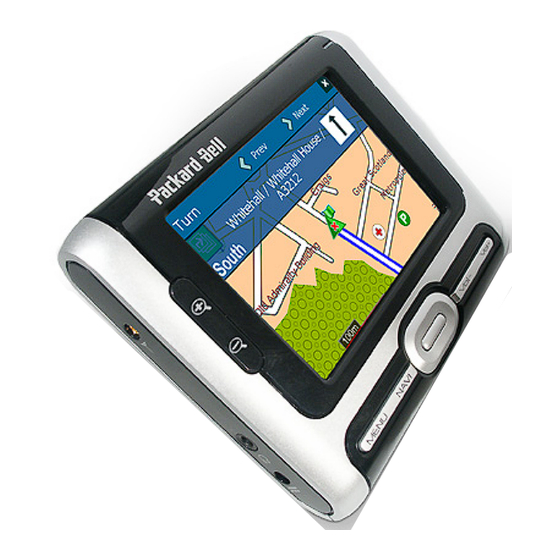
Your current location in Vehicle Mode. Your current location in Pedestrian Mode. Your last known location when GPS signal is unreliable. The generated route. Your selected destination. The Compass displays the travel direction. The red GPS receiver means that the navigation device has not yet located a reliable GPS signal. -
Page 16: Map Views
6.3 Map views You can determine whether you want to see a two-dimensional or three-dimensional map in daylight or nighttime conditions. The 2D Day Mode View is optimized for a daytime viewing. 2D views let you manually pan or zoom. For an example, refer to Figure 3 - 2D Day Mode Map View. The 2D Night Mode View is optimized for night driving or adverse weather conditions. -
Page 17: Point On The Map
6.4 Point on the map You can navigate to any point by tapping its location directly on the Map screen. This feature is especially handy when you want to navigate to a specific point on the map, but you don’t have the street address. -
Page 18: Option Menu
The Enter Address button lets you navigate to an address. The Recent Locations button lets you navigate to a previously visited destination. The My Favorites button lets you navigate to a favorite location. The Points of Interest button lets you navigate to thousands of interesting places, such as beaches, parks, hotels, museums, and restaurants. -
Page 19: Settings Menu
The 2D/3D Mode toggle button lets you display the map view in 2- dimensional or 3-dimensional views for either day or night driving. The Day/Night Mode toggle button lets you display the map view for either day or night driving. The Map Browsing button lets you browse the map unconnected to the current location. -
Page 20: Screens Buttons
6.6 Screens buttons The following buttons appear on many of the navigation Destinator screens. When you tap the Next button for a selected address, group, or place, Destinator automatically opens the next screen in the sequence. After you have specified your destination, tap the Next button to display a map screen showing your selected location. -
Page 21: Chapter 7 - Searching For A Location
Chapter 7 - Searching for a location 7.1 Enter address When you click the Address button, the Address screen appears, as shown below. Figure 9 - Display the Address Screen You can use the keyboard to enter the first characters of the address name. The characters appear in the Address field. -
Page 22: Address Actions
This sequence displays the following address screens: City, Street, and City-Street Address Number. You can also navigate to city or street only. When you have selected a city, the first entry of the Street Name list is City Center. When you have selected a street, the first entry in the Address Number list is Street Midpoint. -
Page 23: Go To Your Destination
Allows you to add an address to your list of favorite locations, as shown Add to My Favorites in the figure below. Figure 10 - Add Address to My Favorites Displays the location’s address information. Information Go to your destination After you have specified the address, tap the Next button. -
Page 24: Recent Locations
7.2 Recent Locations The Recent Locations screen lets you select an existing destination from a list of destinations that you have previously traveled to. Destinator automatically stores the last 64 destinations in memory. As each new route is added to the top of the list, the older destinations at the bottom are erased. -
Page 25: Favorite Groups
Figure 13 - Travel to a Favorite Location The My Favorites folder is the default folder where all favorites are stored if not assigned to a group. The Show Map screen also lets you set your route type, Faster or Shorter. Favorite Groups You can tap the Actions button from the My Favorites screen to add, edit, or delete groups, as described below. -
Page 26: Favorite Alerts
Favorite Alerts Alerts let you know that you are within a certain distance of a favorite location. You can tap the Alerts button to set the distances for the 1st and 2nd Alerts. When you travel closer than the designated distance, the alert will sound, as shown below. Figure 15 - Setting Your Favorite Alerts Examples: •... -
Page 27: Add Favorite Locations
Add Favorite Locations Tap MY FAVORITES or any selected group that you have created to display its locations. You can save a location to your favorites groups from the Address, Recent Locations, or POI screens. From this screen, you can tap the Actions button to display the following commands. Allows you to designate the selected location as the route origin. -
Page 28: Subcategories
Figure 17 - Points of Interest Note: From the Item Entries Actions screen, click the Sort by ABC button to display the category entries in alphabetical order. Subcategories Many categories have subcategories to provide for an even greater list of choices. For example, “Gasoline Station”... -
Page 29: Actions
Lets you search near your current location. This is the default value. Current Location Lets you search near a specified destination. For example, you know Destination your general destination, but not very much about interesting locations in the area. You can use Destinator to locate the tourist attractions most appealing to yourself, family, or friends. -
Page 30: Route Overview Or Cancel Route
7.5 Route Overview or Cancel Route The Route Overview button lets you display an overview of your complete route on the Map screen, the total driving distance to your destination, the estimated travel time, and the complete destination address. Figure 2 - Show Route The Cancel Route button stops the current navigation and clears the route. -
Page 31: Select Map
The following options are available: The Route Summary button displays your entire route on the Map screen, plus the travel distance and the Estimated Travel Time Remaining (ETR). The Show Turn button displays the next turn on the Map screen, including the street name, the distance to it, and the turn direction. -
Page 32: Chapter 8 - Planning A Trip
Chapter 8 - Planning a trip 8.1 Multistop planner The Multistop Planner lets you plan a route with up to twelve stops. When you press the GO button, the route is calculated in stages, from the departure point to the first stop. -
Page 33: Setting Stops Along The Route
Figure 6 - Defining the Route Group Setting Stops along the Route You can set up stops by selecting the Route Group and tapping the Next button. From the Stops screen, tap the Actions button to add, rename, or delete a destination. Add a stop by Address, POI, My Favorites, or Recent Locations. -
Page 34: Avoid Roads
Lets you add a location by specifying an address from recent locations, favorite Add Stop locations, or pre-defined POIs, such as fuel, food, or lodging. Lets you change the stop information, such as name, comments, or route group. Rename Stop Lets you remove a selected stop. -
Page 35: Avoid Road Locations
Avoid Road Locations When you tap Default or an Avoid Roads group, Destinator displays the group screen, which lets you select roads to avoid. From this screen, you can use the Allow or Avoid buttons to include or exclude a selected road when calculating a route. Figure 26 - Adding a Road to Avoid Note: You cannot specify a particular toll road. -
Page 36: Pedestrian Mode
Figure 9 - Recording a Route To playback your recording, select the data file, and tap the Play button. Destinator ND shows the Map screen to play the recorded route. To stop the playback, return to the Route Playback screen and tap the Stop button. You can tap the Actions button to display the following commands: This button lets you remove a selected recording. -
Page 37: Chapter 9 - Settings
Chapter 9 - Settings 9.1 Map You can click the Map Settings button from the Settings menu to customize your map display, as shown in the figure below. Figure 10 - Map Settings The following map settings are: Forward is up – This option orients the map so that your forward Map Orientation direction is always at the top. -
Page 38: Gps Settings
Figure 29 - Setting the Quick Nav Location 9.3 GPS Settings Destinator ND uses the GPS receiver to pinpoint your location. GPS signals are automatically acquired and your vehicle's location and position are constantly updated unless you are working in the Browse Map mode. The GPS may take a few minutes to find its initial location. For best results, ensure that the GPS has a clear view of the sky. -
Page 39: Prompts
9.4 Prompts You can select the types of voice and visual notifications that you would like to use while navigating. From the Settings menu, tap the Prompts button. The Prompts screen appears, as shown in the figure below. Figure 31 - Prompts Settings Voice Prompts This prompt warns you when your car exceeds the speed limit. -
Page 40: Look & Feel
Figure 32 - Units of Measure You can select: Imperial – Yards or miles System Units Metric – Meters or kilometers This information box provides version and copyright information. About 9.6 Look & Feel From the Settings menu, click the Look & Feel button to select from other skins that have been installed. -
Page 41: Chapter 10 - Installation Requirements
Chapter 10 - Installation Requirements Destinator ND is already installed on your proprietary device, but to add or change maps, you are required to install the Destinator ND Console on to your PC. 10.1 Computer Requirements To install and use the Console, your PC must meet the following requirements: - Microsoft Windows 98, ME, NT, 2000, or XP - Microsoft ActiveSync - A minimum of 300 MB free space for temporary files... -
Page 42: Chapter 11 - Maps
Chapter 11 - Maps When you receive your device, Destinator ND is installed on your SD memory card along with a series of maps. This section provides information about installing additional maps from the Destinator ND Console. 11.1 Map Screen Interface On the Destinator ND Console, a collection of maps is displayed. -
Page 43: Focus The Map
Figure 34 - Using the Map Cutter The following tools are provided to help you easily move, view, and designate an area on the map: You can use the Pan tool to move the map up, down, left, or right. You can use the Zoom tool to increase or decrease the map detail. -
Page 44: Focus The Map By Route
You can click the Select tool to set the origin of the map by a predefined sub-region. A list of sub-regions is displayed in a pane to the right of the map. When you click a sub- region, that area is highlighted. Focus the Map by Route Destinator ND supports route cutting, which allows you to create a map composed of points on a route. -
Page 45: Cut Map
11.5 Cut Map When you have designated your map area, click the Cut Map tool. The Cut Map dialog box appears, as shown in the figure below. Figure 36 - Cutting a Map You must enter a map name and description. If you have entered a name that already exists, Destinator ND prompts you to enter a different name. -
Page 46: Chapter 12 - Importing A Favorite
Chapter 12 - Importing a Favorite You can download a list of favorite locations from your PC to your device. The list must be contained in .csv files. As part of the download procedure, you convert the .csv files to .dat format for storage on your device by using the Destinator Conversion utility. 12.1 Favorites Importing File Structure The Favorites Importing file structure must be in .csv (Comma-Separated Values) format. -
Page 47: Chapter 13 - Mp3 Player
Chapter 13 - MP3 Player 13.1 Overview The Packard Bell GPS 400 scans its memory card for MP3 audio recordings. You can create play lists from the audio files. Songs on a play list will be played sequentially. Note: You must exit Destinator ND before you can use the MP3 Player. -
Page 48: Basic Operation
13.3 Basic Operation Figure 15 - Current MP3 Selection Play the Created Play List The Packard Bell GPS 400 has standard playback features: to start playing the songs that are displayed in the Player Main Screen. to stop the playback. -
Page 49: Chapter 14 - Photo Viewer
Chapter 14 - Photo Viewer 14.1 Overview The Packard Bell GPS 400 scans its memory card for images. Any pictures found will be displayed as thumbnails. Note: You have to exit Destinator ND before you can use the Photo Viewer. -
Page 50: Chapter 15 - Packard Bell Gps Settings
Chapter 15 - Packard Bell GPS Settings Starts the Destinator Starts Photo ND application Viewer Opens the device’s System Settings screen Figure 37 - The Main Menu You can change the system settings by tapping the System button. The System screen shows all of the system settings that you can change, as displayed below. -
Page 51: Power Settings
15.2 Power Settings Figure 40 - Power Settings This screen indicates the battery status of the device. You can select the hot key checkboxes to determine whether you want the backlight for the device keys. 15.3 Backlight Settings Figure 41 - Backlight Settings This screen lets you determine the brightness of the screen. -
Page 52: Language Settings
15.5 Language Settings Figure 43 - Language Settings This screen allows you to select the language to be used for screen displays and voice prompts. 15.6 System Information Figure 44 - System Information This screen displays information about the device. -
Page 53: Specifications
Specifications Hardware Processor: Samsung S3C2410X02/A26 with internal clock speed 266MHz On Board Memory FLASH: 64MB for OS image and data storage DRAM: 64MB Display LCD: 3.5” TFT-LCD Backlight: six levels of intensity (0, 20, 40, 60, 80 and 100% of the maximum level) Touch Panel: 300 DPI touch screen;... - Page 54 Disclaimers All Packard Bell GPS products and accessories are to be used only as travel aids. THEY MUST NOT BE USED FOR ANY PURPOSE REQUIRING PRECISE MEASUREMENT OF DIRECTION, DISTANCE, LOCATION, OR TOPOGRAPHY. It is the user's responsibility to use the product prudently.
Need help?
Do you have a question about the GPS 400 and is the answer not in the manual?
Questions and answers