Table of Contents
Advertisement
Advertisement
Table of Contents

Related Manuals for Hitachi MGE25


Summary of Contents for Hitachi MGE25
- Page 1 MICROWAVE OVEN MODEL MGE25 INSTRUCTION MANUAL...
-
Page 2: Table Of Contents
Table of Contents ELECTRICAL CONNECTION....................2 IMPORTANT SAFETY INSTRUCTIONS.................. 3 COOKING UTENSILS....................... 4 OTHER HELPFUL INSTRUCTIONS ..................6 OVEN OVERVIEW ........................7 TURNTABLE INSTALLATION ....................7 COUNTERTOP INSTALLATION ....................8 MICROWAVE OVEN INSTALLATION ..................8 CONTROL PANEL........................9 OPERATION ........................... 10 CLEANING AND MAINTENANCE .................. -
Page 3: Electrical Connection
ELECTRICAL CONNECTION (UK ONLY) For your safety please read the following information. Warning: This appliance must be earthed. The appliance must be connected to a 230 volts 50 cycle AC supply. The appliance is supplied with a moulded 13 amp 3 pin mains plug fitted with a 13 amp fuse. -
Page 4: Important Safety Instructions
PRECAUTIONS TO AVOID POSSIBLE EXPOSURE TO EXCESSIVE MICROWAVE ENERGY The oven cannot be operated with the door open due to the safety interlocks built in the door mechanism which switch off cooking functions when the door is opened. Operating the oven with the door open could result in harmful exposure to microwave energy. -
Page 5: Cooking Utensils
After heating, allow to stand in the oven for a short time. Stir or shake the contents (especially feeding bottles and baby foods) and carefully check the temperature before use. WARNINGS: If the door door seals are damaged, the oven must not be operated until it has been repaired by a competent person. - Page 6 should be at least 2.5cm away from oven walls. Browning dish Follow manufacturer’s instructions. The bottom of browning dish must be at least 5mm above the turntable. Incorrect usage may cause the turntable to break. Dinnerware Microwave-safe only. Follow manufacturer’s instructions. Do not use cracked or chipped dishes.
-
Page 7: Other Helpful Instructions
Notes: Care should be taken when removing utensils or the glass turntable, as they may become hot during cooking. Only use a thermometer that is designed for use in the microwave oven. Ensure the turntable is in place when you operate the oven. For best results and more enjoyable cooking, please read these comments thoroughly. -
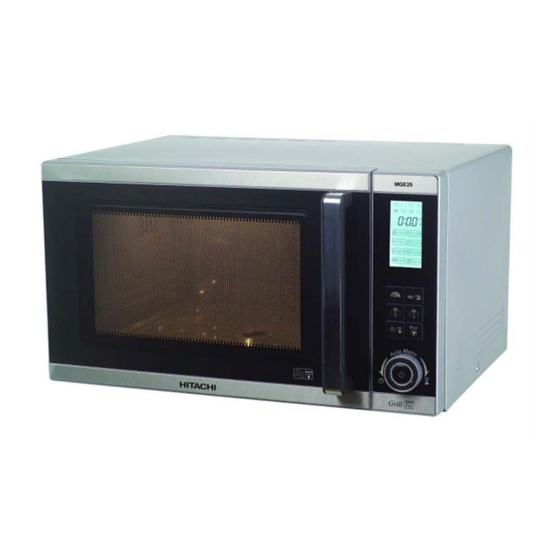
Page 8: Oven Overview
Names of Oven Parts A) Control panel B) Turntable shaft C) Turntable ring assembly D) Glass tray E) Observation window F) Door assembly Grill Rack G) Safety interlock system a. Never place the glass tray upside down. Hub (underside) The glass tray should never be restricted. b. -
Page 9: Countertop Installation
Remove all packing material and Cabinet: Remove any protective film accessories. Examine the oven for found on the microwave oven any damage such as dents or broken cabinet surface. door. Do not install if the oven is Do not remove the light brown damaged. -
Page 10: Control Panel
DISPLAY SCREEN Cooking time, power, indicators and present time are displayed. MICROWAVE Press to set microwave power level. GRILL/COMBI. Press repeatedly to set a grill-cooking program or select one of four combination cooking settings. WEIGHT DEFROST Press to defrost food by weight. TIME DEFROST Press to defrost food by time. -
Page 11: Operation
When the oven is plugged in, the display will show “0:00” and a beep sound will be heard. Setting the Clock 1. Press to set the clock in 24-hour cycle. The hour digits will flash. 2. Turn to adjust the hour digits, the input hour should be a 24-hour time value. - Page 12 1. Press twice, “P80” will show on the display. indicator lights will come on. 2. Press to confirm. 3. Turn to set the cooking time until “20:00” shows on the display. indicator lights will flash. 4. Press to start cooking. Note: You can check the cooking power during cooking by pressing Grill The longest cooking time is 95 minutes.
- Page 13 Weight Defrost The oven could be used to defrost food based on the weight selected. The defrosting time and power level are automatically set once the weight is programmed. The frozen food weight ranges from 100g to 2000g. 1. Press .
- Page 14 Menu Weight(g) Pizza Meat Vegetable 50 (with 450ml cold water) Pasta 100 (with 800ml cold water) Potato Fish 1 (about 120ml) 2 (about 240ml) Beverage 3 (about 360ml) Popcorn Note: The result of auto cook depends on factors such as the shape and size of food, your personal preferences as to the doneness of certain foods and even how well you happen to place food in the oven.
-
Page 15: Cleaning And Maintenance
1. Press , “ ” appears on the display. dEF2 2. Turn to select the defrosting time until “5:00” displays. 3. Press once. 4. Press again or turn to select the microwave power level until “P80” displays. 5. Press to confirm. 6. -
Page 16: Specifications
Oven Door Remove any food deposits and grease between the door seal and oven cavity using a damp cloth, it is important to keep this area clean at all times. Interior Walls Remove any grease splashes from the oven cavity walls with soap and water, then rinse and dry. -
Page 17: Questions And Answers
Q. What is wrong when the oven light will not glow? A. * Light bulb has blown. *Door not closed. Q. Why is steam coming out of the air exhaust vent and/or why is water dripping from the bottom of the door? A. -
Page 18: Troubleshooting
the food has been properly cooked just as you would do with a conventional cooker. Q. Why do sparks and crackling (arcing) occur in the oven? A. There may be several reasons why sparks and crackling (arcing) within the cavity happens. * You have left a fork or other metal utensils in the oven. -
Page 19: Before You Call For Service
Refer to the following short checklist. You may find that the problem you are experiencing has nothing to do with the microwave oven itself. A couple of quick checks may save you an unnecessary service call. Problem The oven doesn’t work at all. Check the following The mains plug is securely plugged into the mains socket. -
Page 20: Warranty
MGE25 Warranty Kesa Electricals UK, HU1 3AU 18/05/2010...