Table of Contents
Advertisement
1.
INTRODUCTION ................................................................................................................ 2
2.
MINIMUM SYSTEM REQUIREMENTS .............................................................................. 3
3.
INSTALLATION ................................................................................................................. 4
3.1. First installation ........................................................................................................... 4
3.2. Power consumption .................................................................................................... 5
4.
OVERVIEW ........................................................................................................................ 6
4.1. The top face ................................................................................................................ 6
5.
CONNECTING HEADPHONES ......................................................................................... 7
6.
DJ CONTROL STEEL FEATURES ................................................................................... 8
6.1. Jog wheels .................................................................................................................. 8
6.2. Faders (sliders) ........................................................................................................... 8
6.3. Play/Pause, Stop and Cue buttons ............................................................................. 9
6.4. Backward and Forward buttons .................................................................................. 9
6.5. Pitch settings ............................................................................................................... 9
6.6. Effects and loops (buttons 1-6) ................................................................................... 9
6.7. Load Deck buttons .................................................................................................... 10
6.8. Cue Select buttons .................................................................................................... 10
6.9. Browser buttons ........................................................................................................ 10
6.10. Balance knob ............................................................................................................ 10
6.11. Monitor knob ............................................................................................................. 10
6.12. Equalization knobs .................................................................................................... 10
6.13. Kill buttons................................................................................................................. 11
6.14. Shift button ................................................................................................................ 11
6.15. Control 1 and 2 encoders .......................................................................................... 11
6.16. Apply Ctrl. On button ................................................................................................. 11
7.
THE TASKBAR ICON AND CONTROL PANEL ............................................................. 12
7.1. The DJ Control Steel taskbar icon ............................................................................ 12
7.2. Using the DJ Control Steel control panel .................................................................. 12
8.
USING THE DJ CONTROL STEEL AT A PARTY .......................................................... 15
8.1. Overview ................................................................................................................... 15
8.2. Mixing in VirtualDJ .................................................................................................... 15
8.3. Scratching ................................................................................................................. 19
9.
MIDI STANDARD SUPPORT .......................................................................................... 20
10.
FREQUENTLY ASKED QUESTIONS ............................................................................. 26
11.
TECHNICAL SUPPORT .................................................................................................. 27
ENVIRONMENTAL PROTECTION RECOMMENDATION ....................................................... 30
CONTENTS
Advertisement
Table of Contents

Related Manuals for Hercules DJ CONTROL STEEL


Summary of Contents for Hercules DJ CONTROL STEEL
-
Page 1: Table Of Contents
THE TASKBAR ICON AND CONTROL PANEL ............. 12 7.1. The DJ Control Steel taskbar icon ................12 7.2. Using the DJ Control Steel control panel ..............12 USING THE DJ CONTROL STEEL AT A PARTY ............15 8.1. Overview ........................15 8.2. -
Page 2: Introduction
Your DJ Control Steel is a powerful and versatile piece of hardware that offers nearly unlimited possibilities in terms of what you can do with your music. The DJ Control Steel is easy to learn and also offers many advanced functionalities, making it perfect for all users from beginners to seasoned professionals. -
Page 3: Minimum System Requirements
2. MINIMUM SYSTEM REQUIREMENTS Desktop/laptop PC with Intel Pentium III/Athlon 1GHz processor or compatible 512MB RAM Operating system: Microsoft Windows XP/Vista 32-bit Available USB port Internal or external sound card (4 channel sound card or greater recommended for ... -
Page 4: Installation
Because drivers and software are constantly being developed, the ones provided on your CD-ROM may not be the most recent versions. You can visit the Hercules website to verify this and, if necessary, download the very latest versions. 3.1.1. Installing drivers and software - Insert the installation CD-ROM into your CD-ROM drive. -
Page 5: Power Consumption
VirtualDJ is launched automatically. The VirtualDJ icon now appears on your desktop. Windows may prompt you to reboot your computer at the end of the driver installation. The DJ Control Steel icon appears in the taskbar, indicating that your DJ Control Steel is ready for use. -
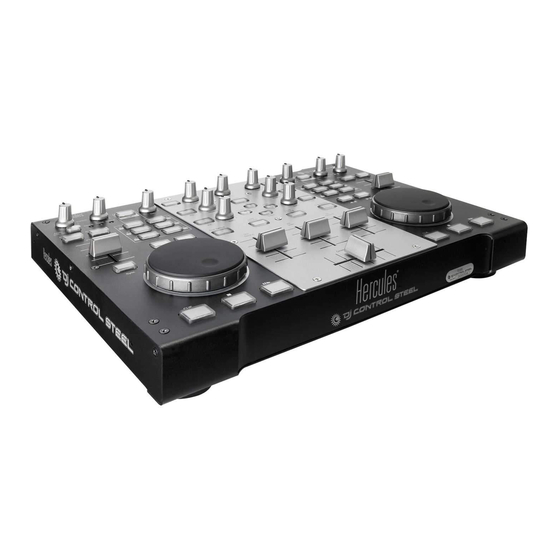
Page 6: Overview
Your DJ Control Steel has a variety of controls allowing you to interact with DJ software. There are two sets of these controls, as the left and right sections of the DJ Control Steel each correspond to a separate deck in DJ software applications. Descriptions of the default function of each control are provided below. -
Page 7: Connecting Headphones
26. USB connector 5. CONNECTING HEADPHONES With DJ Control Steel, your can use headphones connected to your PC’s sound card, taking care to adjust the sound level directly in the operating system of your PC or Mac. For a multimedia card, use headphones of 32 ohms maximum. -
Page 8: Dj Control Steel Features
6. DJ CONTROL STEEL FEATURES 6.1. Jog wheels The jog wheels on your DJ Control Steel emulate vinyl turntables: turning a jog wheel lets you scratch or move the cursor backward or forward within music tracks, allowing you to select the cue point where playback will start for the audience. -
Page 9: Play/Pause, Stop And Cue Buttons
6.3. Play/Pause, Stop and Cue buttons These buttons are available for both decks on your DJ Control Steel. - Play: starts music playback, while Pause pauses music playback at the current position in the track and sets the cue point at this position. -
Page 10: Load Deck Buttons
- Button 6 (Beatgrid): adds a beat pattern over the music track, based on the track’s tempo. Other functions can be assigned to these buttons as well: - Record Sample: records the music. - Play Sample: plays the sampled music. This allows you to play a sample stored on the button where you have recorded the sample. -
Page 11: Kill Buttons
- Make dancing easier by enhancing the bass (the bass provides the tempo for dancing). - Remix songs by boosting the mids (the mids contain the singer’s voice) on one track and mixing it with another track on the other deck, where you’ve cut the mids. You can also manipulate the bass to make transitions between two tracks: - Synchronize the 2 tracks: move the pitch fader to set both tracks at the same BPM. -
Page 12: The Taskbar Icon And Control Panel
DJ Control Steel. Please note that in order to check for updates, you must have an active Internet connection. - Page 13 Main tab: In this tab, you can: - disable and re-enable the jog wheels. - set the sensitivity of the jog wheels. User Manual – 13/30...
- Page 14 About tab: - This tab provides all of the information about the package, firmware, driver, DJ API and control panel versions you are using. Please refer to this information when contacting technical support. 14/30 – User Manual...
-
Page 15: Using The Dj Control Steel At A Party
In concrete terms, you will launch the VirtualDJ software provided with your DJ Control Steel and program pieces onto each of the decks. - Page 16 Mixing your songs in VirtualDJ is fun and easy to master. Thanks to the perfect integration of the controls on your DJ Control Steel with the included VirtualDJ 5 DJC Edition software, in no time at all you'll be mixing and scratching your favorite songs, looping and applying amazing effects just like a pro and making seamless transitions from one song to the next.
- Page 17 Make sure that the cross fader on your DJ Control Steel is set all the way to the left, meeting that only Deck A will be heard in your mix. Press the Play/Pause button on Deck A of your DJ Control Steel to launch playback on Deck A.
- Page 18 Scratch button on your DJ Control Steel, the jog wheels switch to the seek function, allowing you to move quickly within a track. You can also move quickly within a track using the backward and forward buttons, just above the jog wheel. Press the Scratch button again to return to the default scratch function.
-
Page 19: Scratching
8.3. Scratching The DJ Control Steel allows you to scratch your MP3s and CDs in the same way that a DJ scratches vinyl records. To do this you will use the DJ Control Steel’s jog wheels, together with the cross fader to boost/interrupt the sound. -
Page 20: Midi Standard Support
9. MIDI STANDARD SUPPORT Your DJ Control Steel can function as a MIDI controller: the buttons and potentiometers can send and receive MIDI signals that will then be interpreted by software. In software that accepts MIDI commands, you must select your DJ Control Steel as the MIDI controller. - Page 21 DJ Control Steel MIDI Message type Value description control message Right Kill Bass Bx 28 Value Button - Toggling Output 7F: Pressed – 00: Released Scratch Bx 29 Value Button - Toggling Output 7F: Pressed – 00: Released Menu Up...
- Page 22 DJ Control Steel MIDI Message type Value description control message Controls 2 Deck B Bx 44 Value Incremental – Coarse (128 7F > 40 : CCW Slow>Fast – 01 > values) 3F : CW Slow>Fast Controls 1 Select A Bx 45 Value Incremental –...
- Page 23 MIDI messages received by DJ Control Steel: MIDI control MIDI message Value description LED left key 1 Bx 01 Value 00 : OFF – 7F: ON LED left key 2 Bx 02 Value 00 : OFF – 7F: ON LED left key 3 Bx 03 Value 00 : OFF –...
- Page 24 MIDI control MIDI message Value description Blink LED left Stop Bx 3D Value 00 : OFF – 7F: ON Blink LED left KillTreb Bx 3E Value 00 : OFF – 7F: ON Blink LED left KillMed Bx 3F Value 00 : OFF – 7F: ON Blink LED left KillBass Bx 40 Value 00 : OFF –...
- Page 25 00 : OFF – 7F: ON Key 6 Hercules has released a MIDI Mapper application for the DJ Control Steel: this software allows you to change the DJ Control Steel’s MIDI messages and values. The MIDI Mapper application is intended for advanced users familiar with the MIDI standard and can be downloaded from http://ts.hercules.com.
-
Page 26: Frequently Asked Questions
Please see section 10. MIDI standard support. 5. Will DJ Control Steel function when connected to a USB hub? Yes, as long as the USB hub’s power supply is connected, since DJ Control Steel needs a USB port’s full power in order to function properly. -
Page 27: Technical Support
11. TECHNICAL SUPPORT If you encounter a problem with your product, please go to http://ts.hercules.com and select your language. From there you will be able to access various utilities (Frequently Asked Questions (FAQ), the latest versions of drivers and software) that may help to resolve your problem. If the problem persists, you can contact the Hercules products technical support service (“Technical... -
Page 28: Warranty Information
Where authorized by applicable law, the full liability of Guillemot and its subsidiaries (including for indirect damages) is limited to the repair or replacement of the Hercules product. The consumer’s legal rights with respect to legislation applicable to the sale of consumer goods are not affected by this warranty. -
Page 29: Declaration Of Conformity
Trademarks Hercules® is a registered trademark of Guillemot Corporation S.A. Intel® and Pentium® are registered trademarks of Intel Corporation. Microsoft® Windows® 98 SE, Me, 2000 and XP are either registered trademarks or trademarks of Microsoft Corporation in the United States and/or other countries. -
Page 30: Environmental Protection Recommendation
ENVIRONMENTAL PROTECTION RECOMMENDATION At the end of its working life, this product should not be disposed of with standard household waste, but rather dropped off at a collection point for the disposal of Waste Electrical and Electronic Equipment (WEEE) for recycling. This is confirmed by the symbol found on the product, user manual or packaging.
Need help?
Do you have a question about the DJ CONTROL STEEL and is the answer not in the manual?
Questions and answers