Table of Contents
Advertisement
Advertisement
Table of Contents

Related Manuals for Britax Child Safety Traveller Plus

Summary of Contents for Britax Child Safety Traveller Plus
- Page 1 Traveller Plus User Guide...
-
Page 2: Table Of Contents
Table of Contents Safety Information ........2–5 Features . - Page 3 • Use only with children who weigh between 22 and 105 pounds • Never route vehicle belt over child! (10 and 48 kg) and whose height is 56 inches (142 cm) or less. • Based on crash statistics, the National Highway Traffic Safety •...
-
Page 4: Safety Information
• Cover the restraint if your vehicle is parked in direct sunlight. Parts date to Britax Child Safety, Inc. 13501 South Ridge Drive of the restraint can become hot enough to burn. -
Page 5: Features
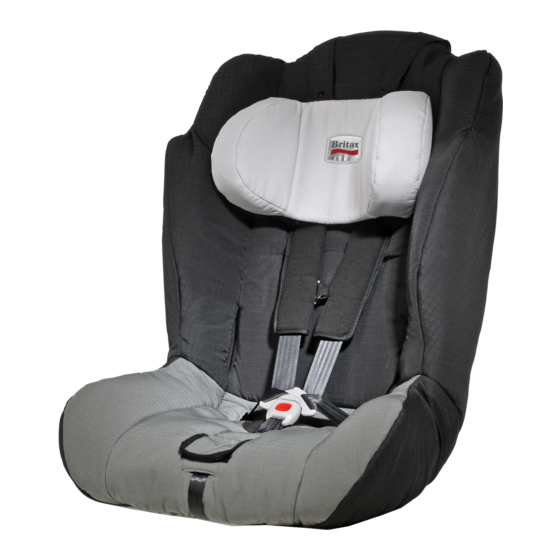
Features Features 1 Head Pad 2 Cover 3 Harness Retainer 12 Harness Adjuster (under flap) 17 LATCH/Tether/User Guide 8 Buckle Storage Pouches 4 Harness Slots 13 Harness Adjuster Strap 9 Pommel 18 Harness Yoke 5 Comfort Pads 14 Head Pad Straps 10 Belly Pad 19 Recline Bar 6 Chest Clip... -
Page 6: Vehicle Safety Belts
Vehicle Safety Belts Vehicle Seating Positions NOTE: The information in this section only WARNING: applies to installation with vehicle seat • Forward facing vehicle seats MUST be used with this restraint. Side belts. facing or rear facing seats in vans, station wagons or trucks CANNOT be used. -
Page 7: Installation
Installation Installation LATCH Installation Route the closest LATCH connector LATCH Anchors under the recline bar, then attach to Verify that your vehicle is LATCH anchor (Fig. C). equipped with LATCH anchors • A positive click confirms attachment. (Fig A). • Verify that LATCH harness is not •... -
Page 8: Lap-Shoulder Belt Installation Long Route
Installation Installation Lap-Shoulder Belt Installation Route the vehicle belt around the back of the restraint then Long Route through the second belt slot, (Recommended vehicle belt route) Shoulder • Figure A illustrates a typical lap- from the rear of the restraint shoulder belt installation. -
Page 9: Lap-Shoulder Belt Installation (Short Route)
Installation Installation Lap-Shoulder Belt Installation Route the vehicle belt under the cover then through the Short Route second belt slot, from the (Recommended ONLY if vehicle belt is Shoulder too short for Long Route) front of the restraint to the •... -
Page 10: Lap Belt Only Installation
Installation Installation Lap Belt Only Installation Verify that the vehicle belt is not twisted, then buckle (Fig. D). • Figure A illustrates a typical lap belt only installation. While pushing the restraint • When not in use, always store the firmly into the vehicle backrest, LATCH connectors in storage remove all slack from the... -
Page 11: Versa-Tether
Versa-Tether Versa-Tether ® ® WARNING: Using the Versa-Tether • ATTACH THE VERSA-TETHER ONLY TO TETHER ANCHORS Locate the teth- IDENTIFIED BY YOUR VEHICLE MANUFACTURER AS TETHER er on the back ANCHORAGE POINTS. USE OF OTHER LOCATIONS IS NOT of the restraint. APPROVED OR PERMITTED. -
Page 12: Using Restraint Features
Using Restraint Features Using Restraint Features Recline Bar Pad Inserts Flat Pads The recline bar allows the restraint recline The pad inserts are designed to be to be adjusted for comfort. Use of the adjusted to offer the child more or less recline bar is optional. -
Page 13: Pommel
Using Restraint Features Using Restraint Features Pommel Buckle Buckle Pommel The pommel (Fig. A) is intended for extra Fastening the Buckle comfort with older children. While the Hold the buckle with one hand. pommel is optional, the belly pad should Use your other hand to insert one always be used. -
Page 14: Securing Your Child
Securing Your Child Securing Your Child Once the restraint has been installed in Position the harness straps around the the vehicle, follow these instructions to child and fasten the restraint buckle secure your child in the restraint. (Fig. Proper connection confirmed with a positive click after IMPORTANT: Before securing your child... -
Page 15: Harness Height
Harness Height Harness Height Checking Harness Height: Pull one strap through the shell and cover, to the front of the restraint. Place child in restraint, then secure Thread the harness strap through the harness (see pages 22–23). appropriate harness slot (Fig. C). Observe where the shoulder harness is Reattach harness strap to the yoke. -
Page 16: Care And Maintenance
Care and Maintenance Care and Maintenance Cover Removal Cleaning the Cover Loosen the harness, by lifting the harness adjuster while pulling the HAND WASH, using cold water and mild soap. shoulder straps forward as far as possible. LINE DRY, to prevent cover from shrinking. Unhook the shoulder straps from the yoke, on the rear of restraint. - Page 17 Care and Maintenance Care and Maintenance Buckle Removal Cleaning the Buckle Locate the metal buckle strap If your child eats and drinks while retainer on bottom of the in the restraint, you may need to restraint. check the buckle periodically and wash out any accumulated debris Pull retainer away from or dried liquids.
-
Page 18: Warranty
Warranty ® This restraint was distributed by SnugSeat . SnugSeat warrants this product to the original purchaser as follows: LIMITED ONE-YEAR WARRANTY This product is warranted against defective materials or workmanship for one year from the date of original purchase. Proof of purchase is required. Your exclusive remedy for this warranty is that SnugSeat will, at its option, provide repair or replacement components for this product or refund the original purchase price of the product.
Need help?
Do you have a question about the Traveller Plus and is the answer not in the manual?
Questions and answers