Ltl Acorn Ltl 5210 User Manual
5mp/12mp infrared scouting camera
Hide thumbs
Also See for Ltl 5210:
- User manual (28 pages) ,
- Operation manual (24 pages) ,
- User manual (44 pages)
Table of Contents
Advertisement
Advertisement
Table of Contents

Related Manuals for Ltl Acorn Ltl 5210


Summary of Contents for Ltl Acorn Ltl 5210
- Page 1 Infrared Scouting Camera ( ) ( ) Ltl 5210 & Ltl 5210A 12MP USER’S MANUAL...
-
Page 2: Table Of Contents
Contents I. Quick Introduction • Front • Bottom Part and Switch • Battery Cover • Function Switch • Preview Testing Mode • Automatic Infrared Shooting Mode II. Advanced Operations 1. Keypad Operations 2. Menu Functions • Camera Mode • Format SD card •... -
Page 3: Quick Introduction
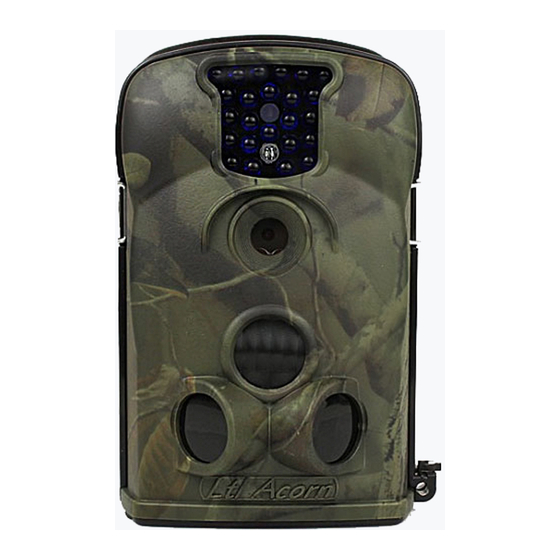
I. Quick Introduction • Front... -
Page 4: Bottom Part And Switch
• Bottom and Switch When the switch is at “OFF”, the camera is turned off. When the switch is at “ON” position in the middle, the camera is on the automatic infrared shooting mode. When the switch is moved to the TEST position, the previewing test mode is on, and you can set parameters or test different functions. -
Page 5: Function Switch
Function Switch After putting in the batteries and a SD card (4M~16G), the device can be started. There are three positions for the switch: OFF, ON and TEST. They each correspond to three different modes of the camera. When batteries need to be changed or when the device is not in used, it should be at the OFF mode. -
Page 6: Automatic Infrared Shooting Mode
that the position can be sensed by the “prepare PIR” on the left and right. There are three scenarios in the preview testing mode, and they are: 1) the preview mode, where you can see the scenes directly in front of the camera lens from the TFT LCD screen or the TV, 2) the setting mode, where the menu is shown, and 3) the playback mode, where you can view existing photos and videos that are stored in SD card from the TFT LCD screen or the TV. -
Page 7: Advanced Operations
II. Advanced Operations Compared with ordinary cameras, Ltl 5210 has more professional functions. The user can change the settings according to specific needs under the preview test mode. • Keypad Operation The 6 keys from left to right are: “MENU” , “left”, “Up”, “Down”, “right” and “OK”. -
Page 8: Camera Mode
• Camera Mode There are two modes(5MP) or three modes(12MP)for the camera, the “Camera” mode, and the “Video” mode,and “Camera+ Video” for 12MP . 、 Press to alternate between these two or three modes and press“OK” to confirm. Press “MENU” to exit the menu. “Camera+ Video” mode can first take photo and consequential take video. -
Page 9: Changing Photo Resolution
• Changing Photo Resolution Press to find “Photo Size” in the menu, and then use shift between “3MP”(or “12MP”) and “5MP”. Then press “OK” to confirm or press “MENU” to exit. • Setting Video Resolution to find “Video Size”, then choose between “640X480” and “320X240”. -
Page 10: Consecutive Photographing
to switch among “month”, “day”, “year”, “hour”, “minute” and “second”. Then use to set the date and time, then press “OK” to confirm or “MENU” to exit. Consecutive Photographing When the automatic photographing function under the Automatic Infrared Shooting Mode is activitated, you need to set the number of pictures you want the camera to take automatically. -
Page 11: Pir Sensitivity Adjustment
the default value is set at 1 minute. To change this interval value, press to find the “Interval” menu, and press to choose a value between “01S~ 59S” and “01min~ 60min”. Press “OK” to confirm or press “MENU” to exit the screen. PIR Sensitivity Adjustment The level of PIR sensitivity applies only to the Automatic Infrared Shooting Mode, and it shows the sensitivity level of the PIR to the objects including people and... -
Page 12: Setting Timer
Time stamps are used to identify and show the time that the photos or videos are shot. When it is set “on”, the time will appear on the photos or videos, and when it is set “OFF” , no time will appear. To change the settings of time stamps, press to find the “Time Stamp”... -
Page 13: System Password
System Password If the system password is set, the device can be protected from non-users, since it cannot enter the Preview Test mode without the password and thus cannot be used. to find the “Password Set” option and press choose either “On” or “Off”. Once the function is turned on, press “OK” and set the password. -
Page 14: Automatic Periodic Shooting
Press to find “Serial NO.” in the functions menu, press to shift between “On” and “Off”. If the “On” is selected, then press “OK” to enter “Serial NO Set” as shown below. to alternate between each slot, and then press to set the digits and 26 alphabets. -
Page 15: Seting Prepare Pir On Or Off
NOTE: When the Automatic Periodic Shooting Mode is on, the PIR will be turned off. to find the “Periodic Interval Set” option in the functions menu, and use to select either “ON” or “OFF”. Select “OK” to confirm changes. When “ON” is chosen, the system will enter the submenu that allows you to set the interval. -
Page 16: File System
Under the Preview TEST mode, pressing “OK” will display the last photos or videos. Use to playback the photos or video clips. If it is a video (SHOT) to play, then press (SHOT) to stop playing. clip, you can press When in 12MP camera, Photos can 16 times zoom playback,press zoom in and press... -
Page 17: Factory Default Settings
V. Factory Default Settings The parameters are usually set before leaving the factory, and their values are optimal or commonly used. These predetermined values of primary parameter are identified in the following table. Parameter Default data Remark others name Mode Camera Photo Video(Photo+ Video when 12MP) -
Page 18: Appendix I: Technical Specifications
Appendix I:Technical Specification Type Parameters Ltl-5210 Ltl-5210A 5 Mega Pixels Color CMOS Image Sensor Maximum Pixel Size 2560x1920 F=3.1; FOV=52°; Auto IR-Cut Lens IR-Flashlight 65 Feet/20 Meters TFT Display Screen 48x35.69mm (2.36");480(RGB)*234DOT; 16.7M color Option Operation Keypad 6 keys Option Memory SD Card (8MB ~16GB) And 3MP =... -
Page 19: Appendix Ii: Parts List
Appendix II:Parts list Part name Quantity Digital camera Addition battery box TV AV IN cable USB cable Belt External DC cable(optional) Manual Guarantee card... -
Page 20: Appendix Iii: Additional Battery Box Installation Instructions
Appendix III: Additional battery box installation instructions...
Need help?
Do you have a question about the Ltl 5210 and is the answer not in the manual?
Questions and answers