Broan 336 Instructions Manual
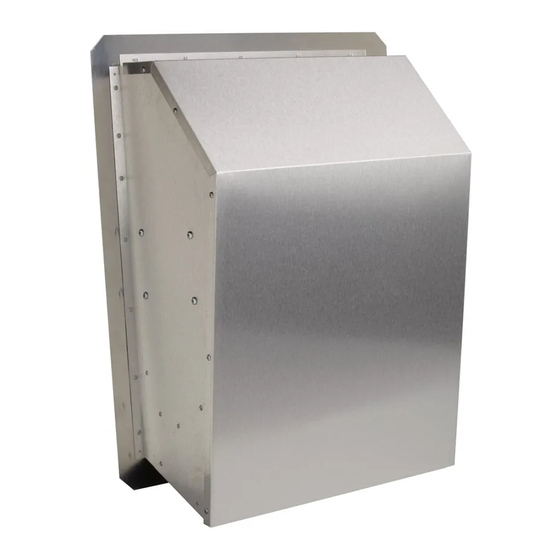
Exterior mounted blower for use with rangeivlaster 60000 or rlvl60000 series or 64000 series range hoods
Hide thumbs
Also See for 336:
- Instruction manual (13 pages) ,
- Specification sheet (1 page) ,
- Installation instructions manual (49 pages)
Table of Contents
Advertisement
Available languages
Available languages
Quick Links
BReAN
L
EXTERIOR MOUNTED BLOWER
FOR USE WiTH RANGEiVlASTER
60000 OR RlVl60000 SERIES OR 64000 SERIES RANGE
HOODS
WARNING
TO REDUCE THE RISK OF FIRE, ELECTRIC
SHOCK, OR
INJURY TO PERSONS, OBSERVE THE FOLLOWING:
1.
Use this unit only in the manner intended by the manufac-
turer. If you have questions, contact the manufacturer at the
address or phone number listed in the warranty.
2.
Before servicing or cleaning unit, switch power off at service
panel and lock the service disconnecting
means to prevent
power from being switched on accidentally. When the service
disconnecting
means cannot be locked, securely fasten a
prominent warning device, such as atag, to the service panel.
3.
Installation work and electrical
wiring must be done by a
qualified person(s) in accordance with all applicable codes
and standards, including fire-rated construction
codes and
standards.
4.
Sufficient air is needed for proper combustion and exhaust-
ing of gases through the flue (chimney)
of fuel burning
equipmentto
prevent backdrafting. Followthe heating equip-
ment manufacturer's guideline and safety standards such as
those published by the National Fire Protection Association
(NFPA), and the American Society for Heating, Refrigeration
and Air Conditioning
Engineers (ASHRAE),
and the local
code authorities.
WARNING
5.
When cutting or drilling into wall, or ceiling, do not damage
electrical wiring or other hidden utilities.
6.
Ducted fans must always be vented to the outdoors.
7.
To reduce risk of fire, use only metal ductwork.
8.
This unit must be grounded.
CAUTION
1. For general ventilating
use only. Do not use to exhaust
hazardous or explosive material and vapors.
2.
To avoid motor bearing damage and noisy and/or unbal-
anced impellers, keep drywall spray, construction
dust, etc.
off power unit.
3.
Please read specification label on product forfurther
informa-
tion and requirements.
4.
Electrical circuit, including speed control, (if used), must be
rated 6 AMPS minimum.
SPECiFiCATiONS
MODEL
VOLTS
AMPS
CFM
336
120
4.3
1500
DUCT SIZE
10" DIA.
PLAN THE INSTALLATION
1.
Locate the blower so the length of the duct run and number
of elbows needed are kept to a minimum.
2.
Where possible, blower should be centered between wall
studs or roof rafters.
3.
Avoid pipes, wires, or other ductwork that may be running
through the wall.
NOTE: Horizontal
discharge
requires
relocation
of the duct
opening cover plate. See hood manual for instructions.
MODEL 336
EXTERIOR
BLOWER
\
10" ROUND
DUCT
ROUGH-IN
PLATE
DUCT
TYPICALROOFMOUNTEDINSTALLATION
(Vertical discharge)
10" ROUND ELBOW
10" ROUND DUCT
• MODEL
WALL HOOD
336
CANOPY
r"EXTERIOR
(island canopy
BLOWER
available)
DUCT
ROUGH-IN
PLATE
24" or 27"
TYPICALWALL MOUNTEDINSTALLATION
(Vertical discharge- elbow to horizontal)
10"ROUND
DUCT
WALL HOOD
CANOPY
(island canopy
available)
DUCT
OPENING
COVER
PLATE
MODEL
336
EXTERIOR
BLOWER
PLATE
TYPICALWALL MOUNTEDINSTALLATION
(Horizontal discharge)
INSTALLER:
Leave This Manual With The Homeowner
HOMEOWNER"
Use And Care Information
On Page 4
Advertisement
Table of Contents

Related Manuals for Broan 336


Summary of Contents for Broan 336
- Page 1 Locate the blower so the length of the duct run and number of elbows needed are kept to a minimum. opening cover plate. See hood manual for instructions. MODEL 336 EXTERIOR BLOWER 10" ROUND ELBOW 10" ROUND 10"...
-
Page 2: Prepare The Installation Location
PREPARE THE iNSTALLATiON PREPARE THE iNSTALLATiON LOCATION LOCATION Locate the blower on the rear slope of the roof. Place it 1. Choose a position on the outside wall. Make sure that no in a location to minimize duct run. The location should wall studs, pipes or wires run through the opening area. - Page 3 iNSTALL THE BLOWER iNSTALL THE BLOWER 1. Remove the cover and screws. 1. Place a large bead of caulk on the back side of the housing all along the outer edges. 2. Attach an appropriate U.L. approved cable connector in the hole at the rear of the wiring box.
-
Page 4: Service Parts
(a) normal maintenance and service or (b) any products or parts which have been subject to misuse, negligence, accident, improper maintenance or repair (other than by Broan-NuTone), faulty installation or installation contrary to recommended installation instructions, The duration of any implied warranty... -
Page 5: Specifications
} VENTILA- HOTTEDE MUR (18 po) HOTTEDEMUR DECHARGE HOTTEDEMUR TEUR (verrieredetie (verrierede fie EXTERIEUR (verrierede fie disponible) disponible) disponible) MODELE 336 VENTI- PLAQUEDU PLAQUE PLAQUEDU PLAQUE LATEUR DECHARGE DECHARGE VENTILA- VENTILA- EXTERIEUR TEUR 61 0u 68,6cm TEUR 61 0u 68,6 cm... - Page 6 PR# PARATION DE L'INSTALLATION PR# PARATION DE L'INSTALLATION 1. Choisissez I'emplacement sur un mur exterior. Assurez- 1. Positionez le ventilateur sur la pente arri_re du toit. Placez-le de mani_re & minimiser la Iongueur des vous qu'aucun montant, tuyau ou fil ne court dans conduits.
-
Page 7: Installation Du Ventilateur
INSTALLATION DU VENTILATEUR INSTALLATION DU VENTILATEUR 1. Enlevez le couvercle et les vis. Appliquez une grosse bande de mastic _. I'arri_re du boftier le long des ar_tes extetieures. 2. Fixez un connecteur de c&ble adequat portant I'homologation U.L. dans le trou arri_re de las bofte de Centrez I'anneau du ventilateur dans le trou de 11 po c&blage. -
Page 8: Pieces De Rechange
Cette garantie vous donne des droits specifiques at il se peut que vous ayezd'autres droits quivarient d'une province & I'autre ou d'un Etat& I'autre. Cette garantie annule toutes les garantiesprecedentes. Pourle service sousgarantie, vous devez (a) aviser Broan-NuTonea radresse ou le numero ci-dessous, (b) donner le numero ou le modele at I'identificationde la piece et (c) decdre la nature de tout defaut dans le produit ou lapiece. Au moment de la demande de service sous garantie, vous devez presenter une preuve de la date d'achat original du produit en question. - Page 9 NOTA: Descarga horizontal requiere la relocalizaci6n de la placa 1. Ubique el ventilador de manera que la Iongitud del ducto y el n0mero de codos se reduzcan al minimo. de d6scarga. Vea el manual de la capilla para las instrucciones. MODELO 336 CODODE VENTILADOR EXTERIOR CONDUCTO...
- Page 10 PREPARE EL AREA DE LA PREPARE EL/_REA DE LA INSTALACION INSTALACION Ubique el ventilador en la pendiente posterior del techo. Seleccione un Area en la pared exterior. AsegOrese de que Col6quelo en un Area en la cual minimice la Iongitud del no haya montantes de la pared, tuberia ni cables tendidos tramo de conductos.
- Page 11 INSTALE DEL VENTILADOR INSTALE DEL VENTILADOR Quite la cubierta y los tornillos. Coloque un reborde grande de material de calafateo en el lado posterior de la cubierta, a Io largo de todos los bordes Coloque un conectador de cables apropiado, aprobado por externos.
-
Page 12: Uso Y Cuidado
Esta garanfia le proporciona derechos legales especificos, y usted puede tambien tener otros derechos, los cuales vadan de estado a estado. Esta garantia reemplaza todas las garantias anteriores. Paracalificar en la garanfla de servicio, usted debe (a) notificar a Broan-NuTone al domicilio o el nOmerode telefono abajo, (b) dar el nOmerodel modelo y la identificaci6n de la pieza, y (c) describir la naturaleza de cualquier defecto en el producto o pieza.
Need help?
Do you have a question about the 336 and is the answer not in the manual?
Questions and answers