Troy-Bilt TB22 Operator's Manual
2-cycle trimmer
Hide thumbs
Also See for TB22:
- Operator's manual (40 pages) ,
- Operator's manual (40 pages) ,
- User manual
Table of Contents
Advertisement
Available languages
Available languages
Removing Unit From Carton
Assemble The Unit
Slot
Bracket
1 1
2
Remove all contents from
Slide shield's slot onto
carton.
mounting bracket. Rotate
shield onto shaft. Push
square bolt through shield
and bracket. Tighten
washer and wing nut
onto bolt.
Assemble The Unit
40:1
1 Gallon
3.2 oz
5
6
Mix thoroughly in separate
Place unit on a level surface.
fuel can:
Fill fuel tank.
– 3.2 fl. oz. of 2-cycle
engine oil
– 1 gallon of unleaded
gasoline (less than 30
days old)
NOTE: Do not mix directly in
fuel tank.
Starting The Unit
1 9
10
Crouch in starting position.
SQUEEZE and HOLD
throttle for ALL further
steps.
Reloading the Line*
Outer
Bump
Spool
Knob
Spring
1 1
2
Unscrew the bump knob
Remove the inner reel and
counterclockwise.
spring.
Reloading the Line
For replacement line, call 1–800-800-7310 or go to
an authorized service dealer.
For single line installation or replacement spool
installation instructions, refer to the Replacing the
Trimming Line section of this manual.
*This is to assist in the reloading of Splitline® only. These instructions
are NOT part of the fast assembly instructions. Line does not need to
be installed on the initial assembly and start-up.
1 8
Hold the inner reel and outer
spool together. Firmly pull the
two line ends to release them
from the holding slots. Screw
the bump knob on clockwise.
Tighten the bump knob
securely.
IMPORTANT: READ THE OPERATOR'S MANUAL THOROUGHLY AND FOLLOW THE SAFE OPERATION PRACTICES WHILE OPERATING THE UNIT.
NEED HELP?
769-08425 / 00
Operator's Manual
3
Remove cap from lower
boom. Push cutting
attachment into coupler.
Turn coupler knob clockwise
to tighten.
Starting The Unit
Primer
Bulb
10 X
7
Press primer bulb 10 times,
or until fuel is visible
5 X
11
Pull rope 5 times.
Inner
Reel
3
Cut one 6-foot (1.8 m) length
of new 0.095" split line
trimming line. Split each end
about 6 inches (150 mm).
CALL 1-800-828-5500 IN U.S. OR 1–800–668–1238 IN CANADA
Electric Starter or
Power Start Bit Optional!
THESE OPTIONAL ACCESSORIES
ARE SOLD SEPARATELY!
This unit has an alternate starting method
that many find easier to use than pulling a
rope. Please contact a local retailer or call
1-800-828-5500 for more information.
Information may also be found at
Min. 6"
4
Push the handle onto the shaft
housing. The bolt hole should be
to the right. Insert the bolt into the
bolt hole. Tighten the bolt, but not
ASSEMBLY TOOLS
completely. Move the handle to
REQUIRED:
the location that provides the best
grip. Move the handle a minimum
• 3/8" Socket
of 6 inches away from the shaft
grip. Tighten the bolt until the
handle is secure.
Choke Lever
Cutting Head Shield
8
Move choke lever to
Position 1.
Choke Lever
12
13
Move choke lever to
Pull rope 3-5 times to start
Position 2 and squeeze
engine. Run unit for 30-60
throttle.
seconds to warm up.
Top Hole
Split Wall
Bottom Hole
4
5
Insert the end of one line into
Wind the line tightly in the
the top hole and the end of
direction shown on the inner
the other line into the bottom
reel. The split wall will divide
hole.
the line. Wind the line until it
is completely divided and
about 6 inches (150 mm) of
line remains.
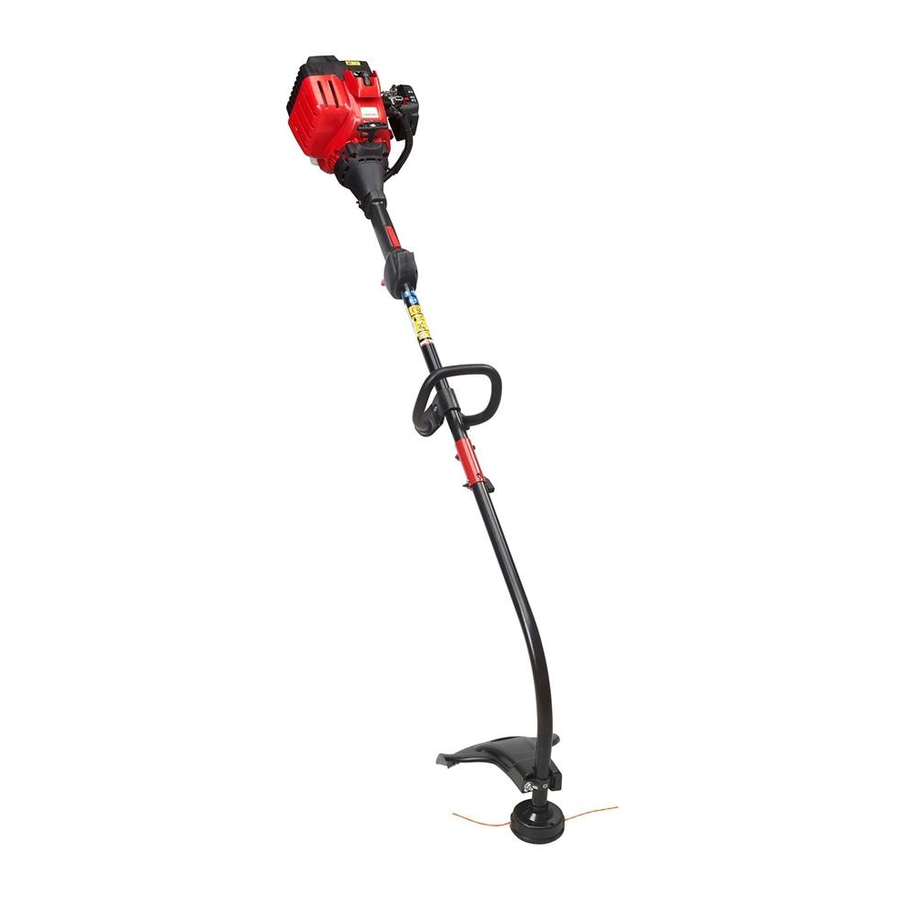
TB22 EC
2-Cycle Trimmer
Starter Rope
On/ Off Switch
D-Handle
www.troybilt.com
Coupler
Call 1-800-828-5500
IF engine fails to start after 2 attempts,
move choke lever to position 3 and pull
IF unit still fails to start, refer to the
operator's manual for additional starting
Choke Lever
3-5 X
14
Continue to squeeze
throttle. Move choke lever
to Position 3.
Holding Slots
6
Insert the two 6-inch sections
into the two .095 holding
slots.
Fuel Cap
Throttle Control
Need Help?
DIDN'T START?
Repeat these instructions.
the starter rope until engine starts
and troubleshooting information
15
Continue to squeeze
throttle. Run unit for an
additional 60 seconds to
complete warm-up. Unit
may be used during this
time.
Eyelets
7
Pass the two line ends
through the eyelets. Place the
spring inside the inner reel.
Insert the inner reel into the
outer spool. Push the inner
reel and outer spool together.
09/12
Advertisement
Table of Contents

Related Manuals for Troy-Bilt TB22


Summary of Contents for Troy-Bilt TB22
- Page 1 TB22 EC 2-Cycle Trimmer Operator’s Manual Removing Unit From Carton Assemble The Unit Electric Starter or Power Start Bit Optional! THESE OPTIONAL ACCESSORIES Slot Starter Rope ARE SOLD SEPARATELY! Fuel Cap This unit has an alternate starting method that many find easier to use than pulling a rope.
-
Page 2: Table Of Contents
TABLE OF CONTENTS RULES FOR SAFE OPERATION Service Information ..............2 Rules for Safe Operation . -
Page 3: Know Your Unit
KNOW YOUR UNIT ASSEMBLY INSTRUCTIONS APPLICATIONS OPERATING THE COUPLER As a trimmer: The coupler enables the use of various optional attachments. Spark Plug Muffler • Cutting grass and light weeds. WARNING: Before using any attachment, read and understand the manual that came •... -
Page 4: Starting And Stopping Instructions
OPERATING INSTRUCTIONS STARTING AND STOPPING INSTRUCTIONS STARTING INSTRUCTIONS HOLDING THE UNIT WARNING: Operate this unit in a well-ventilated outdoor area. Carbon monoxide WARNING: Always wear eye, hearing, foot and body exhaust fumes can be lethal in a confined area. protection to reduce the risk of injury when operating this unit. Before operating the unit, stand in the operating position (Fig. -
Page 5: Idle Speed Adjustment
MAINTENANCE AND REPAIR INSTRUCTIONS MAINTENANCE AND REPAIR INSTRUCTIONS REPLACING THE TRIMMING LINE AIR FILTER MAINTENANCE Only use the trimming line described in the Specifications section. Other types of trimming line may WARNING: To avoid serious personal injury, always turn the unit off and allow it to cool cause the engine to overheat or fail. -
Page 6: Cleaning And Storage
CLEANING AND STORAGE TROUBLESHOOTING CLEANING CAUSE ACTION ENGINE WILL NOT START WARNING: To avoid serious personal injury, always turn the unit off and allow it to cool before you clean or service it. Empty fuel tank Fill fuel tank with properly mixed fuel The primer bulb wasn't pressed enough Press the primer bulb 10 times or until fuel is visible Use a small brush to clean off the outside of the unit. - Page 7 TB22 EC Recortador de 2 Ciclos Manual del Operador Sacar la unidad de la caja Ensamblado de la unidad ¡Arranque eléctrico o accesorio de arranque eléctrico opcional! Ranura ¡ESTOS ACCESORIOS OPCIONALES Cuerda de arranque SE VENDEN POR SEPARADO! Esta unidad posee un método de arranque alternativo que, para muchas personas, resulta más sencillo de usar que tirar la cuerda de...
- Page 8 INDICE DE CONTENIDOS NORMAS PARA UNA OPERACION SEGURA Llamadas a apoyo al cliente ............8 Normas para una operación segura .
- Page 9 CONOZCA SU UNIDAD INSTRUCCIONES DE ENSAMBLE APLICACIONES FUNCIONAMIENTO DEL ACOPLADOR Como recortadora; Bujía de encendido El acoplador permite el uso de varios accesorios opcionales. Silenciador • Corte de césped y hierbas delgadas • Recorte de bordes ADVERTENCIA: Antes de comenzar a utilizar cualquiera de los accesorios, lea y •...
- Page 10 ACEITE Y COMBUSTIBLE INSTRUCCIONES DE OPERACIÓN CARGA DE COMBUSTIBLE EN LA UNIDAD COMO SOSTENER EL RECORTADOR ADVERTENCIA: La gasolina es muy inflamable. Los gases pueden explotar si se encienden. ADVERTENCIA: Use siempre protección para sus ojos, Apague siempre el motor y espere que se enfríe antes de cargar el tanque de combustible. No fume audición, pies y cuerpo para reducir el riesgo de una lesión al mientras llena el tanque.
- Page 11 INSTRUCCIONES DE MANTENIMIENTO Y REPARACIÓN INSTRUCCIONES DE MANTENIMIENTO Y REPARACIÓN REEMPLAZO DEL HILO DE RECORTE MANTENIMIENTO DEL FILTRO DE AIRE ADVERTENCIA: ADVERTENCIA: Para evitar graves lesiones personales, apague siempre su recortador Nunca use un hilo, un cable, una cadena o una cuerda de metal y espere que se enfríe antes de limpiarlo o realizar todo tipo de mantenimiento.
- Page 12 LIMPIEZA Y ALMACENAMIENTO RESOLUCIÓN DE PROBLEMAS LIMPIEZA CAUSA ACCIÓN EL MOTOR NO ARRANCA ADVERTENCIA: Para evitar graves lesiones personales, apague siempre su recortador y espere que se enfríe antes de limpiarlo o realizar cualquier tipo de mantenimiento. El tanque de combustible está vacío Remplissez-le de carburant bien mélangé.
- Page 13 NOTES...
- Page 14 NOTES...
- Page 15 NOTES...
-
Page 16: Warranty Information
Troy-Bilt LLC concede la garantía limitada establecida debajo para mercancías nuevas que sean compradas y usadas en los Estados Unidos, sus posesiones y territorios. Troy-Bilt LLC garantiza este producto contra defectos en el material y la mano de obra durante un período de dos (2) años, a partir de la fecha de compra original y a su entera discreción, arreglará o substituirá sin costo alguno cualquier pieza cuyo material o mano de obra se considere defectuoso.
Need help?
Do you have a question about the TB22 and is the answer not in the manual?
Questions and answers
How to take off coil cover?