Table of Contents
Advertisement
Advertisement
Table of Contents

Related Manuals for Thecus N2310 series


Summary of Contents for Thecus N2310 series
- Page 1 User’s Manual N2310 series v1.0...
-
Page 2: Copyright And Trademark Notice
Thecus Technology Corporation is not responsible for any damage or loss of data deemed to be caused by its products. It is highly recommended that users conduct neces- sary back-up practices. -
Page 3: Safety Warnings
�o ��T place Thecus IP storage on any uneven surfaces. ¾ �� ��T place Thecus IP storage in direct sunlight or expose it to other heat sourc� Thecus IP storage in direct sunlight or expose it to other heat sourc�... -
Page 4: Table Of Contents
Table of Contents ™ Copyright and Trademark Notice..........ii About This Manual...............ii Limited Warranty.................ii Safety Warnings................iii §Chapter 1: Introduction.............1 1.1 Overview..................1 1.2 Package Contents................1 1.3 Front Panel ..................2 1.4 Rear Panel..................3 §Chapter 2: Hardware Installation..........4 §Chapter 3: System Administration. - Page 5 3.3.13 UI Login Function...................... 17 3.3.14 �etworking......................... 17 3.4 Storage Management..............18 3.4.1 �isks Information......................18 3.4.2 RAI� Information......................20 3.5 File Sharing/Privilege..............27 3.5.1 Local User Configuration................... 27 3.5.2 Local Group Configuration..................29 3.5.3 Batch Users and Groups Creation................30 3.5.4 Share Folder.
- Page 6 3.9.2 Uninterrupted Power Source................... 76 Appendix A: Customer Support..........77 Appendix B: RAID Basics.............78 Appendix C: Licensing Information..........81 Table of Contents...
-
Page 7: Chapter 1: Introduction
Thecus IP storage, securing the continuity of data in the event of hardware failure. The Thecus IP storage allows data consolidation and sharing between Windows (SMB/CIFS) and Apple OS X environments. -
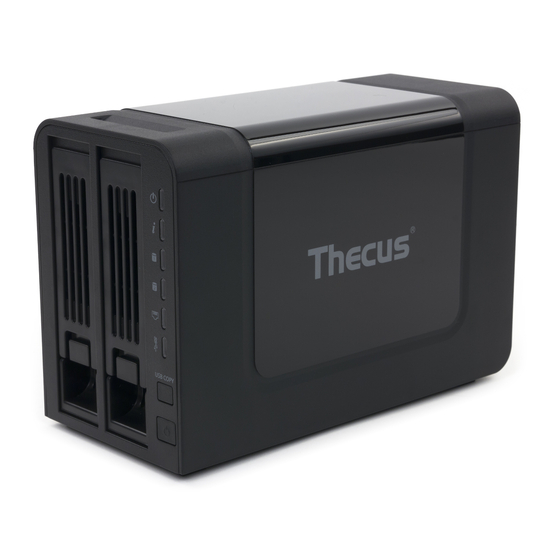
Page 8: Front Panel
Front Panel • N2310: The Thecus N2310’s front panel shows the device’s indicators and hard disk install slots: Front Panel Item Description Solid blue: System ready 1. Power LED Blinking blue: Power on process Solid Red: System with error occurred Blinking white: Diagnostic mode kick-in 2. -
Page 9: Rear Panel
Rear Panel • N2310: The N2310 rear panel features ports and connectors. Back Panel Item Description 1. USB 3.0 Port USB 3.0 port for compatible USB devices, such as digital cameras, USB disks, and USB printers. 2. USB 2.0 Port USB 2.0 port for compatible USB devices, such as digital cameras, USB disks, and USB printers. -
Page 10: Chapter 2: Hardware Installation
Your Thecus IP storage is designed for easy installation. To help you get started, the following chapter will help you quickly get your Thecus IP storage up and running. Please read it carefully to prevent damaging your unit during installation. - Page 11 Press the power button on the Front Panel to boot up the Thecus IP storage. N2310 power button Chapter 2: Hardware Installation...
-
Page 12: Chapter 3: System Administration
The Thecus IP storage provides an easily accessible Web Administration Interface. With it, you can configure and monitor the Thecus IP storage anywhere on the network. Web Administration Interface Make sure your network is connected to the Internet. To access Thecus IP storage Web Administra- Thecus IP storage Web Administra- Web Administra-... -
Page 13: My Favorite
Administrators can add or remove favorite functions to My Favorites by right clicking the mouse on the menu tree. 3.2.2 Control Panel The Control Panel is where you will find all of the information screens and system settings of Thecus IP storage. Control Panel Item... -
Page 14: Message Bar
3.2.3 Message Bar You can get quick information about your system status by moving your mouse over these icons. Message Bar Item Status Description Display the status of created RAID volume. Click to go to RAID information page as RAID Information. short cut. -
Page 15: Language Selection
Information provides viewing on current Product info, System Status, Service Status and Logs. The menu bar allows you to see various aspects of the Thecus IP storage. From here, you can discov- Thecus IP storage. From here, you can discov- . -
Page 16: System/Service Status
3.3.2 System/Service Status From the System Management category,, choose the Status item, System Service Status and HW Sta- tatus item, System Service Status and HW Sta- item, System Service Status and HW Sta- Service Status and HW Sta- and HW Sta- HW Sta- Sta- tus screens appear. -
Page 17: Syslog Management
Re-loading logs. 3.3.4 Syslog Management Generates system log to be stored locally or remotely, it also can be chose to act as syslog server for all other devices. Information can be obtained in two ways: locally and remotely. • Configuration with syslog server: •... -
Page 18: Time: Setting System Time
From the System Management category, choose the Time item and the Time screen appears. Set the desired Date, Time, and Time Zone. You can also elect to synchronize the system time on Thecus IP storage with an NTP (Network Time Protocol) Server. -
Page 19: Schedule Power �N/�Ff
From the System Management category, choose the Schedule Power On/Off item and the Schedule Power On/Off screen appears. To designate a schedule for the Thecus IP storage to turn on and off, first enable the feature by checking the Enable Schedule Power On/Off checkbox. -
Page 20: Administrator Password
The backup details exclude user/group accounts. 3.3.10 Factory Default From the System Management category, choose the Factory Default item and the Reset to Factory Default screen appears. Press Apply to reset Thecus IP storage to factory default settings. Chapter 3: System Administration... -
Page 21: Power Management
Resetting to factory defaults will not erase the data stored in the hard disks, but WILL revert all the settings to the factory default values 3.3.11 Power Management From the System Management category, choose Power Management item, and the Shutdown/Re- boot System screen appears. - Page 22 When the file system check is running, the system will show 20 lines of information until it is com- plete. Once complete, the results will be shown at the bottom. The system must be rebooted before Thecus IP storage can function normally after file system check completes.
-
Page 23: Ui Login Function
Display associated NIC port link status. MAC address MAC address of the network interface. Jumbo Frame Support Enable or disable Jumbo Frame Support of associate interface on your Thecus IP storage. IPv4/IPv6 Click to enable IPv4/IPv6 for TCP/IP. The default is IPv4 enabled. Mode It can choose a static IP or Dynamic IP. -
Page 24: Storage Management
Gateway Gateway for associate NIC. Default gateway It can be chosen from a drop down list of default gateway that’s been used for the Thecus IP storage. • �nly use Jumbo Frame settings when operating in a Gigabit environment where all other clients have Jumbo Frame Setting enabled. - Page 25 Disks Information Item Description Disk No. Indicates disk location. Capacity Shows the SATA hard disk capacity. Model Displays the SATA hard disk model name. Firmware Shows the SATA hard disk firmware version. Bad Block scan Yes to start scan Bad Block. •...
-
Page 26: Bad Block Scan
From the Storage menu, choose the RAID Management item and the RAID Management screen ap- pears. This screen lists the RAID volumes currently residing in the Thecus IP storage. From this screen, you can get information about the status of your RAID volumes, as well as the capacities allocated for data. - Page 27 RAID Information Item Description Master RAID The RAID volume currently designated as the Master RAID volume. ID of the current RAID volume. NOTE: All RAID IDs must be unique. RAID Level Shows the current RAID configuration. Indicates status of the RAID. Can read either Healthy, Degraded, or Damaged. Status Disks Used Hard disks used to form the current RAID volume.
- Page 28 Specify a RAID ID. If this RAID volume is meant to be the Master RAID volume, tick the Master RAID checkbox. Quick RAID � Enabled the quick RAID setting is going to enhance RAID creation time. We recommend using the “Quick RAI�” setting only if the hard disks are brand new or if no existing partitions are contained.
- Page 29 Press Submit to build the RAID storage volume. Press “Yes” for RAID volume creation preparation. Then click “Finish” to start up with RAID volume building. Chapter 3: System Administration...
-
Page 30: Raid Level
Building a RAI� volume may be time consuming, depending on the size of hard drives and RAI� mode. In general, if the RAI� volume building process is up to “RAI� Building”, then the data volume is accessible. Creating RAI� destroys all data in the current RAI� volume. The data will be unrecoverable. -
Page 31: Edit Raid
Creating RAI� destroys all data in the current RAI� volume. The data will be unrecoverable. • Edit RAID On the RAID Information screen, press the Edit button to go to the RAID Information screen. Using Edit RAID, you can select RAID ID and the Spare Disk. Chapter 3: System Administration... -
Page 32: Remove Raid
• Remove RAID Click to remove the RAID volume. All user data created in the selected RAID volume will be deleted. To remove a RAID volume, follow the steps below: On the RAID List screen, select the RAID volume by clicking on its radio button, and click RAID Information to open the RAID Configuration screen. -
Page 33: File Sharing/Privilege
File Sharing/Privilege The Thecus IP storage has built-in user database that allows administrators to manage user access using different group policies. From the File Sharing/Privilege menu, you can create, modify, and de- File Sharing/Privilege menu, you can create, modify, and de- menu, you can create, modify, and de- lete users, and assign them to groups that you designate. - Page 34 • Edit Users Select an existing user from the Local User Configuration screen. Click on the Edit button, and the Local User Setting screen appears. From here, you can enter a new password and re-enter to confirm, or use the << or >> but- tons to have this user join or leave a group.
-
Page 35: Local Group Configuration
3.5.2 Local Group Configuration From the File Sharing/Privilege menu, choose the Group item, and the Local Group Configuration screen appears. This screen allows you to Add, Edit, and Remove local groups. Local Group Configuration Item Description Press the Add button to add a user to the list of local groups. Press the Edit button to modify a selected group from the system. -
Page 36: Batch Users And Groups Creation
Batch Users and Groups Creation The Thecus IP storage can also add users and groups in batch mode. This enables you to convenient- Thecus IP storage can also add users and groups in batch mode. This enables you to convenient- can also add users and groups in batch mode. -
Page 37: Share Folder
3.5.4 Share Folder From the File Sharing/Privilege menu, choose Share Folders, and the Shared Folder screen appears. This screen allows you to create and configure folders on the Thecus IP storage volume. • Adding Folders On the Folder screen, press the Add button and the Add Folder screen appears. This screen allows you to add a folder. -
Page 38: Remove Folders
you to change folder information. After entering the information, press Apply to save your changes. Modify Folder Item Description Folder Name Enter the name of the folder. Public Admit or deny public access to this folder. Press Apply to create the folder. Apply •... - Page 39 • Samba Configuration On the Folder screen, press the Samba button and the Samba Configuration screen appears. This screen allows you to setup samba configuration for associated folder. After entering the information, press Apply to activate input settings. Samba Configuration Item Description RAID ID...
- Page 40 ACL setting Item Description Deny Denies access to users or groups who are displayed in this column. Read Only Provides Read Only access to users or groups who are displayed in this column. Writable Provides Write access to users or groups who are displayed in this column. Recursive Enable to inherit the access right for all its sub-folders.
-
Page 41: User Quota
3.5.5 User Quota The Thecus IP storage support local or AD users with storage quota limitations in each RAID volume of the system. To enable this function, simply click “Enable”, then apply. Next, each user can be setup a global storage quota size for each RAID volume. Simply click on “Quota Size”... -
Page 42: User And Group Backup
3.5.6 User and Group Backup The user and group backup feature allow system users and groups to be backed up to another location and be restored if needed. Please note, when restoring previous backup users and groups, the current users and groups list will be replaced from this restore file’s contents. -
Page 43: Network Service
• Samba is Native mode The Thecus IP storage is supported Samba mode options. In the ADS environment with “Native” mode selected then Thecus IP storage is capable to become local master position. •... - Page 44 Simply enable the “Recycle Bin” function and “Recycle Folder Display” then all of deleted files/folders will reside in the “_NAS_Recycle_(Associated RDID Volume)” share folder. For example, the system has created 2 RAID volumes with ID “RAIDpm” and ‘RAID”. Then it will have 2 recycle bin folder appear as “_NAS_Recycle_RAID”...
-
Page 45: Afp (Apple �Etwork Setup)
If your AppleTalk network uses extended networks and is assigned with multiple zones, assign a zone name to the Thecus IP storage. If you do not want to assign a network zone, enter an asterisk (*) to use the default setting. -
Page 46: Webservice
1 ~ 32 MB/s. To access the share folder on the Thecus IP storage, use the appropriate user login and password set up on the Users page. Access control to each share folder is set up on the ACL page (Storage Management >... -
Page 47: Upnp
This device supports UPnP Media server, which allows users to play media files with UPnP client (ex. DMA devices). Enable or disable Universal Plug and Play protocol. UPnP helps to find the IP address of Thecus IP storage. 3.6.6 Bonjour Setting Bonjour, is Apple Inc. -
Page 48: Upnp Port Management
3.6.8 DDNS To set up a server on the Internet and enable the users to connect to it easily, a fixed and easy-to remember host name is often required. However, if the ISP provides only dynamic IP address, the IP address of the server will change from time to time and is difficult to recall. - Page 49 After the router has enabled “UPnP Service” then you will have information come from associated router to UPnP port management as shown in the screen shot below. And click “Add Rule” to add more port mapping from Internet to access desired services or press “Refresh”...
-
Page 50: Application Server
Rescan interval in seconds. MP3 Tag Encode Specify tag encoding for MP3 files stored in Thecus IP storage. All ID3 tags will be sent out in UTF-8 for- Thecus IP storage. All ID3 tags will be sent out in UTF-8 for- . -
Page 51: As Application
Click on NAS Application from the Application Server category, it will list the current system software and official application status. Backup There are a number of ways to back up data with the Thecus IP storage. 3.8.1 Rsync Target Server When it comes to backing up your data, it’s very important to have flexibility. -
Page 52: Ata Guard (Remote Backup)
Enable Rsync Target Server Add a username and password (they can be different than your NAS’s username and password) Select Apply You will need this user name and password while the data is going to remotely backup to this Rsync target server. Now Rsync is turned on your NAS, which means it can be used as a target for Rsync backup, in other words, only the backup NAS needs to be activated in this way. - Page 53 Then 2 different selections appear and can be chosen from: Remote Data backup Item Description Full Backup The “Full backup” will have all shares from source backup to destination. It could also create shares automatically from destination if it is not existent. This only applies if the target server is the same model as the source.
- Page 54 • Full Backup Click on full backup and the setup screen appear as below. Fill in the remote target IP (Destination) and port (need to be changed only if this port is already in use). If encryption is required then enable it. Please make sure the associated target server also has encryption enabled.
- Page 55 -Fill out all the necessary details and choose your parameters Add Rsync Backup Task Item Description Task Name This is how this task will appear in the task list. Backup Type Real time: It will backup folders/files from source to target on the fly. On the other hand, any changes from the source will back up to the target right away.
- Page 56 From the task list, you can now see the newly added task “fullback01”. The backup is setup as “real time”. From the status field, “Processing” can be read as the back-up is performed on the fly. • Custom Backup The custom backup setting is similar to the full backup. The only differences are explained below: Inputs the share folder name of target sever where the source is going to backup.
- Page 57 Click “Next” and more setting appears. These are the as the settings for “Full backup” Click “Finish” and the data guard task will appear in the list as shown below. From the task list, you can now see the newly added “customback01”. This backup is setup as “schedule”.
- Page 58 • Restore To restore a backup from the backup task, simply select a task from the task list then click “Restore” from the function bar. The restore task will start to have the associated files/folders from the target server restored to the source. •...
- Page 59 Click on “Restore NAS Configuration” and the screen shown below will appear. Input the target server’s IP address where the system configuration has been backed up, and necessary authentication info. Confirm by doing a “Connection Test” to make sure the communication between the source and the target server works.
- Page 60 After clicking “Next”, a screen will appear as shown below. Listed on the left hand side, you will see the configuration backup details which contain the 3 RAID volumes. On the right hand side, you will see a list of single “RAID” volume. You may roll back to previous page to recall the example we have taken.
- Page 61 will be mapped to the volume “RAIDa” of the current unit. Once again, it means all the shares that were created in the volume “RAID01” will be restored to volume “RAIDa” of the current system. Chapter 3: System Administration...
-
Page 62: Ata Guard (Local Backup)
3.8.3 Data Guard (Local Backup) The Thecus product provides complete backup solution between Thecus NAS systems as well as between folders of local systems. Remote Data backup Item Description Add a new task. Edit Edit selected task. Remove Remove selected task. - Page 63 Local Data backup Item Description Import This is associated with external devices which are added to the system such as USB disk. You can select a folder from an external device and import it to the NAS as a share folder. Copy Copy folder to folder or NAS folder to external device or external device to NAS folder.
- Page 64 Next, please select the path from the drop down list to save the log. Also, give the access permission whether these selected folders will be “Public” or not after the import. Read the notes and check the “Accept” box for confi rmation. If a share name already exists for the im- s and check the “Accept”...
- Page 65 Now, you will see in the data guard task list that you have created a task . And that the system has created 2 new share folders from the task just created. Copy: click on “Copy” and this screen appears. 3 different options can be selected, folder to folder, folder to external device or external device to folder.
- Page 66 • Folder to Folder • Folder to external device • External device to Folder Chapter 3: System Administration...
- Page 67 Let’s take “Folder to External device” as an example. In the source pane, select the desired RAID volume and its associated folder list will appear; same method in the target pane for the associated external device. Select a folder from the source pane which is going to be copy over, then select in target pane it’s destination.
- Page 68 Read the notes and check the “Accept” box for confirmation. Now, you will see in the data guard task list that you have created a task. Realtime Backup: click on “Realtime Backup” and this screen will appear. 2 different options can be selected from, folder to folder, folder to external device. Let’s take “Folder to Folder”...
- Page 69 Next, fill in the task name and related settings. Chapter 3: System Administration...
- Page 70 Realtime Backup Item Description Task Name Input the task name, length limited to 4~12 characters. Sync Type Select “Incremental” or “Synchronize”. Backup Symbolic Link Choose to backup symbolic link which is included in the source. Filter The filter can be set to be executed only in certain circumstances. If none of them has been selected, it will do the real time backup from the source to the destination in full.
- Page 71 Schedule Backup: click on “Schedule Backup” and this screen will. 2 different choices can be selected from, folder to folder, folder to external device. Let’s use “Folder to External device” backup for our example. From the NAS volume RAID in the Source pane select the folder “NAS_Public”, then in the target pane select the external USB disk folder “N10850”.
- Page 72 Read the notes and check the “Accept” box for confirmation. Now, you will see in the data guard task list that you have created a task. Chapter 3: System Administration...
-
Page 73: Acl Backup And Restore
3.8.4 ACL Backup and Restore The ACL backup and restore feature enables the system ACL (Access Control List) to be backed up on the RAID volume based to other location and restored if needed. Let’s look at the example bellow to see how it works. We have one system with a RAID volume “RAID”, select “Backup”... -
Page 74: Ata Burn
• The ACL backup will only back to share folder level; it does not apply to its sub�layer. • If recursive has been checked during the ACL restoration, it will apply to all of its sub�folders with the same permission. 3.8.5 Data Burn The data burn is featured to support 3 different modes of data burning for files/folders to and from... - Page 75 Select files/folders which you would like to burn. All of the selected folders/files will be seen under the disc label name “New Disc”. The disc label name can be changed by clicking on it and press “Edit” from menu bar. The selected folders/files also can be removed by clicking on them and then pressing “remove”...
- Page 76 Select the ISO file. Select from the installed USB burning devices. Please click the “detect disc” button to check the status once the disc is inserted. Select the burning speed from the drop down list. Select whether disc data verification is required or not. Click “Burn”...
-
Page 77: External Devices
The Thecus IP storage supports printer server and UPS via USB interface. The integrated Print Server allows you to share a single USB printer with all users on the network. For the UPS, Thecus IP storage support via USB, Series and Network interface. The following section shows you how. -
Page 78: Windows Xp Sp2
Click Next. Click Finish. �ote that if a multi�function (all�in�one) printer is attached to the Thecus IP Storage, usually only the printing and fax functions will work. �ther features, such as scanning, will probably not function. - Page 79 Select Add a network, wireless or Bluetooth printer. Select The printer that I want isn’t listed. You can press The printer that I want isn’t listed to go into next page without waiting for Searching for available printers to finish. Click Select a shared printer by name.
- Page 80 Type http://<Thecus_NAS>:631/printers/usb-printer in the box, where <Thecus_NAS_IP> is the IP address of Thecus IP storage. Click Next. Select or install a printer and then press OK. Windows will attempt to connect to the printer. You can choose to set this printer as the default printer by checking the Set as the default printer box.
- Page 81 Done! Click Finish. Chapter 3: System Administration...
-
Page 82: Uninterrupted Power Source
3.9.2 Uninterrupted Power Source From the External Devices menu, choose the Uninterrupted Power Source item and the UPS Setting screen appears. Make any changes you wish, and press Apply to confirm changes. See the following table for a detailed description of each item. UPS Setting Item Description... -
Page 83: Appendix A: Customer Support
Appendix A: Customer Support ™ If your Thecus IP storage is not working properly, we encourage you to check out Chapter 6: Trouble- Thecus IP storage is not working properly, we encourage you to check out Chapter 6: Trouble- is not working properly, we encourage you to check out Chapter 6: Trouble- shooting, located in this manual. -
Page 84: Appendix B: Raid Basics
• RAID Levels The Thecus IP storage supports standard RAID levels 0, 1, 5, 6, 10 and JBOD. You choose a RAID level when you create a system volume. The factors for selecting a RAID level are: Š... - Page 85 RAID. Since multiple disks are accessed at the same time, disk strip- ing enhances performance. The stripes can vary in size. Disk Usage When all disks are of the same size, and used in RAID, Thecus IP storage disk usage percentage is Appendix B: RAID Basics...
- Page 86 listed below: RAID Level Percentage Used RAID 0 100% RAID 1 1/n x 100% RAID 5 (n-1)/n x 100% (n-2)/n x 100% RAID 6 RAID 10 JBOD 100% n: HDD number Appendix B: RAID Basics...
-
Page 87: Appendix C: Licensing Information
Public License. Please see THE GNU General Public License for extra terms and conditions of this license. Source Code Availability Thecus Technology Corp. has exposed the full source code of the GPL licensed software. For more information on how you can obtain our source code, please visit our web site, http://www.thecus. com. - Page 88 • CGIC License Terms Basic License CGIC, copyright 1996, 1997, 1998, 1999, 2000, 2001, 2002, 2003, 2004 by Thomas Boutell and Boutell. Com, Inc. Permission is granted to use CGIC in any application, commercial or noncommercial, at no cost. HOWEVER, this copyright paragraph must appear on a “credits” page accessible in the public online and offline documentation of the program.
- Page 89 the recipients all the rights that you have. You must make sure that they, too, receive or can get the source code. And you must show them these terms so they know their rights. We protect your rights with two steps: (1) copyright the software, and (2) offer you this license which gives you legal permission to copy, distribute and/or modify the software.
- Page 90 warranty protection in exchange for a fee. You may modify your copy or copies of the Program or any portion of it, thus forming a work based on the Program, and copy and distribute such modifications or work under the terms of Sec- tion 1 above, provided that you also meet all of these conditions: You must cause the modified files to carry prominent notices stating that you changed the files and the date of any change.
- Page 91 ware interchange; or, Accompany it with a written offer, valid for at least three years, to give any third party, for a charge no more than your cost of physically performing source distribution, a complete machine- readable copy of the corresponding source code, to be distributed under the terms of Sections 1 and 2 above on a medium customarily used for software interchange;...
- Page 92 If, as a consequence of a court judgment or allegation of patent infringement or for any other reason (not limited to patent issues), conditions are imposed on you (whether by court order, agree- ment or otherwise) that contradict the conditions of this License, they do not excuse you from the conditions of this License.
- Page 93 rivatives of our free software and of promoting the sharing and reuse of software generally. NO WARRANTY BECAUSE THE PROGRAM IS LICENSED FREE OF CHARGE, THERE IS NO WARRANTY FOR THE PROGRAM, TO THE EXTENT PERMITTED BY APPLICABLE LAW. EXCEPT WHEN OTHERWISE STATED IN WRITING THE COPYRIGHT HOLDERS AND/OR OTHER PARTIES PROVIDE THE PROGRAM "AS IS"...
Need help?
Do you have a question about the N2310 series and is the answer not in the manual?
Questions and answers