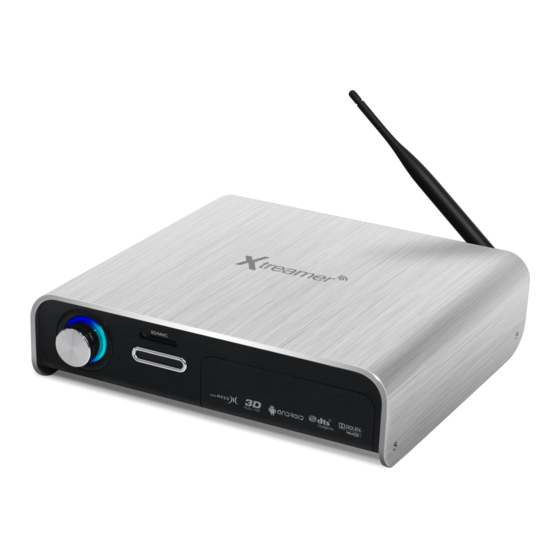
Xtreamer Prodigy User Manual
Media player & streamer
Hide thumbs
Also See for Prodigy:
- Quick start manual (2 pages) ,
- User manual (115 pages) ,
- User manual (87 pages)
Table of Contents
Advertisement
Advertisement
Table of Contents

Related Manuals for Xtreamer Prodigy


Summary of Contents for Xtreamer Prodigy
- Page 1 User Manual Xtreamer Prodigy Ver.3.0.*...
- Page 2 GB LAN and can be equipped with one 3.5” HDD. With Xtreamer Prodigy media player you can bring your movies, music and images to your living room, get rid of that bulky DVD collection, access hundreds of internet feeds and channels, check your favorite online services and social nets, browse the web, stream from your iOS device via Airplay, use Android applications and so on.
-
Page 3: Table Of Contents
Page 47 – Network Setup Page 51 – NFS Shortcut setup Page 56 – Settings up Network Shares Page 79 – Prodigy Bit-Torrent client Page 83 – DVB-T Tuner Page 92 – Android App installation Page 97– Web UI Page 104 –... - Page 5 Connections...
- Page 6 Open the hard disk cover on the front panel Connect the HDD guard to an HDD as shown on the picture. Fasten the screws. As shown here, slowly and carefully push the HDD guard together with the HDD into the main body of Xtreamer Prodigy.
- Page 7 Connections Video & Audio Output Connections ㆍHDMI cable connection Connect HDMI cable to HDMI terminal at the back of product. Connect the remaining cable terminal to HDMI terminal at the back of a digital TV. Make sure to carefully distinguish between input and output terminals.
- Page 8 Connection ㆍComponent cable connection Connect the green, blue and red terminal cables to the Xtreamer Prodigy and TV in accordance with the color scheme; connect white AV cable to L terminal, and red AV cable to R terminal. (Component cable is an optional item)
- Page 9 You can enjoy high-quality 5.1CH sound when connected to an amplifier or a receiver with coaxial output cable. Connect coaxial cable to coaxial port on Xtreamer Prodigy as shown above. Then, connect to an amplifier or a receiver. ( Coaxial cable is optional )
-
Page 10: Connect To The Network
Connection Connect to the Network ㆍWired and Wireless Network Wireless IP Sharing Router To set up your network connection please check the Settings guide below. To setup shared folders on your local network, please refer to this online guide or check a dedicated section below. - Page 11 Remote Functions...
-
Page 12: Remote Control Functions
Remote Control Functions... - Page 13 General Remote Control Functions Power on / off POWER Record (DVB-T Tuner module required) Page mode in browser, special functions Bookmarks, playlist, special functions, access TV channels in DVB Address bar input, special functions Special functions, playlist operations Eject for DVD EJECT Delete DELETE...
- Page 14 To repeat file in play or to repeat all media files in the corresponding REPEAT folder To set zone repetition Turns On/Off LED part of Xtreamer Can be used to set the timer to turn off the player SLEEP Screen shifts into 16:9/16:10/4:3 ratio during playback 16:9 Used if Angle is supported in a DVD file.
-
Page 15: Main Menu And Settings
Main Menu and Settings... -
Page 16: Main Menu
Main Menu Favorites Under FAVORITES you can find the shortcuts to the files and folders you added to your Favorites list as well as the playlists you created History HISTORY tab gives you a quick access to the Recently Played and Recently Added files. -
Page 17: Basic Setup
Basic Setup 1. Adjusting output mode with TV output and Video output 1. Automatically adjust the TV output mode when connected via HDMI cable. Cycle through available resolutions. Remote Control Key: TVOUT // Press 2 times consecutively 2. . Connect Component / Composite cable Please note that video might suffer when connected via analogue. - Page 18 1080P 24Hz This feature allows you 1080P 24Hz output when playing Blu-ray files (BD); however, this function is only available when Xtreamer is connected using a HDMI cable to a TV that supports 24Hz frame rate. Note for 1080p 24p - TV, AV amp and media file you use must support 1080P 24Hz and your media file should be encoded 1080P 23.976fps.
- Page 19 Settings Video Aspect Ratio You will be able to select Aspect Ratio type of movie screen for playback. 16:9 Ratio converted to 4:3 Ratio is referred to as high definition TV. It will reduce PanScan 4:3 scan lines to 4:3. 16:9 Ratio converted to 4:3 Ratio is referred to as your TV.
- Page 20 Settings Audio HDMI Output Select a desired configuration for your digital audio output. SPDIF output Select a desired configuration for your optical audio output. Night Mode Outputting raw sound. It provides high-definition audio that is identical to, and every bit as spectacular as, the master recording.
- Page 21 Please note that in order to access your home computer you will need to set up Shared folders. Check the dedicated section below. If you want learn how to setup shortcuts to NFS shares on Xtreamer Prodigy, please refer to the dedicated section ( refer this...
-
Page 22: System Configuration
Settings System Configuration Time Zone Time zone selected time zone of Xtreamer. Select your time zone. HDD Format This feature supports internal HDD format function. Formatted file system is divided into Linux Swap partition and NTFS partition. By auto formatting, Linux swap partition is an independent section of hard disk used solely for swapping. - Page 23 Settings System configuration DVD Autoplay The feature allows you to select automatic DVD play mode when inserting a DVD disk into the DVD ROM connected to your player via USB port DVD Disk isn’t automatically played DDVD Disk is automatically played. DLNA DMR Turn it on to automatically connect to DLNA devices Screen size...
- Page 24 This option enables DLNA service. Airplay Enable to stream videos (Youtube) and images from your iOS device to a TV via Xtreamer player. Android You can disable Android services if you want to dedicate all the device’s resources to playing media files.
-
Page 25: Firmware Upgrade
Manually. Check below for details. IMPORTANT Every Xtreamer media player has its own specific firmware. Please make sure you download the correct file before running the upgrade procedure. Emergency Firmware Emergency firmware can be a great help for de-bricking an unresponsive unit and fixing various problems. - Page 26 Resume Play You can begin playing Xtreamer from the point where you previously stopped it. Your system saves a record of the scene that was playing when you stopped playback so it knows where to resume playing.
- Page 27 Settings Search and Indexing Easily find your Media files Scan your local storage for media files on your local storage devices in order to be able to find them easily in the Media Library. Use Automatic scan or press Rescan Storage to manually update the database. Note: When Auto scan is enabled the player might take some additional time loading the system.
- Page 28 Settings DVBT TV Region Specify your location for the scan. Channel Scan Choose auto or Manual method to scan for channels available at your location. Recording Device Set the device where the recorded files will be saved (HDD or USB storage). REC Priority Specify the priority order for Manual vs Scheduled recordings...
-
Page 29: Basic Functions
Basic Functions... -
Page 30: Media Library
Media Library Using Media Sources General remote functions in the Media Library Cursor keys – use them to navigate the Media sources. ENTER – to make a selection or to play a file. MENU (6) – open a list of viewing options, file filtering, 3D playback functionality, Add to favorites feature, setup NFS shares, slideshow timing and effects, background music for image viewing and much more. -
Page 31: Play Movies
Play Movies Most control buttons are the same as everywhere else: Play, Pause, Stop, Fast-Forward, Next and so on. Info button opens an time-bar with a relevant information about the file you are playing (see the picture above) While watching a movie press MENU (6) to open a list of options including an access to subtitles browser, GOTO menu, repeat options, audio channels and, in relevant cases, a 3D options menu. - Page 32 Play Movies You can use LEFT and RIGHT cursor to skip – press ENTERT to jump to a desired location. ZOOM button to enlarge the picture. Audio button is used to switch between different audio channels and tracks.
- Page 33 Play Movies Subtitles button will open the subtitles browser that will allow you to customize the way your subtitles look on TV and switch the subtitles file if needed. It allows you to open an external file, change the color or the font, outline, change the size and encoding etc.
- Page 34 Play Movies. 3D playback Xtreamer Prodigy is the first media player to support full 3D home experience. Please remember that you might need to enable 3D playback on you TV in order to enjoy it. Use 3D button on your remote or the TV set.
-
Page 35: Play Music
Play Music While playing music press MENU (6) to open a list of options including repeat options such as play once, repeat all and so on. Press SHUFFLE to toggle random playback. Start the playback to initiate music jukebox. You can use Cursor keys to navigate or regular command buttons such as Play, Pause, Fast-forward etc. Press RETURN to go back to the media library file list. - Page 36 Play Photo Use MENU key to toggle view mode options. To start a Slideshow open a file (ENTER or PLAY) and press MENU of a list of advanced options. •You can set up the time intervals your images will be displayed using Slide Timing. •Slide Transition lets you to setup transition effects •Background music allows you to specify audio tracks for your Slideshow.
- Page 37 Advanced Features...
- Page 38 Displaying Cover art In Media Sources (the library) the corresponding image files stored in the file folders will be displayed if the Preview or Thumbnail modes are activated. Same the cover art file as folder.jpg in a relevant folder. For additional information and tips please refer to this article.
-
Page 39: Creating A Playlist
Creating a playlist You can use self-made M3U playlists on Xtreamer Prodigy. Just make sure that the paths are relative. You can also setup and save multiple playlists via Xtreamer user interface. Press FUNC button while in media library and choose Multiple Select... - Page 40 Creating a playlist Use the BLUE button to add files to the playlist (or to remove from the list) Press FUNC button again once you are done.
- Page 41 Creating a playlist Navigate to Save Playlist and press ENTER. Pick a name for your new playlist and press OK. Now you will be able to play the playlist from the media library.
- Page 42 Android on Prodigy You can use remote or a keyboard and mouse to use Android. Use the BLUE button for the Android option screen. Choose a pre-installed application or install your own. Currently we recommend manual installation. We are constantly testing and will post the our picks on the main site and our forum.
-
Page 43: Web Browser
Web Browser When you choose Web Browser in the main menu the list of Bookmarks will open. Press LEFT or RIGHT to navigate and ENTER to load. When viewing web pages you have two options - Page mode or Navigation mode. You can switch between the two of them using RED button. - Page 44 Apps You can access various internet resources via App section of the Main Menu.
- Page 45 Apps Check out our amazing YouTube application. And xLive – a wonderful collection of live Internet feeds and channels. You can find other RSS based projects on our forum (you will need to register) and install them on your machine. Many projects are being updated every few days with new content.
- Page 46 Check the predefined stations, browse by genres or search. Add stations to favorites. Xtreamer also support PLS format so you can create files to access your own radio stations and play them from the Media Library. You can download a list of 17,000 stations HERE.
-
Page 47: Network Setup
Network Setup... -
Page 48: Setting Up Wired Network
Settings Up Network on Xtreamer 1. Setting up Wired Network DHCP IP (AUTO) The Dynamic Host Configuration Protocol DHCP is a networking protocol used to automatically retrieve IP address assignments through Wired LAN. This feature is set as a default value so that IP address is automatically assigned by RJ45 connecting and rebooting. -
Page 49: Wireless Lan Setup
Settings Up Network on Xtreamer 2. Wireless LAN Setup 1. Choose Wireless Network option. 2. Select [Infrastructure (AP)]. 3. Select SSID type (available wireless network), you want to use. 4. Enter correct passkey, and then press [OK]. Note - Only “Web hex character codes” is supported. - Page 50 Settings Up Network on Xtreamer 2. Wireless LAN Setup 5. Navigate to OK button and press ENTER to test the connection. Device Name Use this option to give your Xtreamer a unique name under which it will appear on your local Network.
- Page 51 NFS Sharing Setup...
- Page 52 NFS Share Setup To setup an NFS share please go to the list of Media Library resources. Go to NFS and press MENU button...
- Page 53 NFS Share Setup Add NFS client Enter IP address of the relevant device.
- Page 54 NFS Share Setup And the path to the shared folder...
- Page 55 NFS Share Setup Press OK to confirm. The new entry will now be listed under NFS shortcuts in the Media Library.
- Page 56 Network Sharing...
-
Page 57: Network Sharing
Network Sharing How to set-up Folder Sharing in Windows 7 This instruction is for Window 7 Ultimate. 1. Click [Start] – [Control Panel] - [View network status and tasks in Network and Internet]. 2. Click [Change advanced sharing settings] on the right side of the screen after appearing Network and Sharing Centre. - Page 58 Network Sharing How to set-up Folder Sharing in Windows 7 3. Change sharing options (refer to the above image). The sharing option needs to be applied in your home or company (Current Profile).
- Page 59 Network Sharing How to set-up Folder Sharing in Windows 7 4. Select a folder you want to share, and click on the right side of mouse, then click [Properties] on pop-up menu. Click 5. Click *Sharing+ on tap menu, and then click *Advanced Sharing…+.
- Page 60 Network Sharing How to set-up Folder Sharing in Windows 7 Click Click 6. Check on [Share this folder], then click [Permissions]. Click Click 7. Click *Add+ if there is no “Guest” account due to “Everyone” and “Guest” account is needed in order to Network sharing.
- Page 61 Network Sharing How to set-up Folder Sharing in Windows 7 Click 8. Click [OK] after entering [Guest] (refer to the above image). 9. Click [OK] - [Apply] – *OK+ in order to confirm if “Guest” account is added or not. (Both Guest and Everyone account must be present).
- Page 62 Network Sharing How to set-up Folder Sharing in Windows 7 Click 10. Plus, add *Guest+ account on Security tap menu, then click *Edit…+ (refer to the above image). Click 11. Click *Add…+ (refer to the above image).
- Page 63 Network Sharing How to set-up Folder Sharing in Windows 7 12. Click [OK] after typing [Guest] account. 13. Complete setup as confirming “Guest” account added by selecting *OK+ – [Apply] – [OK] (Both Guest and Account must be present). If there is no “Everyone”, you should add it.
- Page 64 Network Sharing How to set-up Folder Sharing in Windows Vista This instruction is for Window Visa Ultimate. 1. Click [Start] - [Network] – [Properties]. Click Click 2. Click [Network discovery] - [Turn on network discovery] and then, click [Apply].
- Page 65 Network Sharing How to set-up Folder Sharing in Windows Vista Click Click 3. Click [File sharing] – [Turn on file sharing], and then click [Apply]. Click Click 4. Important Click [Password protected sharing] – [Turn off password protected sharing], and then click [Apply].
- Page 66 Network Sharing How to set-up Folder Sharing in Windows Vista Click 5. Move cursor to which folder you want to share and then go to the [Properties] on pop-up menu as clicking on the right side of mouse. Click 6. Click [Sharing] – *Advanced sharing…+.
- Page 67 Network Sharing How to set-up Folder Sharing in Windows Vista Click Click 7. Check on [Share this folder], then click [Permissions]. Click 8. Click *Add…+ button in order to add “Guest” account.
- Page 68 Network Sharing How to set-up Folder Sharing in Windows Vista Click 9. Type [Guest], and then click [OK]. Click Click Click 10. Once completed, check if there is “Guest” account or not, then *OK+ – [Apply] – [OK].
- Page 69 Network Sharing How to set-up Folder Sharing in Windows Vista 11. Click [Apply] – *OK+ so you will complete adding “Guest” account on sharing tap menu. Click 12. Confirm if there are both “Guest” and “Everyone” accounts or not on “Security” tap menu. If there is no “Guest”...
- Page 70 Network Sharing How to set-up Folder Sharing in Windows Vista Click 13. Click *Add+ if there is no “Guest” account. Click 14. Type [Guest] (refer to the above image), then click [OK].
- Page 71 Network Sharing How to set-up Folder Sharing in Windows Vista 15. Check if “Guest” account is correctly added or not, then click *Apply+ – [OK]. 16. Click [Close] to set completed.
- Page 72 Network Sharing If folder accessing in window XP isn’t available. The instruction is subject to there isn’t any problem in Network Sharing Network Workgroup, Computer’s name, and so on. You, therefore, need to check Security set up part. Note: This instruction will be able to have effect on changing value, Network Sharing registry key correction in system, hence, you must not change other set value, incorrect setting value will be able to cause serious damage to your system].
-
Page 73: How To Configure Folder Sharing Permission In Windows Xp
Network Sharing How to configure Folder Sharing Permission in Windows XP This instruction is for Windows XP Professional Users. Click 1. Click [My Computer] – [Tools] – *Folder Options…+. Click 2. Click *Folder Options…+ – [View] – *Use Simple File Sharing (Recommended)+ in “Advanced settings” – [OK]. ※... - Page 74 Network Sharing How to configure Folder Sharing Permission in Windows XP Click 3. Select a folder you want to share in Network, then click [Properties] – [Sharing]. Click 4. Click [Share this folder] – [Permission]. If there is no “Guest” account, click *Add…+ button.
- Page 75 Network Sharing How to configure Folder Sharing Permission in Windows XP Click 5. Type [Guest], and then click [OK]. 6. As you check “Guest” account added, the setting will be completed by clicking *OK+ – [Apply] – [OK].
- Page 76 Network Sharing How to configure Folder Sharing Permission in Windows XP Click 7. Click [Share permissions] – [Add]. Click 8. Type [Guest] and then, click [OK].
- Page 77 Network Sharing How to configure Folder Sharing Permission in Windows XP 9. As you check “Guest” account added in Security tap, setting will be completed by *Apply+ – [OK]. You will be able to use this method in order to allow (or block) the access by someone.
- Page 78 For Windows Vista, (1) Select [Start] – [Control Panel] – [User accounts] – [Manage another account] (2) Click [Guest] (3) Change from [Guest accounts is off] to [Turn on] Reboot PC and Xtreamer, then you will be able to connect Network.
- Page 79 Bit Torrent guide...
- Page 80 Step 2, In the Settings turn BT on. Step 3, To access the bit-torrent interface launch a web browser program on your computer and at the address bar, type in the local IP address of your Prodigy followed by /unicgi (for example - http://192.168.0.9/unicgi).
- Page 81 •Click Start to begin download. •Click Stop to stop download. •Click Delete to delete the selected torrent. •Click Refresh to refresh the current status. •Click Down arrow to decrease the priority for the selected torrent. •Click Up arrow to increase the priority for the selected torrent.
- Page 82 Alternatively you can enable Transmission in the Settings and access it’s Web Interface using the Prodigy’s internal IP followed by :9091 (for example 192.168.0.2:9091) The interface is easy to use and is similar to all the most popular bit-torrent clients.
-
Page 83: Dvb-T Tuner
DVB-T Tuner... - Page 84 , check out the programming schedule and, of course, use your Xtreamer Prodigy as a PVR machine. Please note, you need the DVB-T module installed on your Xtreamer Prodigy to use this feature. Xtreamer Prodigy Black comes with the tuner module pre-installed.
- Page 85 In the Settings -> DVB you can scan for available channels, set up storage device for recorded materials and more. Choose a country from the list for automatic scanning of TV channels and Radio Stations available at your location or use the manual scan.
- Page 86 Choose a device to store your recorded files and the priority of the recording processes.
- Page 87 After the scan is complete you can access the TV channels via App tab in the main menu. Channel List To access the list of available channels press the Enter button on your remote when watching TV programs within the DVB. The channel list will be displayed with the channel numbers abd names.
- Page 88 Teletext If the broadcasted stream supports Teletext, press the TTX button to enter the Teletext menu. This option is also available from the Side panel. Subtitle List Press the Subtitle button when watching DVB-T TV programs, the Subtitle List menu will be displayed.
- Page 89 Schedule Recording To enter the Timer list, press RIGHT navigation button when watching TV programs, and select Schedule Recording from the Side Panel option menu. Here you can Add, Edit, Delete recording schedules, Change all schedule status and View schedule recording history. Create a New Schedule In timer list, press the RECORD button on the remote control to add a new schedule recording, then the schedule setting screen appears.
- Page 90 Channel Edit To enter channel edit menu, press RIGHT button when watching TV programs, and select Edit from the Side Panel option menu. In this menu, you can Lock, Delete, Rename, Skip, Swap TV channels and also edit your favorite TV list. Use Up/Down buttons to select and modify the settings. Note: A password needed when you try to enter this menu, default is 0000...
-
Page 92: Android App Installation
Android App Installation... -
Page 93: Android App Installation
Android App Installation To manually install a new Android application you need to download an .apk file on a SD card, USB stick or internal drive. Enter Android home screen Choose the OI FILE MANAGER from the bar on the bottom... - Page 94 Android App Installation Navigate to a folder with the APK files. Choose an application to install and press ENTER.
- Page 95 Android App Installation Press INSTALL...
- Page 96 Android App Installation Once the application is installed you can press OPEN to start it. It will also appear on the main Android screen.
-
Page 97: Web Ui
Web UI Xtreamer Prodigy and SideWinder 3... - Page 98 Android device. Please Note: not all the Web UI features are implemented in Prodigy and SideWinder 3 firmware. More will be added in the upcoming releases.
-
Page 99: Initial Setting For Web Server Connection
In order to use “Web Server” Xtreamer player needs to be connected to a computer via network Firstly, check the player IP. Enter the allocated IP address of Xtreamer in browser URL address bar. The PC and Xtreamer need to be the same local network. -
Page 100: Web Server
It changes FTP connection port number (Default value : 21). - It provides adding user specified RSS address when you use Xtreamer Live. - Web port default value must be 80. - Live keyword: This button enables you to connect “make” button on Xtreamer key board input Live screen. - Page 101 Web Server How to use “Web GUI File Manager” of Web Server Menu Description Video To view video files only. Audio To view audio files. Photos To view photos files. To display all files. It provides managing personal playlist i.e. Mylist, [Media Library] – [Mylist]. Mylist Upload Allows you to upload one or several files.
-
Page 102: Advanced Users Guide
Advanced Users Guide Web Server 4 How to “File Upload & File Download” How to Upload to Web Server 1. If you click [Upload] button, window will be popped up (refer to the next image), and then add up files here. 2. - Page 103 Remote RC control To use Xtreamer virtual remote control applications simply enter Xtreamer’s internal IP into the URL bar of your preferred browser followed by /rc You can also use an iOS or Android device to operate your player remotely.
- Page 104 Firmware Upgrade...
- Page 105 Firmware Upgrade We constantly working to improve our devices. Firmware upgrades bring new features and fixes and will make your Prodigy even more interesting and diverse device. Please check for new releases on our site in the Download section. Download the firmware file and unzip it into the root of a USB stick. Plug the stick into one of USB ports.
- Page 106 Once the upgrade file is detected, press OK to start the procedure. Please be patient, the process takes time. Once the procedure is finished the Prodigy will reboot. Make sure to reset your player to factory default settings after a firmware upgrade (Settings -> System...
- Page 107 4. Plug the device into power and insert the USB stick into one of the ports on the back panel. 5. Make sure the device is OFF and press the Power button on Prodigy for about 10 sec. The device LED will initially turn ON and after few sec it will turn OFF.
-
Page 108: Useful Links
For an updated version of this manual check here. If you are interested to become a member of the Xtreamer community please register on our forum. You might be interested in tip and opinions of your fellow Xtreamer enthusiasts.
Need help?
Do you have a question about the Prodigy and is the answer not in the manual?
Questions and answers