Table of Contents
Advertisement
Advertisement
Table of Contents

Related Manuals for Nakamichi SoungSpace 5


Summary of Contents for Nakamichi SoungSpace 5
- Page 1 Stereo Music System Stereo Music System Owner’s Manual...
- Page 2 EXCEPT as that specified portant operating and maintenance (servicing) in- by Nakamichi in this manual. Failure to comply with this gov- structions in the literature accompanying the appliance. ernment regulation could void your authority to operate the equipment.
-
Page 3: Table Of Contents
This is applicable to sales outside the European Community. Safety Instructions .............. Usage Precautions ............. We thank you for your purchase of this Nakamichi product and External View ..............trust that it will provide you with many years of trouble-free Installation ................ -
Page 4: Safety Instructions
Stereo Music System Safety Instructions The following safety instructions have been included in com- 10. Heat – The appliance should be situated away from heat pliance with safety standard regulations. Please read them sources such as radiators, heat registers, stoves, or other carefully. - Page 5 Stereo Music System Safety Instructions 19. Damage Requiring Service – The appliance should be ser- Caring for the Exterior Panels viced by qualified service personnel when: Caring for the exterior panels of the unit should be limited to A. The power-supply cord or the plug has been damaged; wiping with a soft dry cloth.
-
Page 6: Usage Precautions
Stereo Music System Usage Precautions About the batteries About Remote Control - Do not charge the batteries. Attempting to charge regular Do not expose the remote control to direct sunlight or high (non-rechargeable) batteries may cause fluid leakage or temperatures. Failure to observe this precaution may cause cause the batteries to explode, involving the risk of fire and deformation of the case. -
Page 7: Inserting The Batteries
Stereo Music System Usage Precautions On CDs Inserting the batteries Be sure to observe the following points concerning CD use in order to avoid CD damage, jams, sound skipping, and break- Removing the battery compartment cover (Main remote control) down. Do not insert the 8-cm (3-inch) CDs (CD Singles). -
Page 8: External View
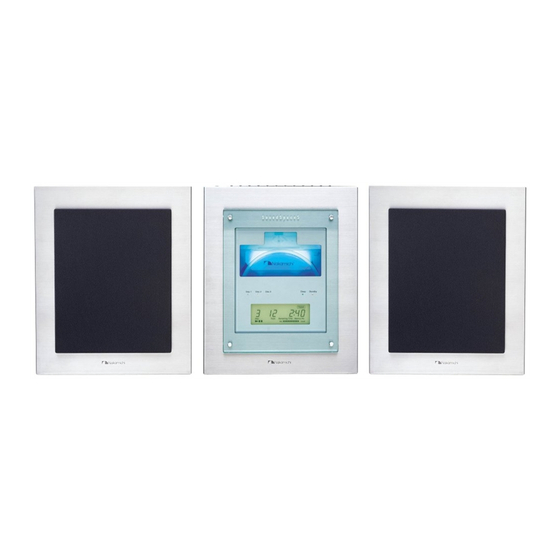
Stereo Music System External View 3 Disc MusicBank System Standby Sleep Disc 3 Disc 2 Disc 1 Memory Repeat Random Preset Disc Track Remaining Time Memory No. Vol. Loud. Speaker Unit (Front) Main Unit (Front) Speaker Unit (Front) (With speaker grill removed) Power Sleep Illumi. -
Page 9: Installation
Stereo Music System Installation Decide the installation locations for the main unit and the left Installing on wall and right speaker units before making the connections. Place You can use the main unit and speaker units fastened to a wall each unit on furniture or the like or hang it from the wall. -
Page 10: Connections
Stereo Music System Connections Notes System Connections - Be sure to disconnect the power cords for this system and all 1. Connect the cables from the rear of the speaker units to the other audio equipments from the AC outlets before making left and right Speaker terminals on the rear of the main unit. -
Page 11: Am Antenna Connection
Stereo Music System Connections AM antenna connection AM wire antenna Supplied AM loop antenna AM Antenna Antenna 75Ω Unbal. Loop Ground 1. Assemble the supplied AM loop antenna. Establishing a ground connection 2. Connect the loop antenna lead to the AM Antenna terminal. 1. -
Page 12: Fm Antenna Connection
Stereo Music System Connections FM antenna connection Supplied dipole antenna FM antenna Orient towards transmitter AM Antenna Antenna 75Ω Unbal. Loop 300-ohm 75-ohm twin-lead cable coaxial cable Supplied antenna adapter Areas in close proximity to strong stations Areas with many noise or interference sources Extend the supplied 300-ohm twin-lead folded dipole and fix it Use shielded coaxial cable (5C-2V or 3C-2V) for the antenna to a wall or similar, in a position that yields best reception (high-... - Page 13 Stereo Music System Connections Connecting source equipment Commonly available active subwoofer To Subwoofer Commonly available RCA pin Output terminal plug cable Commonly available To Digital Output optical digital connec- terminal Tape tion cable Input Play To MD player optical input terminal To Line Output MD player or Commonly available RCA...
-
Page 14: Basic Operation
Stereo Music System Basic Operation Headphone jack Disc Track Source /Power Volume Select FM/AM /Seek Preset Memory Phones Volume Adjustment button Power button/ Source selector Main Unit (Top) Power on Volume adjustment Pressing the Power button switches on the power. You can adjust the volume with the Volume Adjustment but- - Pressing the Source selector on the main remote control will tons... -
Page 15: Using Headphones
Stereo Music System Basic Operation Power button Power button/ Volume Adjustment button Source selector Source selector Play button Source Volume Select Power Loud. FM/AM P.Scan Mono Stop Track/ Tune Power Sleep Illumi. Tuner Tape Mute Tune Preset Sleep FM/Mono P.Scan Disc 1 Disc 2 Disc 3... -
Page 16: Cd Playback (Basic)
Stereo Music System CD Playback (Basic) Dust cover/Disc slot Disc Source Track /Power Volume Select FM/AM /Seek Preset Memory Phones Power button CD Select button Eject button Main Unit (Top) Loading the CD Ejecting a CD Before loading the CD, press the Power button to switch on Before ejecting a CD, press the Power button to switch the the power. - Page 17 Stereo Music System CD Playback (Basic) Disc indicator display The display on the Disc indicator changes as follows accord- ing to CD player operation and state. - Green: CD loaded 3 Disc MusicBank System - Off: No CD loaded Standby Sleep Disc 3 Disc 2...
-
Page 18: Playing Back A Cd
Stereo Music System CD Playback (Basic) Disc Source Track Select FM/AM /Power Volume /Seek Preset Memory Phones CD Select button Stop button Track Search button Play button/Pause button Main Unit (Top) Playing back a CD CD playback 1. Select the CD you wish to listen to with the CD Select but- Press the Stop button. -
Page 19: Disc Scan
Stereo Music System CD Playback (Basic) Track Search button Play button/ Pause button/ Track Search button Stop button Disc Scan button CD Select button Time button Source Volume Select Power Loud. P.Scan FM/AM Stop Mono Track/ Tune Power Sleep Illumi. Tuner Tape Mute... -
Page 20: Cd Playback (Advanced)
Stereo Music System CD Playback (Advanced) Memory play This unit can store up to 50 tracks in memory and play them back. Time button Memory button 1. With the CD Select button, select the CD containing the track you wish to store into memory. (The selected disc number is displayed.) 2. - Page 21 Stereo Music System CD Playback (Advanced) Check the contents of the program With CD playback stopped, press the Memory Call button. - Each time you press the Memory Call button, you can check Memory Clear button Time button the memory number, memory disc number, and memory track on the main unit display.
-
Page 22: Random Play
Stereo Music System CD Playback (Advanced) Random play You can play back all tracks on all inserted CDs in random order. 1. Press the Stop button. Random button 2. Press the Random button. - The Random indicator lights up on the display and ran- dom play starts. - Page 23 Stereo Music System CD Playback (Advanced) Track repeat play The current track is played over and over. 1. Start normal playback (Page 18), memory play (Page 20), Repeat button or random play (Page 22). 2. Press the Repeat button. - The Repeat indicator on the display lights up, the Track indicator flashes, and the current track is played back over and over.
-
Page 24: Fm/Am Broadcast Reception
Stereo Music System FM/AM Broadcast Reception Disc Source Track /Power Volume Select FM/AM /Seek Preset Memory Phones Preset Station button Band selector Auto Tuning button/Manual Tuning button Main Unit (Top) Automatic tuning Preset Memory 1. With the Band selector, select the desired frequency band. 1. - Page 25 Stereo Music System FM/AM Broadcast Reception Band selector/ Preset Scan button Band selector Preset Station button Mono button Auto Tuning button/ Manual Tuning button Source Volume Select Power Loud. FM/AM P.Scan Mono Stop Track/ Tune Power Sleep Illumi. Mute Tuner Tape Sleep Tune...
-
Page 26: Other Functions
Stereo Music System Other Functions Disc Source Track /Power Volume Select FM/AM /Seek Preset Memory Phones Sound Tuning Mode selector/Loudness button Volume Adjustment button Main Unit (Top) Tone/balance adjustment Audio mute ....................Loudness compensation... - Page 27 Stereo Music System Other Functions Volume Adjustment button Sound Tuning Mode selector/ Loudness button Aux button Source Volume Select Power Loud. FM/AM P.Scan Mono Stop Track/ Tune Power Sleep Illumi. Tuner Tape Mute Tune Preset Sleep FM/Mono P.Scan Disc 1 Disc 2 Disc 3 Random...
-
Page 28: Sleep Function
Stereo Music System Other Functions Display section 3 Disc MusicBank System Standby Sleep Disc 3 Disc 2 Disc 1 Random Memory Repeat Preset Disc Track Remaining Time Memory No. Vol. Loud. Main Unit (Front) Sleep function Audio timer Each time you press the Sleep button, the time until the unit You can use any commercially available audio timer to switch automatically goes on standby is changed to the next step in on the power at the set time. - Page 29 Stereo Music System Other Functions Sleep button Illumination button Sleep button Source Volume Select Power Loud. FM/AM P.Scan Mono Stop Track/ Tune Power Sleep Illumi. Tuner Tape Mute Tune Preset Sleep FM/Mono P.Scan Disc 1 Disc 2 Disc 3 Random Repeat D.Scan Time...
-
Page 30: Troubleshooting
Stereo Music System Troubleshooting Some apparent malfunctions may be remedied by simple checks as described below. If the problem persists, please contact your dealer or an authorized Nakamichi service center. No power. After insertion, a disc is ejected again. - Verify that the plug of the power cord is plugged properly into - The disc was inserted upside down. - Page 31 Stereo Music System Troubleshooting FM broadcast is supposed to be in stereo, but sound Remote control cannot be operated. - Verify that power is supplied to the unit. is monaural. - Verify that batteries are inserted properly. - Verify that antenna is connected properly. - Replace both batteries with fresh ones.
-
Page 32: Specifications
Stereo Music System Specifications [Main unit] Control Amplifier Section FM Tuner Section Inputs ......... 2 (Tape, Aux) - All RF levels in microvolts given re 75-ohm antenna input. Outputs ........1 channel (Subwoofer) - Modulation: Mono 100 %, Stereo Pilot: 10 %, Stereo Audio Signal: Recording Outputs .... - Page 33 Speaker grill (green) X 2 * Dimensions do not include protruding parts. Height is the panel height. - Specifications and design are subject to change for further improve- ment without notice. - MusicBank is a registered trademark of Nakamichi Corporation.
- Page 34 Stereo Music System CAUTION Adjusting the knobs, switches and controls, etc. or taking ac- tions not specified herein may result in a harmful emission of laser beams. This Compact Disc Player must be adjusted and repaired only by qualified service personnel. OBSERVERA! I n s t ä...
- Page 35 Stereo Music System The label is attached to the Compact Disc Player on the loca- CLASS 1 LASER PRODUCT tion specified in the illustration. For your own protection, you LUOKAN 1 LASERLAITE KLASS 1 LASERAPPARAT are strongly advised to follow the directions on the label, when handling laser radiation-emitting equipment.
- Page 36 8/F The Grande Bldg., 398 Kwun Tong Rd., Kowloon, Hong Kong Phone: 852(2357)6690 Fax: 852(2357)6697 Nakamichi Europe Berkshire House, 56, Herschel Street, Slough, Berkshire SL1 1PY, England Phone: 44(1753)577 345 Fax: 44(1753)550 211 Web Site http://www.nakamichi.com © Nakamichi Corp. 1999 0D07251A...
Need help?
Do you have a question about the SoungSpace 5 and is the answer not in the manual?
Questions and answers