Toshiba dynadock U3.0 User Manual
Universal docking station
Hide thumbs
Also See for dynadock U3.0:
- Quick start manual (103 pages) ,
- Specifications (2 pages) ,
- User manual (86 pages)
Table of Contents
Advertisement
Advertisement
Table of Contents

Related Manuals for Toshiba dynadock U3.0


Summary of Contents for Toshiba dynadock U3.0
- Page 1 dynadock™ U3.0 User’s Manual...
-
Page 2: Safety Icons
Safety icons This manual contains safety instructions that must be observed to avoid potential hazards that could result in personal injuries, damage to your equipment, or loss of data. These safety cautions have been classified according to the seriousness of the risk, and icons highlight these instructions as follows: Indicates an imminently hazardous situation which, if not avoided, will result in death or serious injury. -
Page 3: Safety Instructions
Only use TOSHIBA AC adaptor ❖ Always use the TOSHIBA AC adaptor that may have been provided with your product, or use AC adaptors specified by TOSHIBA to avoid any risk of fire or other damage to the product. Use of an incompatible AC... - Page 4 TOSHIBA assumes no liability for any damage caused by use of an incompatible adaptor. Use correct power source ❖ Never plug the AC adaptor into a power source that does not correspond to both the voltage and the frequency specified on the regulatory label of the unit.
-
Page 5: Fcc Information
Never place your product in a location with extremely low temperatures ❖ Never place your product in a location where it will be exposed to extremely low temperatures. This may result in a system failure, malfunction or loss of data. Never subject your product to sudden temperature variations ❖... - Page 6 B est conformé à la norme NMB-003 du Canada. Copyright statement This guide is copyrighted by Toshiba Corporation with all rights reserved. Under the copyright laws, this guide cannot be reproduced in any form without the prior written permission of Toshiba.
- Page 7 Microsoft, Windows, Windows Vista and Windows 8 are either registered trademarks or trademarks of Microsoft Corporation in the United States and/or other countries. Other brands and product names are trademarks or registered trademarks of their respective companies.
-
Page 8: Table Of Contents
Contents Safety icons ..............2 Safety instructions ............3 FCC information ............5 Introduction................10 Overview ..............10 Features ............10 Package contents............10 Quick Tour ..............12 Front view ............12 Back view............14 Computer requirements ..........16 Chapter 1: Setting Up the dynadock™ and Connecting Peripherals............17 Setting up the dynadock™ ........17 Install the software ...........17 Assemble the dynadock™... - Page 9 Selecting Extended mode or Mirror mode ..25 Supported display modes ........26 Adjusting audio settings .........27 Configuring audio ports ........27 Charging USB devices using Toshiba USB Sleep and Charge ..............30 Using standby/sleep/hibernation modes with the dynadock™ ............31 Chapter 3: Support..............32 If you need further assistant ........32...
-
Page 10: Introduction
Introduction Thank you for purchasing the dynadock™ U3.0 universal docking station that enables you to connect your computer peripherals through a single ® USB cable to just about any Windows -based computer. NOTE ® All instructions in this Guide are for Windows 7 systems unless otherwise noted. - Page 11 Introduction ❖ Base ❖ USB 3.0 cable ❖ AC adaptor and power cord ❖ DVI-I to VGA adaptor ❖ Installation CD (User’s Guide (this document) and drivers) ❖ Standard limited warranty ❖ Quick Start Guide...
-
Page 12: Quick Tour
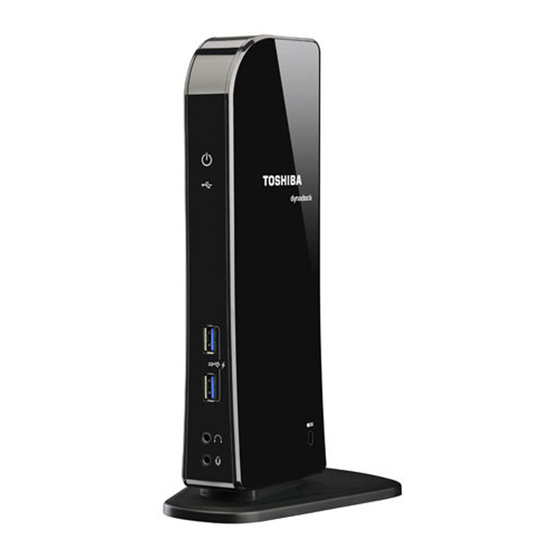
Introduction Quick Tour This section identifies the various components of the dynadock™. For a description of each component, please refer to the corresponding table that follows each illustration. Front view Power light USB light Powered USB 3.0 ports (USB Sleep and Charge .. - Page 13 For more information, please see “Charging USB devices using Toshiba USB Sleep and Charge” on page Note 1: Some USB devices may not support this feature. Note 2: Certain USB devices, such as optical disk drives and hard disk drives, have high power requirements.
-
Page 14: Back View
Introduction Back view 5.1 Channel audio output port USB 3.0 ports USB 2.0 ports Network port ® HDMI out port DVI-I video out port Security lock slot USB 3.0 Type B connector (side of dynadock™) DC-IN (Sample Illustration) Connections on the back of the dynadock™ Component Description 5.1 channel audio... - Page 15 Introduction Component Description USB 3.0 ports Connection points for USB 3.0, and 2.0, devices. Note 1: Certain USB devices, such as optical disk drives and hard disk drives, have high power requirements. Due to the power output limitations of the USB ports, you may not be able to operate more than one such device at a time.
-
Page 16: Computer Requirements
Introduction Computer requirements Component Description ® ® ® 1.6 GHz or higher processor (Intel Pentium /Celeron ® family, or AMD K6 /AMD Athlon™/AMD Duron™ family, or ® compatible processor recommended. Intel Core™ 2 Duo 1.4 GHz or higher processor recommended for optimal video performance.) Memory 1 GB memory or higher (2 GB or more recommended) -
Page 17: Peripherals
Chapter 1 Setting Up the dynadock™ and Connecting Peripherals Setting up the dynadock™ This section provides instructions on setting up the dynadock™. You will need to perform the following steps in the order shown: Install the software Assemble the dynadock™ Connect the power adaptor Connect the dynadock™... - Page 18 ❖ TOSHIBA USB Display Drivers Follow the on-screen instructions to finish the installation. NOTE You will need to read and accept the TOSHIBA software license agreement when prompted, to proceed with the installation. Restart your computer if prompted. NOTE Complete the software installation process before connecting the dynadock™...
-
Page 19: Assemble The Dynadock
Setting Up the dynadock™ and Connecting Peripherals Assemble the dynadock™ Slide the dynadock™ onto the base as shown below. (Sample Illustration) Attaching the base to the dynadock™ Connect the power adaptor Plug the AC adaptor into the DC-IN on the back of the dynadock™. (Sample Illustration) Connecting the AC adaptor to the dynadock™... -
Page 20: Connect The Dynadock™ To Your Computer
Setting Up the dynadock™ and Connecting Peripherals Connect the dynadock™ to your computer Connect the square end of the provided USB cable into the USB type B connector on the back of the dynadock™. Connect the other end of the USB cable to an available USB port on your computer. -
Page 21: Connecting To A Network
DVI component. Adjust the resolution of the external display until an image appears. For more information, see “Using the TOSHIBA dynadock™ U3.0 Utility” (page 24). You can customize the video settings of the dynadock™. See “Adjusting... -
Page 22: Connecting Audio Devices
Setting Up the dynadock™ and Connecting Peripherals opens the Local Area Connection Properties window, allowing you to configure the network settings as required according to your network environment. If you are unsure about the settings, consult your network administrator for assistance. NOTE The dynadock's Network port does not support Wake-up-on-LAN. -
Page 23: Connecting Usb Devices
USB port on the front of the dynadock™.For more information, see “Charging USB devices using Toshiba USB Sleep and Charge” (page 30). -
Page 24: Chapter 2: Using The Dynadock™ And Adjusting Settings
Use the TOSHIBA dynadock™ U3.0 utility to adjust video and audio settings for the device(s) connected to the dynadock™. To access the Audio and Video Dock Utility: ❖ Click the dynadock U3.0 icon in the system tray/notification area of ® your Windows desktop. -
Page 25: Adjusting Video Settings
Using the dynadock™ and Adjusting Settings Option Use this option to: dynadock™ U3.0 Screen Resolution: Changes the resolution setting of the external display connected to the dynadock™. Screen Rotation: Rotates the image on the external display connected to the dynadock™. Extend To: Specifies the extension direction if you are using multiple displays and Extended mode. -
Page 26: Supported Display Modes
Extended mode, connect an external display to the dynadock™ as described in the section “Connecting your external displays” on page and then follow the steps below: Click the dynadock U3.0 icon in the system ® tray/notification area of your Windows desktop. -
Page 27: Adjusting Audio Settings
Using the dynadock™ and Adjusting Settings Resolution Refresh Rates (Hz) Resolution Refresh Rates (Hz) 640 x 480 60, 72, 75, 85 1280 x 960 60, 85 720 x 400 70, 85, 88 1280 x 1024 60, 75 800 x 600 56, 60, 72, 75, 85 1360 x 768 832 x 624... - Page 28 , as described in this section. For example, if you want to use the computer’s audio ports while the computer is docked, you will need to change the default settings. Configuring audio playback ports Click the dynadock U3.0 icon in the system ® tray/notification area of your Windows desktop.
- Page 29 Select Configure and select 5.1 Surround Speakers. Follow the on- screen instructions to complete the configuration (Sample Image) 5.1 Channel surround sound function configuration Configuring audio recording ports (microphone) Click the dynadock U3.0 icon in the system ® tray/notification area of your Windows desktop.
-
Page 30: Charging Usb Devices Using Toshiba Usb Sleep And Charge
You may need to restart your media player for the audio changes to take effect. Charging USB devices using Toshiba USB Sleep and Charge Your dynadock can supply USB bus power (DC 5V) and can charge select USB devices (such as MP3 players and mobile phones) using the dynadock's front USB ports (“USB Sleep and Charge”... -
Page 31: Using Standby/Sleep/Hibernation Modes With The Dynadock
Using the dynadock™ and Adjusting Settings NOTE When there is a current overflow of the external USB device connected to the compatible port, USB bus power (DC 5V) supply may be stopped for safety reasons. To stop charging the USB device, disconnect the device from the dynadock™. -
Page 32: Chapter 3: Support
Before you contact Toshiba Since some problems may be related to software or the operating system, it is important that you investigate other sources of assistance first. Try the following, before contacting Toshiba: ❖ Review the troubleshooting information in your operating system documentation. -
Page 33: Contacting Toshiba
Support Contacting Toshiba Need Help? Toshiba's Support Web sites: www.mytoshiba.com.au/support www.mytoshiba.co.nz/support Toshiba Customer Support Centres: Calling within Australia: 13 30 70 Calling within New Zealand: 0800-445-439 Expert staff provides technical assistance during normal business hours, 5 days a week, excluding public holidays. Be sure to have the following information available before you call: ❖... -
Page 34: Chapter 4: Specifications
Appendix A Specifications Specifications This section summarizes the dynadock™ U3.0 technical specifications.* Physical dimensions Weight Approx. 530g/18.7 ounces (including the Base) Size 47(w) x 77(d) x 223(h) mm (1.8(w) x 3.0(d) x 8.8(h) in.) (not including the parts that extend beyond the main body) 113.8(w) x 130(d) x 235(h) mm (4.5(w) x 5.1(d) x 9.2(h) in.) (including the Base) Environmental requirements... - Page 35 *Specifications are subject to change without further notice. General specifications Computer Interface USB 3.0 or 2.0 Ports and Connectors 2 x USB 3.0 ports and 2 x USB 2.0 ports in the back 2 x USB 3.0 ports in front ("USB Sleep and Charge" icon) (up to DC 5V) with ( 1 x Network Port (RJ-45 10 Base-T/100BASE-TX Ethernet...
-
Page 36: Index
27 audio settings peripherals 20 adjusting 27 to a network 21 USB devices 23 back view connector Quick Tour 14 USB Type B connector 15 contacting Toshiba 33 charging USB devices 30 DC-IN computer requirements 16 connection 19... - Page 37 Index DC-IN port 15 icons display modes safety 2 Extended/Mirror mode 25 indicator light 12 DisplayLink™ Manager install Extend mode 26 software 17 DVI-I video port instructions connecting to 20 safety 3 dynadock™ introduction 10 assemble 19 environmental requirements 34 light features 10 power 12...
- Page 38 29 software install 17 specifications 34 standby/sleep/hibernation using 31 supported display modes dynadock™ 26 TOSHIBA dynadock™ U3.0 Utility using 24 USB 3.0 (USB Sleep and Charge port) USB devices charging 30 connecting 23 using TOSHIBA dynadock™ U3.0 Utility 24...
Need help?
Do you have a question about the dynadock U3.0 and is the answer not in the manual?
Questions and answers