
Related Manuals for Intellinet GUESTGATE MK II


Summary of Contents for Intellinet GUESTGATE MK II
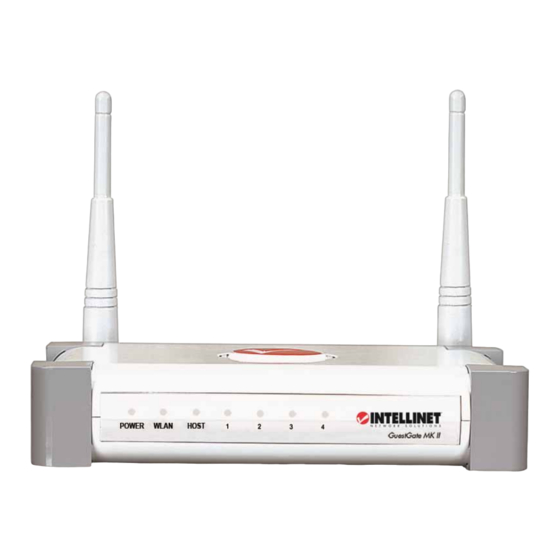
- Page 1 ™ MK II UEST Wireless 300N Hotspot Gateway USER MANUAL MODEL 524827 INT-524827-UM-0710-02...
-
Page 2: Safety And Regulatory Notices
SAFETY AND REGULATORY NOTICES This equipment has been tested and found to comply with the limits for a Class B computing device pursuant to Subpart B of Part 15 of FCC rules, which are designed to provide reasonable protection against such interference when operated in a commercial environment. -
Page 3: Table Of Contents
TABLE OF CONTENTS SAFETY AND REGULATORY NOTICES ......................2 TABLE OF CONTENTS ............................3 INTRODUCTION ..............................4 Function Description ............................4 Installation Examples ............................6 GuestGate Function Basics ..........................8 INSTALLATION ..............................9 Recommended Setup ............................9 Advanced Setup ............................... 14 CONFIGURATION OPTIONS .......................... -
Page 4: Introduction
INTRODUCTION Congratulations on your purchase of the INTELLINET NETWORK SOLUTIONS GuestGate ™ MK II Hotspot Gateway. GuestGate connects guests to your network, allowing them to access only the Internet (Web, Email, Chat and other applications). GuestGate protects your existing network from unauthorized access and, if required, even shields the guest computers among themselves. - Page 5 Block access to certain Web sites or entire IP ranges. 300 Mbps Wireless N Support GuestGate MK II has integrated Wireless LAN support for connection speeds up to 300 Mbps. It supports the latest Wireless N technology as well as legacy Wireless G and Wireless B connections.
-
Page 6: Installation Examples
GuestGate in a SOHO Network Environment This is a typical setup in which the Internet connection is established through an NAT router with an integrated firewall. Modem / Router LAN / Host Network GuestGate MK II Wireless Guest Network Wired Guest Network... - Page 7 GuestGate in an SMB Environment In larger networks GuestGate connects to any available switch port behind the Firewall/Gateway/Router. Firewall / Gateway LAN Switches LAN / Host Network Wireless Guest GuestGate MK II Network Wired Guest Network - 7 -...
-
Page 8: Guestgate Function Basics
GuestGate Function Basics Ports GuestGate features a total of five 10/100 RJ45 ports. One port is for the connection of GuestGate to the host network (Host Port), four ports are available for guest connections (guest ports). The guest ports can be connected to hubs, switches, wireless access points, PCs or notebooks. -
Page 9: Installation
INSTALLATION Recommended Setup This setup method assumes that a DHCP Server such as a router is present in your network. 1. Connection to the Host Network Connect standard RJ45 network cable to GuestGate’s Host Port and to a RJ45 port on your existing network (Ethernet switch port, router switch port, etc.). - Page 10 3. Testing Internet Access Start a PC or notebook which is connected to one of the guest ports. Launch a Web browser and open an Internet Web site such as http://www.intellinet-network.com. You will then see GuestGate’s welcome page. Click “continue” and you will then be forwarded to the Web page you originally entered in the Web browser’s address bar.
- Page 11 4. Accessing the Administrator Web Interface from the Host Network A. Connect to the router (DHCP server) in your network and open the DHCP client log of the router. Connect GuestGate’s host port to one of the router’s LAN ports and power on GuestGate.
- Page 12 5. Changing Administrator Password For security reasons it is recommended to change the administrator password of GuestGate. Follow the steps below to change the password. Click on “Device Settings.” Enter the old password: 1234. Enter a new password (up to 20 characters long). Retype the new password.
- Page 13 Check “Save settings.” Check “Reboot device.” The reboot takes about 25 seconds, after which you will be redirected to GuestGate’s login page when the reboot is completed. NOTE: The interface is designed to let you make changes on all configuration screens without saving each change individually.
-
Page 14: Advanced Setup
Advanced Setup The standard installation of GuestGate is based on the assumption that a DHCP Server is present in your network. If this is not the case, you can still configure GuestGate manually. To do this you need to turn GuestGate on while it is disconnected from the network. If no DHCP Server can be found after 3 minutes, GuestGate will fall back to its default IP address of 192.168.2.1. - Page 15 Right-click the “Local Area Connection” icon and select “Properties” from the context menu. In the “Local Area Connection Properties” window, highlight “Internet Protocol (TCP/IP)” and click on “Properties.” When the “Internet Protocol (TCP/IP) Properties” window opens, you need to make the changes as shown below.
- Page 16 Click “OK” when done. Close the previous Windows by clicking “OK” as well. The TCP/IP settings of your system are now compatible to GuestGate. - 16 -...
- Page 17 2. Connecting to GuestGate via a Web Browser Start your Web browser and open the address http://192.168.2.1. The Administrator Web Interface Login Screen then appears. Enter the password 1234 and click “login.” NOTE: It is recommended that you change the administrator password as described in the previous section.
- Page 18 Configuration Host: With the Configuration Host window displayed, specify the device IP address, IP netmask, IP gateway (Internet connection gateway, router) and DNS server. Device IP address: A free IP address in your network. This is the IP address you assign to GuestGate. IP Netmask: Enter the same netmask (or subnet mask) you use in your network.
-
Page 19: Configuration Options
CONFIGURATION OPTIONS Status Screen 1. Network Information: Basic information about the host network interface. 2. Device Information: Display of the current firmware version, the system’s uptime and the system time. 3. Device Status Displays the status of the password-protected Internet access (“disabled” = no password required) and the status of the Internet access (“enabled”... -
Page 20: Guest Configuration Screen
Guest Configuration Screen This page shows the configuration options for the connected guest computers. 1. Configuration Guest Option “separate network for each client (automatic)” If this option is activated, GuestGate randomly assigns different networks to each connected guest computer. This option should be activated if you want to prevent guest computers from seeing and accessing each other (Layer 3 Client Isolation = on). - Page 21 2. Access Control: Wireless LAN Wireless LAN Allows activating or deactivating the WLAN function of GuestGate. SSID Define the name of the Wireless network, e.g., “free wifi,” “guest wireless,” “hotelwifi,” etc. Operational Mode Here you can select which wireless modes are supported by GuestGate.
- Page 22 Bandwidth Upload Limit Bandwidth control for the upload speed (sending files to the Internet), with options the same as above. Trusted Ethernet Addresses If you wish to permanently authenticate a guest computer, you can add its MAC address to GuestGate’s configuration. GuestGate will not show the welcome page to any computer that has been entered here.
- Page 23 Access Control: Welcome Screen Welcome Screen Enable or disable the welcome page for guests. (Default = enabled.) If this parameter is set to “disabled,” all guest users can access the Internet freely. No welcome page is displayed, even if a guest password is defined below. Global Guest Password If you require your guests to enter a password to access the Internet, you can define it here.
-
Page 24: Host Configuration Screen
Host Configuration Screen 1. Configuration Host Option “dhcp” GuestGate automatically receives the IP address, netmask, gateway and DNS server information from the DHCP server in your network, typically a router. Option “static” In larger networks, a manual configuration of the IP settings may be necessary. Select “static”... - Page 25 If you wish to block certain IP addresses, domain names or an entire network, you can enter this here. “Add Host Address” is used to enter domain names such as guestgate.com or intellinet-network.com. Enter the domain name and click “Add Host.” Repeat the steps to block additional domains.
- Page 26 Walled Garden Addresses You can grant an unauthenticated user limited access to Web sites, both external and internal, using the Walled Garden function. You can define external and internal addresses to which every user, logged in or not, has access. This area is called the Walled Garden.
- Page 27 Using Walled Garden in combination with a custom welcome screen (see next section), you can allow guests access to Web sites of your choosing without providing a password. The welcome page could look like this: You need to enter the URLs and IP addresses your guests can access without providing a password in the Walled Garden configuration.
-
Page 28: Welcome Screen Configuration
Welcome Screen Configuration 1. Redirect first request to URL: When a guest connects to GuestGate for the first time, GuestGate can redirect the guest to a Web page you want them to see, e.g., a page displaying special offers or advertising. - Page 29 4. Welcome Text You can overwrite the default text with your own custom text. GuestGate supports HTML tags to format your text. Below is a small selection: <strong>bold text</strong> <font color = red>red text</font> <font color = #00ff00”>green text</font> <u>underlined text</u> <u><strong><font color = red>red bold underlined text</font></strong></u>...
-
Page 30: Time / Scheduler Configuration
Time / Scheduler Configuration 1. Time Setup (Time Zone and Update Interval) Select the time zone in which you are located. The update interval parameter defines how often GuestGate re-synchronizes the internal time with the Internet time. - 30 -... - Page 31 2. Reboot Device With this parameter, you can set up GuestGate to perform a scheduled restart once per day at a time of your choosing. If you have a lot of users connected to GuestGate, this feature will improve overall system stability. Furthermore, you can use this feature to force all users to re-authenticate at a defined time if you so desire.
-
Page 32: Device Settings Configuration
Device Settings Configuration This page allows changing the administrator password, saving and restoring the configuration as well as upgrading the firmware. 1. Admin Password To change the administrator password, you need to enter the old password and the new password. You also must confirm the new password by retyping it. Click “Change”... - Page 33 Select “Save File.” Specify the location and rename the file from “config.cgi” to “log.txt.” Click “Save.” Start MS Excel and open the file log.txt. You’ll then be presented with the Excel’s text import wizard. Select “Delimited” and click “Next >.” - 33 -...
- Page 34 Select “Tab” and click “Next >.” On the next screen, you can assign different formats to the individual columns. Recommended values for the “login date” and “logout date” column are “Date YDM.” Click “Finish” and MS Excel will open the log file. 3.
-
Page 35: Firmware Upgrade Process
Click on the link "Click here for more information” and you will be taken to the Web page that includes information about the new firmware. b) Manually check the download section at www.intellinet-network.com. Upgrade Process: Open the Device Settings screen of the Administrator menu. -
Page 36: Exit Screen
Exit Screen This page lets you save the new configuration. [x] Save Settings All changes you made to the configuration will only be remembered if you save the changes by activating this check box. If you made changes in some of the configuration screens and fail to perform this step before closing the Web browser, all changes will be lost. -
Page 37: Questions & Answers
QUESTIONS & ANSWERS Q: What is the default IP address of GuestGate? A: The default IP address is: 192.168.2.1 Q: What is the default administrator password of GuestGate? A: The default password is: 1234 Q: How do I reset GuestGate to the factory default state? A: Power on GuestGate, wait 5 seconds and then press the reset button on the back panel for 10 seconds. - Page 38 Q: Can I use HTML code in my custom welcome page? A: Yes. GuestGate does not limit you in any way. If you are an HTML Web developer you can create an enhanced welcome page simply by pasting the HTML code into the welcome page configuration field.
- Page 39 12. Q: Does GuestGate support PHP, ASP or Perl? A: No. GuestGate does not support server-side scripting. 13. Q: How often does a guest need to authenticate on the welcome page? A: Only once. As long as GuestGate is not restarted and the guest remains connected to GuestGate, the guest will never again be prompted to enter the password and agree to your terms and conditions.
- Page 40 19. Q: Some of my guests wish to play a network game, or share files and folders. But that does not work. How come the connected guest computers cannot communicate with each other? A: That is because Layer 3 Client Isolation is activated by default. You need to disable it to allow network communication between the connected guest computers.
-
Page 41: Appendix
APPENDIX Below you can find a list of common TCP/IP service ports. These ports can be entered in the host configuration of GuestGate to block access to certain services. Port Number Service Name / Description SSH (Secure Shell) Telnet SMTP (Outgoing Mail, Sendmail Server Port) TFTP (Trivial File Transfer Protocol) Gopher Finger... -
Page 42: Warranty Information
Informacje dotyczące gwarancji znajdują się na stronie Polski www.intellinet-network.com/warranty. Poliza de Garantia INTELLINET — Datos del importador y responsable ante el consumidor IC México Intracom México, S.A. de C.V. • Av. Interceptor Poniente # 73, Col. Parque Industrial La Joya, Cuautitlan Izcalli, Estado de México, C.P. - Page 43 - 43 -...
- Page 44 INTELLINET NETWORK SOLUTIONS™ offers a complete line of active and passive networking products. Ask your local computer dealer for more information or visit www.intellinet-network.com Copyright © INTELLINET NETWORK SOLUTIONS All products mentioned are trademarks or registered trademarks of their respective owners.
Need help?
Do you have a question about the GUESTGATE MK II and is the answer not in the manual?
Questions and answers