Table of Contents
Advertisement
Advertisement
Table of Contents

Subscribe to Our Youtube Channel
Related Manuals for BH FITNESS X8 Elliptical


Summary of Contents for BH FITNESS X8 Elliptical
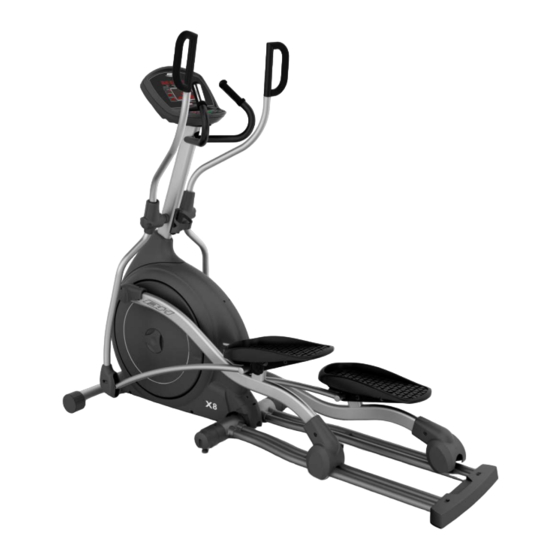
- Page 1 BH FITNESS X8 ELLIPTICAL OWNER S MANUAL...
-
Page 2: Before You Begin
BH X8 ELLIPTICAL INTRODUCTION ongratulations for selecting the X8 Elliptical as a fitness resource. The BH Fitness Elliptical offers many exercise programs that benefit users of all levels and ages. The X8 is designed to make your workouts more effective and enjoyable. -
Page 3: Table Of Contents
BH X8 ELLIPTICAL TABLE OF CONTENTS SECTION PAGE 1. IMPORTANT SAFETY INSTRUCTIONS ............. 3 2. ASSEMBLY INSTRUCTIONS ..............5 3. COMPUTER CONSOLE................25 4. COMPUTER CONSOLE DESCRIPTIONS ..........27 5. PROGRAM PROFILES................28 6. MAKING ENTRIES ..................29 7. PROGRAM MODE..................30 8. -
Page 4: Important Safety Instructions
BH X8 ELLIPTICAL SECTION 1 IMPORTANT SAFETY INSTRUCTIONS Read all instructions before using the elliptical. User Safety 1. Users should pass a full medical examination before they begin an exercise program. Work at the recommended exercise level. Do not over exert yourself. If you feel any pain or discomfort, stop exercising immediately and consult your doctor. -
Page 5: Power Supply
BH X8 ELLIPTICAL IMPORTANT SAFETY INSTRUCTIONS CONTINUED WARNING: To reduce the risk of fire, electric shock, injury to persons or inflicting the harm of a burn: 7. Remove the batteries before adding or removing parts. 8. Do not operate the unit under a blanket or pillow. Excessive heating can occur and cause fire, electric shock, injury to persons or inflict the harm of a burn. -
Page 6: Assembly Instructions
BH X8 ELLIPTICAL SECTION 2 – ASSEMBLY INSTRUCTIONS... - Page 7 BH X8 ELLIPTICAL ASSEMBLY INSTRUCTIONS CONTINUED Lower Handrails Pedal Rods Upper Control Tube...
- Page 8 BH X8 ELLIPTICAL ASSEMBLY INSTRUCTIONS CONTINUED Pedal Rod Cover Computer Cover Rear Running Leg Cover Heart Rate Belt (wireless pulse emitter)
- Page 9 BH X8 ELLIPTICAL ASSEMBLY INSTRUCTIONS CONTINUED STEP ITEM Description QTY STEP ITEM Description Nut M8 (PL item 92) Bolt M8X45 (PL item 101) Spring Washer M10 (PL item 90) Nylon Nut M8 (PL item 9) Screw ψ4X16 (PL item 25)
- Page 10 BH X8 ELLIPTICAL ASSEMBLY INSTRUCTIONS CONTINUED For safety, it is recommended that a minimum of two people assemble this elliptical trainer.
- Page 11 BH X8 ELLIPTICAL STEP 1. Assembly of frame and front lower tube. 1.1 As required, lift the frame up onto foam or cardboard to assist during assembly. 1.2 Align the bolts in the front lower tube with the holes in the front of the frame. Assemble the...
- Page 12 BH X8 ELLIPTICAL ASSEMBLY INSTRUCTIONS CONTINUED STEP 2. Assembly of frame and running leg set. 1.1 Align the holes in the steel plate of the running legs with the holes at the rear of the frame and attach using M10 washers and M10 bolts as shown.
- Page 13 BH X8 ELLIPTICAL ASSEMBLY INSTRUCTIONS CONTINUED Middle foot pads Rear foot pads STEP 3. Assembly of center frame cover and rear running leg cover. 1.1 Align the hole in the center shroud with the hole in the center of the running leg set and attach with M5 bolt.
- Page 14 BH X8 ELLIPTICAL ASSEMBLY INSTRUCTIONS CONTINUED STEP 4. Assembly of pedal rods and frame. 1.1 For the left side. Slide the wave washer onto the left crankshaft of the frame. 1.2 One person should hold the left pedal rod. 1.3 A second person slide the left pedal rods steel tube onto the left crankshaft followed by the flat washer and fasten with M8 bolt.
- Page 15 BH X8 ELLIPTICAL ASSEMBLY INSTRUCTIONS CONTINUED STEP 5. Assembly of upper control tube and frame. 1.1 Insert the wires and the Upper Control Tube into the Control Tube plastic cover (see photo on next page). Insert the Control Tube into the tube of the Frame.
- Page 16 BH X8 ELLIPTICAL ASSEMBLY INSTRUCTIONS CONTINUED Additional Upper Control Tube Assembly Information If necessary, change the direction of the Control Tube plastic cover in order to insert the wire into the tube. Turn the plastic cover back into position. After tightening the bolts, press the plastic cover into place.
- Page 17 BH X8 ELLIPTICAL ASSEMBLY INSTRUCTIONS CONTINUED Step 6.1.1 Step 6.1.1 Step 6.1.2. STEP 6. Assembly of lower handrails, upper control tube and pedal rods. NOTES: 1. The left and right lower handrails are different. Look for “LEFT” or “RIGHT” labels.
- Page 18 BH X8 ELLIPTICAL ASSEMBLY INSTRUCTIONS CONTINUED STEP 7. Assembly of upper handrail to lower handrail. NOTE: The upper left and right handrails are different. Make sure to install them as shown in the illustration above with the curve outward and rearward.
- Page 19 BH X8 ELLIPTICAL ASSEMBLY INSTRUCTIONS CONTINUED STEP 8. Assembly of handrail covers. 1.1 Place the front left cover and the rear left cover on the horizontal bar and fasten them with M4 screw. 1.2 Place the front right cover and the rear right cover on the horizontal bar and fasten them...
- Page 20 BH X8 ELLIPTICAL ASSEMBLY INSTRUCTIONS CONTINUED STEP 9. Assembly of handrail and pedal rods plastic covers. 1.1 Place the plastic cover on the front top of the left pedal rods, make sure the bolt hole on the plastic and the bolt hole on the steel tube are aligned, then fasten the plastic cover with M4 bolts.
- Page 21 BH X8 ELLIPTICAL ASSEMBLY INSTRUCTIONS CONTINUED STEP 10. Assembly of foot pedals to pedal rods base plate. Make sure the bolt holes on the left foot pedal and left base plate are aligned and fasten them loosely with flat washers and M5 bolts. Fasten again to prevent loosening during use.
- Page 22 BH X8 ELLIPTICAL ASSEMBLY INSTRUCTIONS CONTINUED Four AA, 1.2V rechargeable batteries here STEP 11. Assembly of console. NOTE: Be careful not to pinch or damage the cables. Fasten the console to the top of the mast with the bolts under the console using M6 acorn nuts and flat washers.
- Page 23 BH X8 ELLIPTICAL ASSEMBLY INSTRUCTIONS CONTINUED STEP 12. Assembly of bottle holder. Place the bottle holder on the mast and fasten with M4 bolts.
- Page 24 BH X8 ELLIPTICAL ASSEMBLY INSTRUCTIONS CONTINUED Step 13 Adjustable Width Technology (AWT) AWT allows you to adjust the horizontal distance between the foot pedals. Each pedal has a range of 1~5. You can see the number through a small opening near the top of each pedal.
- Page 25 BH X8 ELLIPTICAL ASSEMBLY INSTRUCTIONS CONTINUED STEP 14. Check and adjust foot pad contact 1.1 Try to slide a piece of paper under all four foot pads to verify that they all touch the floor. 1.2 If a rear pad is lifted, then lift the middle pad until the rear touches the floor.
-
Page 26: Computer Console
BH X8 ELLIPTICAL SECTION 3 – COMPUTER CONSOLE... -
Page 27: Console Display
BH X8 ELLIPTICAL Console Display During a workout, the computer console is powered by the energy generated by the pedal motion (self generated). If the unit is not being pedaled, the console will be powered by the four 2A batteries which allow the console to stay on for 2 minutes. The LED backlight will turn off after the first minute of inactivity. -
Page 28: Computer Console Descriptions
BH X8 ELLIPTICAL SECTION 4 – COMPUTER CONSOLE DESCRIPTIONS A. QUICK/START - Press the QUICK START button to begin a MANUAL workout without having to set individual information. You can adjust the resistance level with the + / - keys. All values will be set to defaults. -
Page 29: Program Profiles
BH X8 ELLIPTICAL SECTION 5 – PROGRAM PROFILES MANUAL is the default program. Resistance is at a fixed level through all segments, but can be adjusted up or down if desired. By increasing the resistance you can increase your heart rate and burn more calories. -
Page 30: Making Entries
BH X8 ELLIPTICAL SECTION 6 – MAKING ENTRIES NOTE: There is no ON/OFF button. The display will automatically turn on after approximately 2-3 seconds of pedal movement. If you stop pedaling, the display will automatically turn off. You will hear a confirmation “Beep” when you press any key. -
Page 31: Program Mode
BH X8 ELLIPTICAL MAKING ENTRIES CONTINUED lower target heart rates than determined by this formula. SECTION 7 – PROGRAM MODE 1. Enter your weight. 2. Select a workout. 3. Set level. If you press Quick/Start instead of Enter/Select after setting the level, the timer will count UP from 0 to 99 minutes. -
Page 32: Target Heart Rate Calculation
BH X8 ELLIPTICAL SECTION 9 – TARGET HEART RATE CALCULATION NOTE: This is not a medical appliance and therefore the heart/pulse rate shown is merely for guideline purposes. Stop exercising before you exceed 85% of your maximum heart rate. The calculation is explained below.
Need help?
Do you have a question about the X8 Elliptical and is the answer not in the manual?
Questions and answers