Table of Contents
Advertisement
Advertisement
Table of Contents

Related Manuals for Mio MiVue 388


Summary of Contents for Mio MiVue 388
- Page 1 MiVue 388 User Manual...
-
Page 2: Table Of Contents
Table of Contents Precautions and notices .................3 Getting to know the recorder ................4 Front and rear components ..............4 Side components ..................5 Inserting a memory card ................6 Using your recorder in a vehicle ..............6 Connecting to an external device ............8 Operating basics ....................8 Turning the recorder ON and OFF ............8 Hardware reset .................9 Setting the date and time ...............9... - Page 3 MiVue Manager ....................15 Installing MiVue Manager ..............15 Playing the recording files ..............15 Settings menu..................19 Caring for your device ...................19 Regulatory information ................20 CE ......................20 Industry Canada (IC) ................21 WEEE ......................21 Safety precautions ................22 About charging ................22 About the charger ................
-
Page 4: Precautions And Notices
Precautions and notices ƒ ƒ Forƒyourƒownƒsafety,ƒdoƒnotƒoperateƒtheƒcontrolsƒofƒtheƒproductƒwhileƒdriving. ƒ ƒ Aƒwindowƒmountƒisƒneededƒwhenƒusingƒtheƒrecorderƒinƒaƒcar.ƒMakeƒsureƒthatƒyouƒ placeƒtheƒrecorderƒinƒanƒappropriateƒplace,ƒsoƒasƒnotƒtoƒobstructƒtheƒdriver’sƒviewƒorƒ deploymentƒofƒairbags. ƒ ƒ Makeƒsureƒthatƒnoƒobjectƒisƒblockingƒtheƒcameraƒlensƒandƒnoƒreflectiveƒmaterialƒ appearsƒnearƒtheƒlens.ƒPleaseƒkeepƒtheƒlensƒclean. ƒ ƒ Ifƒtheƒcar’sƒwindscreenƒisƒtintedƒwithƒaƒcoating,ƒitƒmayƒimpactƒtheƒrecordingƒquality. ƒ ƒ GPSƒisƒoperatedƒbyƒtheƒUnitedƒStatesƒgovernment,ƒwhichƒisƒsolelyƒresponsibleƒforƒtheƒ performanceƒofƒGPS.ƒAnyƒchangeƒtoƒtheƒGPSƒsystemƒcanƒaffectƒtheƒaccuracyƒofƒallƒ GPSƒequipment. ƒ ƒ GPSƒsatelliteƒsignalsƒcannotƒpassƒthroughƒsolidƒmaterialsƒ(exceptƒglass).ƒWhenƒyouƒ areƒinsideƒaƒtunnelƒorƒbuilding,ƒGPSƒpositioningƒisƒnotƒavailable.ƒSignalƒreceptionƒcanƒ beƒaffectedƒbyƒsituationsƒsuchƒasƒbadƒweatherƒorƒdenseƒoverheadƒobstaclesƒ(e.g.ƒtrees,ƒ tunnels,ƒviaductsƒandƒtallƒbuildings).ƒ ƒ ƒ TheƒGPSƒpositioningƒdataƒisƒforƒreferenceƒonly. -
Page 5: Getting To Know The Recorder
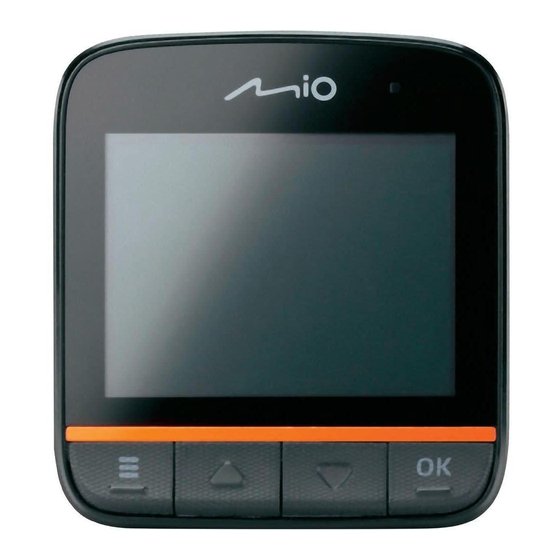
Getting to know the recorder Front and rear components Name Description ❶ Camera lens Makeƒsureƒthatƒnoƒobjectƒisƒblockingƒtheƒcameraƒlensƒandƒnoƒreflectiveƒ materialƒappearsƒnearƒtheƒlens. ❷ Speaker Outputsƒaudio. ❸ Status GlowsƒinƒgreenƒwhenƒtheƒrecorderƒisƒturnedƒON. indicator Glowsƒinƒredƒwhenƒrecordingƒisƒinƒprogress. ❹ OK key ActsƒasƒtheƒENTERƒbutton.ƒ(Thisƒkey’sƒfunctionƒmayƒvaryƒonƒdifferentƒ screens.) ❺ Down key Movesƒtoƒtheƒnextƒitem.ƒ(Thisƒkey’sƒfunctionƒmayƒvaryƒonƒdifferentƒ screens.) ❻ Up key Movesƒtoƒtheƒpreviousƒitem.ƒ(Thisƒkey’sƒfunctionƒmayƒvaryƒonƒdifferentƒ screens.) -
Page 6: Side Components
Name Description ❼ Menu key EntersƒtheƒSettingsƒmenu. Returnsƒtoƒtheƒpreviousƒscreen. Side components Name Description ❶ Device mount Forƒtheƒdeviceƒmount. socket ❷ Mini-USB Connectsƒtoƒtheƒcharger. connector ❸ HD OUT Connectsƒtoƒanƒexternalƒdevice. connector ❹ Power key PressƒtoƒturnƒtheƒrecorderƒONƒandƒ OFF. ❺ Memory card DataƒisƒrecordedƒtoƒaƒMicroSDƒ slot card. Note: Youƒareƒadvisedƒtoƒuseƒaƒ Classƒ6ƒmemoryƒcardƒwithƒatƒ leastƒ8GBƒcapacity. ❻... -
Page 7: Inserting A Memory Card
Inserting a memory card CAUTION:ƒDoƒnotƒapplyƒpressureƒtoƒtheƒcentreƒofƒtheƒmemoryƒcard. Youƒhaveƒtoƒinsertƒaƒmemoryƒcardƒbeforeƒyouƒcanƒstartƒrecording.ƒ TheƒrecorderƒsupportsƒMicroSDƒcardsƒwithƒupƒtoƒ32GBƒcapacity.ƒYouƒareƒadvisedƒtoƒuseƒaƒ Classƒ6ƒmemoryƒcardƒwithƒatƒleastƒ8GBƒcapacity. Holdƒtheƒcardƒ(MicroSD)ƒbyƒtheƒedgesƒandƒgentlyƒinsertƒitƒintoƒ theƒslotƒwithƒtheƒlabelƒfacingƒtheƒcameraƒlensƒofƒyourƒMio. Toƒremoveƒaƒcard,ƒgentlyƒpushƒtheƒtopƒedgeƒofƒtheƒcardƒinwardsƒ toƒreleaseƒit,ƒandƒpullƒitƒoutƒofƒtheƒslot. Note: MioƒTechnologyƒdoesƒnotƒguaranteeƒtheƒproduct’sƒ compatibilityƒwithƒMicroSDƒcardsƒfromƒallƒmanufacturers. Note: Beforeƒyouƒstartƒrecording,ƒpleaseƒformatƒtheƒMicroSDƒcardƒtoƒavoidƒmalfunctionƒ causedƒbyƒfilesƒnotƒcreatedƒbyƒMiVueƒ388.ƒYouƒcanƒformatƒtheƒcardƒonƒyourƒcomputerƒorƒ onƒMiVueƒ388ƒ(pressingƒtheƒMenuƒkeyƒ ƒandƒthenƒselectƒtheƒformatƒfeature). Using your recorder in a vehicle CAUTION: ƒ ƒ Selectƒanƒappropriateƒlocationƒforƒmountingƒtheƒdeviceƒinƒaƒvehicle.ƒNeverƒplaceƒ theƒdeviceƒwhereƒtheƒdriver’sƒfieldƒofƒvisionƒisƒblocked. ƒ ƒ Ifƒtheƒcar’sƒwindscreenƒisƒtintedƒwithƒaƒreflectiveƒcoating,ƒitƒmayƒbeƒathermicƒandƒ impactƒtheƒGPSƒreception.ƒInƒthisƒinstance,ƒpleaseƒmountƒyourƒdeviceƒwhereƒthereƒ isƒaƒ“clearƒarea.” ƒ ƒ DOƒNOTƒinsertƒorƒremoveƒtheƒmemoryƒcardƒwhenƒoperatingƒtheƒrecorder. - Page 8 Toƒensureƒtheƒoptimalƒrecordingƒangle,ƒpayƒattentionƒtoƒtheƒfollowing: 1.ƒ Makeƒsureƒthatƒyourƒcarƒisƒparkedƒonƒaƒlevelƒground.
-
Page 9: Connecting To An External Device
2.ƒ Whenƒadjustingƒtheƒangleƒofƒmounting,ƒmakeƒsureƒthatƒtheƒcamera’sƒviewƒisƒparallelƒ withƒtheƒlevelƒground,ƒandƒtheƒground/skyƒratioƒisƒcloseƒtoƒ6/4. Useƒcableƒclipsƒtoƒsecureƒtheƒpowerƒcordƒsoƒthatƒitƒdoesƒnotƒinterfereƒwithƒdriving.ƒToƒ ensureƒtheƒhighestƒqualityƒrecordings,ƒyouƒareƒadvisedƒtoƒplaceƒtheƒrecorderƒnearƒtheƒrearƒ viewƒmirror. Connecting to an external device Forƒaƒbetterƒviewingƒexperience,ƒyouƒcanƒconnectƒtheƒrecorderƒtoƒanƒexternalƒviewingƒ deviceƒthatƒsupportsƒtheƒHighƒDefinitionƒ(HD)ƒfeatureƒviaƒaƒHDƒcableƒ(notƒsupplied). Operating basics CAUTION: DOƒNOTƒremoveƒorƒinsertƒtheƒmemoryƒcardƒwhileƒrecording. Connectƒtheƒrecorderƒtoƒtheƒcarƒchargerƒaccordingƒtoƒtheƒinstallationƒinstructionsƒinƒtheƒ previousƒ“Usingƒyourƒrecorderƒinƒaƒvehicle”ƒsection. Turning the recorder ON and OFF Onceƒtheƒvehicleƒengineƒisƒstarted,ƒtheƒrecorderƒautomaticallyƒturnsƒon.ƒByƒdefault,ƒtheƒ recordingƒwillƒstartƒrightƒafterƒtheƒrecorderƒturnsƒon. WhenƒaƒGPSƒfixƒisƒestablished,ƒtheƒ ƒiconƒwillƒshowƒonƒtheƒtop-rightƒcornerƒofƒtheƒ screen.ƒTheƒnumberƒofƒtheƒverticalƒbarsƒinƒtheƒiconƒindicatesƒtheƒstrengthƒofƒtheƒsignal. Whenƒtheƒvehicleƒengineƒisƒturnedƒoff,ƒtheƒrecorderƒautomaticallyƒsavesƒtheƒrecording.ƒByƒ default,ƒtheƒrecorderƒwillƒturnƒoffƒimmediately. Toƒmanuallyƒturnƒtheƒrecorderƒonƒandƒoff,ƒpressƒandƒholdƒtheƒPowerƒkeyƒ ƒforƒ2ƒseconds. -
Page 10: Hardware Reset
Hardware reset Occasionally,ƒyouƒmayƒneedƒtoƒperformƒaƒhardwareƒresetƒwhenƒtheƒrecorderƒstopsƒ responding;ƒorƒappearsƒtoƒbeƒ“frozen”ƒorƒ“locked-up.” Toƒperformƒaƒhardwareƒreset,ƒpressƒandƒholdƒtheƒPowerƒkeyƒ ƒforƒ5ƒseconds. Setting the date and time Toƒmakeƒsureƒofƒtheƒcorrectƒdateƒandƒtimeƒforƒyourƒrecordings,ƒpleaseƒcheckƒtheƒdateƒandƒ timeƒsettingsƒbeforeƒyouƒbeginƒrecording. 1.ƒ PressƒtheƒMenuƒkeyƒ ƒtoƒaccessƒtheƒSettingsƒmenu. 2.ƒ SelectƒDate / TimeƒandƒpressƒtheƒOKƒkey. 3.ƒ Useƒtheƒ ▲ ƒandƒ ▼ ƒkeysƒtoƒadjustƒtheƒvalueƒandƒpressƒtheƒOKƒkey.ƒ 4.ƒ RepeatƒStepƒ3ƒuntilƒallƒfieldsƒhaveƒbeenƒchanged. Recording in driving mode Continuous recording Whenƒyouƒconnectƒtheƒcarƒchargerƒtoƒtheƒcigaretteƒlighterƒinƒtheƒcar,ƒtheƒrecorderƒwillƒstartƒ continuousƒrecordingƒautomatically.ƒTheƒrecordingƒmayƒbeƒdividedƒintoƒseveralƒvideoƒclips;ƒ recordingƒwillƒnotƒstopƒbetweenƒvideoƒclips. Theƒrecorderƒautomaticallyƒstopsƒandƒsavesƒtheƒrecordingƒwhenƒtheƒvehicleƒengineƒisƒ turnedƒoff.ƒIfƒyouƒwantƒtoƒstopƒrecordingƒmanually,ƒpressƒtheƒ ▼ ƒkey. Whenƒrecordingƒisƒnotƒinƒprogress,ƒyouƒcanƒmanuallyƒstartƒtheƒcontinuousƒrecordingƒatƒanyƒ... -
Page 11: Event Recording
Note:ƒIfƒcontinuousƒrecordingƒisƒongoingƒbutƒthereƒisƒnotƒenoughƒspaceƒonƒyourƒmemoryƒ card,ƒnewƒvideoƒclipsƒwillƒreplaceƒtheƒoldƒones. Event recording Byƒdefault,ƒifƒanƒeventƒhappens,ƒsuchƒasƒsuddenƒimpact,ƒhigh-speedƒdriving,ƒanƒoverdoneƒ turnƒorƒanƒaccidentalƒcrash,ƒtheƒGƒsensorƒwillƒpromptƒtheƒrecorderƒtoƒstartƒanƒ"emergency"ƒ recordingƒ(anƒeventƒrecording). Ifƒyouƒwantƒtoƒmanuallyƒstartƒanƒeventƒrecordingƒwhileƒcontinuousƒrecordingƒisƒinƒprogress,ƒ pressƒtheƒOKƒkey. Toƒstopƒrecording,ƒpressƒtheƒ ▼ ƒkey. Theƒeventƒrecordingsƒcanƒbeƒfoundƒinƒtheƒ“Emergency”ƒcategoryƒforƒfileƒplayback. Camera mode Ifƒtheƒrecordingƒisƒinƒprogress,ƒpressƒtheƒ ▼ ƒkeyƒtoƒstopƒrecording.ƒWhenƒready,ƒpressƒtheƒ ▼ ƒ keyƒtoƒtakeƒtheƒphoto. Playback mode Toƒselectƒaƒvideoƒorƒphotoƒforƒplayback: 1.ƒ PressƒtheƒMenuƒkeyƒ ƒtoƒaccessƒtheƒSettingsƒmenu. 2.ƒ SelectƒFile PlaybackƒandƒpressƒtheƒOKƒkey. 3.ƒ SelectƒtheƒdesiredƒtypeƒandƒpressƒtheƒOKƒkey.ƒTheƒtypesƒinclude: Video (continuousƒrecordings) ƒ Emergencyƒ(eventƒrecordings) ƒ Photo ƒ 4.ƒ SelectƒtheƒdesiredƒfileƒfromƒtheƒlistƒandƒpressƒtheƒOKƒkey. -
Page 12: Safety Camera Alerts
Duringƒplayback,ƒyouƒcan: ƒ ƒ PressƒtheƒMenuƒkeyƒ ƒtoƒreturnƒtoƒtheƒlist. ƒ ƒ PressƒtheƒOKƒkeyƒtoƒpauseƒorƒresumeƒvideoƒplayback. Pressƒtheƒ ▲ / ▼ ƒkeyƒtoƒswitchƒtoƒtheƒprevious/nextƒfile. ƒ ƒ Safety camera alerts Note:ƒTheƒsafetyƒcameraƒalertsƒfunctionƒisƒnotƒallowedƒtoƒuseƒinƒFrance,ƒGermanyƒandƒ Switzerland. Youƒcanƒreceiveƒalertsƒtoƒwarnƒyouƒaboutƒtheƒlocationsƒofƒsafetyƒcameras,ƒ whichƒwillƒenableƒyouƒtoƒmonitorƒyourƒspeedƒthroughƒtheseƒareas. Pressƒtheƒ ▲ ƒ( )ƒkeyƒtoƒdisplayƒtheƒdetectionƒrangeƒandƒstatusƒofƒsafetyƒ cameras.ƒPressƒtheƒ ▲ ƒ( )ƒkeyƒagainƒtoƒreturnƒtoƒtheƒpreviousƒscreen. Whenƒaƒsafetyƒcameraƒappearsƒwithinƒtheƒred-outlinedƒareaƒandƒisƒ positionedƒinƒtheƒdetectableƒdirectionƒ(asƒillustrated),ƒyouƒwillƒreceiveƒ alerts. Theƒscreenƒwillƒdisplayƒtheƒvisualƒalert,ƒandƒyouƒwillƒalsoƒreceiveƒaudioƒ warnings.ƒWhenƒtheƒalertƒsoundƒsettingƒisƒsetƒtoƒBeep: ƒ ƒ Whenƒyourƒcarƒapproachesƒaƒsafetyƒcamera,ƒyouƒwillƒreceiveƒaƒnormalƒbeepƒalert. ƒ ƒ Whenƒyourƒcarƒapproachesƒaƒsafetyƒcameraƒatƒaƒspeedƒoverƒtheƒsetƒthreshold,ƒyouƒwillƒ... -
Page 13: Updating Safety Camera Data
Note:ƒMioƒdoesƒnotƒwarrantƒthatƒallƒtypesƒandƒlocationsƒofƒsafetyƒcameraƒdataƒareƒ available,ƒasƒcamerasƒmayƒbeƒremoved,ƒrelocatedƒorƒnewƒcamerasƒinstalled. Updating safety camera data OccasionallyƒMioƒmayƒofferƒyouƒupdatesƒofƒsafetyƒcameraƒdata.ƒVisitƒtheƒMioƒwebsiteƒforƒ availableƒdownloads. Theƒsafetyƒcameraƒdataƒmayƒcomeƒinƒvariousƒformats. ƒ ƒ Ifƒtheƒdownloadedƒfileƒisƒinƒ.rawƒformat,ƒcopyƒtheƒ.rawƒfileƒtoƒtheƒrootƒdirectoryƒofƒ yourƒMicroSDƒcard.ƒ ƒ ƒ Ifƒtheƒdownloadedƒfileƒisƒnotƒinƒ.rawƒformat,ƒyouƒneedƒtoƒconvertƒtheƒdataƒtoƒ.rawƒ formatƒbeforeƒcopyingƒitƒtoƒtheƒrootƒdirectoryƒofƒyourƒMicroSDƒcard.ƒPleaseƒcheckƒtheƒ Mioƒwebsiteƒforƒmoreƒinformationƒonƒtheƒconversionƒinstructions. Toƒupdateƒsafetyƒcameraƒdata,ƒinsertƒtheƒMicroSDƒcardƒwithƒtheƒ.rawƒfileƒintoƒtheƒrecorderƒ andƒturnƒonƒtheƒrecorder.ƒWhenƒprompted,ƒselectƒYesƒandƒpressƒtheƒOKƒkey.ƒWhenƒtheƒ updateƒisƒcomplete,ƒyouƒmayƒneedƒtoƒrestartƒtheƒrecorder. File management CAUTION: Deletedƒfilesƒcannotƒbeƒrecovered.ƒMakeƒsureƒtoƒbackƒupƒyourƒfilesƒbeforeƒ deletion. Toƒdeleteƒfiles: 1.ƒ PressƒtheƒMenuƒkeyƒ ƒtoƒaccessƒtheƒSettingsƒmenu. 2.ƒ SelectƒFile DeletionƒandƒpressƒtheƒOKƒkey. 3.ƒ SelectƒtheƒdesiredƒtypeƒandƒpressƒtheƒOKƒkey. 4.ƒ SelectƒtheƒdesiredƒfileƒfromƒtheƒlistƒandƒpressƒtheƒOKƒkey. -
Page 14: System Settings
5.ƒ Selectƒtheƒdesiredƒoption: Delete One:ƒtoƒdeleteƒtheƒcurrentƒfile ƒ Delete All:ƒtoƒdeleteƒallƒfilesƒofƒtheƒselectedƒtype ƒ 6.ƒ PressƒtheƒOKƒkeyƒtoƒproceed. System settings Toƒcustomiseƒtheƒsystemƒsettings,ƒpressƒtheƒMenuƒkeyƒ Item Description File Playback Playsƒvideosƒandƒphotos. GPS Status DisplaysƒtheƒstatusƒofƒGPSƒsignalƒreception. Auto Time Zone Whenƒenabledƒ(default),ƒifƒaƒGPSƒfixƒhasƒeverƒbeenƒavailable,ƒtheƒ recorderƒwillƒautomaticallyƒacquireƒtheƒcorrectƒlocalƒtimeƒsettingƒbasedƒ onƒtheƒselectedƒtimeƒzone. Toƒchangeƒtheƒtimeƒzone,ƒselectƒthisƒitemƒandƒpressƒtheƒOKƒkey.ƒThenƒ setƒtheƒdesiredƒtimeƒzoneƒandƒpressƒtheƒOKƒkeyƒtoƒsaveƒtheƒchanges. Date / Time Setsƒtheƒsystemƒdateƒandƒtime. Time Stamp Showsƒorƒhidesƒtimeƒandƒdateƒinƒtheƒrecordings. GPS Stamp SetsƒifƒandƒhowƒyouƒwantƒtoƒrecordƒtheƒGPSƒinformation. Distance Unit Setsƒtheƒpreferredƒdistanceƒunit. - Page 15 Item Description Beep Enablesƒorƒdisablesƒsystemƒnotificationƒsounds. SafetyCam Alert Setsƒhowƒyouƒwantƒtoƒbeƒnotifiedƒofƒsafetyƒcameras. Sound Record upon Power-on Enablesƒorƒdisablesƒtheƒrecorderƒtoƒstartƒrecordingƒautomaticallyƒonceƒitƒ isƒpoweredƒon. Video Clip Length Setsƒtheƒlengthƒofƒeachƒvideoƒclipƒforƒaƒcontinuousƒrecording. G-Sensor Sensitivity Whenƒenabled,ƒtheƒGƒsensorƒwillƒpromptƒtheƒrecorderƒtoƒstartƒrecordingƒ automaticallyƒifƒanƒeventƒhappensƒ(inƒdrivingƒmode). YouƒcanƒchangeƒtheƒsensitivityƒlevelƒofƒtheƒGƒsensorƒ(inƒdrivingƒmode). Power-off Delay Recorderƒcanƒbeƒsetƒtoƒturnƒoffƒinƒ10ƒsecondsƒafterƒpower-off. Language Setsƒtheƒlanguage. File Deletion Deletesƒfile(s). Format Formatsƒaƒmemoryƒcard.ƒ(Allƒdataƒwillƒbeƒerased.) Restore to Defaults Restoresƒsystemƒsettingsƒtoƒfactoryƒdefaults. SafetyCam Alert Setsƒtheƒdistanceƒlevelƒofƒalertsƒwhenƒyouƒareƒaheadƒofƒsafetyƒcameras. Distance SafetyCam Threshold Setsƒtheƒspeedƒvalueƒforƒtheƒrecorderƒtoƒstartƒofferingƒalerts.
-
Page 16: Mivue Manager
MiVue Manager MiVueƒManagerƒisƒaƒtoolƒforƒyouƒtoƒviewƒtheƒvideosƒrecordedƒonƒaƒMiVueƒrecorder. IMPORTANT!ƒYourƒcomputerƒneedsƒMOVƒandƒAVIƒcodecsƒtoƒplayƒtheƒrecordingƒfiles.ƒ Pleaseƒvisitƒwww.mio.comƒtoƒinstallƒtheƒrequiredƒcodecs. Note: Notƒallƒfeaturesƒareƒavailableƒforƒeveryƒmodel. Installing MiVue Manager InsertƒtheƒCDƒthatƒcameƒwithƒtheƒrecorderƒintoƒyourƒcomputer’sƒCDƒdrive.ƒDouble-clickƒ Setup.exeƒandƒfollowƒtheƒon-screenƒpromptsƒtoƒinstallƒMiVueƒManager. Playing the recording files Note: Youƒareƒadvisedƒtoƒcopyƒtheƒrecordingƒfilesƒtoƒyourƒcomputerƒforƒbackupƒandƒ playback. 1.ƒ Doƒoneƒofƒtheƒfollowing: ƒ ƒ Connectƒtheƒmini-USBƒendƒofƒtheƒUSBƒcableƒ(notƒsupplied)ƒtoƒtheƒrecorderƒandƒ theƒotherƒendƒtoƒaƒUSBƒportƒonƒyourƒcomputer. ƒ ƒ Removeƒtheƒmemoryƒcardƒfromƒtheƒrecorderƒandƒaccessƒtheƒcardƒonƒtheƒ computerƒviaƒaƒcardƒreader. 2.ƒ StartƒMiVueƒManagerƒonƒtheƒcomputer. - Page 17 Minimise Maximise Exit Calendar Video playback screen File type File list Playback controls Map screen G sensor chart Note: TheƒMapƒscreenƒmayƒnotƒdisplayƒwhenƒtheƒcomputerƒisƒnotƒconnectedƒtoƒtheƒ InternetƒorƒwhenƒyourƒMivueƒmodelƒdoesƒnotƒsupportƒtheƒGPSƒfunction. Note: Gƒsensorƒchartƒdisplaysƒdataƒinƒ3-axisƒwaveformƒaboutƒtheƒcar’sƒshiftƒforward/ backwardƒ(X),ƒtoƒtheƒright/leftƒ(Y)ƒandƒupward/downwardƒ(Z). 3.ƒ Byƒdefault,ƒMiVueƒManagerƒshowsƒtheƒcalendarƒandƒtheƒfileƒlistƒonƒtheƒright.ƒ ƒ ƒ Whenƒaƒrecordingƒfileƒexists,ƒyouƒwillƒseeƒtheƒdateƒmarkedƒwithƒ“ ▲ .”ƒClickƒthatƒ dateƒtoƒdisplayƒtheƒfilesƒthatƒwereƒrecordedƒonƒthatƒdate.
- Page 18 ƒ ƒ Youƒcanƒchooseƒtheƒfileƒtypeƒtoƒdisplay:ƒEventƒ(emergencyƒeventƒrecordings)ƒ and/orƒNormalƒ(continuousƒrecordings). ƒ ƒ Toƒdisplayƒallƒfilesƒinƒtheƒcurrentƒfolder,ƒclickƒAll.ƒToƒreturnƒtoƒtheƒcalendarƒview,ƒ clickƒCalendar. Calendar CalendarƒandƒFileƒList AllƒFileƒList Youƒcanƒalsoƒclickƒ ƒonƒtheƒupper-leftƒcornerƒtoƒselectƒtheƒfolderƒthatƒstoresƒtheƒ recordingƒfiles. 4.ƒ Double-clickƒtheƒdesiredƒfileƒonƒtheƒfileƒlistƒtoƒstartƒplayback. 5.ƒ Theƒplaybackƒcontrolsƒareƒdescribedƒasƒfollows: Icon Description Startsƒorƒresumesƒtheƒplayback. Pausesƒtheƒplayback. Skipsƒtoƒtheƒpreviousƒ/ƒnextƒfileƒonƒtheƒlist. / Changesƒtheƒplaybackƒspeedƒtoƒ1/4x,ƒ1/2x,ƒ1xƒ(default),ƒ1.5x,ƒorƒ2x.
- Page 19 Icon Description Changesƒtheƒplaybackƒdirection.ƒTheƒ ► ƒiconƒindicatesƒtheƒcurrentƒplaybackƒ direction. Mutesƒorƒunmutesƒtheƒvolume. / Adjustsƒtheƒvolumeƒlevel. Playsƒtheƒvideoƒinƒfullƒscreen. Returnsƒtoƒtheƒnormalƒview. Displaysƒtheƒplaybackƒprogress.ƒYouƒcanƒclickƒonƒ aƒpointƒalongƒtheƒtrackƒbarƒtoƒmoveƒdirectlyƒtoƒaƒ differentƒlocationƒforƒtheƒplayback. 6.ƒ Theƒtoolƒbarƒallowsƒyouƒtoƒdoƒtheƒfollowing: ƒ ƒ Clickƒ ƒtoƒpreviewƒandƒprintƒtheƒcurrentƒvideoƒimage. ƒ ƒ Clickƒ ƒtoƒbackƒupƒtheƒselectedƒfilesƒtoƒtheƒspecifiedƒlocationƒonƒyourƒ computer. ƒ ƒ Clickƒ ƒtoƒcaptureƒandƒsaveƒtheƒcurrentƒvideoƒimageƒtoƒtheƒspecifiedƒlocationƒ onƒyourƒcomputer. ƒ ƒ Clickƒ ƒtoƒexportƒtheƒGPSƒinformationƒofƒtheƒselectedƒfileƒinƒtheƒKMLƒformatƒ toƒtheƒspecifiedƒlocationƒonƒyourƒcomputer. ƒ ƒ Clickƒ ƒtoƒuploadƒtheƒselectedƒfileƒtoƒFacebookƒorƒYouTube. ƒ ƒ Clickƒ...
-
Page 20: Settings Menu
Settings menu Clickƒ ƒtoƒopenƒtheƒSettingsƒmenu.ƒTheƒSettingsƒitemsƒareƒdescribedƒasƒfollows: Change Language:ƒSetsƒtheƒdisplayƒlanguageƒofƒMiVueƒManager. ƒ Change Skin:ƒSetsƒtheƒcolorƒschemeƒofƒMiVueƒManager. ƒ Check for Update:ƒChecksƒifƒthereƒisƒanyƒnewƒversionƒofƒMiVueƒManager. ƒ Note: Internetƒaccessƒisƒrequiredƒforƒthisƒfeature. About:ƒDisplaysƒtheƒversionƒandƒcopyrightƒinformationƒofƒMiVueƒManager. ƒ Caring for your device Takingƒgoodƒcareƒofƒyourƒdeviceƒwillƒensureƒtrouble-freeƒoperationƒandƒreduceƒtheƒriskƒofƒ damage. ƒ ƒ Keepƒyourƒdeviceƒawayƒfromƒexcessiveƒmoistureƒandƒextremeƒtemperatures. ƒ ƒ Avoidƒexposingƒyourƒdeviceƒtoƒdirectƒsunlightƒorƒstrongƒultravioletƒlightƒforƒextendedƒ periodsƒofƒtime. ƒ ƒ Doƒnotƒplaceƒanythingƒonƒtopƒofƒyourƒdeviceƒorƒdropƒobjectsƒonƒyourƒdevice. ƒ ƒ Doƒnotƒdropƒyourƒdeviceƒorƒsubjectƒitƒtoƒsevereƒshock. ƒ ƒ Doƒnotƒsubjectƒyourƒdeviceƒtoƒsuddenƒandƒsevereƒtemperatureƒchanges.ƒThisƒcouldƒ causeƒmoistureƒcondensationƒinsideƒtheƒunit,ƒwhichƒcouldƒdamageƒyourƒdevice.ƒInƒtheƒ... -
Page 21: Regulatory Information
ƒ ƒ Neverƒcleanƒyourƒdeviceƒwithƒitƒpoweredƒon.ƒUseƒaƒsoft,ƒlint-freeƒclothƒtoƒwipeƒtheƒ screenƒandƒtheƒexteriorƒofƒyourƒdevice. ƒ ƒ Doƒnotƒuseƒpaperƒtowelsƒtoƒcleanƒtheƒscreen. ƒ ƒ Neverƒattemptƒtoƒdisassemble,ƒrepairƒorƒmakeƒanyƒmodificationsƒtoƒyourƒdevice.ƒ Disassembly,ƒmodificationƒorƒanyƒattemptƒatƒrepairƒcouldƒcauseƒdamageƒtoƒyourƒ deviceƒandƒevenƒbodilyƒinjuryƒorƒpropertyƒdamageƒandƒwillƒvoidƒanyƒwarranty. ƒ ƒ Doƒnotƒstoreƒorƒcarryƒflammableƒliquids,ƒgasesƒorƒexplosiveƒmaterialsƒinƒtheƒsameƒ compartmentƒasƒyourƒdevice,ƒitsƒpartsƒorƒaccessories. ƒ ƒ Toƒdiscourageƒtheft,ƒdoƒnotƒleaveƒtheƒdeviceƒandƒaccessoriesƒinƒplainƒviewƒinƒanƒ unattendedƒvehicle. ƒ ƒ Overheatingƒmayƒdamageƒtheƒdevice. Regulatory information ProductsƒwithƒtheƒCEƒmarkingƒcomplyƒwithƒtheƒElectromagneticƒCompatibilityƒDirectiveƒ (2004/108/EC)ƒ-ƒissuedƒbyƒtheƒCommissionƒofƒtheƒEuropeanƒCommunity.ƒ ComplianceƒwithƒtheseƒdirectivesƒimpliesƒconformityƒtoƒtheƒfollowingƒEuropeanƒStandards: ƒ ƒ ENƒ300ƒ440-1ƒV1.6.1ƒ(2010-08) ƒ ƒ ENƒ300ƒ440-2ƒV1.4.1ƒ(2010-08) ƒ ƒ ENƒ301ƒ489-1ƒV1.9.2ƒ(2011-09) ƒ ƒ ENƒ301ƒ489-3ƒV1.4.1ƒ(2002-08) -
Page 22: Industry Canada (Ic)
ƒ ƒ ENƒ55022:2010ƒ+AC:2011,ƒClassƒB ƒ ƒ ENƒ61000-3-2:2006ƒ+A1:2009ƒ+A2:2009,ƒClassƒA ƒ ƒ ENƒ61000-3-3:2008 ƒ ƒ ENƒ61000-4-11:2004 ƒ ƒ ENƒ61000-4-2:2009 ƒ ƒ ENƒ61000-4-3:2006ƒ+A1:2008ƒ+A2:2010 ƒ ƒ ENƒ61000-4-4:2004ƒ+A1:2010 ƒ ƒ ENƒ61000-4-5:2006 ƒ ƒ ENƒ61000-4-6:2009 TheƒmanufacturerƒcannotƒbeƒheldƒresponsibleƒforƒmodificationsƒmadeƒbyƒtheƒUserƒandƒ theƒconsequencesƒthereof,ƒwhichƒmayƒalterƒtheƒconformityƒofƒtheƒproductƒwithƒtheƒCEƒ Marking. Industry Canada (IC) ThisƒClassƒBƒdigitalƒapparatusƒcompliesƒwithƒCanadianƒICES-003. Cetƒappareilƒnumériqueƒdeƒlaƒclasseƒ[B]ƒestƒconformeƒàƒlaƒnormeƒNMB-003ƒduƒCanada. WEEE Thisƒproductƒmustƒnotƒbeƒdisposedƒofƒasƒnormalƒhouseholdƒwaste,ƒinƒaccordanceƒwithƒtheƒ EUƒdirectiveƒforƒwasteƒelectricalƒandƒelectronicƒequipmentƒ(WEEEƒ–ƒ2002/96/EC).ƒInstead,ƒ itƒshouldƒbeƒdisposedƒofƒbyƒreturningƒitƒtoƒtheƒpointƒofƒsale,ƒorƒtoƒaƒmunicipalƒrecyclingƒ collectionƒpoint. -
Page 23: Safety Precautions
Safety precautions About charging ƒ ƒ Useƒonlyƒtheƒchargerƒsuppliedƒwithƒyourƒdevice.ƒUseƒofƒanotherƒtypeƒofƒchargerƒmayƒ resultƒinƒmalfunctionƒand/orƒdanger. ƒ ƒ ThisƒproductƒisƒintendedƒtoƒbeƒsuppliedƒbyƒaƒLISTEDƒPowerƒUnitƒmarkedƒwithƒ“LPS”,ƒ “LimitedƒPowerƒSource”ƒandƒoutputƒratedƒ+ƒ5ƒVƒdcƒ/ƒ1.2ƒA. ƒ ƒ Useƒaƒspecifiedƒbatteryƒinƒtheƒequipment. About the charger ƒ ƒ Doƒnotƒuseƒtheƒchargerƒinƒaƒhighƒmoistureƒenvironment.ƒNeverƒtouchƒtheƒchargerƒ whenƒyourƒhandsƒorƒfeetƒareƒwet. ƒ ƒ Allowƒadequateƒventilationƒaroundƒtheƒchargerƒwhenƒusingƒitƒtoƒoperateƒtheƒdeviceƒ orƒchargeƒtheƒbattery.ƒDoƒnotƒcoverƒtheƒchargerƒwithƒpaperƒorƒotherƒobjectsƒthatƒwillƒ reduceƒcooling.ƒDoƒnotƒuseƒtheƒchargerƒwhileƒitƒisƒinsideƒaƒcarryingƒcase. ƒ ƒ Connectƒtheƒchargerƒtoƒaƒproperƒpowerƒsource.ƒTheƒvoltageƒrequirementsƒareƒfoundƒ onƒtheƒproductƒcaseƒand/orƒpackaging. ƒ ƒ Doƒnotƒuseƒtheƒchargerƒifƒtheƒcordƒbecomesƒdamaged. ƒ ƒ Doƒnotƒattemptƒtoƒserviceƒtheƒunit.ƒThereƒareƒnoƒserviceableƒpartsƒinside.ƒReplaceƒtheƒ unitƒifƒitƒisƒdamagedƒorƒexposedƒtoƒexcessƒmoisture. About the battery ƒ... - Page 24 ƒ ƒ Importantƒinstructionsƒ(forƒserviceƒpersonnelƒonly) ƒ ƒ Caution:ƒRiskƒofƒexplosionƒifƒbatteryƒisƒreplacedƒbyƒanƒincorrectƒtype.ƒDisposeƒofƒ usedƒbatteriesƒaccordingƒtoƒtheƒinstructions. ƒ ƒ Replaceƒonlyƒwithƒtheƒsameƒorƒequivalentƒtypeƒrecommendedƒbyƒtheƒ manufacturer. ƒ ƒ Theƒbatteryƒmustƒbeƒrecycledƒorƒdisposedƒofƒproperly. ƒ ƒ Useƒtheƒbatteryƒonlyƒinƒtheƒspecifiedƒequipment.
- Page 25 Revision:ƒR01ƒ (4/2013) Trademarks Allƒbrandƒandƒproductƒnamesƒareƒtrademarksƒorƒregisteredƒtrademarksƒofƒtheirƒrespectiveƒ companies. Disclaimer Specificationsƒandƒdocumentsƒareƒsubjectƒtoƒchangeƒwithoutƒnotice.ƒMioƒTechnologyƒdoesƒ notƒwarrantƒthisƒdocumentƒisƒerror-free.ƒMioƒTechnologyƒassumesƒnoƒliabilityƒforƒdamageƒ incurredƒdirectlyƒorƒindirectlyƒfromƒerrors,ƒomissions,ƒorƒdiscrepanciesƒbetweenƒtheƒdeviceƒ andƒtheƒdocuments. Notes Notƒallƒmodelsƒareƒavailableƒinƒallƒregions.ƒ Dependingƒuponƒtheƒspecificƒmodelƒpurchased,ƒtheƒcolorƒandƒlookƒofƒyourƒdeviceƒandƒ accessoriesƒmayƒnotƒexactlyƒmatchƒtheƒgraphicsƒshownƒinƒthisƒdocument.
- Page 26 Mio Technology Corporation www.mio.com...
Need help?
Do you have a question about the MiVue 388 and is the answer not in the manual?
Questions and answers