Table of Contents
Advertisement
Quick Links
Advertisement
Table of Contents

Related Manuals for ATEN VE809


Summary of Contents for ATEN VE809
- Page 1 HDMI Wireless Extender VE809 User Manual www.aten.com...
-
Page 2: Rohs
VE809 User Manual RoHS This product is RoHS compliant. SJ/T 11364-2006 The following contains information that relates to China. -
Page 3: User Information
VE809 User Manual User Information Online Registration Be sure to register your product at our online support center: International http://eservice.aten.com Telephone Support For telephone support, call this number: International 886-2-8692-6959 China 86-10-5255-0110 Japan 81-3-5615-5811 Korea 82-2-467-6789 North America 1-888-999-ATEN ext 4988... -
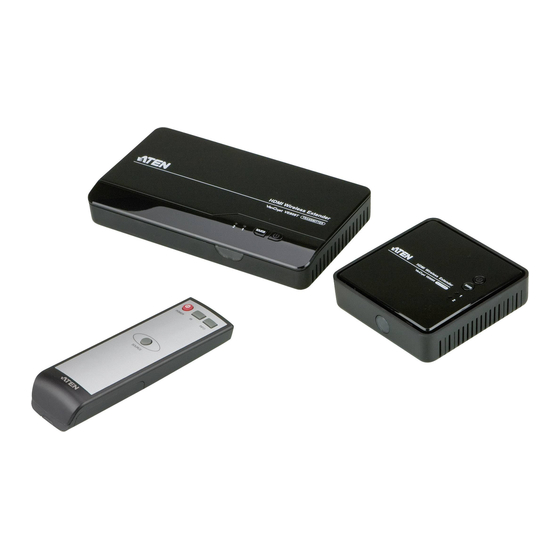
Page 4: Package Contents
© Copyright 2012 ATEN® International Co., Ltd. Manual Date: 2012-12-10 ATEN and the ATEN logo are registered trademarks of ATEN International Co., Ltd. All rights reserved. All other brand names and trademarks are the registered property of their respective owners. -
Page 5: Table Of Contents
VE809 User Manual Contents RoHS............ii SJ/T 11364-2006. -
Page 6: About This Manual
An overview of the information found in the manual is provided below. Chapter 1, Introduction, introduces you to the VE809 system. Its purpose, features and benefits are presented, its front and back panel components and remote control are described. -
Page 7: Conventions
For information about all ATEN products and how they can help you connect without limits, visit ATEN on the Web or contact an ATEN Authorized Reseller. Visit ATEN on the Web for a list of locations and telephone numbers: International http://www.aten.com... -
Page 8: Introduction
HDTV- simultaneously. The VE809 consists of a wireless audio/ video transmitter and receiver. Consolidate your HDMI electronics and use the VE809 as a wireless 2-port HDMI switch to connect remote devices such as Blu-ray players and HD Cable boxes to design your own custom wireless entertainment space. -
Page 9: Features
1. Introduction Features Wirelessly extend an HDMI display up to 30m from the HDMI source* Setup two HDTVs and view HD content on two HDTVs simultaneously* Connect and transmit wireless video content from your Blu-ray DVD player, HD Cable box or other HDMI device wirelessly Wireless 3D Supported Wireless HD in Full 1080p and 5.1 channel digital audio Video Resolutions: 480p, 720p, 1080i and 1080p (24 / 30 / 60fps) -
Page 10: Requirements
VE809 User Manual Requirements Source Device HDMI Type A output connector Display Device A display device or receiver with an HDMI Type A input connector... -
Page 11: Components
Pushbutton the two connected HDMI media sources. Power Press this button to turn the VE809 on / off. The blue LED Pushbutton / LED indicates the VE809 is powered on,. The red LED indicates the VE809 is in power saving mode. -
Page 12: Ve809T Transmitter Rear View
Plug the IR Blaster cable that came with your unit into this port. Service Port This port is used by the manufacturer to service the VE809. USB Mini Power The Mini USB Power Adapter that came with your unit plugs Adapter Port in here. -
Page 13: Ir Remote Control
1. Introduction IR Remote Control Component Description Power Press to turn transmitter and receiver on or off. INFO Press to show on-screen display (OSD) information on the HDTV connected to the receiver. Press to switch the IR Blaster frequency to meet the media source devices requirements. -
Page 14: Hardware Setup
2. Make sure that the power to all devices connected to the installation are turned off. To install the VE809 HDMI Wireless Extender, refer to the installation diagrams below as you preform the following steps: VE809T - Transmitter Installation 1. -
Page 15: Ve809R - Receiver Installation
2. Hardware Setup VE809R - Receiver Installation 1. Place the VE809R Receiver up to 30m from the VE809T Transmitter. 2. Use the HDMI cable included with this package to connect the HDMI video display (HDTV) to the HDMI output port on the rear of the VE809R Receiver. - Page 16 VE809 User Manual (Continued from previous page.) 3. Adjust the IR Blasters’ sensors until the remote control can be used effectively from the receiver side of the installation 4. For IR Blaster operational instructions, see IR Blaster, page 12, for details.
-
Page 17: Operation
Receiver. Note: If you don’t get a display on the TV connected to the Receiver, press INFO on the VE809’s remote control , then refer to the on-screen display (OSD) information, and see Troubleshooting, page 18 to resolve the issue. -
Page 18: Power
VE809 User Manual Power To establish the best resolution for connected displays*, the VE809 will cause a normal short signal disruption to occur: If both HDMI TVs and VE809T/VE809R units are on: Powering off and then on the local HDMI TV will cause the remote HDMI display signal to turn off for 5-10 seconds. -
Page 19: Ir Remote Control
Press this button to change the RF frequency for an HDMI source device’s remote control, so that it can be used from the VE809R Receiver. Refer to your source devices user manual for the correct frequency, then change the VE809’s setting to match it. -
Page 20: Edid Management
In order to provide the best “common” output resolution, for both displays, the VE809 reads the EDID whenever a TV is plugged in, unplugged, or turned on/ off. It is normal to see both TVs flash for a couple seconds when they are powered on, or when switching source devices, this allows the EDID to adjust to the best “common”... -
Page 21: Appendix
Appendix Safety Instructions General Read all of these instructions. Save them for future reference. Follow all warnings and instructions marked on the device. Do not place the device on any unstable surface (cart, stand, table, etc.). If the device falls, serious damage will result. Do not use the device near water. - Page 22 VE809 User Manual If an extension cord is used with this device make sure that the total of the ampere ratings of all products used on this cord does not exceed the extension cord ampere rating. Make sure that the total of all products plugged into the wall outlet does not exceed 15 amperes.
-
Page 23: Technical Support
Appendix Technical Support International For online technical support – including troubleshooting, documentation, and software updates: http://support.aten.com For telephone support, see Telephone Support, page iii: North America Email Support support@aten-usa.com Online Troubleshooting http://www.aten-usa.com/support Technical Documentation Support Software Updates Telephone Support 1-888-999-ATEN ext 4988 When you contact us, please have the following information ready beforehand: Product model number, serial number, and date of purchase. -
Page 24: Specifications
VE809 User Manual Specifications Function VE809T VE809R Connectors Device HDMI In 2 x HDMI Type A Female (Black) Display HDMI Out 1 x HDMI Type A Female 1 x HDMI Type A Female (Black) (Loop-through) (Black) Power Jack 1 x DC Jack... -
Page 25: Troubleshooting
Searches The receiver may be out available of the transmitter’s channels if range. Please shorten Blinking Blinking the VE809 the distance or remove Blue cannot any obstacles that might establish a be obstructing the connection wireless signal. The after the... - Page 26 (38KHz, 40KHz, or default 33KHz) setting. 3D Movie 3D is supported through Support the VE809 on all 3D capable TVs and devices. see EDID Management, page 13, or the 3D devices user manual for more information. * Distance may vary depending on the actual environment; solid objects such as steel, concrete, or brick may cause interference and shorten the transmission distance.
-
Page 27: Limited Warranty
Appendix Limited Warranty IN NO EVENT SHALL THE DIRECT VENDOR'S LIABILITY EXCEED THE PRICE PAID FOR THE PRODUCT FROM DIRECT, INDIRECT, SPECIAL, INCIDENTAL, OR CONSEQUENTIAL DAMAGES RESULTING FROM THE USE OF THE PRODUCT, DISK, OR ITS DOCUMENTATION. The direct vendor makes no warranty or representation, expressed, implied, or statutory with respect to the contents or use of this documentation, and especially disclaims its quality, performance, merchantability, or fitness for any particular purpose.
Need help?
Do you have a question about the VE809 and is the answer not in the manual?
Questions and answers