Table of Contents
Advertisement
Advertisement
Table of Contents

Related Manuals for AEG Electrolux B 89090-5


Summary of Contents for AEG Electrolux B 89090-5
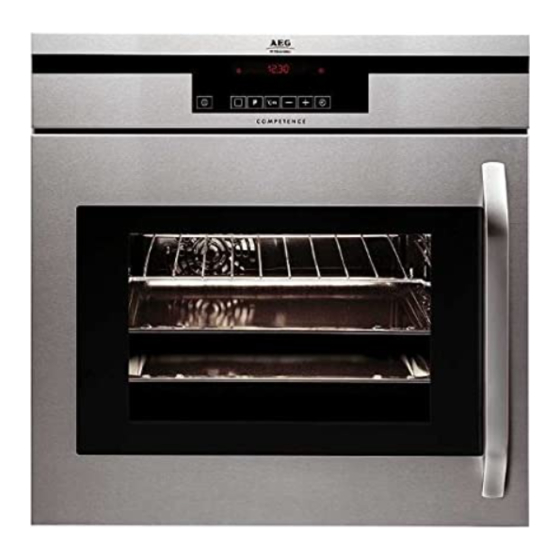
- Page 1 B 89090-5 Operating Instructions Built-in Oven...
-
Page 2: Guide To Use The Instructions
Guide to use the instructions The following symbols will be found in the text to guide you throughout the Instructions: Safety Instructions ! ! ! ! ! Step by step instructions for an operation Hints and Tips Environmental Information... -
Page 3: Table Of Contents
Contents Warnings and Important Safety Information ....................4 Description of the appliance ..........................6 General Features of The Oven Electronic Control ..................7 The electronic oven controls ........................... 8 Buttons ................................9 Before Using for the first time ........................11 Using the Oven .............................. -
Page 4: Warnings And Important Safety Information
Warnings and Important Safety Information Always keep these user instructions with the appliance. Should the appliance be passed on to third persons or sold, or if you leave this appliance behind when you move house, it is very important that the new user has access to these user instructions and the accompanying information. -
Page 5: Customer Service
• This appliance is not intended for use by children or other persons whose physical, sensory or mental capabilities or lack of experience and knowledge prevents them from using the appliance safely without su- pervision or instruction by a responsible person to ensure that they can use the appliance safely. -
Page 6: Description Of The Appliance
Description of the appliance 1. Control Panel 2. Grill 3. Oven light 4. Telescopic runners 5. Oven Fan 6. Rating plate... -
Page 7: General Features Of The Oven Electronic Control
General Features of The Oven Electronic Control The touch controls The Safety Thermostat All the oven functions are controlled by an This oven is provided with a safety thermostat. electronic device. You can select any In case of malfunctioning of the main combination of cooking function, cooking thermostat, and consequential over-heating, temperature and automatic timing using the... -
Page 8: The Electronic Oven Controls
The electronic oven controls Indicators Menu status bar Symbol status bar Text line Heat indicator Shelf positions Clock functions Temperature Time Period of operation Menu status bar In the menu status bar the current position within a menu is shown by a flashing bar. When the menu status bar can no longer be seen in the display, the oven begins to heat or the time set begins to count down. -
Page 9: Buttons
Buttons Button Function To select oven functions. To move down and up in the menu. To open the Options menu. To close the Options menu (press and hold button). Confirm, change to the sub-menu. To switch appliance on or off. Switch RAPID HEAT UP on or off. - Page 10 Oven accessories Grease Filter When cooking meat, the grease filter must be fitted over the oven fan by clipping it over the vents in the back panel. This will prevent a built-up of fat on the fan impellor. Do not use abrasive materials to clean the seal.
-
Page 11: Before Using For The First Time
Before using the oven for the first time Setting the language 1. When the appliance has been connected to the electrical supply, LANGUAGE MENU is shown in the display. 2. Using the arrow buttons select the desired language. 3. Confirm selected language with the OK button. -
Page 12: Before Using For The First Time
Initial cleaning Clean the oven before using it for the first time. Before using for the first time, the oven should be heated up without food. Important: Do not use caustic or abrasive cleaning agents! These can During this time, an unpleasant odour damage the oven surfaces. -
Page 13: Using The Oven
Using the Oven Menu operation in overview Menu Oven Options Functions Menu LIGHT RECIPE MENU TRUE FAN MEMORY MENU FAN BAKING SETTINGS MENU SLOW COOK CONVENTIONAL ROTITHERM DUAL GRILL HEAT+HOLD MENU SINGLE GRILL EXTRA TIME MENU KEEP WARM RAPID HEAT UP MENU DEFROST RESIDUAL HEAT MENU BASE HEAT... -
Page 14: The Options Menu
Setting an example oven function 1. Switch on the appliance using the ON/OFF button. 2. Using the arrow buttons select the oven function. A suggested temperature appears in the temperature display. The oven starts to heat up. 3. With the button, the tempera- ture can be raised or lowered. -
Page 15: Use Of The Oven Functions
Use of the oven functions The oven has the following functions: Heating Oven function Application element/fan LIGHT Oven light - The oven light will be on None without any cooking function TRUE FAN For baking on two oven levels at the same Rear wall heating time. -
Page 16: Meat Programmes
Meat programmes Meat programmes Application Weight range with weight input POULTRY Chicken, duck, goose, turkey 0.8 to 6.0 kg PORK Roast pork, shoulder of pork 0.8 to 3.0 kg BEEF Roast beef, pot roast 0.8 to 2.5 kg VEAL Roast veal 0.8 to 2.5 kg GAME Vension, rabbit... - Page 17 Cooling fan The fan switches on automatically in order to keep the appliance’s surfaces cool. When the oven is switched off, the fan continues to run to cool the appliance down, then switches itself off automatically. Pre-heating with the RAPID HEAT UP function After an oven function has been selected, with the additional function RAPID HEAT UP the pre- heating time can be shortened.
-
Page 18: Heat Indicator
Heat indicator Heating up indicator When the oven function has been switched on the four bars that slowly light up one after the other indicate how far the oven has heated RAPID HEAT UP indicator When the RAPID HEAT UP function has been switched on, the bars that flash one after the other indicate that RAPID HEAT UP is operating. -
Page 19: Automatic Programmes
Automatic programmes In addition to the oven functions for individually setting baking and roasting, you have the option of working with various automatic programmes: 1. Meat programmes with weight input (OVEN FUNCTIONS menu) 2. Automatic recipes (Options menu) Meat programmes with weight input The meat programmes offer optimum settings for each type of meat. -
Page 20: Options
Options RECIPE MENU in overview RECIPE MENU BAKING RECIPES LEMON SPONGE CAKE SWEDISH CAKE SPONGE CAKE CHEESE CAKE FRUIT CAKE STREUSEL PLAIT YEAST PLAIT WHITE BREAD BACK ROASTING RECIPES PIZZA POTATO GRATIN ONION TARTE QUICHE LORRAINE LASAGNE CANNELLONI MEAT CASSEROLE FISH STEAKS BACK OTHER RECIPES... - Page 21 BAKING RECIPES and ROASTING RECIPES For this function, use the recipes supplied in the booklet “Tables, Tips and Recipes”. This function offers optimum settings for each recipe. Selecting a recipe. 1. Use the OPTION button to change to the Options menu. 2.
- Page 22 6. An acoustic signal will sound when the cooking time has finished. – “00:00:” flashes in the clock display and the symbol flashes. – The oven heating switches itself off. 7. The audible signal can be stopped by pressing any button. Delaying the start time Running the programme can also be automatically started at a later time (see Clock...
- Page 23 With the recipes DRYING HERBS and PRESERVING using the buttons, the suggested temperture can be increased or decreased by 5°C. In the category OTHER RECIPES you will find the following menu options: CAKE MIX For baking ready-made cakes and cake mixes. FROZEN PIZZA For baking ready-made meals such as pizza, lasagne, gratins and chips from the deep freeze.
-
Page 24: Memory Menu
MEMORY MENU With this function you can save the optimum settings for your own recipes. The first three “Personal recipes” can be called up again directly in the Oven Functions menu. There are 10 memory positions available for recipes with pre-set cooking times. Saving settings for “Personal Recipes”... -
Page 25: Overwriting A Memory Position
When you have finished writing the name, press and hold the OK button. SAVED is displayed. Calling up settings for “Personal Recipes” 1. Switch on the appliance with the ON/OFF button. 2. Using the arrow button select saved recipe. You can call up the first three saved “Personal Recipes”... -
Page 26: Settings Menu
SETTINGS MENU Independent of the current use of the oven, you can change various base settings. These remain permanently set, until they are changed again. HEAT+HOLD MENU This function will operate only when the DURATION or END – HEAT+HOLD ON clock functions have been set. - Page 27 RESIDUAL HEAT MENU After the appliance is switched off, the residual heat is – RESIDUAL HEAT ON indicated. After the appliance is switched off, the residual heat is not – RESIDUAL HEAT OFF indicated. DISPLAY MENU After the appliance is switched off, the time is displayed. –...
- Page 28 Adjusting SETTINGS MENU 1. Using the OPTION button, open the Options menu. 2. Using the arrow buttons select the menu option SETTINGS MENU. 3. Using the OK button, change to the SETTINGS MENU. 4. Using the arrow buttons go to the setting that you want to adjust. 5.
-
Page 29: Clock Functions
Clock Functions MINUTE MINDER To set a countdown. A signal sounds after the time has elapsed. This function does not affect the functioning of the oven. DURATION To set how long the oven is to be in use. To set when the oven is to switch off again. HEAT+HOLD To activate the HEAT+HOLD function, when it has been set "ON"... -
Page 30: Minute Minder
MINUTE MINDER 1. Press the SELECTION button repeatedly, until MINUTE MINDER and the symbol displayed. 2. Using the button, set the desired Countdown time (max. 99 minutes). The time is diplayed in minutes and seconds. After about 5 seconds the display shows the time remaining. - Page 31 DURATION 1. Select oven function and temperature. 2. Press the SELECTION button repeatedly until DURATION and the symbol is displayed. 3. Using the button, set the desired cooking time. After about 5 seconds the remaining cooking time is displayed. The symbol lights up: When the time has elapsed, an audible signal sounds for 2 minutes.
- Page 32 1. Select the oven function and temperature. 2. Press the SELECTION button repeatedly until END and the symbol are displayed. 3. Using the button, set the desired switch-off time. After about 5 seconds the switch-off time is displayed. The symbol lights up: When the time has elapsed, an audible signal sounds for 2 minutes.
- Page 33 DURATION and END combined DURATION and END can be used simultaneously, if the oven is to be switched on and off automatically at a later time. 1. Select the oven function and temperature. 2. Using the DURATION function, set the time that the dish needs to cook, for example: 1 hour.
- Page 34 "HEAT + HOLD" The function Heat+Hold keeps your prepared dish warm for 30 minutes, after the baking or roasting has ended. This is helpful, for example, when your guests are late. Fixed temperatur is above 80°C The "Heat+Hold" Function can be set "ON"...
-
Page 35: Additional Functions
Additional functions CHILD LOCK for the oven As soon as the CHILD LOCK is activated, the appliance cannot be operated. Switching on the CHILD LOCK 1. If necessary, switch on the appliance using the ON/OFF button. No oven function must be selected. 2. - Page 36 Oven automatic cut-out If not switched off after a certain time, or if the temperature is not modified, the oven switches off automatically. The oven switches itself off when the oven temperature is: 30 - 115°C after 12.5 hours 120 - 195°C after 8.5 hours 200 - 245°C...
-
Page 37: Inserting The Oven Shelf, The Baking Tray And The Dripping Pan
Inserting the Oven Shelf, the Baking Tray and the Dripping Pan The oven has four shelf levels, and is supplied with two shelves. The shelf positions are counted from the bottom of the oven as shown in the diagram. It is important that these shelves are correctly positioned as shown in the diagram. -
Page 38: Hints And Tips
Hints and Tips Always cook with the oven door closed. Stand clear when opening the drop down oven door. Do not allow it to fall open - support the door using the door handle, until it is fully open. The oven is supplied with an exclusive system which produces a natural circulation of air and the constant recycling of steam. -
Page 39: Cleaning And Maintenance
Cleaning and maintenance Before cleaning switch the oven off External cleaning and let it cool down. Regularly wipe over the control panel, The appliance must not be cleaned oven door and door seal using a soft cloth well with a superheated steam cleaner or wrung out in warm water to which a little a steam jet cleaner. - Page 40 Cleaning the oven door The following instructions explain how to disassemble the oven door as it is supplied by the Manufacturer. If your oven door has been reversed, please note that the references to the right or left side have to be Fig.
- Page 41 Figure 5. Tightly hold with both hands the second inner glass “E” and remove it from its original position also by sliding it upwards. After removing the inner glass, clean the oven door and the glasses. We recommend to clean the oven door using only a wet sponge and dry it after cleaning with a soft cloth.
- Page 42 Stainless steel or aluminium appliances: We recommend that the oven door is only cleaned using a wet sponge and dried after cleaning with a soft cloth. Never use steel wool, acids or abrasive products as they can damage the oven surface.
-
Page 43: Oven Shelves And Shelf Supports
Oven Shelves and Shelf Supports To clean the oven shelves, soak in warm soapy water and remove stubborn marks with a well wetted soap impregnated pad. Rinse well and dry with a soft cloth. The shelf supports can be removed for easy cleaning. - Page 44 The Hinged Grill This models is fitted with a hinged grill element, to enable you to clean the roof of the oven easily. Before proceeding ensure the oven is cool and is isolated from the electricity supply. " Undo the screw which hold the grill in place.
- Page 45 Replacing The Oven Light Disconnect the appliance If the oven bulb needs replacing, it must comply with the following specifications: - Electric power: 25 W, - Electric rate: 230 V (50 Hz), - Resistant to temperatures of 300°C, - Connection type: E14. These bulbs are available from your local Service Force Centre.
-
Page 46: Something Not Working
Something not working If the appliance is not working correctly, please carry out the following checks, before contacting your local Electrolux Service Centre. IMPORTANT: If you call out an engineer to a fault listed below, or to repair a fault caused by incorrect use or installation, a charge will be made even if the appliance is under guarantee. -
Page 47: Technical Data
Technical Data Heating element ratings Bottom heating element 1000 W Top Heating element 800 W True Fan 2000 W Fan Baking 3000 W Conventional 1800 W Rotitherm 2475 W Dual Grill 2450 W Single Grill 1650 W Slow Cook 2000 W Keep Warm 1800 W Oven light... -
Page 48: Instructions For The Installer
The mains cable and plug as supplied are to be Instructions for the Installer connected to a shockproof socket (230 V~, 50 The instructions given below are Hz). The shockproof socket must be installed in designed specifically for a qualified accordance with the regulations. -
Page 49: Building-In
Building-in To ensure correct operation of the built-in assembly, the kitchen cabinet and the recess for the built-in appliance must have suitable dimensions. When the appliance is fitted-in, there must be no open spaces left and it must be closed on all sides by the kitchen furniture to prevent the possibility of inadvertently touching “live”... -
Page 50: Service And Spare Parts
Securing the oven to the cabinet (Fig. 11). - Fit the appliance into the cabinet recess. - Open the oven door and secure the oven to the kitchen cabinet by placing the four distance holders (A) in the holes provided in the oven frame and then inserting the four wood screws (B) Fig.11... -
Page 51: Declaration Of Guarantee Terms
Declaration of guarantee terms Belgium Our appliances are produced with the greatest of care. However, a defect may still occur. Our consumer services department will repair this upon request, either during or after the guarantee period. The service life of the appliance will not, however, be reduced as a result. This declaration of guarantee terms is based on European Union Directive 99/44/EC and the provisions of the Civil Code. - Page 52 12. If, during the guarantee period, repairing the same defect repeatedly is not conclusive, or if the repair costs are considered disproportionate, in agreement with the consumer, the defective appliance may be replaced with another appliance of the same value. In this event, we reserve the right to ask for a financial contribution calculated according to the length of time it has been used.
-
Page 53: European Guarantee
European Guarantee This appliance is guaranteed by Electrolux in each of the countries listed at the back of this user manual, for the period specified in the appliance guarantee or otherwise by law. If you move from one of these countries to another of the countries listed below the appliance guarantee will move with you subject to the following qualifications: •... - Page 55 B89090-5 0,79 kWh 0,78 kWh 43 min. 41 min. 1130 cm²...
- Page 56 35697-4001 08/07 R.0...
Need help?
Do you have a question about the B 89090-5 and is the answer not in the manual?
Questions and answers
Πως λειτουργεί
The AEG Electrolux B 89090-5 is a built-in oven with electronic controls. It features various cooking functions, meat and automatic programs, and multiple options and settings. The oven includes a clock with additional functions and allows for inserting shelves, baking trays, and a dripping pan. It has a hinged grill for easier cleaning and a replaceable oven light. The appliance must be installed according to the provided instructions, and it operates on an electrical connection.
This answer is automatically generated