Table of Contents
Advertisement
Advertisement
Table of Contents

Related Manuals for AirLive N.MINI


Summary of Contents for AirLive N.MINI
- Page 1 N.MINI 300Mbps 11/b/g/n Mini-AP User’s Manual...
- Page 2 OvisLink Corp. has made the best effort to ensure the accuracy of the information in this user’s guide. However, we are not liable for the inaccuracies or errors in this guide. Please use with caution. All information is subject to change without notice All Trademarks are properties of their respective holders. AirLive N.MINI User’s Manual...
-
Page 3: Fcc Statement
IMPORTANT NOTE FCC Radiation Exposure Statement: This equipment complies with FCC radiation exposure limits set forth for an uncontrolled environment. This equipment should be installed and operated with minimum distance 20cm between the radiator & your body. AirLive N.MINI User’s Manual... -
Page 4: Table Of Contents
Router Mode..................... 17 4.1.2 AP/Client Mode....................18 Wireless ..................20 4.2.1 Basic Settings ....................20 4.2.2 Advanced Settings ..................23 4.2.3 Security ......................25 4.2.4 Access Control....................28 4.2.5 WDS Settings....................28 4.2.6 Site Survey ....................... 34 AirLive N.MINI User’s Manual... - Page 5 Checking TCP/IP Settings - Windows Vista..........68 5.2.5 Checking TCP/IP Settings - Windows 7 ............69 5.2.6 Internet Access ....................71 5.2.7 Macintosh Clients .................... 73 5.2.8 Linux Clients..................... 73 5.2.9 Other Unix Systems ..................74 5.2.10 Wireless Station Configuration ..............74 AirLive N.MINI User’s Manual...
- Page 6 Table of Contents Appendix A: Troubleshooting..............75 Overview....................75 General Problems ..................75 Internet Access ..................75 Wireless Access..................76 Appendix B: About Wireless LANs ............78 ......................78 Channels....................78 Security....................78 Wireless LAN Configuration..............79 AirLive N.MINI User’s Manual...
-
Page 8: Introduction
Introduction 1.1 Overview N.MINI is a pocket size IEEE802.11b/g/n router with 1 fast Ethernet ports, which provides a powerful high-speed wireless connection for compatible wireless-enabled devices into the network with the freedom to roam. With web-based UI, this wireless router is easy to be setup and maintained. -
Page 9: Features
FAQ are frequently updated with latest information. In addition, you might find new firmwares that either increase software functions or provide bug fixes for N.MINI. You can reach our on-line support center at the following link: http://www.airlive.com/support/support_2.jsp Since 2009, AirLive has added the “Newsletter Instant Support System” on our website. -
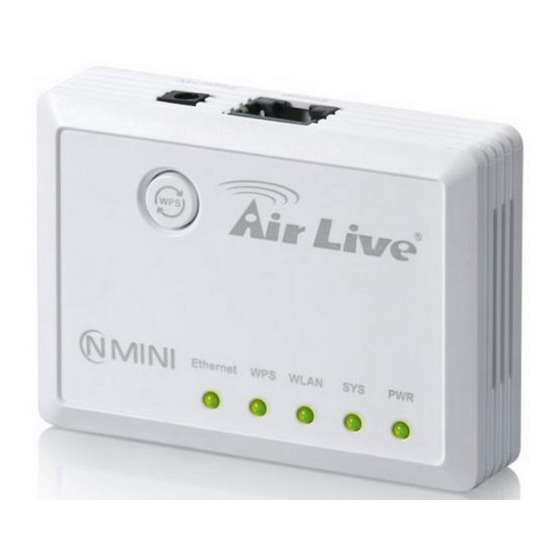
Page 10: Physical Details
Power on Blinking Power saving mode starting Press reset button two seconds the LED will on, keep on pressing more than 3-5 seconds, the LED System Green will start to flash Blinking System CPU is busy AirLive N.MINI User’s Manual... -
Page 11: Bottom Switch
Wireless Router will set all setting back to factory default values. Switch User need to MANUALLY switch the bar into the mode preferred, Router, AP or Client mode, then the device will reboot automatically into the mode selected. AirLive N.MINI User’s Manual... -
Page 12: Side Panel
When the mode be set to Router mode, connect the ADSL or Cable Modem here with RJ45 cable. If your modem came with a cable, use the supplied cable, otherwise, use a standard LAN cable (RJ45 connectors). Power (5V) Connect the supplied power adapter here. AirLive N.MINI User’s Manual... -
Page 13: Operation Modes
Wireless Router by Ethernet cable. After connected successfully, user can login the web page of the Wireless Router to set up the Internet connection by using PPPoE, DHCP client, PPTP client , L2TP client or static IP. AirLive N.MINI User’s Manual... -
Page 14: Access Point Mode
2. Operation Modes 2.2 Access Point Mode When acting as an Access Point (AP), this device connects all the stations (PC/notebook with wireless network adapter) to a wireless network. AirLive N.MINI User’s Manual... -
Page 15: Client Mode
2.3 Client Mode If set to Client (Infrastructure) mode, this device can work like a wireless station when it’s connected to a computer so that the computer can send packets from wired end to wireless interface. AirLive N.MINI User’s Manual... -
Page 16: Installation
Step3. After make a connection and set up(please refer to TCP/IP Settings> WAN Interface Setup) successfully, connect the ADSL or cable modem with an cable to the Ethernet port(act as WAN port here). If your modem came with a cable, use the supplied cable. AirLive N.MINI User’s Manual... -
Page 17: Bridging The Network
3.1.3 Bridging the Network Configure one N.MINI as AP and the other as Client… Step1. Please set one N.MINI to AP mode and the other N.MINI to Client mode. Using the hardware switch in the back of the APs. Step2. Wait for about 2 minutes for both AP to finish reboot Step3. -
Page 18: Login
Wireless Router's default IP address: AP or Router Mode IP 192.168.1.254 Client Mode IP: 192.168.1.253 Step4. After connected successfully, the following screen will show up. Simply enter the username “admin” without password to login(case-sensitive). AirLive N.MINI User’s Manual... - Page 19 3. Installation After login successfully, please click the Setup Wizard item that provides a primary configuration of this device. You may enter each screen to change the default settings step by step. AirLive N.MINI User’s Manual...
-
Page 20: Default Settings
3. Installation 3.3 Default Settings The default settings of N.MINI are listed below: AP or Router Mode IP: 192.168.1.254 • Client Mode IP: 192.168.1.253 • Username: admin • Password: airlive • SSID: airlive • If you cannot connect... If the Wireless Router does not respond, please check following: ... -
Page 21: Common Connection Types
3.3.2 DSL Modems Type Details ISP Data required Dynamic IP Your IP Address is None. Address allocated automatically, when you connect to you ISP. Static (Fixed) IP Your ISP allocates a IP Address allocated to you. AirLive N.MINI User’s Manual... -
Page 22: Other Modems (E.g. Broadband Wireless)
ISP Data required Dynamic IP Your IP Address is None Address allocated automatically, when you connect to you ISP. Static (Fixed) IP Your ISP allocates a IP Address allocated to you. Address permanent IP Address to you. AirLive N.MINI User’s Manual... -
Page 23: Web Configuration
You may enter each screen to change the default settings step by step. 4.1 Setup Wizard The setup wizard will guide you to configure access point for first time. Please follow the setup wizard step by step. AirLive N.MINI User’s Manual... -
Page 24: Router Mode
Maximum input is 32 alphanumeric characters (case sensitive). User Name Enter the username that provide by your ISP provider. Maximum input is 32 alphanumeric characters (case-sensitive). Password Enter the password that provide by your ISP provider. Maximum input is 32 alphanumeric characters (case-sensitive). AirLive N.MINI User’s Manual... -
Page 25: Ap/Client Mode
A SSID is referred to a network name because essentially it is a Name (SSID) name that identifies a wireless network (case-sensitive). Step 2- Select Wireless Security Mode User can setup the security here, it is strongly recommended to set up security mode to prevent any unauthorized accessing. AirLive N.MINI User’s Manual... - Page 26 ASCII (WEP 64 bits): 5 ASCII characters (case-sensitive). ASCII (WEP 128 bits): 13 ASCII characters (case-sensitive). Key Setting: Enter the key in the key setting field. WPA/WPA2/WPA2 Mixed Key Length: Select key length 64-bit or 128-bit. AirLive N.MINI User’s Manual...
-
Page 27: Wireless
Hexadecimal (WEP 128 bits): 26 Hex characters (0~9, a~f). ASCII (WEP 64 bits): 5 ASCII characters (case-sensitive). ASCII (WEP 128 bits): 13 ASCII characters (case-sensitive). Key Setting: Enter the key in the key setting field. 4.2 Wireless 4.2.1 Basic Settings AirLive N.MINI User’s Manual... - Page 28 A SSID is referred to a network name because essentially it is a (SSID) name that identifies a wireless network(case-sensitive). Channel Width This function will be available under 2.4GHz (N), 2.4GHz (G+N), 2.4GHz (B+G+N) mode. Select 20MHz the channel number will AirLive N.MINI User’s Manual...
- Page 29 Enable Mac Clone This function will be enabled under Client mode. (Single Ethernet Client) Enable Universal This function will be enabled under AP mode. Repeater Mode (Acting as AP and Client simultaneously) AirLive N.MINI User’s Manual...
-
Page 30: Advanced Settings
This value should remain at its default setting of 2347. Should you encounter inconsistent data flow, only minor modifications of this value are recommended. AirLive N.MINI User’s Manual... - Page 31 Select Enabled or Disabled to execute this function. The default is Disabled. 20/40MHz Coexist Select Enabled or Disabled to execute this function. The default is Disabled. RF Output Power Select the transmitting power rate 100%, 70%, 50%, 35%, 15%. AirLive N.MINI User’s Manual...
-
Page 32: Security
WPA and WPA2 only support TKIP and AES as encryption method. Shared Key only supports WEP as encryption method. AUTO(Open/Shared) means AP can accept station connect to it using OPEN-WEP or SHARED-WEP 802.1x Authentication: Check the box to enable the 802.1x authentication. AirLive N.MINI User’s Manual... - Page 33 Address provided by your ISP. RADIUS Server Port: Enter the RADIUS Server’s port number provided by your ISP. The default is 1812. RADIUS Server Password: Enter the password that the AP shares with the RADIUS Server. WPA/ WPA2/ WPA2-Mixed AirLive N.MINI User’s Manual...
- Page 34 Address provided by your ISP. RADIUS Server Port: Enter the RADIUS Server’s port number provided by your ISP. The default is 1812. RADIUS Server Password: Enter the password that the AP shares with the RADIUS Server. AirLive N.MINI User’s Manual...
-
Page 35: Access Control
Wireless Distribution System uses wireless media to communicate with other APs, like the Ethernet does. To do this, you must set these APs in the same channel and set MAC address of other APs which you want to communicate with in the table and then enable the AirLive N.MINI User’s Manual... - Page 36 To setup WDS must use the same wireless products (the same model will be better); due to different wireless products might support different WDS settings. Thus, it is suggested that to use the same wireless products that support WDS function. AirLive N.MINI User’s Manual...
- Page 37 WDS function and then enter Wireless MAC address (please make sure the BSSID of the other WDS supported AP) 12 characters to each other to make the WDS connection. Please click Apply Changes button to execute. AirLive N.MINI User’s Manual...
- Page 38 Wireless Configuration to find your BSSID (Wireless MAC address.) Data Rate Select the data rate form the pull-down list. Comment Enter a description for the device. Apply Changes After completing the settings on this page, click Apply changes button to save the settings. AirLive N.MINI User’s Manual...
- Page 39 (0-9, or A-F). Select ASCII if you are using ASCII characters (case-sensitive). Hexadecimal (WEP 64 bits): 10 Hex characters (0~9, a~f). Hexadecimal (WEP 128 bits): 26 Hex characters (0~9, a~f). ASCII (WEP 64 bits): 5 ASCII characters (case-sensitive). AirLive N.MINI User’s Manual...
- Page 40 WDS AP. Refresh: Click to renew the counters information. Close: Click to leave the screen. Current WDS AP List Here shows the current WDS AP information. Delete Selected Click Delete Selected to delete the selected AP information. AirLive N.MINI User’s Manual...
-
Page 41: Site Survey
Refresh Check this button to renew all the listed access point. Connect Under the client mode and select a site that you would like to communicate, and then click the Connect button to make a connection. AirLive N.MINI User’s Manual... -
Page 42: Wps
This table shows the security status of the Wireless Router. If user would like to set up the security, please go to Wireless > Security. Client PIN Number Enter the client (Enrollee) PIN code into the blank field then click AirLive N.MINI User’s Manual... -
Page 43: Schedule
IP address. 4.2.8 Schedule Enable Wireless Check the box to enable the schedule function. Set up the time to Schedule schedule the wireless access rule. Select the day and time you want to enable the wireless function. AirLive N.MINI User’s Manual... -
Page 44: Tcp/Ip Settings
The starting address of this local IP network address pool. The pool is a piece of continuous IP address segment, the device will distribute IP addresses from 192.168.1.100 to 192.168.1.200 to all the computers in the network that request IP addresses from AirLive N.MINI User’s Manual... - Page 45 IP Address: Enter the fixed IP address that DHCP server assigned to a certain connected station. MAC Address: Enter the MAC address of a certain station, and then the DHCP server will to distribute a fixed IP address to the AirLive N.MINI User’s Manual...
- Page 46 Internet. This MAC address is the PC’s MAC address that your ISP had originally connected your Internet connection to. Type in the MAC address to replace the WAN MAC address with the MAC address of that PC. AirLive N.MINI User’s Manual...
-
Page 47: Wan Interface
4. Web Configuration 4.3.2 WAN Interface WAN Access Type DHCP Client If the DHCP Client connection be selected, the PC will obtain the IP address automatically. AirLive N.MINI User’s Manual... - Page 48 ISP, or you can specify your own preferred DNS server IP address(es). DNS 2/ DNS 3: These servers are optional. You can enter another DNS server’s IP address as a backup. DNS 2 and 3 servers will be used when the DNS 1 server fails. AirLive N.MINI User’s Manual...
- Page 49 Reducing the packet size can help connecting to certain web sites or speeding up packet transfer rate. If the incorrect packet size is entered, you may not be able to open certain web sites. AirLive N.MINI User’s Manual...
- Page 50 Reducing the packet size can help connecting to certain web sites or speeding up packet transfer rate. If the incorrect packet size is entered, you may not be able to open certain web sites. AirLive N.MINI User’s Manual...
- Page 51 If the incorrect packet size is entered, you may not be able to open certain web sites. Attain DNS Select to Attain DNS Automatically or select Set DNS Manually to Automatically set the DNS server IP address at the following DNS 1~3 AirLive N.MINI User’s Manual...
-
Page 52: Firewall
Check to enable the listed functions. Apply Changes After completing the settings on this page, click Apply changes button to save the settings. Reset Click Reset to restore to default values. 4.4 Firewall 4.4.1 Port Filtering AirLive N.MINI User’s Manual... -
Page 53: Ip Filtering
Click Delete Selected button to delete items which are selected. Delete All Click Delete All button to delete all the items. Reset Click Reset button to rest. 4.4.2 IP Filtering Enable IP Filtering Check to enable IP filtering function. AirLive N.MINI User’s Manual... -
Page 54: Mac Filtering
Click Reset button to rest. 4.4.3 MAC Filtering Enable MAC Filtering Check to enable MAC filtering function. MAC Address Enter the client MAC address in the field. Comment You may key in a description MAC address. AirLive N.MINI User’s Manual... -
Page 55: Port Forwarding
Select the protocol (TCP, UDP or Both) used to the remote system or service. Port Range For TCP and UDP Services, enter the beginning of the range of port numbers used by the service. If the service uses a AirLive N.MINI User’s Manual... -
Page 56: Url Filtering
4.4.5 URL Filtering Enable URL Filtering Check to enable URL filtering function. URL Address Enter the URL address in the field Apply Changes After completing the settings on this page, click Apply Changes button to save the settings. AirLive N.MINI User’s Manual... -
Page 57: Dmz
You need to give your LAN PC clients a fixed/static IP address for DMZ to work properly. Apply Changes After completing the settings on this page, click Apply Changes button to save the settings. Reset Click Reset button to restore to default values AirLive N.MINI User’s Manual... -
Page 58: Vlan
LAN segments. Because VLANs are based on logical instead of physical connections, it is very flexible for user/host management. Enable this function to setup the virtual local area network. AirLive N.MINI User’s Manual... -
Page 59: Qos
4. Web Configuration 4.5 QoS Use this section to configure QoS. The QoS settings improve your online gaming experience by ensuring that your game traffic is prioritized over other network traffic, such as FTP or Web. AirLive N.MINI User’s Manual... - Page 60 Select Guaranteed minimum bandwidth or Restricted maximum bandwidth modes. Uplink Bandwidth Enter the Uplink Bandwidth (Kbps) in the column. (Kbps) Downlink Bandwidth Enter the Downlink Bandwidth (Kbps) in the column. (Kbps) Comment Enter the note for the setting. AirLive N.MINI User’s Manual...
-
Page 61: Route Setup
RIP and OSPF. Network Address Translation (NAT) selects to enable or disable this function. Transmit Select to enable or disable RIP protocol for transmit. Receive Select to enable or disable RIP protocol for receive. AirLive N.MINI User’s Manual... -
Page 62: Management
Maximum Transmission Unit (MTU), reliability and communications cost. Interface Select the interface of the setting path. 4.7 Management 4.7.1 Status This page shows the current Wireless Router settings information. AirLive N.MINI User’s Manual... -
Page 63: Statistics
4. Web Configuration 4.7.2 Statistics This page shows the packet counters for transmission and reception regarding to wireless and Ethernet networks. AirLive N.MINI User’s Manual... -
Page 64: Dynamic Dns
Enter your passwords that you registered in service provider website. Maximum input is 30 alphanumeric characters (case sensitive). Apply Changes After completing the settings on this page, click Apply Changes button to save the settings. Reset Click Reset button to restore to default values. AirLive N.MINI User’s Manual... -
Page 65: Time Zone Setting
IP Setting enter an IP address of a specific server manually. Apply Changes After completing the settings on this page, click Apply Changes button to save current settings. Refresh Click Refresh button to renew current time. AirLive N.MINI User’s Manual... -
Page 66: Denial Of Service
Prevention with invalid packets and connection requests, using so much bandwidth and so many resources that Internet access becomes unavailable. The Wireless Router incorporates protection against DoS attacks. This screen allows you to configure DoS protection. AirLive N.MINI User’s Manual... -
Page 67: Logs
DoS preventions. Clear All After you enabled the DoS prevention, you can click to uncheck all DoS preventions. Apply Changes After completing the settings on this page, click Apply Changes button to save current settings. 4.7.6 Logs AirLive N.MINI User’s Manual... -
Page 68: Upgrade Firmware
Select File Click the Browse button to find and open the firmware file (the browser will display to correct file path.) Upload Click the Upload button to perform. Reset Click Reset button to restore to default values. AirLive N.MINI User’s Manual... -
Page 69: Save /Reload Settings
Click the Browse button to find and open the previous saved file File (the browser will display to correct file path.) Then, click Upload button to upload the previous file. Reset Settings to Click Reset button to set the device back to default settings. Default 4.7.9 Password AirLive N.MINI User’s Manual... -
Page 70: Log Out
New Password Maximum input is 30 alphanumeric characters (case sensitive.) Confirmed Password Key in the password again to confirm. 4.8 Log out Click the Logout button to leave the web configuration page. AirLive N.MINI User’s Manual... -
Page 71: Pc Configuration
5.2.2 Checking TCP/IP Settings - Windows 2000 1. Select Control Panel - Network and Dial-up Connection. 2. Right - click the Local Area Connection icon and select Properties. You should see a screen like the following: AirLive N.MINI User’s Manual... - Page 72 5. PC Configuration 3. Select the TCP/IP protocol for your network card. 4. Click on the Properties button. You should then see a screen like the following. Ensure your TCP/IP settings are correct, as described below. AirLive N.MINI User’s Manual...
-
Page 73: Checking Tcp/Ip Settings - Windows Xp
2. Right click the Local Area Connection and choose Properties. You should see a screen like the following: 3. Select the TCP/IP protocol for your network card. 4. Click on the Properties button. You should then see a screen like the following. AirLive N.MINI User’s Manual... - Page 74 LAN administrator can advise you of the IP Address they assigned to the Wireless Router. If the DNS Server fields are empty, select Use the following DNS server addresses, and enters the DNS address or addresses provided by your ISP, then click OK. AirLive N.MINI User’s Manual...
-
Page 75: Checking Tcp/Ip Settings - Windows Vista
2. Right click the Local Area Connection icon and choose Properties. You should see a screen like the following: 3. Select the Internet Protocol Version 4(TCP/IPv4) or 6 (TCP/IPv6) for your network card. 4. Click on the Properties button. You should then see a screen like the following. AirLive N.MINI User’s Manual... -
Page 76: Checking Tcp/Ip Settings - Windows 7
1. Go to Start > Control Panel> Network and Sharing Center> Manage Network Connections> Local Area Connection. 2. Right click the Local Area Connection icon and choose Properties. You should see a screen like the following: AirLive N.MINI User’s Manual... - Page 77 5. PC Configuration 3. Select the Internet Protocol Version 4(TCP/IPv4) or 6 (TCP/IPv6) for your network card. 4. Click on the Properties button. You should then see a screen like the following. AirLive N.MINI User’s Manual...
-
Page 78: Internet Access
1. Select Start menu >Control Panel > Network and Internet Connections. 2. Select Set up or change your Internet Connection. 3. Select the Connection tab, and click the Setup button. 4. Cancel the pop-up "Location Information" screen. AirLive N.MINI User’s Manual... - Page 79 4. Click Edit Location. Select TCP/IP for the Network field. (Leave the Phone Number blank.) 5. Click Save, then OK. 6. Configuration is now complete. 7. Before clicking "Sign On", always ensure that you are using the " Wireless Router " location. AirLive N.MINI User’s Manual...
-
Page 80: Macintosh Clients
3. Select the "Interface" entry for your Network card. Normally, this will be called "eth0". 4. Click the Edit button, set the "protocol" to "DHCP", and save this data. 5. To apply your changes: Use the "Deactivate" and "Activate" buttons, if available. OR, restart your system. AirLive N.MINI User’s Manual... -
Page 81: Other Unix Systems
Each station must set up the RADIUS Server’s IP 802.1x address, port and passwords that provided by your ISP. Note By default, the Wireless Router will allow 802.11b, 802.11g and 802.11n connections. AirLive N.MINI User’s Manual... -
Page 82: Appendix A: Troubleshooting
When I enter a URL or IP address I get a time out error. Solution 1: A number of things could be causing this. Try the following troubleshooting steps. Check if other PCs work. If they do, ensure that your PCs IP AirLive N.MINI User’s Manual... -
Page 83: Wireless Access
If security is enabled on the Wireless Router, your PC must have security enabled, and the key must be matched. To see if radio interference is causing a problem, see if connection is possible when close to the Wireless Router. AirLive N.MINI User’s Manual... - Page 84 Any "noisy" devices should be shielded or relocated. RF Shielding Your environment may tend to block transmission between the wireless stations. This will mean high access speed is only possible when close to the Wireless Router. AirLive N.MINI User’s Manual...
-
Page 85: Appendix B: About Wireless Lans
64 Bits, 128 Bits. For 64 Bits encryption, the Key value must match. For 128 Bits encryption, the Key value must match. WEP Authentication Open System or Shared Key. AirLive N.MINI User’s Manual... -
Page 86: Wireless Lan Configuration
OPEN-WEP or SHARED-WEP. If WEP remains disabled on the Wireless Router, all stations must have WEP disabled. If WEP is enabled on the Wireless Router, each station must use the same settings as the Wireless Router. AirLive N.MINI User’s Manual... - Page 87 Server that desires to authenticate its links. The server is a server that has access to a user database with authentication information. Each station must set up the RADIUS Server’s IP WPA2 address, port and passwords that provided by your ISP. WPA2-Mixed 802.1x AirLive N.MINI User’s Manual...
Need help?
Do you have a question about the N.MINI and is the answer not in the manual?
Questions and answers