Table of Contents
Advertisement
Welcome to Team Giant
Giant is a global bicycle company, dedicated to bringing you the finest bicycles for over thirty years. The Giant brand is sold throughout Europe,
the Pacific Rim and North America by Giant Professional Cycling Retailers. Just about anywhere you go, you'll find Giant Bicycles.
We may be big, but it's the local touch from our dealers that provides the assistance that will make your ride safe and fun. Authorized Giant
Dealers are the only place in the U.S. and Canada where you can buy the Giant product of your choice. We are dedicated to the independent
bicycle dealers in your community because they are the most professional and best-qualified source to assure your bike's mechanical integrity,
guarantee proper fit, give you proper advice on where and when to ride, consult with you about safety (including selection and proper fit of a
helmet), properly assemble and install accessories, and to communicate anything and everything else you need to know about the grand sport
of cycling!
Our employees and Professional Cycling Retailers are justifiably proud of our international reputation for the highest-quality bicycle products
and service. We have spent the last three decades learning our craft and winning multiple awards for excellence along the way.
Giant makes a bike for every member of the family, for every stage of their lives, on any kind of terrain. Our contributions to cycling encompass
every facet of the sport and lifestyle, from transportation to recreation to competition. At Giant, we believe that the bicycle is more than just a
machine. We believe that it is an integral component of society, a friend, and a way to explore your personal boundaries. We're proud to know
that we have contributed to a healthy lifestyle for millions of people all around the world.
Giant Bicycle, Inc.
Advertisement
Table of Contents

Related Manuals for Giant Revive


Summary of Contents for Giant Revive
- Page 1 Pacific Rim and North America by Giant Professional Cycling Retailers. Just about anywhere you go, you’ll find Giant Bicycles. We may be big, but it’s the local touch from our dealers that provides the assistance that will make your ride safe and fun. Authorized Giant Dealers are the only place in the U.S.
-
Page 2: Table Of Contents
This manual is not intended as a comprehensive use, ser vice, repair or maintenance manual. Please see your dealer for all ser vice,repairs or maintenance. Your Dealer may also be able to refer you to classes, clinics or books on bicycle use, ser vice, repair or maintainance. -
Page 3: General Warning
A special note for parents: As a parent or guardian, you are responsible for the activities and safety of your minor child, and that includes making sure that the bicycle is properly fitted to the child; that it is in good repair and safe operating condition; that you and your child have learned and understand the safe operation of the bicycle;... -
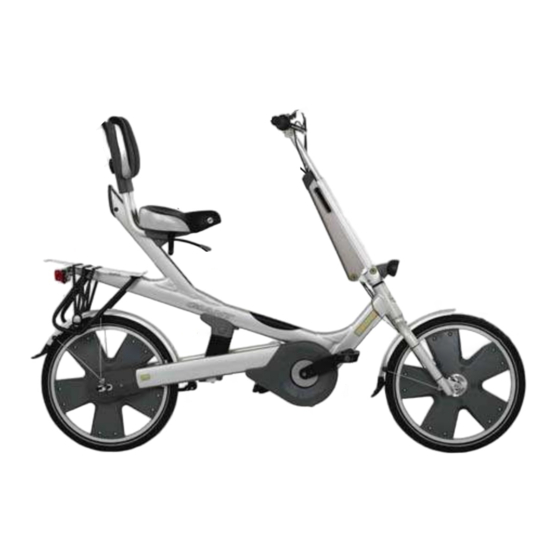
Page 4: Revive At A Glance
5-feet to 6-feet five inches tall. Revive’s unique riding position is designed to take pressure off the posterior, hands, shoulders, neck and back. Although it is a superior ergonomic position, you will still need to adjust the saddle height for optimum pedaling efficiency, as well as the handlebar stem for proper control and comfort. -
Page 5: What It's Called
1 . L u m b a r S u p p o r t 6 . G e a r S h i f t e r ( Tw i s t g r i p ) 2 . L u m b a r S u p p o r t 7 . -
Page 6: Getting The Right Fit
Seating Adjustment Saddle Height or maximum pedalling efficiency and power transfer, the saddle should be raised to a height that creates a bend in your knees of approximately 30 degrees when the pedal is farthest away from you (right pedal at 4 o’clock, left pedal at 8 o’clock). To Adjust Saddle Height: Use both hands to move the saddle up or down. -
Page 7: Handlebar Stem Adjustment
If there is a clicking sound when tightening, this is normal. WARNING Do not raise the handlebar past the “minimum insertion” line. WARNING Never open the handlebar/stem adjustment lever while riding. Doing so could cause you to lose control of the bicycle. FIG. 9 FIG. 6 FIG. 7... -
Page 8: Luggage Carrier
The maximum load capacity for the luggage carrier is 33 pounds (15 kilograms). WARNING: Revive is not designed to be used with a child carrier. DO NOT ATTEMPT TO ATTACH A CHILD CARRIER TO REVIVE. WARNING: Use caution when riding up a steep incline. Quick and forceful acceleration can cause the front wheel to raise up off the ground, which could cause you to lose control of the bicycle. -
Page 9: Revive Dx Cycle Computer
For your convenience a cycle computer has been integrated into the Reive DX handlebar. To avoid theft or damage while parked or transporting Revive, the computer can be easily removed. (For instructions on how to operate the cycle computer’s features, please refer to the instruction manual.) - Page 10 Stopping: Before coming to a stop, shift the drivetrain into an easier gear selection (1, 2, or 3 on the twist shifter gear indicator) so that you’ll be in an easier gear when you start rid ing again. lways use both brakes at the same time and place both feet on the ground.
-
Page 11: Giant Bicycles Owners Information
A. Bike fit . Is your bike the right size? To check, see Section 3.A. If your bicycle is too large or too small for you, you may lose control and fall. If your new bike is not the right size, ask your dealer to exchange it before you ride it. -
Page 12: Mechanical Safety Check
5. Does your bike have suspension? If so, check Section 4.F. Suspension can change the way a bicycle performs. Follow the suspension manufacturer’s instructions for use, adjustment and care. 6. Do you have toe overlap? On smaller framed bicycles your toe or toeclip may be able to contact the front wheel when a pedal is all the way forward and the wheel is turned. -
Page 13: First Ride
D. First ride When you buckle on your helmet and go for your first familiarization ride on your new bicycle, be sure to pick a controlled environment, away from cars, other cyclists, obstacles or other hazards. Ride to become familiar with the controls, features and performance of your new bike. -
Page 14: Safety
· Shoes that will stay on your feet and will grip the pedals. Never ride barefoot or while wearing sandals. · Bright, visible clothing that is not so loose that it can be tangled in the bicycle or snagged by objects at the side of the road or trail. - Page 15 5. Ride in designated bike lanes, on designated bike paths or as close to the edge of the road as possible. 6. Stop at stop signs and traffic lights; slow down and look both ways at street intersections. Remember that a bicycle always loses in a collision with a motor vehicle, so be prepared to yield even if you have the right of way.
-
Page 16: Off Road Safety
C. Off Road Safety . The variable conditions and hazards of off-road riding require close attention and specific skills. Start slowly on easier terrain and build up your skills. If your bike has suspension, the increased speed you may develop also increases your risk of losing control and falling. -
Page 17: Night Riding
Bicycle reflectors are designed to pick up and reflect street lights and car lights in a way that may help you to be seen and recognized as a moving bicyclist. -
Page 18: Downhill Or Competition Biking
There are many components and accessories available to enhance the comfort, performance and appearance of your bicycle. However, if you change components or add accessories, you do so at your own risk. The bicycle’s manufacturer may not have tested that component or accessory for compatibility, reliability or safety on your bicycle. -
Page 19: Fit
If your bicycle does not fit properly, you may lose control and fall. With a Revive breakthrough adjustability you can custom fit the bike to you, check the Revive section at the front of this manual for instructions on how to adjust the revive to fit your body, if in any doubt consult an approved Giant Dealer for assistance. - Page 20 Place one heel on the pedal. rotate the crank until the pedal with your heel on it is in the furthest position from your body. If your leg is not completely straight and just touching the center of the pedal, your saddle height needs to be adjusted. If your hips must rock for the heel to reach the pedal, the saddle is too high.
-
Page 21: Handlebar Height And Angle
Revive section of this manual for instructions. If you aren’t absolutely sure how to adjust the Revive stem your bike has, ask your dealer. There are currently two types of Revive Stems, If the stem has an etched or stamped mark on its shaft which designates the stem minimum Insertion or maximum extension, This mark must not be visible above the headset. -
Page 22: Tech
The Revive is fitted with Bolt on wheels, do not attempt to remove the rear wheel if you have a hub gear fitted otherwise consult your dealer when it is appropriate to remove the wheels. - Page 23 (3) Re-engage the brake quick-release mechanism to restore correct brake pad-to-rim clearance; spin the wheel to make sure that it is centered in the frame and clears the brake pads; then squeeze the brake lever and make sure that the brakes are operating correctly. c.
-
Page 24: B.seatpost Quick Release
(2) With a correctly sized box wrench or a six-inch adjustable wrench, loosen the two axle nuts. (3) Push the wheel forward to slacken the chain, and remove the chain from the chainring and wheel sprocket. (4) Pull the wheel out of the frame. FIG. -
Page 25: Brakes
3. Some bicycle brakes, such as disc brakes (fig. E) and linear-pull brakes (fig. F), are extremely powerful. Take extra care in becoming familiar with these brakes and exercise particular care when using them. - Page 26 The braking action of a bicycle is a function of the friction between the brake surfaces - usually the brake pads and the wheel rim. To make sure that you have maximum friction available, keep your wheel rims and brake pads clean and free of lubricants, waxes or polishes.
-
Page 27: Shifting Gears
D. Shifting gears Your multi-speed bicycle will have a derailleur drivetrain (see 1. below), an internal gear hub drivetrain (see 2. below) or, in some special cases, a combination of the two. - Page 28 Whether upshifting or downshifting, the bicycle derailleur system design requires that the drive chain be moving forward and be under at least some tension. A derailleur will shift only if you are pedaling forward.
-
Page 29: How An Internal Gear Hub Drivetrain Works
The derailleur may be out of adjustment and the chain could jam, causing you to lose control and fall. 2. How an internal gear hub drivetrain works If your bicycle has an internal gear hub drivetrain, the gear changing mechanism will consist of: a 3, 5, 7 or possibly 12 speed internal gear hub . -
Page 30: Pedals
2. Some higher performance bicycles come equipped with pedals that have sharp and potentially dangerous surfaces. These surfaces are designed to add safety by increasing adhesion between the rider’s shoe and the pedal. If your bicycle has this type of high-performance pedal, you must take extra care to avoid serious injury from the pedals’... -
Page 31: Bicycle Suspension
Many bicycles are equipped with suspension systems. There are many different types of suspension systems - too many to deal with individually in this Manual. If your bicycle has a suspension system of any kind, be sure to read and follow the suspension manufacturer’s setup and service instructions. - Page 32 2. Tire Valves There are primarily two kinds of bicycle tube valves: The Schraeder Valve and the Presta Valve. The bicycle pump you use must have the fitting appropriate to the valve stems on your bicycle.
- Page 33 The Presta valve (fig. S) has a narrower diameter and is only found on bicycle tires. To inflate a Presta valve tube using a Presta headed bicycle pump, remove the valve cap; unscrew (counterclockwise) the valve stem lock nut; and push down on the valve stem to free it up.
-
Page 34: Service
Technological advances have made bicycles and bicycle components more complex, and the pace of innovation is increasing. It is impossible for this manual to provide all the information required to properly repair and/or maintain your bicycle. In order to help minimize the chances of an accident and possible injury, it is critical that you have any repair or maintenance which is not specifically described in this manual performed by your dealer. - Page 35 Scratches, cracks, fraying and discoloration are signs of stress-caused fatigue and indicate that a part is at the end of its useful life and needs to be replaced. While the materials and workmanship of your bicycle...
-
Page 36: About Your Dealer
First, check yourself for injuries, and take care of them as best you can. Seek medical help if necessary. Next, check your bike for damage, and fix what you can so you can get home. Then, take your bicycle to your dealer for a thorough check. -
Page 37: Warranty Information
1. Position of the Frame Serial Number You will find the frame number of your Giant bicycle on the seat tube near the bottom bracket set, on the underside of the bottom bracket set or on the left rear dropout. -
Page 38: Giant Bicycle Limited Warranty
7. Giant Bicycle Limited Warranty: Giant Bicycle, Inc. (“Giant”) warrants the steel frame and rigid steel fork of each new Giant brand bicycle to be free from defects in material and workmanship for as long as the original purchaser owns the bicycle. All Aluminum and Carbon Fiber frames and rigid forks as well as Suspension frames are warranted to be free from defects in materials and workmanship for the original owner for a period of 5 years from the date of purchase. - Page 39 What You Should Do Bring your bicycle along with a purchase receipt or other proof of the date of purchase to an Authorized Giant Dealer or write to the Customer Service Department at: Giant Bicycle, Inc.
Need help?
Do you have a question about the Revive and is the answer not in the manual?
Questions and answers
Front brake cable assembly on my Revive broken … how do I fix it ???… Do I need to buy any parts ????