Table of Contents
Advertisement
Quick Links
Advertisement
Table of Contents

Related Manuals for AirLive WMU-6000FS


Summary of Contents for AirLive WMU-6000FS
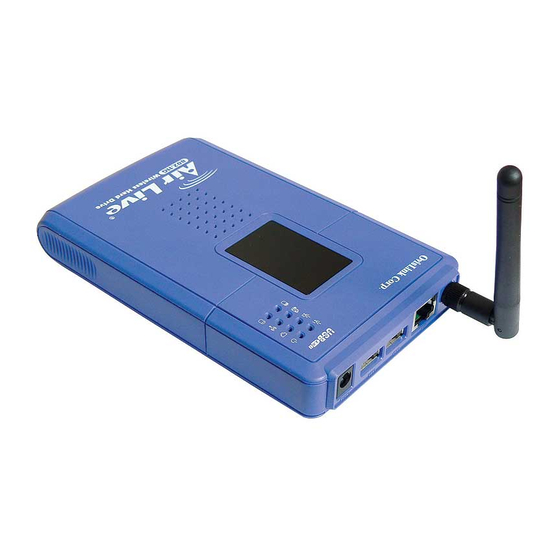
- Page 1 WMU-6000FS Portable Wireless AP Storage User’s Manual...
- Page 2 CE Declaration of Conformity This equipment complies with the requirements relating to electromagnetic compatibility, EN 55022/A1 Class B. Note. The content of user manual will be revised without notice. AirLive WMU-6000FS User’s Manual...
-
Page 3: Table Of Contents
2.3.1 Accessing the network hard drive via my network places..25 2.3.2 Searching the computers ............26 2.3.3 Search the “Entire Network” Manually ........26 2.3.4 Accessing Files via FTP ............27 Chapter 3: Making Configuration ................28 3.1 Wizard.......................30 3.2 Network Settings ..................37 3.2.1 DHCP Setting................37 3.2.2 Wireless Setting................38 AirLive WMU-6000FS User’s Manual... - Page 4 7.2 Configuring on Unix-like based Platforms ...........65 7.3 Apple OS ....................71 Chapter 8: Trouble Shootings ................73 What can I do when I have some trouble in the first time?......73 How to setup wireless function?..............75 Problems of security level ................87 AirLive WMU-6000FS User’s Manual...
-
Page 5: Chapter 1: Introduction
1.1 Overview The AirLive WMU-6000FS is an ultra slim design and compact size of Portable Wireless AP Storage. It is an ideal device for travelers and home users who need to back up and share files more efficiently and easily anytime and anywhere. -
Page 6: Features
The AirLive WMU-6000FS supports the UPnP content directories and users can share the music and video files easily. Besides, the click-and-copying of files from a flash drive to the AirLive WMU-6000FS hard disk make the user backup files efficiently. - Page 7 IEEE 802.11g compatible (54Mbps): Allowing inter-operation among multiple vendors. Wireless data rate supported: 6/12/18/24/36/48/54 Mbps in 802.11g mode; 1/2/5.5/11Mbps in 802.11b mode. 64/128-bit WEP encryption. Support 802.1X authentication. Support WPA with TKIP and AES encryption. Support AP and WDS wireless modes. AirLive WMU-6000FS User’s Manual...
-
Page 8: System Requirements
1.3 System Requirements To start to use the AirLive WMU-6000FS, your system must have the following minimum requirements: Windows 95 / 98 / ME / 2000 / XP. An Ethernet (10BaseT or 10/100 BaseT) adapter for wired client. At least one WLAN client adapter of 802.11g(54Mbps) or 802.11b(11Mbps) for wireless connection. -
Page 9: Hardware Ports And Buttons
5V/3A Power inlet USB1 / USB2 The ports where you can connect to any USB storage. Automatically MDI/MDIX LAN port can sense the cable type when connecting to Ethernet-enabled computer, network of hub, switch or router AirLive WMU-6000FS User’s Manual... -
Page 10: Led Indicators
Press the button over 4 seconds to copy data from USB device to HDD. Reset Press the buttons of “Shutdown” and “Backup” simultaneously over 6 seconds to reset the system to the factory default setting. 1.6 LED Indicators AirLive WMU-6000FS User’s Manual... - Page 11 On Transmitting Not in use HDD read/write USB1 / USB2 No device USB drive ready Backup Backup files from USB to HDD HDD Status No HDD HDD full or error More blinking quickly, fewer available HDD capacity. AirLive WMU-6000FS User’s Manual...
-
Page 12: Chapter 2: Getting Started
Step 1: Use one hand to hold on the AirLive WMU-6000FS, and the other hand to open the upper cover carefully. - Page 13 Step 2: Remove the upper cover Step 3: Insert the 2.5-inch hard drive into the slot. Make sure the hard drive connecting pins and the connectors are properly aligned. AirLive WMU-6000FS User’s Manual...
- Page 14 Step 4: Put the upper cover back and assemble the cover tightly. Step 5: Fasten the screw to make sure the hard drive would not loosen. AirLive WMU-6000FS User’s Manual...
-
Page 15: Making Connections
2.2 Making Connections In order to access the AirLive WMU-6000FS as the network storage drive or as an AP, you may need to configure the TCP/IP settings correctly. Either the “Wired Ethernet settings” or “Wireless Connection” can be used to connect the WMU-6000FS easily. - Page 16 If not, please install those communication protocols. If you use other operating system, such as Linux X-window or Mac OS, please refer to original manual of your OS to finish the configurations of TCP/IP and other required communication protocols. AirLive WMU-6000FS User’s Manual...
-
Page 17: Wired Ethernet Connection
AirLive WMU-6000FS will detect automatically if the DHCP server is existed, it will get a IP address form DHCP server. If there is no DHCP server, AirLive WMU-6000FS will assign a random IP to client and you can get some information as below shown. - Page 18 “airlive” to start. NOTE. The default login password is “airlive” If there is a DHCP server in the network, AirLive WMU-6000FS will be as the client and get one IP address from DHCP server. You can also use configuration utility to Query to find the IP address that WMU-6000FS gets.
- Page 19 Method 2: Use “My Network Places” to Search and Setup First, go to My Network Places and search “Computer name”. Input “WMU-6000FS” and start to search and you will find one device. Click “samba server” and you will see two folders. Then click the folder “Configure”.
- Page 20 Please click “Configure.html” directly to see configuration page. In addition, the user can allocate the IP by himself as below: AirLive WMU-6000FS User’s Manual...
- Page 21 192.168.123.88 as the IP address. The Subnet mask must be 255.255.255.0, and the Default gateway must be 192.168.123.254. Then click “OK” button to complete TCP/IP setup. Step2: Open the DOS command from the Start Menu->Run, and type “cmd” then click OK. AirLive WMU-6000FS User’s Manual...
-
Page 22: Wireless Connection
2.2.3 Wireless Connection Follow the steps below to connect to the AirLive WMU-6000FS in a wireless environment. We assume that there is at least one WLAN card installed on your computer, and AP Storage is powered on Step 1: Enabling the WLAN card first, and check the Wireless Network Connection properties from My Network Places. - Page 23 Step 3: Open the DOS command from the Start Menu->Run. Type “cmd” in the Open folder, then click OK to enter the DOS environment. Step 4: type the “ipconfig” and press the “Enter” in the DOS environment. AirLive WMU-6000FS User’s Manual...
-
Page 24: File Sharing
2.3 File sharing The AirLive WMU-6000FS can be a shared network hard drive in an existing wireless or wired network environment. The users in the same network area can read or write data from the device as required. The following various steps are for users to start using the network hard drive. -
Page 25: Accessing The Network Hard Drive Via My Network Places
Select the “My Network Places” and type the address of “\\Wmu6000fs” and press “Enter”, then you will find the Storage icon. Click the “Storage” icon, and will find the C folder as below. This means you are successfully connected to the AirLive WMU-6000FS storage function. AirLive WMU-6000FS User’s Manual... -
Page 26: Searching The Computers
Open Windows Explorer, and then click the My Network Places icon. Double click the Entire Network to view the components of the network. Select and click the Microsoft Windows Network icon, then the various network components showed in the list. AirLive WMU-6000FS User’s Manual... -
Page 27: Accessing Files Via Ftp
2.3.4 Accessing Files via FTP AirLive WMU-6000FS offers FTP service for the clients which don’t support Microsoft Windows File sharing. You can use any FTP client utility to connect to WMU-6000FS with anonymous username and password (username: ftp, and without password) when the permission setting is set to “Guest Only”. But if you change to “Authorization users”... -
Page 28: Chapter 3: Making Configuration
The WMU-6000FS can be configured various settings through the Configuration Tool. Even you don’t know which IP is being used by AirLive WMU-6000FS, the Configuration Tool will help you to find it. All you have to do is click the “Query” button of the Configuration Tool. - Page 29 “Wizard” if you want to do basic settings with simpler way. (Please check chapter 3.1) Press “General” if y ou want to make some advanced settings. (Please check each item from chapter 3.2) Press “Log out” if you don’t w ant to do anything. AirLive WMU-6000FS User’s Manual...
-
Page 30: Wizard
.1 Wizard ith wizard setting steps, you could configure AirLive WMU-6000FS in a very simple way. Press button Next to start configuration. tep 0: Select Language AirLive WMU-6000FS User’s Manual... - Page 31 Step 1: You have to choose the DHCP option, default setting is Auto. If you use Server/Auto/Static mode, you need to set some TCP/IP settings for WMU-6000FS. If you are not sure these values, ask your MIS or ISP. AirLive WMU-6000FS User’s Manual...
- Page 32 If you choose to use AP Only Mode, in next page, you could specify the SSID and the wireless channel number for WMU-6000FS. If you select the Wireless Client Mode, in next page, you would have to specify the AP that you want WMU-6000FS to connect to. AirLive WMU-6000FS User’s Manual...
- Page 33 You have two ways to do this job. One is searching the AP that WMU-6000FS could get. In this page, you could select the AP you want WMU-6000FS to connect with. AirLive WMU-6000FS User’s Manual...
- Page 34 The other way to add an AP is adding the SSID manually. Step 3: You have two ways to set time for WMU-6000FS. You could sync time with your PC, or set time manually. Step 4: If you use a whole new hard disk, please select “Yes”. If you already have data in this hard disk, you might want to select “No”.
- Page 35 Step 5: Check your settings again before saving. Click “Discard Settings” and you could return the first page. If you want to change any setting, please click “Previous” button. If everything is okay, click “Save Settings”. AirLive WMU-6000FS User’s Manual...
- Page 36 If you need to format disk, please wait the progressing bar become 100%. After all done, system would reboot automatically. Please wait 30 seconds at least for system restarting. AirLive WMU-6000FS User’s Manual...
-
Page 37: Network Settings
DHCP server on the network, the WMU-6000FS will receive an automatic IP address and subnet mask assignment. If no DHCP server on the network, the WMU-6000FS will be a DHCP server on the network. Static: You can manually configure the IP address and subnet mask. -
Page 38: Wireless Setting
Gateway. If you do not know how to set up the Gateway, lea ve this option blank. Client List: When WMU-6000FS is as a DHCP server, here will sho w some information of DHCP client. Fixed Mapping: DHCP server can assign the same IP address to a certain “MAC... - Page 39 Status: to show the current wireless mode you are using. Wireless mode description: to describe the each wireless mode’s major function. Wireless modes selection: WMU-6000FS provides four wireless modes to select. Choose the wireless mode you need and click “Go” to set up detail functions.
- Page 40 LAN, a station must have the same SSID as the access point. The default SSID setting is “airlive”. NOTE: Please DO NOT set the same SSID with your current wireless network. Channel: The radio channel number. The default channel is “6”.
- Page 41 Note. This de vice only supports WPA version 1. WPA: WPA applies IEEE802.1x and Extensible Authentication Protocol (EAP) to authenticate wireless clients using an external RADIUS server. Please input the IP address of RADIUS and Shared Secret. AirLive WMU-6000FS User’s Manual...
- Page 42 RTS Threshold: The RTS threshold specifies the packet size of an RTS transmission. This helps control traffic flow through an access point, especially one with many clients. The setting value rang e is from 1 to 2347, and default value is set to 2347. AirLive WMU-6000FS User’s Manual...
- Page 43 (Cyclic Redundancy Check) block for communication between the Access Point and roaming wireless adapters. SSID Broadcast: Enable or Disable a SSID broadcast. When enabled, the SSID of WMU-6000FS is sent to wireless enabled devices on the LAN. Press “N ext” button, you could see the Wireless MAC Filtering setting.
- Page 44 MAC addresses you enter bellow will be rejected to connect to this AP, the others will be accepted. fter press “Save” button, WMU-6000FS would show you this page about the wireless settings you have done. AirLive WMU-6000FS User’s Manual...
-
Page 45: Wireless Client Mode
3.2.2.2 Wireless client mode Select the “Wireless client mode” and click “Go” to set up under the Wireless client mode. After entering the Wireless client mode setting, click the AP List icon to set up the AP connecting list. AirLive WMU-6000FS User’s Manual... - Page 46 “Add” to set up th e AP list. Select the AP you want to connect and click “Add” to set up the AP list. Click “Mod” to specify t he AP information. After clicking the “Mod” button, you AirLive WMU-6000FS User’s Manual...
- Page 47 WEP. Click the “Next” for advanced setting, or click “Save” or “Undo” for your need. AirLive WMU-6000FS User’s Manual...
-
Page 48: Wds Hybrid Mode
“WDS Hybrid mode” and click “Go” to set up After entering the WDS Hybrid mode setting, click the AP List icon to set up the AP connecting list. Then click the “AP Setting” icon and set up the AP. AirLive WMU-6000FS User’s Manual... - Page 49 6. lick the Advanced Setting icon, and you could set more values. About the meanings of these please refer to 3.2.2.1. Go back to Basic Setting, and click “Save”. AirLive WMU-6000FS User’s Manual...
-
Page 50: Wds Only Mode
3.2.2.4 WDS only mode Select the “WDS only mode” and click “Go” to set up. After entering the WDS only mode setting, click the AP List icon to set up the AP connecting list, or add it manually. AirLive WMU-6000FS User’s Manual... - Page 51 NOTE: In WDS only mode, each AP that bridged together MUST use the same channel. After all, click “Save” to make it work. NOTE: Each WDS device MUST set the others’ MAC addresses, or the WDS mode would be failed. AirLive WMU-6000FS User’s Manual...
-
Page 52: Chapter 4: Disk Management
4.1 Disk Utility Before using the hard disk, users need to format this hard disk first. Click “Format” button, and the WMU-6000FS will start to format the hard disk automatically. Once finishing the format, the WMU-6000FS will reboot automatically, an d please reconnect the network in 30 seconds. - Page 53 Advanced Function In the advanced function, two more options will be shown: The first option is used for disk checking. If you power off WMU-6000FS before normally shut down the system, you are recommended to do this. With second option, you could partition your hard disk to the size you want.
- Page 54 Any data in the hard disk will be lost after creating the new partitions. The hard disk is formatted to EXT2 file system. It can not be connected directly to a Microsoft Windows system without reformatting. AirLive WMU-6000FS User’s Manual...
-
Page 55: Chapter 5: Advanced Functions
F/W Upgrade option and use the bin file you saved. 5.2 Reset to Default This option enables you to reset the WMU-6000FS to its default factory settings. 5.3 Reboot This option enables you to reboot the device. -
Page 56: Chapter 6: Misc
6.1 Administrator Timeout If users login, and idles for a period of time (e.g. 600 seconds), then that user will be logged out automatically. AirLive WMU-6000FS User’s Manual... -
Page 57: Change Password
6.2 Change Password To change the password, you have to enter the old password and confirm the new p assword twice. AirLive WMU-6000FS User’s Manual... -
Page 58: System Time
System Time provides two options for you to select. Set Date and Time using PC’s Date and Time: synchronize the date and time with the computer. Set Date and Time m anually: Manually setting up the date and time. AirLive WMU-6000FS User’s Manual... -
Page 59: Chapter 7: Printer Server Setup
7.1Windows Operating system(NT based) Windows 2000 and XP have built-in LPR client, users could utilize this feature to Print. You have to install your Printer Driver on LPT1 or other ports (Standard TCP/IP port) 1.Open Printers and Faxs... - Page 60 2.Select “Ports” page, Click “Add Port…” 3. Select “Standard TCP/IP Port”, and then click “New Port…” AirLive WMU-6000FS User’s Manual...
- Page 61 4.Click Next and then provide the following informatio : Type address of server providing LPD that is our NAT device: 192.168.123.254 AirLive WMU-6000FS User’s Manual...
- Page 62 5. Select Custom, then click “Settings…” AirLive WMU-6000FS User’s Manual...
- Page 63 6. Select “LPR”, type ” lp“ lowercase letter in “Queue Name:” And enable “LPR Byte Counting Enabled”. AirLive WMU-6000FS User’s Manual...
- Page 64 7.Apply your settings AirLive WMU-6000FS User’s Manual...
-
Page 65: Configuring On Unix-Like Based Platforms
The printer name is “lp.” X-Windows, for example, In Redhat Platforms, Please follow the below steps to configure your printer on Red Hat 9.0.1. Start om the Red Hat---> System Setting---> Printing. AirLive WMU-6000FS User’s Manual... - Page 66 2. Click New---> Forward. AirLive WMU-6000FS User’s Manual...
- Page 67 3.Enter the Pinter Name, C omments then forward. AirLive WMU-6000FS User’s Manual...
- Page 68 4. Select LPD protocol and then forward. 5. Enter Router LAN IP Address and the queue name "lp". Then forward. AirLive WMU-6000FS User’s Manual...
- Page 69 6. Select the Printer Brand and Model Nam e. Then Forward. 7. Click Apply to finish setup. 8. At last you must click Apply on the toolbox to make the change take effective. AirLive WMU-6000FS User’s Manual...
- Page 70 Below is my setting. /etc/printcap ------------------------------------------------------------------------------ lp:\ :sd=/var/spool/lpd/lp:\ :mx#0:\ :sh:\ :rm=192.168.123.254:\ :rp=lp:\ -------------->key point :if=/var/spool/lpd/lp/filter: ------------------------------------------------------------------------------ Then add the corresponding directory #mkdir /var/spool/lpd/lp Too see the detail ,please refer to the online manual in linux. #man printcap AirLive WMU-6000FS User’s Manual...
-
Page 71: Apple Os
7.3 Apple OS 1.First, go to Printer center (Printer list) and add printer AirLive WMU-6000FS User’s Manual... - Page 72 2.Choose IP print setup printer ip address (router Lan ip address). .Disable “Default Queue of Server.” And fill in ‘ lp ‘ in Queue name item. 4.Printer Model: Choose “General” or Printer as below. AirLive WMU-6000FS User’s Manual...
-
Page 73: Chapter 8: Trouble Shootings
HDD is NTFS, the device just can read files and can not copy any files to NTFS folders. 4. No matter what I do, I can not configure WMU-6000FS even if I setup fixed IP and can search or Ping WMU-6000FS. - Page 74 0FS and your computer. Why do I see the wrong name of file duri ng the setting or in the my network place? A: Plea se select the language as you n eed. Please configure again. AirLive WMU-6000FS User’s Manual...
-
Page 75: How To Setup Wireless Function
“AP mode”. The user can make this device as Wireless AP device as follows: First, the wireless client sets up the same SSID with WMU-6000FS and get IP from Router. Then Wireless client can associate the network or roam Internet via Router. - Page 76 Wireless Client Mode: First, please configure the wireless setting of WMU-6000FS via wire. Then use Scan AP of AP-List and joi it. Plug up the cable form WMU-6000FS. The client from LAN can use “Configure” utility to Query. AirLive WMU-6000FS User’s Manual...
- Page 77 WDS function. Second, add the wireless MAC address of WMU-6000FS in this Wireless Router # 2. (Figure2). And use Scan AP to find the wireless which SSID is “WR-2” and join it in the list. Third, if it is normal, LAN-Host#1 can find the devices, like Wireless Router #2 and LAN-Host#2.
- Page 78 Figure2: WDS Hybrid mode: This device also supports WDS and AP mode at the same time. How to configure this in your circumstance? The below figure is for the reference. AirLive WMU-6000FS User’s Manual...
- Page 79 For the setting of WDS, please refer to the above WDS only mode. For AP setting, please refer to the AP mode. 2. How to configure 802.1x or WPA with Radius server? AirLive WMU-6000FS User’s Manual...
- Page 80 3 and HotFix Q313664 (You can get more information from http://support.microsoft.com/default.aspx?scid=kb; en-us;313664) DUT Configuration: 1. Enable DHCP server. 2. WAN setting: static IP address. 3. LAN IP address: 192.168.123.254/24. 4. Set RADIUS server IP. 5. Set RADIUS server shared key. AirLive WMU-6000FS User’s Manual...
- Page 81 Note. Figure 2 is a s etting picture of Windows XP without service pack 1. If users upgrade to service pack 1, then they can’t see e list any more, but they will get a MD5-Challenge from EAP typ AirLive WMU-6000FS User’s Manual...
- Page 82 Choose MD5-Challenge or Smart Card or other Certificate as the EAP type. If choosing use smart card or the certificate as the EAP type, we select to use certificate on this computer. We will change EAP type to fit the variable test condition. AirLive WMU-6000FS User’s Manual...
- Page 83 Figure 2: Enable IEEE 802.1X access control AirLive WMU-6000FS User’s Manual...
- Page 84 PC1. (Figure 5) 7. Windows XP will prompt that the authentication process is success or fail and end the authentication procedure. (Figure 6) 8. Terminate the test steps when PC1 get dynamic IP and PING remote host successfully. AirLive WMU-6000FS User’s Manual...
- Page 85 Figure 4: Certificate information on PC1 Figure 5: Authenticating AirLive WMU-6000FS User’s Manual...
- Page 86 PC2. Windows XP will prompt that the authentication process is success or fail and end the authentication procedure. Terminate the test steps when PC2 get dynamic IP and PING remote host successfully. AirLive WMU-6000FS User’s Manual...
-
Page 87: Problems Of Security Level
If the user sees the warning message, please restart windows and try it again. But th ere are some situations that the users can not access this folder if even they input correct the account and password as below: AirLive WMU-6000FS User’s Manual... - Page 88 Situation 1: The users can acce ss the files or folders before WMU-6000FS is not enabled “security Level”. But when WMU-6000FS is enabled it, the authorization users can not login by inputting the account and password. Please re start your window OS and It can be accessed.
- Page 89 Create two folders. One is “read”, and the other is “write”. The authority is as follows: Then click the User Access Configuration and save “Security Level”. AirLive WMU-6000FS User’s Manual...
- Page 90 Use search WMU-6000FS hostname, if you can not access the directory “Storage”. Then you will find the WMU-6000FS and will find some folders, like read, write and Storage. AirLive WMU-6000FS User’s Manual...
- Page 91 The configuration is the same with above. There are two folders to share. If the users use guest to login ftp service, he just accesses read or write folders. Or login as Authorization users, he can access all. AirLive WMU-6000FS User’s Manual...
Need help?
Do you have a question about the WMU-6000FS and is the answer not in the manual?
Questions and answers