Grandstream Networks UCM6102 User Manual
All-in-one hybrid ippbx appliance
Hide thumbs
Also See for UCM6102:
- User manual (308 pages) ,
- Basic configuration manual (21 pages) ,
- Quick installation manual (17 pages)

Related Manuals for Grandstream Networks UCM6102


Summary of Contents for Grandstream Networks UCM6102
- Page 1 Grandstream Networks, Inc. UCM6102/UCM6104/UCM6108/UCM6116 All-in-one Hybrid IPPBX Appliance User Manual Grandstream Networks, Inc. www.grandstream.com...
-
Page 2: Table Of Contents
PRODUCT OVERVIEW................11 FEATURE HIGHTLIGHTS ........................11 TECHNICAL SPECIFICATIONS ......................11 INSTALLATION ................... 14 EQUIPMENT PACKAGING........................ 14 CONNECTING YOUR UCM6102/UCM6104/UCM6108/UCM6116 ........... 14 CONNECTING THE UCM6102 ....................14 CONNECTING THE UCM6104 ....................15 CONNECTING THE UCM6108 ....................16 CONNECTING THE UCM6116 ....................17 SAFETY COMPLIANCES ........................ - Page 3 CREATING IVR PROMPT ......................... 56 RECORD NEW IVR PROMPT....................56 UPLOAD IVR PROMPT ......................57 VOICE PROMPT ..................58 VOICEMAIL ....................59 CONFIGURING VOICEMAIL ......................59 CONFIGURING VOICEMAIL GROUP ....................60 Firmware Version 1.0.0.32 UCM6102/6104/6108/6116 USER MANUAL Page 2 of 108...
- Page 4 SIP SETTINGS/JITTER BUFFER ....................79 SIP SETTINGS/MISCELLANEOUS .................... 80 SIP SETTINGS/SESSTION TIMER .................... 80 SIP SETTINGS/TLS AND TCP ....................81 SIP SETTINGS/NAT ........................81 SIP SETTINGS/ToS ........................83 SIP SETTINGS/DEBUG ......................84 Firmware Version 1.0.0.32 UCM6102/6104/6108/6116 USER MANUAL Page 3 of 108...
- Page 5 NETWORK BACKUP ........................ 101 CLEANER ............................102 RESET AND REBOOT ........................103 SYSLOG ............................104 TROUBLESHOOTING ........................104 ETHERNET CAPTURE ......................104 PING ............................105 TRACEROUTE ......................... 106 EXPERIENCING THE UCM6102/UCM6104/UCM6108/UCM6116 ..107 Firmware Version 1.0.0.32 UCM6102/6104/6108/6116 USER MANUAL Page 4 of 108...
- Page 6 Table of Tables UCM6102/UCM6104/UCM6108/UCM6116 User Manual Table 1: TECHNICAL SPECIFICATIONS ....................11 Table 2: UCM6102/UCM6104 EQUIPMENT PACKAGING ............... 14 Table 3: UCM6108/UCM6116 EQUIPMENT PACKAGING ............... 14 Table 4: LCD MENU OPTIONS ......................... 19 Table 5: UCM6102/UCM6104 LED INDICATORS ..................20 Table 6: UCM6108/UCM6116 LED INDICATORS ..................20 Table 7: NETWORK SETTINGS .......................
- Page 7 Table 39: Cleaner Configuration ......................103 Firmware Version 1.0.0.32 UCM6102/6104/6108/6116 USER MANUAL Page 6 of 108...
- Page 8 Table of Figures UCM6102/UCM6104/UCM6108/UCM6116 User manual Figure 1: UCM6102 Front View ......................... 14 Figure 2: UCM6102 Back View ......................... 15 Figure 3: UCM6104 Front View ......................... 15 Figure 4: UCM6104 Back View ......................... 16 Figure 5: UCM6108 Front View ......................... 16 Figure 6: UCM6108 Back View .........................
- Page 9 Figure 49: Network Backup ........................102 Figure 50: Cleaner ..........................103 Figure 51: Reset and Reboot ........................104 Figure 52: Ethernet Capture........................105 Figure 53: PING ............................105 Figure 54: Traceroute ..........................106 Firmware Version 1.0.0.32 UCM6102/6104/6108/6116 USER MANUAL Page 8 of 108...
-
Page 10: Change Log
UCM6102/UCM6104/UCM6108/UCM6116 user manuals. Only major new features or major document updates are listed here. Minor updates for corrections or editing are not documented here. FIRMWARE VERSION 1.0.0.32 • This is the initial version. Firmware Version 1.0.0.32... -
Page 11: Welcome
Caution: Changes or modifications to this product not expressly approved by Grandstream, or operation of this product in any way other than as detailed by this User Manual, could void your manufacturer warranty. -
Page 12: Product Overview
UCM6116: 16 ports • Network Interfaces UCM6108/UCM6116: Single 10M/100M/1000M RJ45 Ethernet port with integrated PoE Plug (IEEE 802.3at-2009) • UCM6102/UCM6104: Dual 10M/100M/1000M RJ45 Ethernet ports with integrated PoE Plug (IEEE 802.3at-2009) NAT Router Yes, UCM6102 only Peripheral Ports USB, SD... - Page 13 C, 10-90% (non-condensing) • Storage: 14 - 140 F / -10 - 60 • Dimensions UCM6102/UCM6104: 226mm (L) x 155mm (W) x 34.5mm (H) • UCM6108/UCM6116: 440mm (L) x 185mm (W) x 44mm (H) Mounting Wall mount and Desktop Additional Features...
- Page 14 Customizable Auto Up to 5 layers of IVR (Interactive Voice Response) Attendant • Concurrent Calls UCM6102: Up to 30 simultaneous calls • UCM6104: Up to 45 simultaneous calls • UCM6108/UCM6116: Up to 60 simultaneous calls • Conference Bridges...
-
Page 15: Installation
INSTALLATION This section describes detailed information on installation, connection and warranty policy of the UCM6102/UCM6104/UCM6108/UCM6116. EQUIPMENT PACKAGING Table 2: UCM6102/UCM6104 EQUIPMENT PACKAGING Main Case Yes (1) Power Adaptor Yes (1) Ethernet Cable Yes (1) Quick Installation Guide Yes (1) Table 3: UCM6108/UCM6116 EQUIPMENT PACKAGING... -
Page 16: Connecting The Ucm6104
2. Connect the other end of the Ethernet cable into the uplink port of an Ethernet switch/hub; 3. Connect the 12V DC power adapter into the 12V DC power jack on the back of the UCM6102. Insert the main plug of the power adapter into a surge-protected power outlet;... -
Page 17: Connecting The Ucm6108
6. (Optional) Connect PSTN lines from the wall jack to the FXO ports; connect analog lines (phone and fax) to the FXS ports. CONNECTING THE UCM6108 Figure 5: UCM6108 Front View Figure 6: UCM6108 Back View Firmware Version 1.0.0.32 UCM6102/6104/6108/6116 USER MANUAL Page 16 of 108... -
Page 18: Connecting The Ucm6116
4. Wait for the UCM6116 to boot up. The LCD in the front will show its hardware information when the boot process is done; Firmware Version 1.0.0.32 UCM6102/6104/6108/6116 USER MANUAL Page 17 of 108... -
Page 19: Safety Compliances
If the device was purchased directly from Grandstream, contact the Grandstream Sales and Service Representative for a RMA (Return Materials Authorization) number before the product is returned. Grandstream reserves the right to remedy warranty policy without prior notification. -
Page 20: Getting Started
GETTING STARTED This section provides information about using the LCD menu, LED indicators and Web GUI of the UCM6102/UCM6104/UCM6108/UCM6116. The last section describes how to make your first call using the UCM6102/UCM6104/UCM6108/UCM6116 with your SIP phone. USING THE LCD MENU •... -
Page 21: Using The Led Indicators
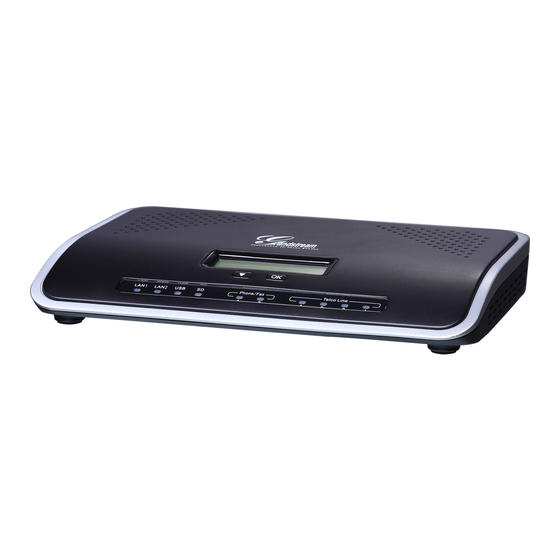
LCD Test Patterns: Press "Down" button to test different LCD patterns • Fan Mode: Auto or On USING THE LED INDICATORS The UCM6102/UCM6104/UCM6108/UCM6116 has LED indicators in the front and the following table shows the status definitions. Table 5: UCM6102/UCM6104 LED INDICATORS LED Status... -
Page 22: Web Gui Configurations
Figure 9: UCM6116 Web GUI Login Page To access the Web GUI: 1. Connect the computer to the same network as the UCM6102/UCM6104/UCM6108/UCM6116; 2. Ensure the device is properly powered up and shows its IP address on the LCD; 3. Open a Web browser on the computer and enter the web GUI URL in the following format:... -
Page 23: Saving And Applying Changes
Follow the prompted message to reboot the device if it's required. MAKING YOUR FIRST CALL Power up the UCM6102/UCM6104/UCM6108/UCM6116 and your phone with network connected. Then follow the steps below to make your first call. -
Page 24: System Settings
UCM6104/UCM6108/UCM6116. The UCM6102 supports both WAN port and LAN port, with Router or Switch mode function configurable on the LAN port. Select each tab in the Network Settings page to configure LAN settings, WAN settings (UCM6102 only) and 802.1X. -
Page 25: Table 8: Ucm6102 Network Settings
Select 802.1X certificate from local PC and then upload. 802.1X Client Select 802.1X client certificate from local PC and then upload. Certificate Table 8: UCM6102 NETWORK SETTINGS Settings -> Network Settings -> WAN IP Method Select DHCP, Static IP, or PPPoE. The default setting is DHCP. IP Address Enter the IP address for static IP settings. -
Page 26: Network Security Settings
Select protocol type for the forwarding in the selected port. NETWORK SECURITY SETTINGS The UCM6102/UCM6104/UCM6108/UCM6116 provides users Firewall configurations to prevent certain malicious attack to the device system, allow, restrict or reject specific traffic through the device for security and bandwidth purpose. Go to Web GUI->Settings->Network Settings->Security page, users will see the current service information with Port, Process and Type, as well as Firewall settings. -
Page 27: Table 9: Firewall Rule Settings
Both Select the traffic type. • Type IN. If selected, users will need specify the interface for the incoming packets. • Select the service type. • Service • • Telnet Firmware Version 1.0.0.32 UCM6102/6104/6108/6116 USER MANUAL Page 26 of 108... -
Page 28: Change Password
By default, the LDAP server has generated the phonebook based on the created extensions already. If users have the Grandstream phone provisioned by the UCM6102/UCM6104/UCM6108/UCM6116, the LDAP directory has been set up on the phone and can be used right away. -
Page 29: Ldap Server Configurations
A new sibling phonebook of the default PBX phonebook can be added by clicking on "Add" under "LDAP Phonebook" section. Once added, users can select to edit the phonebook attributes and contact list (see Figure below), or select to delete the phonebook. Firmware Version 1.0.0.32 UCM6102/6104/6108/6116 USER MANUAL Page 28 of 108... -
Page 30: Ldap Client Configurations
To configure the LDAP client so the default PBX phonebook can be used, follow the instructions in the LDAP Client Configuration section. Suppose your server Base DN is "dc=Grandstream", your extension number is 1000 and your LDAP entry password is "1000", configure your LDAP client as follows (case insensitive):... -
Page 31: Http Server
Figure 14: GXP2200 LDAP Phonebook Configuration HTTP SERVER The UCM6102/UCM6104/UCM6108/UCM6116 embedded Web server responds to HTTP/HTTPS GET/POST requests. Embedded HTML pages allow the users to configure the PBX through a Web browser such as Microsoft’s IE, Mozilla Firefox and Google Chrome. By default, the PBX can be accessed via HTTPS using Port 8089 (e.g., https://192.168.40.50:8089). -
Page 32: Email Settings
EMAIL SETTINGS The Email application on the UCM6102/UCM6104/UCM6108/UCM6116 can be used to send out Emails to users with Fax (e.g., Fax-To-Email), Voicemail (Voicemail-To-Email) and other information as attachment. The configuration parameters can be accessed via Web GUI->Settings->Email Settings. - Page 33 The 3rd number indicates weekday: 0,1,2,..,6 ( for Sun, Mon, Tues, ... ,Sat) Therefore, this example is the DST which starts from the First Sunday of April to the 1st Sunday of November. Firmware Version 1.0.0.32 UCM6102/6104/6108/6116 USER MANUAL Page 32 of 108...
-
Page 34: Provisioning
PROVISIONING OVERVIEW Grandstream SIP Devices can be configured via Web interface as well as via configuration file through TFTP or HTTP/HTTPS download. All Grandstream SIP devices support a proprietary binary format configuration file as well as XML format configuration file. The UCM6102/UCM6104/UCM6108/UCM6116... -
Page 35: Figure 15: Auto Provision Setting
• DHCP OPTION 66 This method should be used on the UCM6102 because only the UCM6102 has WAN and LAN port with LAN port supporting the router function. When the phone restarts (by default DHCP Option 66 is turned on), it will send out a DHCP DISCOVER request. The UCM6102 receives it and returns DHCP OFFER with the config server path URL in Option 66. -
Page 36: Manual Provisioning
• • SIP MESSAGE (OPTIONS) Click on "Auto Discover", fill in the scan method and scan IP. Then click on "Save" to start discovering the devices within the same network. Firmware Version 1.0.0.32 UCM6102/6104/6108/6116 USER MANUAL Page 35 of 108... -
Page 37: Assignment
Version, Vendor, Model, Connect Status, Create Config, Options (Edit/Delete) are displayed in the list. Figure 17: Discovered Devices ASSIGNMENT In the discovered list, click on to assign an extension to the device. Figure 18: Assign Extension To Device Firmware Version 1.0.0.32 UCM6102/6104/6108/6116 USER MANUAL Page 36 of 108... -
Page 38: Provisioning
After the discovery and assignment, reboot the device. It will download the config file and get provisioned with the assigned extension registered. EXAMPLES Depending on the topology, the discovery and provisioning can be done in different ways. Example 1: Firmware Version 1.0.0.32 UCM6102/6104/6108/6116 USER MANUAL Page 37 of 108... -
Page 39: Figure 20: Provisioning Example 1
UCM6102/UCM6104/UCM6108/UCM6116 is placed behind a company’s router or firewall. The phones are in the same network as the UCM6102/UCM6104/UCM6108/UCM6116 and can be discovered automatically by UCM6102/UCM6104/UCM6108/UCM6116 using the Zero Config feature. Example 2: Firmware Version 1.0.0.32 UCM6102/6104/6108/6116 USER MANUAL... -
Page 40: Figure 21: Provisioning Example 2
UCM6102/UCM6104/UCM6108/UCM6116 cannot reach the phones on its own and the typical auto discovery will not work. In this case, the phones can still be provisioned. But the UCM6102/UCM6104/UCM6108/UCM6116 will need help to get the phones to point itself to the UCM6102/UCM6104/UCM6108/UCM6116 first. One possible solution could be as follows. •... -
Page 41: Extensions
Call Forward Busy feature is deactivated. Ring Timeout Configure the number of seconds to ring the user before sending to the user's voicemail (if enabled) or hangup. The default setting is 60 seconds. Technology Firmware Version 1.0.0.32 UCM6102/6104/6108/6116 USER MANUAL Page 40 of 108... - Page 42 If enabled, FAX cannot use Passthrough. Strategy This option controls how the extension can be used on the device. • Allow all Device in any network can register using the extension. Firmware Version 1.0.0.32 UCM6102/6104/6108/6116 USER MANUAL Page 41 of 108...
-
Page 43: Batch Add Extensions
A random password in digits will be automatically generated. It is recommended to use this password for security purpose. • Use Extension as Password. • Enter a password to be used. Firmware Version 1.0.0.32 UCM6102/6104/6108/6116 USER MANUAL Page 42 of 108... - Page 44 Enable to detect fax signal from the user/trunk during the call and send the received fax to the Email address configured in this configuration page. If no Email address can be found for the user, send the received Firmware Version 1.0.0.32 UCM6102/6104/6108/6116 USER MANUAL Page 43 of 108...
-
Page 45: Edit Extension
The configuration options are listed in Table 15: Batch Add Extension Parameters • Delete selected extensions Select the checkbox for the extension(s). Then click on "Delete Selected Extensions" to delete the extension(s). Firmware Version 1.0.0.32 UCM6102/6104/6108/6116 USER MANUAL Page 44 of 108... -
Page 46: Trunks
The analog trunk options are listed in the table below. Table 16: Analog Trunk Configuration Parameters Channels Select the channel for the analog trunk. • UCM6102: 2 channels • UCM6104: 4 channels • UCM6108: 8 channels •... - Page 47 Frequencies are in Hz and cadence on and off are in ms. Frequencies Range: [0, 4000) Busy Level Range: (-300, 0) Cadence Range: [0, 16383]. Select Tone Country "Custom" to edit manually. Firmware Version 1.0.0.32 UCM6102/6104/6108/6116 USER MANUAL Page 46 of 108...
-
Page 48: Voip Trunks
If enabled, the PBX will send SIP OPTIONS to check if the device is still alive. The default setting is disabled. Enable FAX Detect Enable both CNG and T.38 detect. The default setting is disabled. Firmware Version 1.0.0.32 UCM6102/6104/6108/6116 USER MANUAL Page 47 of 108... - Page 49 SRTP Enable SRTP for the VoIP trunk. The default setting is disabled. Firmware Version 1.0.0.32 UCM6102/6104/6108/6116 USER MANUAL Page 48 of 108...
-
Page 50: Call Routes
International: The highest level required. Only users with international level can use this rule. Pin Set Configure the password for users to use this rule. Send This Call Trough Trunk Firmware Version 1.0.0.32 UCM6102/6104/6108/6116 USER MANUAL Page 49 of 108... -
Page 51: Inbound Routes
Click on "Create New Inbound Rule" to add a new inbound route. • Click on "DID Features" to configure DID features for the inbound route. • Click on to edit the inbound route. Firmware Version 1.0.0.32 UCM6102/6104/6108/6116 USER MANUAL Page 50 of 108... -
Page 52: Table 19: Inbound Route Configuration Parameters
Select "By Week" or "By Day" and specify the date for the trunk to use the inbound rule. Destination Select the destination when the inbound rule is used at the configured time range.. • Extension • Extension's voicemail Firmware Version 1.0.0.32 UCM6102/6104/6108/6116 USER MANUAL Page 51 of 108... - Page 53 Select the DID destination. Only the selected category can be reached by DID. • User Extension. This is selected by default. • Conference. • Call Queue. • Ring Group. • Page/Intercom Group. Firmware Version 1.0.0.32 UCM6102/6104/6108/6116 USER MANUAL Page 52 of 108...
-
Page 54: Conference Bridge
The default setting is disabled. Enable User Invite When enabled, users could press 0 to invite other users to join the conference. The default setting is disabled. Note: Firmware Version 1.0.0.32 UCM6102/6104/6108/6116 USER MANUAL Page 53 of 108... - Page 55 When enabled, the invitation from Web GUI for the conference bridge Invite User via Trunk from Web with password will skip the authentication for the invited users. Please be cautious to use this option. The default setting is disabled. Firmware Version 1.0.0.32 UCM6102/6104/6108/6116 USER MANUAL Page 54 of 108...
-
Page 56: Ivr
Select the repeat time if the input is invalid. After the repeat time, go to the timeout destination if configured, otherwise hangup. The default setting is 4. Key Press Event Select the event for each key pressing for 0-9, *. Firmware Version 1.0.0.32 UCM6102/6104/6108/6116 USER MANUAL Page 55 of 108... -
Page 57: Creating Ivr Prompt
Figure 22: Click On Prompt To Create IVR Prompt RECORD NEW IVR PROMPT In Web GUI->PBX->Internal Options->IVR Prompt page, click on "Record New IVR Prompt" and follow the steps below to record new IVR prompt. Firmware Version 1.0.0.32 UCM6102/6104/6108/6116 USER MANUAL Page 56 of 108... -
Page 58: Upload Ivr Prompt
In .mp3 or .wav format; or raw/ulaw/alaw/gsm file with .ulaw or .alaw suffix. • File size smaller than 5M. Click on to select audio file from local PC and click on to start uploading. Firmware Version 1.0.0.32 UCM6102/6104/6108/6116 USER MANUAL Page 57 of 108... -
Page 59: Voice Prompt
(containing the language name for display, in UTF8) • Click on to start uploading. • Voice Prompts Package Lists allows users to select the default language for voice prompt for internal calls, inbound calls and outbound calls. Firmware Version 1.0.0.32 UCM6102/6104/6108/6116 USER MANUAL Page 58 of 108... -
Page 60: Voicemail
Click on "Load Default" button to view a default template as an example. Figure 25: Default Email Template Table 23: Voicemail Settings Max Greeting Configure the maximum number of seconds for the voicemail greeting. The default setting is 60 seconds. Firmware Version 1.0.0.32 UCM6102/6104/6108/6116 USER MANUAL Page 59 of 108... -
Page 61: Configuring Voicemail Group
Click on "Create New Voicemail Mail Group" to configure the group. Figure 26: Voicemail Group Firmware Version 1.0.0.32 UCM6102/6104/6108/6116 USER MANUAL Page 60 of 108... - Page 62 Configure the Name to identify the voicemail group. Letters, digits, underscore and hyphen are allowed. • Select available mailboxes from the right list and add them to the left list. • Click Save the finish the configuration. Firmware Version 1.0.0.32 UCM6102/6104/6108/6116 USER MANUAL Page 61 of 108...
-
Page 63: Ring Group
Ring In Order. Ring the members with the configured order one by one. If the first member doesn't answer the call, it will stop ringing the first member and start ringing the second member. Firmware Version 1.0.0.32 UCM6102/6104/6108/6116 USER MANUAL Page 62 of 108... -
Page 64: Figure 28: Ring Group Configuration
If enabled, the ring group extension can use voicemail. Secret Configure the password to access the ring group voicemail. Email Address Configure the Email address of the ring group extension. Figure 28: Ring Group Configuration Firmware Version 1.0.0.32 UCM6102/6104/6108/6116 USER MANUAL Page 63 of 108... -
Page 65: Paging And Intercom Group
• Click on "Paging/Intercom Group Settings" to edit Alert-Info Header (see figure below). To edit page/intercom feature code, click on "Feature Codes" in the following figure. Firmware Version 1.0.0.32 UCM6102/6104/6108/6116 USER MANUAL Page 64 of 108... -
Page 66: Figure 30: Page/Intercom Group Settings
Figure 30: Page/Intercom Group Settings Firmware Version 1.0.0.32 UCM6102/6104/6108/6116 USER MANUAL Page 65 of 108... -
Page 67: Call Queue
• Random: Ring a random agent. • RRmemory: Ring the agents in Round Robin scheduling with memory. Music On Hold Select the Music On Hold class for the call queue. Firmware Version 1.0.0.32 UCM6102/6104/6108/6116 USER MANUAL Page 66 of 108... - Page 68 It is recommended to configure Wait Time longer than the Wrapup Time. Static Agents Select the available agents from the right list to the left. Click on to arrange the order. Firmware Version 1.0.0.32 UCM6102/6104/6108/6116 USER MANUAL Page 67 of 108...
-
Page 69: Music On Hold
The music file uploaded has to be 8 KHz Mono format with size less than 5M. • Click on to delete the sound file for the selected Music On Hold file. Firmware Version 1.0.0.32 UCM6102/6104/6108/6116 USER MANUAL Page 68 of 108... -
Page 70: Fax/T.38
FAX/T.38 On the UCM6102/6104/6108/6116, the Fax extension can receive T.38 Fax to the specified Email address. Fax/T.38 settings can be accessed via Web GUI->PBX->Internal Options->FAX/T.38. CONFIGURING FAX/T.38 • Click on "Create New Fax Extension". In the popped up window, fill the extension, name and Email address to send the received FAX to. -
Page 71: Internal Options
Conference Extension: 6300-6399 IVR Extension: 7000-7100 Ring Group Extension: 6400-6499 Queue Extensions: 6500-6599 VoiceMail Group Extension: 6600-6699 Note: It is recommended to keep the system assignment for PBX to work Firmware Version 1.0.0.32 UCM6102/6104/6108/6116 USER MANUAL Page 70 of 108... -
Page 72: Internal Options/Feature Codes
- Callee Enable: Enable the feature code on callee side only. • Audio Record Default code: *1. • Enter the code to record the audio call. • Options - Neither: Disable the feature code. Firmware Version 1.0.0.32 UCM6102/6104/6108/6116 USER MANUAL Page 71 of 108... - Page 73 • Dial Voice Mail Default Code: *98. • Enter *98 and follow the voice prompt. Or dial *98 followed by the extension and # to access the entered extension's Firmware Version 1.0.0.32 UCM6102/6104/6108/6116 USER MANUAL Page 72 of 108...
-
Page 74: Internal Options/Rtp Settings
Select country for default tones (dial tone, busy tone, ring tone and etc. Advanced Settings FXO Opermode Specify On Hook Speed, Ringer Impedance, Ringer Threshold, Current Limiting, TIP/RING voltage adjustment, Minimum Operational Loop Firmware Version 1.0.0.32 UCM6102/6104/6108/6116 USER MANUAL Page 73 of 108... - Page 75 Configure the type of Message Waiting Indicator detection on trunk (FXO) interfaces. • None: No detection • FSK: Frequency Shift Key detection • NEON: Neon MWI detection. The default setting is "None". Firmware Version 1.0.0.32 UCM6102/6104/6108/6116 USER MANUAL Page 74 of 108...
-
Page 76: Internal Options/Stun Monitor
The default port number is 3478 if not specified. Leave this field blank to disable STUN. STUN Refresh Number of seconds between STUN Refreshes. The default setting is 30 seconds. Firmware Version 1.0.0.32 UCM6102/6104/6108/6116 USER MANUAL Page 75 of 108... -
Page 77: Pbx Settings
Configures allowed codecs for different bandwidth requirement. The default setting is "Low". IAX SETTINGS/CODECS The following codes are supported in UCM6102/UCM6104/UCM6108/UCM6116 for IAX. Select the codecs from the right side list to the left side. Click on to arrange the order. -
Page 78: Iax Settings/Jitter Buffer
Configures codec negotiation priority to Caller, Host, Disabled or Reqonly. Type of Service Configures ToS bit for preferred IP routing. Trunk Frequency Configures frequency of trunk frames measured in milliseconds. Firmware Version 1.0.0.32 UCM6102/6104/6108/6116 USER MANUAL Page 77 of 108... -
Page 79: Iax Settings/Security
Numbers combined. Call Number Limits Limits the call numbers for a given IP range. SIP SETTINGS The UCM6102/UCM6104/UCM6108/UCM6116 IAX Settings can be accessed via Web GUI->PBX->SIP Settings. SIP SETTINGS/GENERAL Realm Digest Realms MUST be globally unique according to RFC 3261. Configure this Authentication value as your host or domain name. -
Page 80: Sip Settings/Codecx
Allow requests domains that served UCM6102/UCM6104/UCM6108/UCM6116. SIP SETTINGS/CODECX The following codes are supported in UCM6102/UCM6104/UCM6108/UCM6116 for IAX. Select the codecs from the right side list to the left side. Click on to arrange the order. • PCMU • PCMA •... -
Page 81: Sip Settings/Miscellaneous
NonStandard G.726 Support If the peer negotiates G726-32 audio, use AAL2 packing order instead of RFC3551 packing order (this is required for Sipura and Grandstream ATAs). SIP SETTINGS/SESSTION TIMER •... -
Page 82: Sip Settings/Tls And Tcp
TLS CA List The list of files under the CA Cert directory. SIP SETTINGS/NAT External Address A static address (and port) that will be in outbound SIP messages if the Firmware Version 1.0.0.32 UCM6102/6104/6108/6116 USER MANUAL Page 81 of 108... - Page 83 UCM6102/UCM6104/UCM6108/UCM6116 is behind NAT. If it's a hostname, it will only be looked up only. External Host Specifies an external host, which is similar to External Address except the hostname will be looked up every "External Refresh" interval and Asterisk will perform DNS queries periodically.
-
Page 84: Sip Settings/Tos
Some devices do not support this (especially if one of them is behind NAT). SIP SETTINGS/ToS The following options are provided to configure SIP ToS on the UCM6102/UCM6104/UCM6108/UCM6116. ToS For Signaling Packets Configure the Type of Service for SIP packets. The default setting is None. -
Page 85: Sip Settings/Debug
Configures a specific context for SUBSCRIBE requests. This setting is useful to limit subscriptions to local extensions. Allow Subscribe Enables/disables support for subscriptions. Notify on Ringing Sends out NOTIFY on ringing status. Firmware Version 1.0.0.32 UCM6102/6104/6108/6116 USER MANUAL Page 84 of 108... -
Page 86: Status And Reporting
STATUS AND REPORTING PBX STATUS The UCM6102/UCM6104/UCM6108/UCM6116 monitors the status for Trunks, Extensions, Queues, Conference Rooms, Interfaces and Parking lot. It presents administrators the real time status in different sections under web GUI->Status->PBX Status. Figure 33: Status->PBX Status TRUNKS Users could see all the configured trunk status in this section. -
Page 87: Extensions
Click on [ + ] to expand the status detail table. • Click on [ - ] to hide the status detail table. EXTENSIONS Users could see all the configured extension status in this section. Firmware Version 1.0.0.32 UCM6102/6104/6108/6116 USER MANUAL Page 86 of 108... -
Page 88: Table 29: Extension Status
Displays extension type. • SIP User • Type IAX User • Analog User • Features Other operations are also available in extension status section: Firmware Version 1.0.0.32 UCM6102/6104/6108/6116 USER MANUAL Page 87 of 108... -
Page 89: Queues
The agent is talking/busy. The agent is ringing. The agent has been logged out. On the UCM6102/UCM6104/UCM6108/UCM6116, Service Level is defined as the percentage of high-quality calls over all calls in the call queue, where high-quality call means calls answered within 10 seconds. -
Page 90: Conference Rooms
• Click on [ - ] to hide the conference room details. INTERFACES STATUS This section displays interface/port connection status on the UCM6102/UCM6104/UCM6108/UCM6116. The following example shows the interface status for UCM6116 with USB, SD card, LAN port, FXS1 connected. -
Page 91: Table 31: Interface Status Indicators
• Click on to refresh the interface status. • Click on [ + ] to expand the interface details. • Click on [ - ] to hide the interface details. Firmware Version 1.0.0.32 UCM6102/6104/6108/6116 USER MANUAL Page 90 of 108... -
Page 92: Parking Lot
PARKING LOT The UCM6102/UCM6104/UCM6108/UCM6116 supports call park using feature code. When there is call being parked, this section will display the parking lot status. Figure 39: Parking Lot Status Table 32: Parking Lot Status Caller ID Displays the caller ID who parks the call. -
Page 93: General
GENERAL Under Web GUI->Status->System Status->General, users could check the hardware and software information for the UCM6102/UCM6104/UCM6108/UCM6116. Please see details in the following table. Table 33: System Status->General Status ->System Status -> General Model Product model. Part Number Product part number. -
Page 94: Storage Usage
Figure 40: System Status->Storage Usage RESOURCE USAGE When configuring and managing the UCM6102/UCM6104/UCM6108/UCM6116, users could access resource usage information to estimate the current usage and allocate the resources accordingly. Under Web GUI->Status->System Status->Resource Usage, the current CPU usage and Memory usage are shown in the pie chart. -
Page 95: Cdr (Call Detail Report)
A Call Detail Record (CDR) is a data record produced by telephone exchange activities or other telecommunications equipment documenting the details of a phone call that passed through the PBX. The CDR is composed of the following data fields on the UCM6102/UCM6104/UCM6108/UCM6116. •... -
Page 96: Table 35: Cdr Filter Criteria
External calls are calls sent from one trunk to another trunk, which are not sent to any internal extension. The call report will display as the following figure shows. Figure 43: Call Report Firmware Version 1.0.0.32 UCM6102/6104/6108/6116 USER MANUAL Page 95 of 108... -
Page 97: Figure 44: Call Report Entry With Audio Recording File
(the call record entry will not be deleted). CDR Statistics is an additional feature on the UCM6102/UCM6104/UCM6108/UCM6116 which provides users a visual overview of the call report across the time frame. Users can filter with different criteria to generate the statistics chart. -
Page 98: Table 36: Cdr Statistics Filter Criteria
By week (of the selected year). • By day (of the specified month for the year). • By hour (of the specified date). • By range. For example, 2013-01 To 2013-03. Firmware Version 1.0.0.32 UCM6102/6104/6108/6116 USER MANUAL Page 97 of 108... -
Page 99: Upgrading And Maintenance
UPGRADING UPGRADING VIA NETWORK The UCM6102/UCM6104/UCM6108/UCM6116 can be upgraded via TFTP/HTTP/HTTPS by configuring the URL/IP Address for the TFTP/HTTP/HTTPS server and selecting a download method. Configure a valid URL for TFTP, HTTP or HTTPS; the server name can be FQDN or IP address. -
Page 100: Upgrading Via Local Upload
HTTP/TFTP server, users could also upload firmware UCM6102/UCM6104/UCM6108/UCM6116 directly via Web GUI. Please follow the steps below to upload firmware locally. • Download the latest UCM6102/UCM6104/UCM6108/UCM6116 firmware file from the following link and save it in your PC. http://www.grandstream.com/support/firmware •... -
Page 101: No Local Firmware Servers
NO LOCAL FIRMWARE SERVERS For users that would like to use remote upgrading without a local TFTP server, Grandstream offers a NAT-friendly HTTP server. This enables users to download the latest software upgrades for their devices via this server. Please refer to the webpage: http://www.grandstream.com/support/firmware. -
Page 102: Network Backup
SD Card) will be required because the backup file might be too large. Once backup is done, the list of the backups will be displayed with date and time. Users then can download, restore or delete it from the UCM6102/UCM6104/UCM6108/UCM6116 or the external device. Figure 48: Local Backup... -
Page 103: Cleaner
Enter 0-23 to specify the backup hour of the day. All the backup logs will be listed on the bottom of the page. CLEANER Users could configure to clean the Call Detail Report/Voice Records/Voice Mails/FAX automatically under Web GUI->Maintenance->Cleaner. Firmware Version 1.0.0.32 UCM6102/6104/6108/6116 USER MANUAL Page 102 of 108... -
Page 104: Reset And Reboot
RESET AND REBOOT Users could perform reset and reboot under Web GUI->Maintenance->Reset and Reboot. To factory reset the device, select the mode type first. There are three different types for reset. Firmware Version 1.0.0.32 UCM6102/6104/6108/6116 USER MANUAL Page 103 of 108... -
Page 105: Syslog
All: All the configurations and data will be reset to factory default. Figure 51: Reset and Reboot SYSLOG On the UCM6102/UCM6104/UCM6108/UCM6116, users could dump to syslog information to a remote server under Web GUI->Maintenance->Syslog. Enter the syslog server hostname or IP address and select the module/level for the syslog information. -
Page 106: Ping
(host, src, dst, net, protocol, port, port range) before starting capturing the trace. PING Enter the target host in host name or IP address. Then press "Start" button. The output result will dynamically display in the window below. Figure 53: PING Firmware Version 1.0.0.32 UCM6102/6104/6108/6116 USER MANUAL Page 105 of 108... -
Page 107: Traceroute
TRACEROUTE Enter the target host in host name or IP address. Then press "Start" button. The output result will dynamically display in the window below. Figure 54: Traceroute Firmware Version 1.0.0.32 UCM6102/6104/6108/6116 USER MANUAL Page 106 of 108... -
Page 108: Experiencing The Ucm6102/Ucm6104/Ucm6108/Ucm6116
FAQs User and Developer Forum for answers to your general questions. If you have purchased our products through a Grandstream Certified Partner or Reseller, please contact them directly for immediate support. Our technical support staff is trained and ready to answer all of your questions. Contact a technical support...
Need help?
Do you have a question about the UCM6102 and is the answer not in the manual?
Questions and answers