Table of Contents
Advertisement
Quick Links
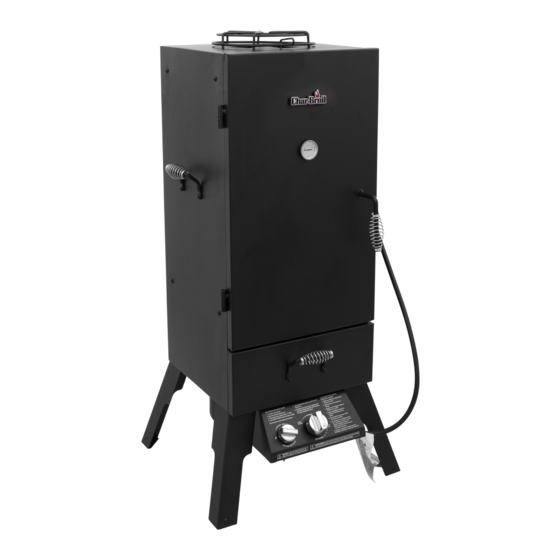
Product Manual
Model 12701705
IMPORTANT: Fill out the product record information below.
Model Number
Serial Number
See rating label on grill for serial number.
Date Purchased
CAUTION
Read and follow all safety statements, assembly
instructions, and use and care directions before
attempting to assemble and cook.
INSTALLER/ASSEMBLER:
Leave this manual with consumer.
CONSUMER:
Keep this manual for future reference.
If you have questions or need assistance during assembly, please call
To insure your satisfaction and for follow-up service, register your smoker online at
FOR OUTDOOR USE ONLY
www.grillregistration.com
WARNING
Failure to follow all manufacturer's instructions could
result in serious personal injury and/or property
damage.
CAUTION
Some parts may contain sharp edges. Wear
protective gloves if necessary.
CAUTION
THIS UNIT IS HEAVY!
DO NOT assemble without a helper.
1-800-241-7548
.
42804658 • 11-29-11
Advertisement
Table of Contents

Related Manuals for Char-Broil 12701705


Summary of Contents for Char-Broil 12701705
-
Page 1: Product Record Information
Product Manual Model 12701705 IMPORTANT: Fill out the product record information below. Model Number Serial Number See rating label on grill for serial number. Date Purchased FOR OUTDOOR USE ONLY CAUTION WARNING Read and follow all safety statements, assembly Failure to follow all manufacturer’s instructions could... -
Page 2: For Your Safety
CAUTION CAUTION: Indicates a potentially hazardous situation or unsafe practice which, if not avoided, may result in minor or moderate injury. CAUTION For residential use only. Do not use for commercial cooking. 2 • 12701705... -
Page 3: Table Of Contents
Limited Warranty........20 CAUTION For residential use only. Do not use for commercial cooking. 12701705 • 3... -
Page 4: Use And Care
Check the telephone Retainer Strap by the sun. directory under “Gas Companies” for nearest certified LP •Do not store an LP cylinder in an area where children play. dealers. 4 • 12701705... - Page 5 Nipple has to be centered into the LP cylinder valve. WARNING If “growing” bubbles appear do not use or move the LP cylinder. Contact an LP gas supplier or your fire department! 12701705 • 5...
- Page 6 • If a leak is detected at any time, STOP and call the fire turning hand wheel clockwise. department. • If you cannot stop a gas leak, immediately close LP cylinder valve and call LP gas supplier or your fire department! 6 • 12701705...
- Page 7 If a grease fire develops, turn knobs and LP cylinder off. • Do not leave unattended while burning appliance off food residue. If has not been regularly appliance 24” cleaned, a grease fire can occur that may damage the product. 12701705 • 7...
- Page 8 • Cooking surfaces: If a bristle brush is used to clean any of the grill cooking surfaces, ensure no loose bristles remain on View is from side of appliance cooking surfaces prior to grilling. It is not recommended to clean cooking surfaces while grill is hot. 8 • 12701705...
-
Page 9: Spider Alert
4. Remove 4 Control Panel screws and nuts. Shown C 5. Disengage Control Panel/control Valve from burner.. 6. Slide Control Panel Assembly from unit, shown D. Proper Venturi Tube to Valve Alignment shown. (Some parts not shown for clarity) 12701705 • 9... - Page 10 Egg Dishes 160° F Turkey, Chicken & Duck Whole, Pieces & Ground 165° F Tools Required for Assembly: #2 Phillips or Standard Flat blade Screwdriver (Not Provided) Small Adjustable Wrench (Not Provided) 7/16” Combination Wrench (Not Provided) 10 • 12701705...
- Page 11 Resist the temptation to open the door during After filling the smoker, close the door and leave cooking time. Opening the door will cause a loss of undisturbed until suggested minimum cooking heat, which will result in longer cooking times. time. 12701705 • 11...
-
Page 12: Parts List/ Parts Diagram
KNOB, CONTROL #1/4-20×1/2" Combo truss head screw IGNITOR, ROTARY NOTE: Some grill parts shown in the assembly steps may differ slightly in appearance from those on your particular model. However, the method of assembly remains the same. 12 • 12701705... -
Page 13: Assembly
#2 phillips screwdriver. (not provided) • NOTE: The venturi tube MUST face up (towards the door opening). NOTE: The venturi tube MUST be installed as shown Qty: 3 Venturi #1/4-20x1/2" Tube Combo Truss head screw #1/4-20x1/2" Burner Housing with Burner 12701705 • 13... - Page 14 • Be sure the electrode wire exits the hole UNDER the venturi tube hole. DO NOT route the wire through the same hole as the burner venturi tube. • Install Ignitor Wire by pushing the round connector onto the Ignitor as shown. Rotary ignitor Push the Round end of ignitor wire onto the Rotary Ignitor 14 • 12701705...
- Page 15 Stand the unit upright on its legs Stand the unit upright on its legs CAUTION: This unit is HEAVY! CAUTION: This unit is HEAVY! Do not attempt this step Do not attempt this step without assistance! without assistance! 10201597-50 • 15 12701705 • 15...
- Page 16 • Slide the Drawer, with Water Pan, into the Smoker body. Water Pan Frame Qty: 2 Qty: 2 #1/4-20 Keps Nut #1/4-20x3/4" Combo truss head screw Smoker Drawer Water Pan 1/4-20 Keps nuts 1/4-20x3/4” bolts Smoker Drawer 16 • 12701705...
- Page 17 Carefully place the door back onto the Smoker Body hinges. Top Grate Cooking Grates (3) • Remove wingnut from Thermometer, insert Thermometer through the hole in the door from the front, reinstall the wingnut to the Thermometer. Thermometer Wing Nut 12701705 • 17...
-
Page 18: Troubleshooting
• Clean wire and/or electrode with rubbing alcohol and clean swab. cooking residue. • Wire is loose or disconnected. • Reconnect wire or replace electrode/wire assembly. • Wire is shorting (sparking) between • Replace ignitor wire/electrode assembly. ignitor and electrode. 18 • 12701705... - Page 19 Reconnect and retry. • Valve not properly aligned to burner • Loosen control panel and valve. Be sure valve is centered top to bottom and left to right in burner tube. Tighten all components once proper alignment is achieved. 12701705 • 19...
-
Page 20: Limited Warranty
Consumer returns will not be accepted unless a valid Return Authorization is first acquired. Authorized returns are clearly marked on the outside of the package with an RA number and the package is shipped freight/postage pre-paid. Consumer returns that do not meet these standards will be refused. WS_1 Rev03 20 • 12701705... - Page 21 NOTES 21 • 12701705...
- Page 22 NOTES 22 • 12701705...
Need help?
Do you have a question about the 12701705 and is the answer not in the manual?
Questions and answers