
Related Manuals for Caple WC6115


Summary of Contents for Caple WC6115
- Page 1 Instruction manual for in-column wine cabinet Model code: WC6115 Contact Caple on 0844 800 3830 or for spare parts www.4caple.co.uk...
-
Page 2: Important Safety Instructions
If the supply cord is damaged, it must be replaced by a Caple service agent or a similarly qualified person in order to avoid a hazard. -
Page 3: Installation Instructions
• under any circumstances cut or remove the third (ground) prong from the power cord. Any questions concerning power and/or grounding should be directed toward a certified electrician or an authorised Caple service centre. Attention Store wine in sealed bottles;... - Page 4 OPERATING YOUR WINE CABINET AND SETTING THE TEMPERATURE CONTROL Please use the cabinet within an ambient temperature of 5-32 °C. If the ambient temperature is higher or lower than this, it will cause temperature fluctuations in the cabinet. Controls This is the LCD touch control panel. P o w e r “Power”...
- Page 5 Setting The Temperature Controls The temperature range can be set as low as 4°C or as high as 18°C to suit your specific storage • requirements. The factory temperature setting is 12°C , and the time is 12:00. • When the system enters the temperature set up. Each press once the button, will •...
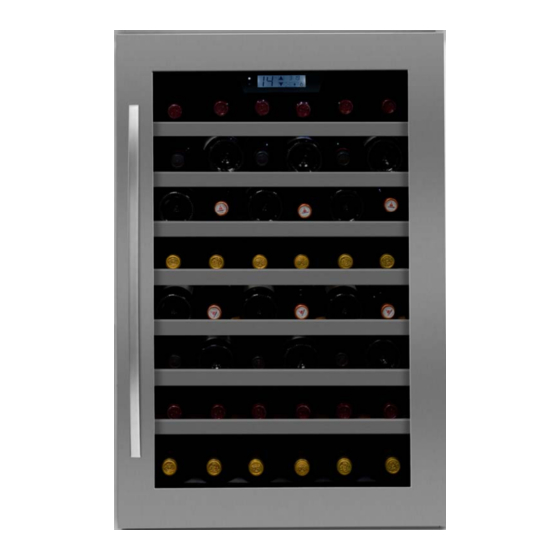
- Page 6 Storage diagram Total: 46 bottles (Max) (for 750 ml Bordeaux bottles) P o w e r Shelves To prevent damaging the door gasket, make sure you have the door fully opened when pulling • shelves out of the rail compartment. For easy access to the storage content, you must pull the shelves approximately 1/3 out of the •...
- Page 7 CAUTION! Do not store bottles crossways on the interior floor! Otherwise, bottles may fall out when the appliance door is opened and this may cause injury or material damage. How to change the door opening This appliance has reversible doors but is delivered with a right hinged door. The left hand hinge kit comes with the unit (in the box), should you wish to reverse the hinge on your unit.
- Page 8 1. Incline the wine cabinet with 45 degrees, take out right lower hinge’s screws with screwdriver (Fig.1) 2. Level the wine cabinet, Hold the door and take out right upper hinge’s screws with screwdriver. Then take out the door and rotate 180 degrees (Fig.2 & Fig.3 & Fig.4) 3.
- Page 9 1. After installing the wine cellar into the cabinet, please adjust the limited block (a) close to the cabinet (b) 2. Please fix the 3 screws through the limited block (a) to fix to the cabinet (b). See the below picture for reference.
-
Page 10: Care And Maintenance
CARE AND MAINTENANCE Cleaning Your Wine cabinet Turn off the power, unplug the appliance, and remove all items including shelves and rack. • Wash the inside surfaces with a warm water and baking soda solution. The solution should • be about 2 tablespoons of baking soda to a quart of water. Wash the shelves with a mild detergent solution. -
Page 11: Troubleshooting Guide
PROBLEMS WITH YOUR WINE CABINET? You can solve many common Wine cabinet problems easily, saving you the cost of a possible service call. Try the suggestions below to see if you can solve the problem before calling the servicer. TROUBLESHOOTING GUIDE PROBLEM POSSIBLE CAUSE Not plugged in. -
Page 12: Humidity Maintenance System
DEFROSTING/CONDENSATION Your wine cellar is designed with an “Auto-cycle” defrost system. When the RUN cycle is OFF, the refrigerated surface of the wine cellar (interior rear wall) defrosts automatically. The defrost water is channelled into a drain pan which is located at the back of the wine cellar next to the compressor from where it evaporates.
Need help?
Do you have a question about the WC6115 and is the answer not in the manual?
Questions and answers