
Related Manuals for Caple C981G


Summary of Contents for Caple C981G
- Page 1 Instruction manual for gas hobs Model code: C981G Model code: C1081G Contact Caple on 0844 800 3830 or for spare parts www.4caple.co.uk...
-
Page 2: General Precautions
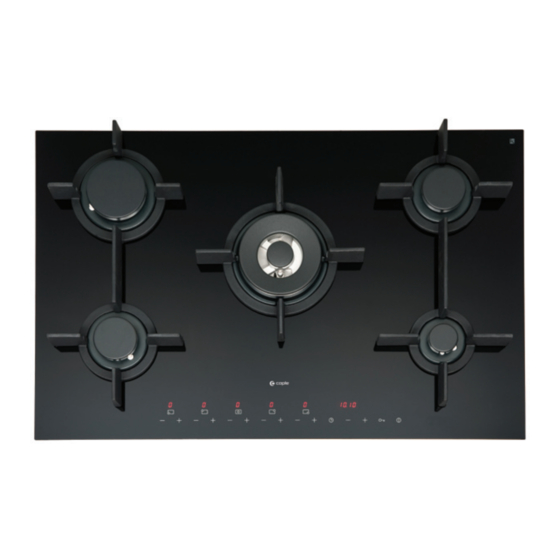
Dear Customer, Thank you for choosing a Boretti product and congratulations on your purchase. We are confident that your new appliance, manufactured with top quality materials, will respond perfectly your requirements. Although this appliance is extremely user-friendly, be sure to read this handbook carefully before proceeding to install and use it. - Page 3 HOBS - DESCRIPTION MODEL: C981G 1 Rapid burner 3000 W 2 Semi-rapid burner 1650 W 3 Auxiliary burner 1000 W 4 Triple crown burner 4000 W MODEL: C1081G 1 Rapid burner 3000 W 2 Semi-rapid burner 1650 W 3 Auxiliary burner...
- Page 4 50 mm between the edge of the appliance and adjacent walls. MODEL L (mm) P (mm) C981G C1081G If the hob is to be installed beneath a wall-mounted kitchen cabinet, ensure there is a minimum clearance of 760 mm between the worktop and the underside of the cabinet.
- Page 5 INSTRUCTIONS FOR THE INSTALLER To install the hob, proceed as follows: - Remove the pan supports and burners from the hob. - Turn the appliance upside down and fit gasket (S) around the outer edge (fig. 3). - Place the hob in the unit opening and fix it with screws (V) of brackets (G) (fig. 4). Installation environment This appliance is not equipped with a combustion products exhaustion system.
- Page 6 INSTRUCTIONS FOR THE INSTALLER Electrical Connection The appliance must be connected to the electrical mains by qualified personnel and in conformity with statutory legislation. The voltage of the electric supply must correspond to the value indicated on the label affixed to the underside of the appliance.
- Page 7 INSTRUCTIONS FOR THE INSTALLER Choosing the type of gas (5-burner version) The hob can be configured for use with natural gas or LPG. To activate the gas selection procedure the hob must be switched on with all of the burners off. Press the “+”...
- Page 8 INSTRUCTIONS FOR THE INSTALLER Minimum flow adjustment (5-burner version) The minimum flow is correctly adjusted when the flame remains lit without a pot on the pan support in position 1 of the burner control. To adjust the minimum flow of each burner, proceed as follows: Press the “+”...
- Page 9 INSTRUCTIONS FOR THE INSTALLER Choosing the type of gas (4-burner version) The hob can be configured for use with natural gas or LPG. To activate the gas selection procedure the hob must be switched on with all of the burners off. Press the “-”...
- Page 10 INSTRUCTIONS FOR THE INSTALLER Minimum flow adjustment (4-burner version) The minimum flow is correctly adjusted when the flame remains lit without a pot on the pan support in position 1 of the burner control. To adjust the minimum flow of each burner, proceed as follows: Press the “+”...
-
Page 11: Maintenance
INSTRUCTIONS FOR THE INSTALLER MAINTENANCE Replacing the power supply cable Should it be necessary to replace the power supply cable, use a standard type H05VV-F or H05RR-F cable with a section of 3 x 0.75 mm The connection to the terminal board must be carried out as shown in the figure on the right: Brown wire L (live) -
Page 12: Instructions For The User
INSTRUCTIONS FOR THE USER GENERAL PRECAUTIONS Using the burners To obtain the maximum efficiency without wasting gas, the pot diameter must be suitable in relation to the burner (see the following table), to avoid the flame extending beyond the bottom of the pot. - Page 13 INSTRUCTIONS FOR THE USER All operations concerning installation, adjustment and adaptation to the available gas type must be carried out by a qualified technician, in compliance with statutory legislation. The specific instructions are given in the section of the handbook reserved for the installer.
- Page 14 INSTRUCTIONS FOR THE USER Turning off all burners To turn off all burners simultaneously, briefly press the ON/OFF button: the appliance will enter standby mode. Setting the clock After a power failure, the hob clock must be reset. To set the clock, simultaneously press and hold the buttons shown in the figure for at least 3 seconds.
- Page 15 INSTRUCTIONS FOR THE USER Touch panel unlock To unlock the touch panel, press the “key” button and the “+” button of the LH burner for at least 2 seconds. When the touch panel is unlocked the decimal points switch off in the power level displays.
- Page 16 INSTRUCTIONS FOR THE USER USING THE APPLIANCE - 4-BURNER VERSION The symbols printed above each burner control show the correspondence between the control and the burner. Standby mode After connecting the appliance to the power supply, it will perform a brief self-diagnosis routine and touch panel calibration (all displays and LEDs remain illuminated for a few seconds).
- Page 17 INSTRUCTIONS FOR THE USER Turning off all burners To turn off all burners simultaneously, briefly press the ON/OFF button: the appliance will enter standby mode. Setting the clock After a power failure, the hob clock must be reset. To set the clock, simultaneously press and hold the buttons shown in the figure for at least 3 seconds.
- Page 18 INSTRUCTIONS FOR THE USER Touch panel unlock To unlock the touch panel, press the “key” button and the “+” button of the LH burner for at least 2 seconds. When the touch panel is unlocked the decimal points switch off in the power level displays.
- Page 19 INSTRUCTIONS FOR THE USER Electronic self-diagnosis The circuit boards perform continuous self-diagnosis. In the event of hardware faults or malfunctions in the circuit board that could be dangerous for the end user, the device will assume “safe” mode, the solenoid valves are deactivated and the display shows the relative fault code. Generally, the default operating parameters are restored by disconnecting and reconnecting the power supply.
- Page 20 This product complies with EU Directive 2002/96/EC. The crossed-out dustbin symbol reported on the appliance indicates that the appliance must be disposed of separately from other domestic refuse at the end of its useful life. It must therefore be delivered to a waste recycling centre specifically for electric and electronic equipment or returned to the retailer at the moment of purchase of a new equivalent appliance.
Need help?
Do you have a question about the C981G and is the answer not in the manual?
Questions and answers