Table of Contents
Advertisement
Advertisement
Table of Contents

Related Manuals for MobileDemand xTablet T7200


Summary of Contents for MobileDemand xTablet T7200
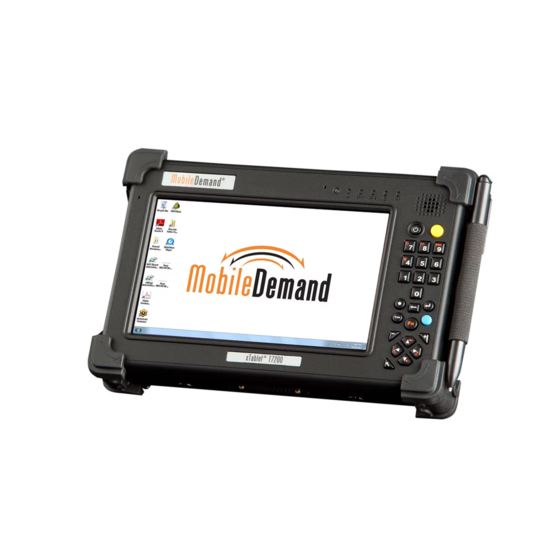
- Page 1 T7200 User Manual...
- Page 2 Products that are referred to in this document may be either trademarks and/or registered trademarks of the respective owners. The publisher and the author make no claim to these trademarks. MobileDemand is a registered trademark of MobileDemand, LC. MobileDemand logos are registered trademarks of MobileDemand, LC. Windows is a trademark of the Microsoft group of companies.
-
Page 3: Table Of Contents
About Your xTablet T7200 Rugged Tablet PC ...................4 About W indows 7 Professional ......................5 ......... 2 Quick Start ..............................6 ............Turning On the xTablet T7200 for the First Time ................7 Turning Off the xTablet T7200......................8 ....... 3 Hardware and Software ..............................9-10 .. - Page 4 6 Appendix ..............................33 ............. Federal Communications Commission Statement ................34 ....European Notice ..........................35 Safety Caution ..........................36 ... Battery Disposal ..........................36 .......... CAUTION FOR ADAPTER ......................36 ....BATTERY CAUTION ........................36-37...
-
Page 5: Before You Begin
Before You Begin Before You Begin... -
Page 6: Inventory
Internet. This user's guide contains all the information you need to set up and use your xTablet T7200. It describes all the features of the xTablet T7200 in an easy-to-read yet thorough manner. -
Page 7: Safety And Maintenance
Slots and openings in the system cabinet are for ventilation purposes. Do not block or cover these openings or the system could overheat. Do not use or store the xTablet T7200 near a source of heat or dust. -
Page 8: Features
Internet or a local area network (LAN). About Your xTablet T7200 Rugged Tablet PC This User’s Guide (installed in the main disk of the xTablet T7200) describes the key elements of your xTablet T7200. New users can find a simple step-by-step orientation in the "Quick... -
Page 9: About Windows 7 Professional
Before You Begin About Windows 7 Professional ® Windows 7 is all about making your life easier. To make it easy, Microsoft recommends "Compatible with Windows 7" devices and printers because they have passed Microsoft-designed tests for compatibility and reliability with Windows 7. Simply put, they install without worry - simply connect the device - and are compatible with all versions of Windows 7. -
Page 10: Quick Start
Quick Start... -
Page 11: Turning On The Xtablet T7200 For The First Time
Quick Start Use the following procedures to turn on your xTablet T7200 rugged tablet PC and get it up and running: "Turning On the xTab let T7200 for the First Time" "Turning Off Your xTab let T7200 Turning On the xTablet T7200 for the First Time Use the following instructions the first time an xTablet T7200 is turned on. -
Page 12: Turning Off The Xtablet T7200
If you are going to be away from the xTablet T7200 for a short period, there are ways of conserving power without shutting down the system. See the "Power Management" chapter for more information. -
Page 13: Hardware And Software
Hardware and Software... -
Page 14: Hardware And Software
Hardware and Software Before you begin using your xTablet T7200 rugged tablet PC, read this chapter to familiarize yourself with the main components installed in the system. This chapter introduces the different components and controls of your xTablet T7200, including hardware components, software, audio and video systems, and a full array of ports and connectors, including standard input/output (I/O) ports for quickly and easily adding peripheral devices. -
Page 15: Front View
Hardware and Software Front View 1. Microphone 2. Light sensor 3. LED indicators 4. Speaker 5. Keypad... -
Page 16: Led Indicators
Battery is overheated, is of f -line, and will come online when cooled down Flashing Red Battery is at slow -power (critical) state and needs recharging Green xTablet T7200 is reading from or writing to the built-in disk drive No light WLAN is not powered and Bluetooth is not powered Blue... -
Page 17: Front View Buttons
Hardware and Software Front View Buttons There are 25 keys located in the keypad on the right side of the front panel, their functions are as follows: Icon Function Power Button Press it to turn on/off the system Yellow Button To trigger Barcode scan f unction Numeric Key Same f unction as on a standard keyboard... -
Page 18: Function Keys
Function Keys Hold the Fn key while pressing keys listed in this table. Ke ys De s cription Fn + Up Volume up Fn + Dn Volume down Fn + Le ft Brightness decrease Fn + Right Brightness increase Fn + 0 Turn on/off Stealth Mode (All indicator LEDs and screen go dark) Fn + 1 F1 function key... -
Page 19: Quick Menu Utility
Quick Menu Utility The Quick Menu Utility is a system control utility that boots with Windows, and sits in the system tray, as seen below. To access the Quick Menu Utility, double click the blue and yellow icon in the system tray. The Quick Menu Utility controls a number of system functions, such as power to the WLAN, Bluetooth, WWAN, GPS, Barcode Scanner, and Keypad Backlight. -
Page 20: Right And Bottom View
Hardware and Software Right and Bottom View The following jacks, ports, and connectors can be built into the right and bottom sides of the xTablet T7200 unit. View the Configuration I/O options on the next section. USB port(s) Gigabit Ethernet Serial Port Configuration A 1. - Page 21 Hardware and Software Configuration B 1. USB port #1 2. USB port #2 3. 9-pin communications jack This connector is reserved specifically for connecting to cradle or docking devices. USB port #1 & #2 The Universal Serial Bus (USB) is the latest standard for attaching monitors, input devices, scanners, and other devices to a PC.
-
Page 22: Top View
3. Barcode Scanner Cover 4. SD card slot The SD card slot can be used as an interface between your xTablet T7200 and a variety of devices. Press an SD card into the SD card slot until it latches into place. -
Page 23: Left View
Hardware and Software Left View 1. Security lock slot (Kensington slot) Install an anti-theft device to this lock 2. DC-in jack Connect with the AC adapter that is included Back View 1. Camera 2. Battery 1 3. Battery 1 latch 4. - Page 24 Camera / Video The Camera application c a l l e d x C a m C a m e r a U t i l i t y is installed on the xTablet T7200 desktop for you. It accompanies the 5-Megapixal integrated camera that is built in the back of the xTablet T7200. See "Back View"...
- Page 25 To record a Video 1. Press the Red record button shown below. The display will change and show the elapsed time for the video recording When you want to stop recording, use the stylus or your finger and press the Red Record button again to stop recording.
-
Page 26: Stylus
Hardware and Software Stylus You can use the stylus (touch pen) like a mouse, a pen, or your finger on the xTablet T7200 display to perform regular left-click and right-click functions and to write in applications where applicable. W hen you are not using the stylus, you should store the stylus in the stylus holder that is on the right side of the xTablet T7200. -
Page 27: Imager/Bar Code Scanner (Optional)
The ScanWizard application is installed on the xTablet T7200 desktop as a shortcut for you. It activates the bar code scanner that is built into your xTablet T7200, such as the Intermec EA15 2-D Imager Engine. Contact the MobileDemand technical support at 319-363-4121 for assistance. -
Page 28: Replacing The Ssd
Replacing the SSD (Solid State Drive) Shut down Windows, turn off the unit, and remove the batteries. Flip the unit on its back. Remove the Battery 1 and Battery 2 on the right of the tablet. The cover that is under Battery Bay 1 is where the SSD drive is. Remove those screws holding that cover down. The cover that is under Battery Bay 1 is where the SSD drive is. -
Page 29: Power Management
Power Management... - Page 30 Battery" "Replacing the Battery Pack " Caution: The xTablet T7200 Rugged Tablet PC processor w as specially designed to consume little pow er, and generates very little heat. How ever, w orking in a hot environment, or w orking for long periods may raise the temperature.
-
Page 31: Monitoring The Battery Power
Power M anagement Monitoring the Battery Power ® You can check the remaining battery power in the W indows Power icon located at the lower right-hand corner of the task tray. The Power icon only appears in the task tray while the unit is running on the battery power but not while the unit is running off an external power source through the AC adapter. -
Page 32: Configuring The Low Battery Alarms
Power Management Configuring the Low Battery Alarms You can configure how your xTablet T7200 will respond to a low battery condition or a critical battery condition. To configure the alarms 1. Select Start > Control Panel > Power Options, then click Change plan settings on the power plan you want to modify, such as the recommended Balanced plan. -
Page 33: Charging The Battery
Charging the Battery When you use the AC adapter to connect your xTablet T7200 to a power outlet, the internal battery will automatically begin to recharge. W hile the battery is charging, the Battery Charge indicators on the LED indicator panel will be active after 6 to12 seconds. -
Page 34: Replacing The Battery Pack
Replacing the Battery Pack Note: The battery packs are hot-swappable. Over time, battery capacity gradually decreases. MobileDemand recommends that you replace your battery packs when you notice that they begin to store significantly less charge. This is usually every 2 years. -
Page 35: Touchscreen Calibration
Touchscreen Calibration... - Page 36 Calibration The touch screen is a thin membrane on the top of the display that responds to mechanical pressure on the screen’s surface. The cursor on the screen is controlled by the stylus or your fingertip. If you notice the tip touch-point not matching up with the cursor, you can calibrate the touch screen.
-
Page 37: Appendix
Appendix... -
Page 38: Federal Communications Commission Statement
Appendix The following documents are provided in this appendix: "Federal Communications Commission Statement" "European Notice" "Safety Caution" "Battery Disposal" "CAUTION FOR ADAPTER" "BATTERY CAUTION" Federal Communications Commission Statement This equipment has been tested and found to comply with the limits for a Class B digital device, pursuant to Part 15 of the FCC Rules. -
Page 39: European Notice
Appendix According to FCC 15.407(e), the device is intended to operate in the frequency band of 5.15GHz to 5.25GHz under all conditions of normal operation. Normal operation of this device is restricted to indoor use environment only. The availability of some specific channels and/or operational frequency bands are country dependent and are firmware programmed at the factory to match the intended destination. -
Page 40: Safety Caution
Appendix Safety Caution To reduce the risk of fire, use only No. 26 AW G or larger telecommunication line cord. IMPORTANT SAFETY INSTRUCTIONS When using your telephone equipment, basic safety precautions should always be followed to reduce the risk of fire, electric shock and injury to persons, including the following: Do not use this product near water, for example, near a bathtub, wash bowl, kitchen sink or laundry tub, in a wet basement or near a swimming pool. - Page 41 Appendix cables and equipment other than manufacturer specified. It is the responsibility of the user to correct any interference caused by such unauthorized modification, substitution or attachment. Manufacturer and its authorized resellers or distributors will assume no liability for any damage or violation of government regulations arising from failing to comply with these guidelines.
Need help?
Do you have a question about the xTablet T7200 and is the answer not in the manual?
Questions and answers