Table of Contents
Advertisement
Quick Links
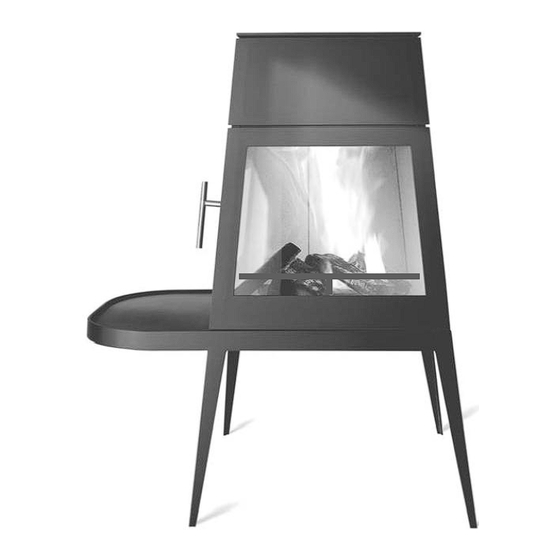
SHAKER Stove
Installation and User Manual
Imported by:
PO Box 120 Pound Ridge NY 10576
T.914-764-5679 F.914-764-0465
info@ Wittus.com www.wittus.com
Tested and
Listed by:
C
OMNI-Test Laboratories, Inc.
Report #: 339-S-01-02
Read this manual carefully and save the instructions.
Revised 10/13/11
Portland
Oregon USA
US
Advertisement
Table of Contents

Related Manuals for Wittus SHAKER

Summary of Contents for Wittus SHAKER
- Page 1 SHAKER Stove Installation and User Manual Imported by: PO Box 120 Pound Ridge NY 10576 T.914-764-5679 F.914-764-0465 info@ Wittus.com www.wittus.com Tested and Portland Listed by: Oregon USA OMNI-Test Laboratories, Inc. Report #: 339-S-01-02 Read this manual carefully and save the instructions.
-
Page 2: Table Of Contents
Installation and User Manual Table of Contents Introduction and Purpose Technical Data Service Packet Outside Air Supply Installation of Your Stove Connection to the Chimney 9-11 Air Flow and Combustion Permitted Fuels Initial Use Heating Up Operation 16-18 Cleaning Instructions 19-21 Spare Parts List Maintenance of the Stove... -
Page 3: Introduction And Purpose
Introduction and Purpose The purpose of this manual is to guide and instruct Shaker stove owners in proper burning to achieve environmentally friendly combustion and to minimize the risk of incorrect use and operation of the stove. Failure to follow instructions may result in property damage, bodily injury, or even death. It is therefore very important to read this entire manual carefully before you install and use your new Shaker stove, and save the instructions. -
Page 4: Technical Data
Technical Data SHAKER Stove: Description Data Test data: Safety approval for United States UL 1482 Safety approval for Canada ULC S627 Environmental approval (EPA Certified) 7.2 gm/hr emission rate Heating: Optimal heat output 20kBTU (6kW) Heat output range (minimum-maximum) 10-23kBTU (3-7kW) - Page 5 14“ 16“ 20“ 10“ 23“ 12“...
-
Page 6: Service Packet
Service Packet The SHAKER stove is delivered with a service packet. It contains the installation and user manual, copper lubricant, the heat protector handle, and a glove. Please note that the glove supplied with the stove is equally suitable for left and right-handed persons. -
Page 7: Installation Of Your Stove
Installation of Your Stove The distances (see Fig. on page 8) of the stove to combustible materials or walls are listed in the table below. These are the minimum clearances for installation, and any reductions must first be approved by Clearances to noncombustible materials are 2”... - Page 8 (not including the bench) - 20” (50cm) wide x 18” (46cm) deep. Therefore, the required minimum size for the Shaker floor plate is 36” (91cm) wide x 34” (86cm) deep in the US and 46” (115cm) wide x 34” (86cm) deep for Canada.
-
Page 9: Connection To The Chimney
Connection to the Chimney The Shaker stove can be connected from top or rear. The diameter of the stove pipe is 6” (152 cm). Do not use connector pipes and chimneys with smaller clearance diameters or less than 24 gauge steel. It must be installed using a Class A UL 103 HT approved factory-built chimney system or a code- approved masonry chimney with a flue liner. - Page 10 Each chimney connector or chimney connector section must be installed to the stove flue collar and to each other with the male (crimped) end toward the stove. This prevents any amount of condensed or liquid creosote from running down the outside of the pipe or the stove top.
- Page 11 211 or CAN/CSA-B365 guidelines. To install the collar on the back, first unscrew the rear plate of the Shaker stove and attach the collar to the back of stove. Then, attach the first stove pipe section to the connector pipe with screws, and replace the rear wall plate.
-
Page 12: Air Flow And Combustion
firebox, so a high combustion temperature can be attained rapidly. The Shaker is designed with a direct air inlet, which supplies air for the lighting phase. The primary air is used for air control once the stove is lit. It is defined as combustion air for burning and ... -
Page 13: Permitted Fuels
Permitted Fuels Only natural, air-dried firewood may be burned. Under no circumstances should rubbish, other fuels, and treated or damp wood be burned. NEVER burn impregnated or painted wood, laminated plastic, plywood, chipboard, garbage, flammable fluids such as gasoline, naphtha, engine oil, refuse, milk cartons, or printed matter. -
Page 14: Initial Use
Although the SHAKER is carefully cleaned and inspected several times, remainders of the sand blasting, or shavings of the cut of the Vermiculite plates in the fireplace can stay. We suggest you remove these with the vacuum cleaner before the first start-up. -
Page 15: Heating Up
Heating Up Fire lighting: Do not insert too much newspaper or kindling for lighting the fire. These materials generate a high temperature, which can cause irreparable damage. This kind of damage is not covered by the warranty. Combustion air supply: Initially, pull out the slider of the air control system completely pos. -
Page 16: Operation
Operation When refilling for the first time after lighting, the primary air supply should remain opened fully. Never add more than 2-4 pounds (1.5-2 kg) of wood (1-2 logs). Otherwise the stove could get overheated, which can cause irreparable damage. This kind of damage is not covered by warranty. - Page 17 Important: DO NOT use a grate or andirons to elevate the fire – build it directly on the hearth. Once there is a good bed of embers in the stove, you can add wood. It is important not to open the door while there are flames in the stove, as this may cause smoke to flow out into the room.
-
Page 18: Operation
door handle Attention: The surface is hot while in operation. Keep children, clothing and furniture away. Contact with the hot surfaces may cause skin burns. Do not store solid fuel within space heater installation heat protector clearances or within the area for loading and ash removal. handle Open the fuel-loading door: Use the heat protector handle for opening the fuel-loading door. -
Page 19: Cleaning Instructions
Cleaning Instruction Your stove (including the chimney and chimney connector) should be thoroughly checked and cleaned at least once during the course of the heating season. The flue gas outlet above the flue gas baffle and the stove connector should be inspected in particular. Please check the stove only when it is cold. Firebox: The ashes should be emptied regularly from the fire chamber. - Page 20 Now you can remove it from fire chamber. Use the same process to remove the second part of the upper flue gas baffle. Now you can clean the plates of the flue gas baffle and insert the parts in reverse order back into the Shaker stove.
-
Page 21: Spare Parts List
Moving parts: All moving parts (e.g. hinges and closing mechanisms) should be treated with a high temperature grease product (e.g. copper paste) regular intervals (at least once annually). This prolongs the life of the parts, and maintains an ease of movement. Air control system: The air control system handle can be treated periodically as required with a Teflon spray, to maintain a well-lubricated easy operation. -
Page 22: Maintenance Of The Stove
Maintenance of the Stove Replacing the gaskets: The gaskets must be replaced if the stove is no longer air-tight or if the gasket is damaged or it feels hard. After removing the old gasket, first clean the rim of any residual adhesive. Add a lower flue gas baffle upper flue gas baffle few drops of adhesive into the slots (to affix the... - Page 23 Replacing the front glass plate window: To remove the glass plate you must remove part of the flue gas baffle and the primary air baffle. First, remove the first part of the lower flue gas baffle (as described in the Cleaning Instruction section of the manual).
-
Page 24: Testing And Approvals
Testing and Approvals The SHAKER stove is safety tested by OMNI-Test Laboratories, Inc. of Portland, Oregon and is listed to UL 1482 for the U.S. and ULC S627 for Canada. It is also EPA certified and meets the stringent environmental standards. -
Page 25: Troubleshooting
Troubleshooting Problem Cause Remedy wood catches fire very - none or too little combustion air - completely open the air control slowly or not at all - logs are too thick - use smaller diameter logs - wood is too moist - use drier wood fire goes out or - none or too little combustion air...
Need help?
Do you have a question about the SHAKER and is the answer not in the manual?
Questions and answers