Advertisement
Table of Contents
- 1 Table of Contents
- 2 Unpacking the Unit
- 3 Responsibilities of the Installer
- 4 Testing Your Tub before Installation
- 5 Installation Preparation
- 6 Electrical Installation
- 7 Installation Procedures
- 8 Safety Instructions
- 9 Operating Instructions
- 10 Cleaning & Maintenance
- 11 Warranty
- 12 Troubleshooting
- Download this manual
Advertisement
Table of Contents

Related Manuals for American Standard WALK-IN BATH


Summary of Contents for American Standard WALK-IN BATH
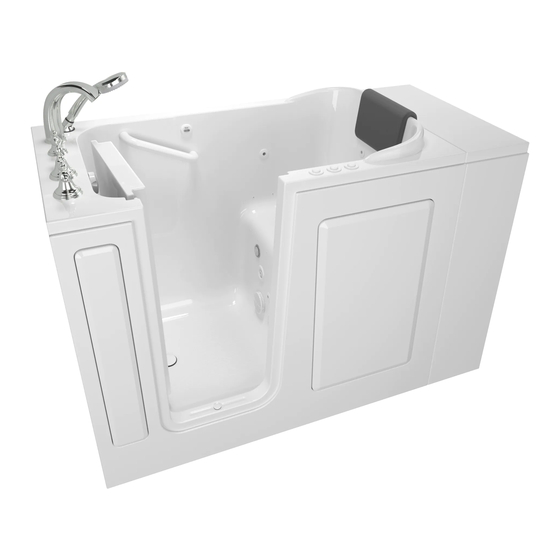
- Page 1 WALK-IN BATH INSTALLATION INSTRUCTIONS AND OWNER’S MANUAL...
- Page 2 CONGRATULATIONS! You are now the owner of a walk-in bathtub from the most trusted name in plumbing. We thank you for your purchase. Your American Standard ® walk-in bath is a true investment in your health and peace of mind.
-
Page 3: Table Of Contents
OWNERS MANUAL TABLE OF CONTENTS UNPACKING THE UNIT………………………………………………………………. Page 3 RESPONSIBILITIES OF THE INSTALLER…………………………………………… Page 4 TESTING YOUR TUB BEFORE INSTALLATION…………………………………… Page 5 INSTALLATION PREPARATION…………………………………………………….. Page 6 ELECTRICAL INSTALLATION………………………………………………………. Page 7 INSTALLATION PROCEDURES…………………………… ………………………... Page 8-17 SAFETY INSTRUCTIONS ……………………………… ……………………………. Page 18 OPERATING INSTRUCTIONS……………………………... -
Page 4: Unpacking The Unit
OWNERS MANUAL UNPACKING THE UNIT 1. FIRST, inspect the carton for damage: CAREFULLY DOCUMENT AND PHOTOGRAGH ALL PERCEIVED DAMAGE. Report all damage claims to customer service at 1-866-423-0800. 2. DO NOT LIFT THE TUB BY THE PLUMBING. Doing so can result in leaks, for which the installer is responsible. -
Page 5: Responsibilities Of The Installer
Installer assumes all liabilities for installation procedures. Although American Standard® has taken reasonable precautions to ensure that the Quick Drain suitable for residential plumbing; it is the responsibility of the installer to insure that the plumbing is acceptable for use of the Quick Drain . -
Page 6: Testing Your Tub Before Installation
OWNERS MANUAL TESTING YOUR WALK-IN TUB BEFORE INSTALLATION 1. All American Standard® walk-in baths are 100% water tested at the factory and have passed inspection. Transportation and mishandling may loosen fittings and cause leaks. It is therefore necessary to test the bathtub while there is access to all sides of the bath. -
Page 7: Installation Preparation
OWNERS MANUAL INSTALLATION PREPARATION 1. Check the floor area where the tub is to be installed. a. Clean area of any debris or trash. b. Use a 5 or 6-foot level and determine if the floor is level. If the floor is not level, adjust all leveling feet to perfectly level the tub. -
Page 8: Electrical Installation
OWNERS MANUAL ELECTRICAL INSTALLATION All electrical wiring must be installed in accordance with the National Electrical Code and with all local codes. All wiring shall be done by a qualified electrician. Run one, two or three branch circuits (as required) from the main electrical service panel to the pump area of the framing structure to provide power to the unit. -
Page 9: Installation Procedures
4. Install the optional in-line water heater per manufacturer’s instructions. 5. Standard Walk-In Bath Installation - After framing is complete, set product in place to check fit and make certain that the tub can be properly leveled. (Caution: If the bathtub is not resting on all leveling feet, water will not drain properly and this may cause the door to leak). - Page 10 OWNERS MANUAL INSTALLATION PROCEDURES WARNING: Never allow the weight of the tub to be supported by wood support stringers and do not use integral tile flange (if equipped) to screw or nail in place, as this will result in product failure and will void the warranty.
- Page 11 OWNERS MANUAL Alcove Installation Faucet and Pump Access Panels IMPORTANT Do not use tile flange to screw or nail tub in place. Integral Flange Non Integral Flange Model 50 ½” 26 ¼” 37 ½” 9 ½” 11 ½” 15 ½” 2651.11X 2848.10X 48”...
- Page 12 OWNERS MANUAL Acrylic Extension Kit Installation The Acrylic Extension Kit is designed to accommodate all acrylic walk-in tubs to fit within a 60” alcove pocket. The top panel measures 30” x 20” (depth x width) and the front panel 37 ½” x 20” (height x width). The panels must be trim to fit the unit within the 60”...
- Page 13 OWNERS MANUAL Acrylic Extension Kit Installation Steps 5 & 6 Remove the tub from the alcove and install the front and then top panel with the self tapping fasteners. Steps 7 & 8 Apply the temporary clamps to help support the front and top panels while re-locating the tub back into the alcove.
- Page 14 OWNERS MANUAL Gelcoat Extension Kit Installation The Gel Coat Extension Kits are designed for each unit to fit within a 60” alcove packet. The top and end panels have integral flange for easy of installation. Step 1 Temporary locate the tub within the alcove walls. Level the tub along the deck and apron.
- Page 15 OWNERS MANUAL Gelcoat Extension Kit Installation Step 3 Remove the tub from the alcove. Install the front and then the top panel with the tub brackets. Step 4 Apply the temporary clamps to help support the panels while re-locating the tub back into the alcove. Remove temporary clamps, check level, shim if necessary, and seal in panels with silicone.
- Page 16 Follow the installation instructions provided with the drain / overflow kit. After the drain is fully installed, test the unit for proper drainage. If the unit does not drain properly, rectify the condition before proceeding with installation. American Standard is not responsible for the removal or re-installation costs.
- Page 17 OWNERS MANUAL Threshold Drain Installation Threshold Drain Information All gel coat walk-in bathtubs are provided with a threshold door drain. All acrylic walk-in bathtubs feature the “Patented T5 Door System” which does not require the threshold drain. Connection of the Door Drain ...
- Page 18 OWNERS MANUAL Inline Heater Installation Whirlpool In-Line Heater All whirlpool systems are deigned with an In-Line Heater Blank. The threads and union set on the heater blank and heaters are specifically designed for our system. All other heaters and heater blanks will not interchanges with our system.
-
Page 19: Safety Instructions
▲ WARNING: Risk of personal injury. To avoid injury, exercise caution when entering or exiting your walk-in bath. ▲ WARNING: Risk of personal injury. To reduce the risk of injury, do not permit children or persons with infirmities to use this product unless they are closely supervised at all times. -
Page 20: Operating Instructions
(If equipped.) 5. If your American Standard® walk-in bath is equipped with an Air Spa system, you can activate the heated blower by pushing the push button on the deck. Push the button to turn on / off and cycle for the various speeds. - Page 21 SAVE THESE INSTRUCTIONS! OPERATING INSTRUCTIONS 9. If your American Standard® walk-in bath is equipped with Chromatherapy lights, the lights have a dedicated control button. Pressing the control button off and back on will change the color of light. 10. If any factory-installed fittings have been removed, do not operate the unit. A safety hazard may have been created by this modification.
-
Page 22: Cleaning & Maintenance
OWNERS MANUAL CLEANING AND MAINTENANCE Pump and pipe circulation systems should be flushed before first use and on a monthly basis when product is under normal use. Below are the recommended procedures for cleaning: Do not run whirlpool dry. Fill the tub with hot water 2-3 inches above the jets and add 2-3 teaspoons of low foaming detergent such as dishwashing machine detergent. -
Page 23: Warranty
God. RETURN POLICY American Standard® is committed to providing premium customer service. In the event that a product must be returned due to reasons other than defects, as mentioned in the warranty, the following procedures apply: Requests for returns and/or exchanges must be made within 30 days of receipt of product. -
Page 24: Troubleshooting
OWNERS MANUAL TROUBLE SHOOTING GUIDELINES WHEN SERVICING THIS UNIT, BASIC PRECAUTIONS SHOULD ALWAYS BE FOLLOWED. To reduce the risk of injury, keep all components in a vented enclosure and out of the reach of ▲ children. ▲ Risk of Electrical Shock – Connect only to a grounding type receptacle protected by a ground fault circuit interrupter (GFCI). - Page 25 OWNERS MANUAL TROUBLE SHOOTING GUIDELINES Whirlpool Pump Motor Will Not Start – Check For: Check the air line between the motor and air button for connection and depress to test air signal. Improper or loose connections, open switches or relays, blown circuit breakers. ...
- Page 26 OWNERS MANUAL TROUBLE SHOOTING GUIDELINES Heaters All heaters are equipped with a preset pressure switch which will not allow the heater to turn on if the pump is not running with water flowing through the whirlpool system. The heater includes an exclusive High Limit Switch.
Need help?
Do you have a question about the WALK-IN BATH and is the answer not in the manual?
Questions and answers