
Related Manuals for GE 29299


Summary of Contents for GE 29299
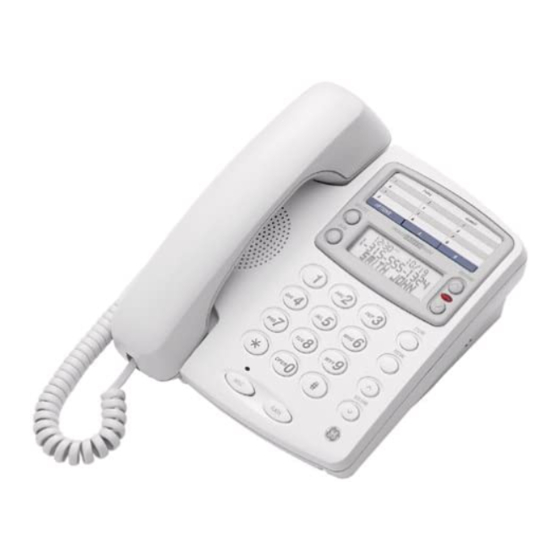
- Page 1 29299 Call Waiting Caller ID Memory phone User’s Guide We bring good things to life.
-
Page 2: Fcc Registration
The REN is useful in determining the number of devices you may connect to your telephone line and still have all of these devices ring when your telephone number is called. In most (but not all) areas, the sum of the RENs of all devices connected to one line should not exceed 5. -
Page 3: Table Of Contents
ABLE OF ONTENTS FCC R EGISTRATION NFORMATION NTERFERENCE NFORMATION EARING OMPATIBILITY ... 4 NTRODUCTION ... 5 ARTS HECKLIST ... 5 EFORE EGIN ODULAR EQUIREMENTS & S ... 6 NSTALLATION ETUP MPORTANT NSTALLATION ... 6 NFORMATION NSTALLING THE ATTERIES ... 8 ESKTOP NSTALLATION OUNT... -
Page 4: Introduction
NTRODUCTION Your Caller ID phone stores and displays specific information, provided by your local telephone company, to subscribers of Caller ID or similar caller identification services. You must subscribe to one of these services in order to use this unit. -
Page 5: Parts Checklist
EFORE ARTS HECKLIST Make sure your package includes the following items: Short telephone line cord Telephone line cord ODULAR You need an RJ11 type modular jack, which is the most common type of phone jack and might look like the one pictured here. If you don’t have a modular jack, call your local... -
Page 6: Installation & Setup
NSTALLATION NFORMATION • Never install telephone wiring during a lightning storm. • Never touch uninsulated telephone wires or terminals, unless the telephone line has been disconnected at the network interface. • Use caution when installing or modifying telephone lines. NSTALLING THE Your Caller ID phone uses 4 AA-size alkaline batteries for receiving and storing Caller ID records and for the numbers you use for memory dialing. - Page 7 60 seconds. Write down any stored information you do not want erased. IMPORTANT: If you’re not going to use the telephone for more than 30 days, remove the batteries because they can leak and damage the unit.
-
Page 8: Desktop Installation
2. Plug the line cord into jack on the back of the base. Plug the other end into a wall jack. 3. Set the RINGER switch on the base to the desired loudness. • HI = Default, loudest sound. • LO = Sound will be lower. • OFF = Telephone will not ring. -
Page 9: Wall Mount Installation
8. Set the RINGER switch on the base to the desired loudness. • HI = Default, loudest sound. • LO = Sound will be lower. • OFF = Telephone will not ring. -
Page 10: Setting U P The Caller
ETTING P THE You should not plug the telephone into the wall line jack while setting up the Caller ID menu. An incoming call may invalidate the change if it was not yet saved. The phone must display xx CALLS before you can enter the setup menu. -
Page 11: Setting Your Local
ETTING OCAL The telephone uses the programmed area code to determine the number format to display when a valid Caller ID signal is received and is also used for the Dialback feature. 1. Press the OPTIONS button. OPTIONS MENU ^ v appears. -
Page 12: Etting The
6. Repeat steps 4 and 5 until all the digits for your area code are correct. If you make a mistake, you can simply retrace the previous steps until your area code is set. 7. Press OPTIONS once again to store the area code and return to the “LOCAL AREA CODE”... -
Page 13: Etting The
ETTING THE ISPLAY This adjustment allows optimization of the contrast and viewing angle of the display. 1. Press the OPTIONS button. OPTIONS MENU ^ v appears. 2. Press the REVIEW up button until (LCD) CONTRAST appears. 3. To enter and change the contrast, press the OPTIONS button. -
Page 14: Etting The
ETTING THE This adjustment allows you to select tone (touch-tone) or pulse (rotary) mode dialing. 1. Press the OPTIONS button. OPTIONS MENU ^ v appears. 2. Press the REVIEW up button until T/P DIAL MODE appears. 3. To enter and change the dial mode, press the OPTIONS button. -
Page 15: Caller Id Features
ALLER WITH Provided your telephone company is able to integrate Caller ID and Call Waiting services, you are able to see who is calling when you hear the call waiting beep. The caller identification information appears in the display after you hear the tone. -
Page 16: Eceiving And Reviewing Callr
ECEIVING AND This unit receives and displays information transmitted by your local phone company. This information can include the phone number, date, and time; or the name, phone number, date, and time. The unit can store up to 60 calls for later review. When the memory is full, a new call automatically replaces the oldest call in memory. -
Page 17: Deleting Call Records
NOTE: If only PICKUP PHONE shows on the display, no other changes to the number can be made. The information sent from the telephone company is known to be a valid number for dialing back (utilized only in very limited areas). Once you pick up the phone, the number will be automatically dialed. -
Page 18: F You Programmed Your Local Area
1 - 315 - 555 - 1324 SMITH JOHN 7-digits: 7-digit telephone number (i.e. 555-5555) 10-digits: 3-digit area code + 7-digit telephone number (i.e. 425-555-5555) 11-digits: long distance code 1 + 3-digit area code + 7-digit telephone number (i.e. 1-425-555-5555) -
Page 19: I F You Did Not Program Your Local
NOTE: If only PICKUP PHONE shows on the display, no other changes to the number can be made. The information sent from the telephone company is known to be a valid number for dialing back (utilized only in very limited areas). Once you pick up the phone, the number will be automatically dialed. -
Page 20: Message Indicators
ESSAGE NDICATORS The following special messages indicate the status of a message or the unit: NO CALLS The caller memory is empty. UNKNOWN The incoming call does not CALL have Caller ID service or their service area is not linked to yours. If UN- KNOWN CALL appears along with a calling number, the name information for that number was not available. -
Page 21: Elephone Asics
LACING A HONE Lift the handset and wait for a dial tone. Dial the telephone number you wish to call. You can adjust the volume of the caller’s voice by pressing the VOLUME up or down buttons. -
Page 22: Temporary Tone Dolume Control
After dialing the telephone number, press and release the * button on the telephone. This allows access to phone services that require a tone, such as banking and long-distance services. After you hang up the handset, the telephone automatically returns to pulse service. -
Page 23: One -Touch Redial
OUCH EDIAL If the last call you dialed was busy, you can redial it immediately by just pressing the REDIAL button without hanging up the handset. NOTE: The Redial feature stores in memory all the numbers you press. If you press any numbers after dialing the phone number you last called (for example, when accessing a voice mail system), those... -
Page 24: Flash
LASH This feature is used to activate customer calling services available through your local phone company, such as Call Waiting. These services generally require an extra monthly fee. If you subscribe to any of these services, please refer to the phone company’s instructions on how to use FLASH. -
Page 25: Emory
"Temporary Tone Dialing". TORING UICK 1. Pick up the handset. 2. Press STORE. 3. Enter the telephone number (up to 20 digits). If you make a mistake, hang up and repeat the procedure for storing from the beginning. 4. Press STORE. -
Page 26: Storing Quick Dial N Storing Frequently C Numbers
REQUENTLY UMBERS 1. Pick up the handset. 2. Press STORE. 3. Enter the telephone number (it will not actually call the number in this mode). If you make a mistake, hang up and repeat the procedure for storing from the beginning. -
Page 27: Umbers
REQUENTLY ALLED 1. Make sure the handset is hung up. 2. Press DIAL. 3. Press 0-9 for the memory location. The number shows on the display. HANGING A TORED Repeat the storage sequence. The new number replaces the old number at the memory location. - Page 28 TORING A PAUSE IN MEMORY The REDIAL button becomes a pause function when the STORE button has been pressed first. It is valid only when storing a number into memory locations. Use the PAUSE (REDIAL) button to insert a pause when a delay is needed in an automatic dialing sequence.
-
Page 29: Numbers
IALING A UICK 1. Pickup the handset. 2. Press the Quick Dial location A or B. The number shows on the display and dials automatically. IALING REQUENTLY UMBERS 1. Pick up the handset. 2. Press DIAL. 3. Press 0-9 for the memory location. The number dials automatically. -
Page 30: Roubleshooting Tips
NFORMATION IS FTER THE HONE • Did you order Caller ID service from your local telephone company? This unit requires that you subscribe to Caller ID service in order to work. • Be sure to wait until the second ring before answering. - Page 31 HONE • Check the dial mode in the setup menu. Is it set to tone, which may not be compatible with your local dialing service? HONE • Is the ringer switch in the OFF position? • Are you using too many phones on one line? (The total REN of all phones on the same line should not be greater than the maximum REN for your calling area.
-
Page 32: Eneral Product Care
ENERAL RODUCT To keep your phone working and looking good, follow these guidelines: • Avoid putting near heating appliances and devices that generate electrical noise ( for example, motors and flourescent lamps). • DO NOT expose to direct sunlight or moisture. •... -
Page 33: Ndex
NDEX Before You Begin 5 Caller ID Features 15 Caller ID with Call Waiting 15 Changing a Stored Number 27 Deleting Call Records 17 Desktop Installation 8 Dialing a Quick Dial Number 29 Dialing Back 17 Dialing Frequently Called Numbers 29 Erasing a Stored Number 27 Exiting Setup 14 FCC Registration Information 2... - Page 34 Setting Your Local Area Code 11 Storing a pause in memory 28 Storing Frequently CalledNumbers 26 Storing Quick Dial Numbers 25 Summary Screen 15 Telephone Basics 21 Temporary Tone Dialing 22 Troubleshooting Tips 30 Volume Control 22 Wall Mount Installation 9...
-
Page 35: Imited Warranty
IMITED ARRANTY What your warranty covers: • Any defect in materials or workmanship. For how long after your purchase: • One year. (The warranty period for rental units begins with the first rental or 45 days from date of shipment to the rental firm, whichever comes first.) What we will do: •... - Page 36 Model 29299 © 1999 Thomson Consumer Electronics, Inc. 15440910 (Rev. 1 E/S) P.O. Box 1976, Indianapolis, IN 46206 99-37 Trademark(s) ® Registered Marca(s) Registrada(s) Printed in China...
- Page 37 29299 Teléfono con Memoria de Identificador de Llamadas (Caller ID) y Llamada en Espera (Call Waiting) Guía del Usuario Creamos cosas buenas para la vida.
-
Page 38: Nformación De La
NFORMACIÓN DE LA Su equipo telefónico de la GE ha sido registrado con la Comisión Federal de Comunicaciones (FCC) y está en acuerdo con las Partes 15 y 68 de las Regulaciones y Reglas de la FCC. Notificación a la Compañía Telefónica Local Al fondo de este equipo Ud. - Page 39 ABLA DE ONTENIDO NFORMACIÓN DE LA EGISTRACIÓN DE LA FCC ... 2 NFORMACIÓN DE NTERFERENCIAS OMPATIBILIDAD CON UDÍFONOS ... 4 NTRODUCTION ... 5 ISTA DE PARTES ... 5 NTES DE OMENZAR EQUERIMIENTOS DE ONTACTO ... 5 ODULAR NSTALACIÓN Y ROGRAMACIÓN NFORMACIÓN MPORTANTE PARA LA ...
-
Page 40: Introduction
NTRODUCTION Your Caller ID phone stores and displays specific information, provided by your local telephone company, to subscribers of Caller ID or similar caller identification services. You must subscribe to one of these services in order to use this unit. -
Page 41: Lista De Partes
NTES DE OMENZAR ISTA DE PARTES Asegúrese de que su paquete incluye los siguientes artículos: Cable corto Cable de la línea telefónica EQUERIMIENTOS DE Usted necesita un contacto modular tipo RJ11, que es el tipo de contacto telefónico más común y se parece al contacto dibujado aquí. -
Page 42: Instalación Y Programación Información Importante Para La Instalación
NSTALACIÓN Y NFORMACIÓN MPORTANTE PARA LA • Nunca instale el cableado del teléfono durante una tormenta de relámpagos. • Nunca toque alambres telefónicos o terminales que no estén aislados, a menos de que la línea telefónica haya sido desconectada en la interfaz de la red. - Page 43 NOTA: Si el símbolo de baja batería necesita cambiar las baterías. Es importante que usted cambie las baterías tan pronto como sea posible para retener la información de la operación del Identificador de Llamadas. Durante el tiempo en el que se reemplazan las baterías, un circuito de repuesto en el aparato retendrá...
-
Page 44: Nstalación Sobre
NSTALACIÓN SOBRE 1. Conecte el cable espiral al auricular. Conecte el otro extremo al contacto en el costado de la base. Coloque el auricular en su sitio sobre la base. 2. Conecte el cable telefónico al contacto en la parte posterior de la base. Conecte el otro extremo en el contacto de la pared. -
Page 45: Instalación Sobre Pared
NSTALACIÓN SOBRE 1. Cuidadosamente voltee el teléfono. Separe la placa de montaje para pared de las ranuras superiores simplemente oprimiendo hacia adentro las lengüetas. Jale la placa para separarla del teléfono y gírela de manera que se vea como el diagrama de abajo de la página. Suavemente oprima la placa dentro de las ranuras inferiores hasta que escuche un chasquido indicando que han entrado en su sitio. -
Page 46: Ara Programar El
ARA PROGRAMAR EL DENTIFICADOR DE Se recomienda que el teléfono no sea conectado a la pared mientras usted está haciendo alguna modificación en el menú para programar el Identificador de Llamadas. Una llamada entrante puede anular un cambio si aún no había sido salvado. -
Page 47: Para Programar S Uc
ROGRAMAR OCAL El teléfono usa el área local programada para determinar el formato de números que se muestra cuando se recibe una señal válida del Identificador de Llamadas, y también se usa para la función de re- discado para contestar la llamada. 1. -
Page 48: Para
6. Repita los pasos 4 y 5 hasta que todos los dígitos de su código de área estén correctos. Si usted comete un error, usted puede simplemente repetir los pasos anteriores hasta que su código de área esté programado. 7. Oprima el botón “OPTIONS” nuevamente para almacenar el código de área y regresar al visor que lee código de área local (“LOCAL AREA... -
Page 49: Para Para C Para
ROGRAMAR EL ANTALLA Este ajuste le permite lograr la optimización del contraste y el ángulo de visión del visor. 1. Oprima el botón de opciones (“OPTIONS”). En el visor aparecerá “OPTIONS MENU ” ^ v 2. Oprima el botón de revisar hacia arriba (“REVIEW up”) hasta que la indicación de contraste ( “(LCD) CONTRAST”... -
Page 50: Para Para Marcar Marcar
ROGRAMAR LA ARCAR Este ajuste le permite seleccionar la modalidad para discar en modalidad de tono (tone) o rotatorio (pulse). 1. Oprima el botón de opciones (“OPTIONS”). La indicación “ OPTIONS MENU ” ^ v aparecerá en el visor. 2. Oprima el botón para revisar hacia arriba (“REVIEW UP”) hasta que la selección de discado (“T/P DIAL MODE”) aparezca en el visor. -
Page 51: Unciones Del
UNCIONES DEL ANTALLA UMARIO La Pantalla Resumen muestra la hora actual, fecha, y número de llamadas nuevas esperando ser revisadas. Esto se muestra hasta que los botones “REVIEW” u “OPTIONS” se oprimen, o un nuevo dato del Identificador de Llamadas es recibido. Dentro de 10 segundos de haber recibido la llamada nueva, la Pantalla Resumen se muestra y el indicador de Llamada Nueva... -
Page 52: Para Recibir Y Almacenar
ARA RECIBIR Y ALMACENAR LAMADAS Este aparato recibe y muestra información transmitida por su compañía telefónica local. Esta información puede incluir el número telefónico, fecha, y hora; o el nombre, número telefónico, fecha y hora. Este aparato puede almacenar hasta 60 llamadas para ser revisadas después. -
Page 53: Para Borrar Información De Las Llamadas
ARA BORRAR INFORMACIÓN DE LAS LLAMADAS • Para borrar los datos mostrados en el visor, oprima el botón para borrar (“DELETE”) una vez. • Para borrar todos los datos mientras los revisa, oprima y sostenga el botón para borrar (“DELETE”) durante aproximadamente 3 segundos. - Page 54 I USTED PROGRAMÓ SU CÓDIGO DE ÁREA EN EL MENÚ DE PROGRAMACIÓN 1. Use los botones “REVIEW” hacia arriba o abajo para que el visor muestre el número que usted desea discar. • Si usted ve un número con 7 dígitos (por ejemplo 555-1234), entonces esa llamada fué...
- Page 55 3. Oprima el botón “DIAL” y el visor leerá “PICKUP PHONE”. Un temporizador de 10 segundos comenzará a contar en este momento en la esquina superior de la pantalla, haciéndole saber el tiempo que pasa hasta que el visor regresa al dato del Identificador de Llamadas.
-
Page 56: Ndicadores De Ensajes
NDICADORES DE Los siguientes mensajes especiales indican el estado actual de un mensaje o del aparato: NO CALLS (NO HAY LLAMADAS) UNKNOWN CALL (LLAMADA DESCONOCIDA) BLOCKED CALL (LLAMADA BLOQUEADA) ERROR NO DATA (NO HAY DATOS ACCESIBLES) START/END (PRINCIPIO/ FINAL) ENSAJES La memoria del Identificador está... -
Page 57: Nformación Ásica Del Eléfono
NFORMACIÓN ARA RECIBIR UNA Asegúrese de que el selector del timbre (“RINGER”) esté en la posición “HI” o “LOW”. Cuando el teléfono timbra y la información de la persona que llama se muestra en el visor, levante el auricular y comience su conversación. Usted puede ajustar el volumen de la voz de la persona que llama, simplemente oprimiendo los botones... -
Page 58: Tono Temporario Para Discar
ONO TEMPORARIO PARA DISCAR Si usted tiene servicio rotatorio de discado, usted puede temporalmente cambiar de servicio rotatorio a servicio de tono. Después de marcar el número telefónico, oprima y suelte el botón * en el teléfono. Esto le permite el acceso a servicios telefónicos que requieren la modalidad de discado por tono, como por ejemplo transacciones bancarias o servicios de... -
Page 59: Ara Volver A Marcar Con Un Solo Toque
ARA VOLVER A MARCAR CON UN SOLO TOQUE Si el último número al que usted llamó estaba ocupado, usted puede re-discar inmediatamente, simplemente oprimiendo el botón “REDIAL” sin haber colgado el auricular. NOTA: La función de Re-discado almacena en la memoria todos los números que usted oprima. -
Page 60: Ervicios Speciales
ERVICIOS SPECIALES Este botón se utiliza para activar los servicios especiales disponibles a través de su compañía telefónica local, como Llamada en Espera. Estos servicios generalmente requieren una tarifa mensual adicional. Si usted se suscribe a alguno de estos servicios, por favor refiérase a las instrucciones de la compañía telefónica con respecto al uso adecuado de este botón (“Flash”). -
Page 61: Emoria
EMORIA Antes de que usted almacene cualquier número telefónico en la memoria, asegúrese de que la modalidad de discado es correcta para el tipo de teléfono que usted está utilizando. La modalidad de discado pre- programada es de tono (touch-tone), así que si usted tiene servicio de pulso (rotatorio), usted tiene que cambiar primero la modalidad de discado. -
Page 62: Ara Almacenar Números Llamados Frecuentemente
ARA ALMACENAR NÚMEROS LLAMADOS FRECUENTEMENTE 1. Levante el auricular. 2. Oprima el botón para almacenar (“STORE”). 3. Inscriba el número telefónico (el aparato no usará esta modalidad para discar el número). Si usted comete un error, cuelgue y repita el procedimiento para almacenar desde el principio. -
Page 63: Números Llamados Frecuentemente
ÚMEROS LLAMADOS FRECUENTEMENTE 1. Asegúrese de que el auricular esté colgado. 2. Oprima el botón para marcar (“DIAL”). 3. Oprima los botones 0-9 para la localización de la memoria. El número se muestra en la pantalla. ARA CAMBIAR UN NÚMERO ALMACENADO Repita la secuencia para almacenar. -
Page 64: Ara Almacenar Una Pausa En La Memoria
ARA ALMACENAR UNA PAUSA EN LA MEMORIA El botón para Discado (“REDIAL”) se convierte en una función de pausa cuando el botón para almacenar (“STORE”) ha sido oprimido primero. Es válido unicamente cuando se almacena información en las localizaciones de memoria. Use el botón “PAUSE(REDIAL)”... -
Page 65: Ara Marcar Un Número De Marcado Rápido En La Memoria
ARA MARCAR UN NÚMERO DE MARCADO RÁPIDO EN LA MEMORIA 1. Levante el auricular. 2. Oprima la localización de la memoria de Discado Rápido (“QUICK DIAL”). El número se marca automaticamente. ARA MARCAR NÚMEROS MARCADOS FRECUENTEMENTE 1. Levante el auricular. 2. -
Page 66: Etección De Verías
ETECCIÓN DE O HAY ONO DE • Cheque todo el cableado para asegurarse de que todas las conecciones están firmemente aseguradas y no dañadas. • Cheque el gancho de colgar (hook switch): ¿Regresa a su lugar completamente cuando el auricular es descolgado? ISOR ESTÁ... - Page 67 L TELÉFONO NO DA LÍNEA HACIA AFUERA • Cheque la modalidad de discado en el menú de programación. ¿Posiblemente está colocado en modalidad de tono, que puede no ser compatible con su servicio local de discado? L TELÉFONO NO TIMBRA •...
-
Page 68: Uidado General Del Producto
UIDADO GENERAL DEL PRODUCTO Para mantener su teléfono funcionando bien y con buena apariencia, observe las siguientes pautas: • Evite poner el teléfono cerca de calentadores (calefactores) de ambiente y dispositivos que generen interferencia eléctrica ejemplo, motores o lámparas fluorescentes). •... - Page 69 NDICE Antes de Comenzar 5 Cómo obtener servicios de mantenimiento 32 Compatibilidad con Audífonos 2 Control del volumen 22 Cuidado general del producto 32 Detección de Averías 30 El teléfono no da línea hacia afuera 31 El teléfono no timbra 31 El tono de re-alimentación palpita mientras se mar 31 El Visor está...
- Page 70 Para Programar elContraste de la Pantalla 13 Para Programar la Modalidad para Marcar 14 Para Programar Su Clave De Area Local 11 Para recibir una Llamada 21 Para recibir y almacenar Llamadas 16 Para revisar números almacenados en la memoriaNúm 26 Para revisar la información de las llamadas 16 Para Salir de Programacion 14...
-
Page 71: Arantía Limitada
ARANTÍA LIMITADA Lo que cubre su garantía: • Cualquier defecto en material o mano de obra. Por cuánto tiempo después de la compra: • Un año. (El periodo de garantía para unidades arrendadas se inicia con la primera renta o 45 días de la fecha del embarque a la firma de arrendamiento, lo que ocurra primero). - Page 72 Modelo 29299 © 1999 Thomson Consumer Electronics, Inc. 15440910 (Rev. 1 E/S) P.O. Box 1976, Indianapolis, IN 46206 99-37 Trademark(s) ® Registered Marca(s) Registrada(s) Impreso en China...