Table of Contents
Advertisement
Advertisement
Table of Contents

Related Manuals for AEG D88106


Summary of Contents for AEG D88106
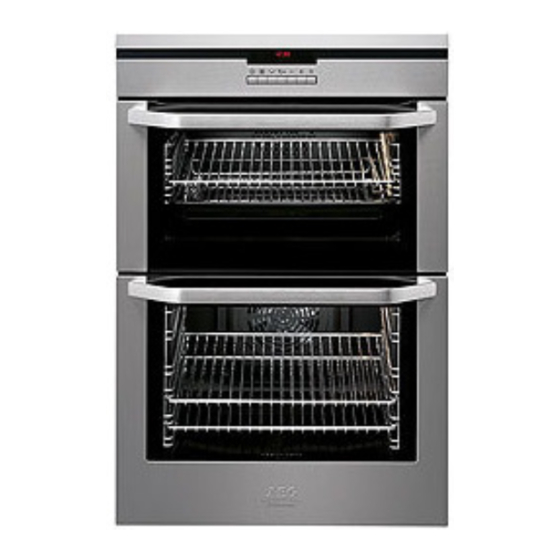
- Page 1 D88106 User manual Built in double oven...
-
Page 2: Table Of Contents
Contents Thank you for choosing one of our high-quality products. To ensure optimal and regular performance of your appliance please read this instruction manual carefully. It will enable you to navigate all processes perfectly and most efficiently. To refer to this manual any time you need to, we recommend you to keep it in a safe place. -
Page 3: Operating Instructions
Safety information Operating Instructions Safety information These warnings are provided in the interests of your safety. Ensure that you understand them all before installing or using the appliance. Your safety is of paramount importance. If you are unsure about any of the meanings of these warnings please contact customer care. -
Page 4: Cleaning And Maintenance
Safety information • Always use oven gloves to remove and place food in the oven. • During use the appliance becomes hot. Care should be taken to avoid touching the heating elements inside the oven. • Ensure that all vents are not obstructed to ensure ventilation of the oven cavity. •... -
Page 5: Product Description
Product description Product description General overview Control panel Top oven handle Top oven Main oven handle Main oven Control Panel Overview Display Function keys... -
Page 6: Oven Accessories
Before first use Oven accessories 3 oven shelfs Oven grill shelf Anti stick meat/Drip pan Before first use Rating plate This is situated on the front frame of the appliance and can be seen upon opening the door. Alternatively the rating plate may also be found on the back or top of some models (where applicable). -
Page 7: Cookware
Before first use normal use. Children should be kept away. During this period an odor may be emitted, it is therefore advisable to open a window for ventilation. The cooling fan The cooling fan comes on immediately the top oven or grill is switched on. It may run on after the ovens are switched off until the appliance has cooled. -
Page 8: Initial Cleaning
Operation Initial Cleaning Before using the oven for the first time, you must clean it. WARNING! Do not use sharp, abrasive cleaning agents! These could damage the surface. For metal fronts, use normal commercially available cleaning agents. 1. Open door. The oven light is activated. -
Page 9: The Top Oven
Operation • The oven light is switched on as soon as an oven function is selected. • When the selected temperature is reached, an audible signal sounds. • Switch off the oven using the On/Off button. The top oven The top oven is the smaller of the two ovens. It is heated by elements in the top and bottom of the oven. - Page 10 Operation Changing the oven temperature Press the button, to raise or lower the temperature. The setting changes in steps of 5°C. Checking the temperature Press the Temperature check button. The current oven temperature appears in the tem- perature display. Selecting an clock function Press the button repeatedly until the desired clock function is flashing.
- Page 11 Operation Switching the oven off Switch off the appliance using the On/ Off button. Cooling fan The fan switches on automatically in order to keep the appliance’s surfaces cool. When the oven is switched off, the fan continues to run to cool the appliance down, then switches itself off automatically.
-
Page 12: Main Oven
Operation Oven function Application Slow Cook For preparing especially tender, succulent roast. Main oven Oven function Application Light Using this function you can light up the oven interior, e.g. for cleaning. Full Grill For grilling flat foodstuffs in large quantities and for toast- ing. -
Page 13: Clock Functions
Operation Clock Functions 1 2 3 4 Time Cook time End time Countdown Clock Functions button Selection button (Plus) Selection button (Minus) Countdown To set a countdown. A signal sounds after the time has elapsed. This function does not affect the functioning of the oven. Cook time To set how long the oven is to be in use. -
Page 14: Countdown
Operation When the Cook time and End time clock functions are used, the oven switches the heating elements off, when 90% of the time set or calculated has elapsed. The residual heat present is used to continue the cooking process until the time set has elapsed (3 to 20 mins.). -
Page 15: Changing The Time
Operation 2. Using the Cook time function, set the time that the dish needs to cook, for example: 1 hour. 3. Using the End time function, set the time at which the dish should be ready, for example: 14:05. Cook time and End time light up. -
Page 16: Use, Tables And Tips
Use, tables and tips 2. Press and hold the Selection buttons at the same time, until “SAFE” appears in the display. The child safety device is now set. Cancelling the child safety device 1. If necessary, switch on the appliance using the On/Off button. - Page 17 Use, tables and tips 1 tray, e.g. oven level 3 1 cake in cake tin, e.g. oven level 1 2 tray, e.g. oven levels 1 and 3 Baking tins • Baking tins made from dark-coloured metal with Teflon coating are suitable for baking using Conventional Cooking.
- Page 18 Use, tables and tips • If you cannot find the settings for a certain recipe, look for similar items. • The baking time can be 10-15 minutes longer when baking cakes on trays or in tins on multiple levels. • Recipes with moist ingredients such as pizzas or fruit flans are to be baked on one level. •...
-
Page 19: Top Oven - True Fan - Baking
Use, tables and tips Hints and tips when using fan cooking • Arrange the shelves in the required positions before switching the oven on. Shelf posi- tions are counted from the bottom upwards. • When cooking more than one dish in the fan oven, place dishes centrally on different shelves rather than placing several dishes on one shelf, this will allow the heat to circulate freely for the best cooking results. - Page 20 Use, tables and tips Temperature Approx Cook Time Food [°C] (mins) - Gingerbread 140 - 150 75 - 90 - Meringues 90 - 100 150 - 180 - Flapjack 160 - 170 25 - 30 - Shortbread 130 - 150 45 - 65 Casseroles: - Beef/Lamb...
-
Page 21: Top Oven - Grilling
Use, tables and tips Top Oven - Grilling Adjust shelf position and grill pan grid to suit different thicknesses of food Grill Time Food (mins in total) Bacon Rashers 5- 6 Beefburgers 10 - 20 Chicken Joints 20 - 40 Chops - Lamb 15 - 25... -
Page 22: Main Oven - True Fan - Baking
Use, tables and tips Temperature Approx Cook Time Food Shelf Position [°C] (mins) - Small & Queen 170 - 180 18 - 25 - Sponges 170 - 180 20 - 25 - Madeira 150 - 160 60 - 75 - Rich Fruit 140 - 150 120 - 150 - Christmas... -
Page 23: Main Oven - True Fan - Roasting
Use, tables and tips Temperature Approx Cook Time Food [°C] (mins) Milk Puddings 140 - 160 60 - 90 Pastry: - Choux 180 - 190 30 - 40 - Shortcrust 180 - 190 25 - 35 - Flaky 180 - 190 30 - 40 - Puff Follow manufacturer´s instructions;... -
Page 24: Main Oven - Rotitherm Roasting
Use, tables and tips Grill Time Food (mins in total) Chicken Joints 20 - 40 Chops - Lamb 15 - 25 - Pork 20 - 25 Fish - Whole 10 -12 Trout/ Makarel Fillets - Plaice/Cod 4 - 6 Kebabs 12 - 18 Kidneys - Lamb/Pig 6 - 10... - Page 25 Use, tables and tips Pork Type of meat Quantity Heating Function Level Temperature Time (h:min) (°C) Shoulder, neck, ham 1 - 1.5 kg Rotitherm 160 - 180 1:30 - 2:00 Roasting Pork chop 1 - 1.5 kg Rotitherm 160 - 180 1:00 - 1:30 Roasting Meatloaf...
-
Page 26: Main Oven - Fan Baking
Care and cleaning Type of meat Quantity Heating Function Level Temperature Time (h:min) (°C) Half chicken Rotitherm 190 - 210 0:35 - 0:50 400-500 Roasting Poultry 1 - 1.5 kg Rotitherm 190 - 210 0:45 - 1:15 Roasting Duck 1.5 - 2 kg Rotitherm 180 - 200 1:15 - 1:45 Roasting... -
Page 27: Shelf Supports
Care and cleaning Inside of the oven 1. When the oven door is opened, the oven light bulb automatically illuminates. 2. Wipe out the oven after every use with a solution of washing-up liquid and then dry Remove stubborn dirt with special oven cleaners. Important: When using oven sprays, please follow the manufacturer's instructions exactly. - Page 28 Care and cleaning Removing the slide-in racks First pull the front of the rails away from the oven wall (1), and then unhook them at the back (2). Inserting the side rails Attention! The rounded ends of the guide bars must point to the front! To insert, first insert the rails in the holes at the back (1) and then lower into position at the front...
-
Page 29: Replacing The Side Oven Lamp/Cleaning The Glass Cover (For Selected Models Only)
Care and cleaning Replacing the side oven lamp/Cleaning the glass cover (for selected models only) 1. Take out the left side rail. 2. Remove the glass cover by using a narrow, blunt object (e.g. a teaspoon) and clean it. 3. If necessary: Replace oven halogen light bulb. -
Page 30: Oven Door
Care and cleaning Replacing the oven light bulb/Cleaning the glass cover 1. Take off the glass cover by turning it anti- clockwise and clean it. 2. If necessary: Replace with a 40 Watt, 230V, 300°C heat-resistant oven light bulb . 3. - Page 31 Care and cleaning 4. Take hold of the sides of the oven door with both hands and pull the door up and diagonally away from the oven ( cau- tion: The door is heavy). Lay the oven door with the outer side facing downwards on something soft and level, for example, a blanket in order to prevent scratches.
-
Page 32: Oven Door Glass
Care and cleaning 3. Click the clamping levers (A) on both door tracks back to their original position. 4. Close the oven door. Oven door glass The oven door is fitted with 2,3 or 4 panels of glass (depends of the model) mounted one behind the other. - Page 33 Care and cleaning 3. Close the oven door as far as the first po- sition (approx. 45°). 45° 4. Take hold of the door cover (B) at the top on both sides and push inwards to release the clip lock. Then remove the door trim by pulling it upwards.
- Page 34 Care and cleaning Putting the door glass panels back 1. Slide the door glass panels one by one at an angle from above into the door panel at the bottom edge of the door and let them slide down. Insert the two smaller panels first, followed by the largest.
-
Page 35: Cleaning The Outside Of The Appliance
Care and cleaning 3. Open the oven door as far as it will go. 90° 4. Click the clamping levers (A) on both door tracks back to their original position. 5. Close the oven door. WARNING! Before cleaning always allow the appliance to cool down before switching off at the elec- tricity supply. -
Page 36: Cleaning Inside The Grill And Oven Compartments
What to do if… WARNING! Do not attempt to remove any of the control knobs from the appliance as this may cause damage and is a safety hazard. Cleaning inside the grill and oven compartments The vitreous enamel coating in the grill/top oven and main oven compartments can be cleaned using normal oven cleaners with care. -
Page 37: Installation Instructions
Installation Please carry out the following checks on your appliance before calling a Service Engineer. It may be that the problem is a simple one which you can solve yourself without the expense of a service call. In-guarantee customers should make sure that the checks have been made as the engineer will make a charge if the fault is not a mechanical or electrical breakdown. - Page 38 Installation • Built-in cookers and cooking surfaces are equipped with special attachment systems. For safety reasons, they must only be combined with appliances from the same manufac- turer. The use of heat protection strips is prohibited for cookers and ovens with Pyrolytic Cleaning, if the recess has a rear wall and closed ground-level compartment.
- Page 39 Installation 90°...
-
Page 40: Electrical Installation
Installation 2x 3,5x25 Electrical Installation • Enquiries regarding the installation of the cooker point, if required, should be made to your Regional Electricity Company to ensure compliance with their regulations. • The appliance socket switch should be outside the cabinet but within 2m of the appliance to make it accessible to switch off the appliance in case of an emergency. -
Page 41: Disposal
Disposal Cooker Point Oven It is good practice to : – Fit an Earth Leakage Circuit Breaker to your house wiring. – Wire your appliance to the latest IEE regulations. Disposal The symbol on the product or on its packaging indicates that this product may not be treated as household waste. - Page 42 Customer Care Department, Tel: (Calls may be recorded for training purposes) Electrolux 08705 950 950 AEG-Electrolux 08705 350 350 Zanussi-Electrolux 08705 727 727 For Customer Service in The Republic of Ireland please contact us at the address below: Electrolux Group (Irl) Ltd, Long Mile Road, Dublin 12, Republic of Ireland...
-
Page 43: Www.electrolux.com
www.electrolux.com www.electrolux.com Albania +35 5 4 261 450 Rr. Pjeter Bogdani Nr. 7 Tirane Belgique/België/Belgien +32 2 363 04 44 Bergensesteenweg 719, 1502 Lembeek Česká republika +420 261302111 Budějovická 3, Praha 4, 140 21 Danmark +45 70 11 74 00 Sjællandsgade 2, 7000 Frederi- Deutschland +49 180 32 26 622... - Page 44 Portugal +35 12 14 40 39 39 Quinta da Fonte - Edificio Gon- çalves Zarco - Q 35 -2774-518 Paço de Arcos Romania +40 21 451 20 30 Str. Garii Progresului 2, S4, 040671 RO Schweiz - Suisse - Svizzera +41 62 88 99 111 Industriestrasse 10, CH-5506 Mägenwil...
- Page 48 www.aeg-electrolux.co.uk...
Need help?
Do you have a question about the D88106 and is the answer not in the manual?
Questions and answers