Table of Contents
Advertisement
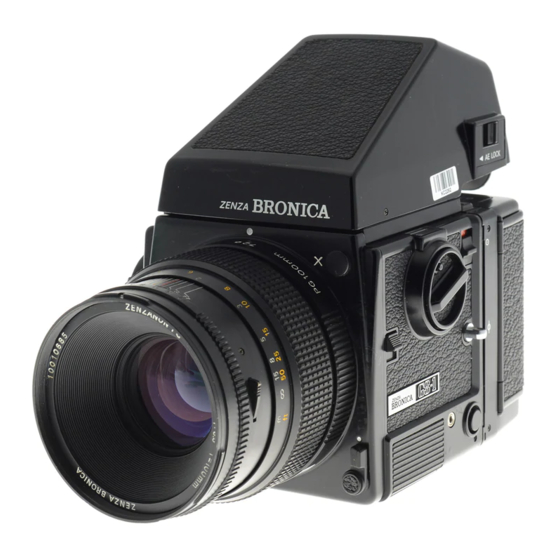
GS-1
Congratulations on your choice of the Zenza Bronica GS-1, a lens shutter type single reflex camera in the 6
x 7 format.
The GS-1 provides the professional user with a lightweight and compact 6 x 7 format single lens reflex of
extremely useful versatility and multi-functional performance, which is based on the history and experience
gained in the development of the Zenza Bronica ETRS and SQ-A single lens reflexes, as well as the latest
technological advances in the electronic field.
The GS-1 has been developed as a full-scale system camera, with a wide range of versatile accessories and
especially with complete film back interchangeability which gives it multi-format capability for use in a
wide field of applications, including commercial photography, news photography, scientific photography,
etc., as well as giving this 6 x 7 format single reflex versatility equal to the 35mm single reflex camera.
Although instructions following are based on the GS-1 camera main body, the Zenzanon-PG 100mm lens
and the Film Back GS 120, the choice of the finder is left to the discretion of the photographer who should
also read the instructions for the finder chosen. The choice of lens, film back and finder should be based on
the type of assignment contemplated by the user.
To obtain best results from the Zenza Bronica GS-1, may we suggest that you read this instruction manual
through carefully, before you even touch the camera, as your pleasure in using the camera will be even
greater if you thoroughly familiarize yourself with its working parts before loading your first roll of film.
1
Advertisement
Table of Contents

Related Manuals for Zenza Bronica GS-1


Summary of Contents for Zenza Bronica GS-1
- Page 1 GS-1 Congratulations on your choice of the Zenza Bronica GS-1, a lens shutter type single reflex camera in the 6 x 7 format. The GS-1 provides the professional user with a lightweight and compact 6 x 7 format single lens reflex of...
-
Page 2: Table Of Contents
Contents Page Specifications of the Zenza Bronica GS-1 3, 4 Parts of the Zenza Bronica GS-1 Loading the Battery Main Switch Finder Display and Battery Checking 6, 7 Attachment and Removal of Film Backs 7, 8 Construction of Film Back... -
Page 3: Specifications Of The Zenza Bronica
Specifications of the ZENZA BRONICA GS-1 Type 6 x 7cm format lens, shutter single lens reflex camera with interchangeable lens, film back, finder and focusing screen systems. Frame Size 55.6 x 69.0mm (4:5 ratio matching the size of the photographic paper.) Film 120 roll film;... -
Page 4: Specifications Of The Zenza Bronica Gs-1
Battery Single 6 volt silver oxide or alkaline-man- ganese battery. Dimensions 106.5 (wide) x 99 (high) x 80 (long) mm- GS-1 main bodies only. 106.5 (wide) x 116 (high) x 196.5 (long) mm- GS-1, with standard 100mm lens, Film Back GS 120 and Waist-level Finder G. -
Page 5: Parts Of The Zenza Bronica
Parts of the ZENZA BRONICA GS-1 Finder release button Main switch Shutter speed dial lock button Depth of field preview lever Film Winding Crank Lens release button Neck strap eyelet Electro-magnetic cable Multiple exposure lever release socket Neck strap eyelet... -
Page 6: Loading The Battery
1. Loading the Battery The electronically controlled shutter and, of course, the electro-magnetic shutter release system will not work without loading the battery. Use one 6 volt silver oxide battery or alkaline-manganese battery. * The battery may be obtained at any photographic equipment or electrical appliance shop. A. -
Page 7: Attachment And Removal Of Film Backs
* Make full use of film back interchangeability, in the following manner: - 1. Take full advantage of the multi-format superiority of the GS-1 and use film backs in many different formats, which will not only give you different effects but will econ- omize on film. -
Page 8: Construction Of Film Back
4. Attachment and Removal of Film Backs (con’t) A. To attach the film back to the main body, simply insert the latches at the upper end of the film back into the attachment openings at the upper end of the main body. Then, press the lower end of the film back against the main body until it locks securely. -
Page 9: Film Loading
5. Construction of Film Back (con’t) B. The film back frame has a base with dark slide slit and a back cover with an ASA/ISO film speed dial, and exposure compensation dial and a film type indicator frame. The film back frame completely encloses the film holder and shields it from outside light, as well as connecting it to the main body and also coupling with finders with built-in expo- sure meters. - Page 10 6. Film Loading (con’t) E. Rotate the manual film winder on top of the film holder in the arrow-indicated direction and wind up the film leader. When the starting point, or arrow-mark appears, align it with the triangular start-mark on the right-top side of the film holder. Then, stop rota- tion.
-
Page 11: Film Speed Dial
6. Film Loading (con’t) I. The manual film winder is used to place the first frame into posi- tion, when the film back is detached from the main body. The manual film winder will not stop rotating, even when the film is in place for the first frame, but should be rotated 2 or 3 times more, in order to take up slack in the loaded film. -
Page 12: Exposure Counter
9. Film Type Indicator Frame Upon loading the film, tear off the end flap from the empty film pack- age and insert it in the film type indicator frame. This will help you keep track of the film loaded in the film back, even when two or more film backs are used with different types of films. -
Page 13: Film Unloading
12. Film Unloading A. After the 10th exposure of the 120 roll film (20th exposure of the 220 roll film), continue rotating the film-winding crank and the film will only be advanced until the remaining film and leader paper are wound up on the take-up spool. -
Page 14: Shutter Release Button
14. Shutter Release Button An electro-magnetic shutter release button is incorporated in the Zenza Bronica GS-1. Stroking the release button halfway illuminates the shutter speed, as digits and dots, etc., in the display panel in the top center of the finder, outside the screen area. -
Page 15: Time (T) Exposure
15. Time (T) Exposures Time exposures are made with the time exposure lever on the lens, regardless of the setting on the shutter speed scale. A. First, cock the shutter with the film-winding crank and then pull up the time exposure lever release. B. -
Page 16: Interchanging Finders
17. Interchanging Finders A. Various types of optional finders can be interchanged to match shooting conditions to photographic conditions. To attach the finder, align the front end of the finder with the front end of the finder frame on top of the main body, as shown. Then, gently lower the finder and, when well seated, slide forward until it locks. -
Page 17: Focusing Adjustments
18. Setting the Aperture Ring (con’t) * When using finders with a built-in exposure meter, exposure meas- urements should not be taken with the depth of field preview lever depressed, as the shutter speed indicated will cause over-exposure. This is because proper exposures are obtained with exposure meas- urements made at the full aperture. -
Page 18: Infrared Photography
21. Infrared Photography In infrared photography, some adjustment is required in the focus in order to retain sharpness on the film, because the invisible infrared rays are longer in wave length than the visible rays used for focusing. For infrared photography: - 1. -
Page 19: Multiple Exposures
23. Multiple Exposures A. To make multiple exposures, rotate the film-winding crank to advance the film and cock the shutter. Then, turn the multiple expo- sure lever in the arrow-indicated direction. When the shutter release button is depressed, in this condition, the shutter will be released any number of times without advancing the film. -
Page 20: Mirror Lock-Up
(See 4. Attachment and Removal of Film Backs.) 25. Remote Control Operations The Zenza Bronica GS-1 has an electro-magnetic shutter release sys- tem which means that the usual cable release cannot be used. A Zenza Bronica Electro-Magnet Cable Release is available for this purpose, although it is also possible to use any cable release with a 2.5mm mini-plug, such as those available in photographic equipment... -
Page 21: Interchanging Focusing Screens
Then, slide both screen removal levers forward to secure the focusing screen. * It will not be possible to attach the finder, if the screen removal levers are not in their forward positions. * There are seven interchangeable focusing screens for the Zenza Bronica GS-1. -
Page 22: Removal And Attachment Of The Film Winding Crank Assembly
27. Removal and Attachment of the Film Winding Crank Assembly The film-winding crank assembly must be removed when attaching the Speed Grip G to the Zenza Bronica GS-1. A. Pull the release lever on the base of the film-winding crank assem-... -
Page 23: Facts About The Battery
29. Facts About the Battery The battery supplies power for the various electronic control mechanisms incorporated in the Zenza Bronica GS-1. When used incorrectly, there is a possibility of the wrong exposure being set to the camera and/or the camera not operating. -
Page 24: Pointers On Shooting
30. Pointers on Shooting * The shutter cannot be cocked when the film is not loaded in the film back. The use of the multiple exposure lever will, however, permit you to cock the shutter, in such instances. This feature is very convenient for familiarizing yourself with the camera and for testing the shut- ter in flash photography. - Page 25 31. Care of the Zenza Bronica GS-1 * Restrict cleaning of the reflex mirror to blowing or brushing with the blower brush or a soft camel hair brush. Don't touch the surface with your fingers or a cloth. * Use lens cleaning tissue and liquid to clean the surface of the lens. Do not use silicon- coated cloth for this purpose, as it will prove detrimental to the lens coating.
-
Page 26: Care Of The Zenza Bronica
31. Care of the Zenza Bronica GS-1 (con’t) * Both camera main body and lens must be in the "cocked" condition to attach or remove the lens. In other words, the cocking pin of the lens must be set between the red band and green dot, in this case, while the cocking pin of the body mount must be set to the green- colored dot. -
Page 27: Depth Of Field Tables
32. Depth of Field Tables Meters F/nu mbers 0.75 21.9 9.58 5.56 3.18 2.08 1.54 1.22 1.02 0.91 0.81 0.76 46.9 11.4 6.87 4.54 2.84 1.93 1.46 1.18 0.99 0.89 0.79 0.74 23.2 9.82 5.64 3.21 2.09 1.55 1.23 1.02 0.91 0.81 0.76... -
Page 28: Specifications Of Zenzanon
33. Specifications of the Zenzanon-PG Lenses Zenzanon-PG 50mm F4.5 65mm F4 80mm F3.5 Lens Construction 8 - 11 7 - 9 6 - 8 (group-element) Angle of View 68.5 58.6 Apertures 4.5~22 4~22 3.5~22 (w. half click) (w. half click) (w/ half click) Minimum focusing dis- tance (m) - Page 29 33. Specifications of the Zenzanon-PG Lenses (con’t) Zenzanon-PG 100mm F3.5 110mm F4 150mm F4 Lens Construction 4 - 6 4 - 6 5 - 5 (group-element) Angle of View 44.5 Apertures 3.5~22 4~32 3.5~22 (w. half click) (w. half click) (w/ half click) Minimum focusing dis- tance (m)
- Page 30 33. Specifications of the Zenzanon-PG Lenses (con’t) Zenzanon-PG 200mm F3.5 250mm F4 500mm F4 Lens Construction 5 - 6 5 - 6 10 - 11 (group-element) Angle of View 25.5 20.5 10.3 Apertures 4.5~32 5.6~32 8~64 (w. half click) (w. half click) (w/ half click) Minimum focusing dis- tance (m)
Need help?
Do you have a question about the GS-1 and is the answer not in the manual?
Questions and answers