
Related Manuals for GE 168947


Summary of Contents for GE 168947
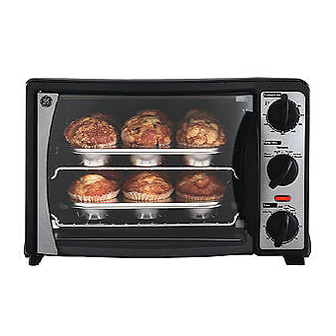
- Page 1 Countertop Oven with Rotisserie Item Stock Number 168947 UPC: 681131689472 www.gehousewares.com For Product Service, Call Customer Assistance at 1-877-207-0923 168947 • 681131689472...
-
Page 2: Important Safeguards
17. A fire may occur if the Oven is covered or touching flammable material, including curtains, draperies, walls, and the like, when in operation. -
Page 3: Consumer Safety Information
SAVE THESE INSTRUCTIONS! Consumer Safety Information THIS UNIT IS FOR HOUSEHOLD USE ONLY. POLARIZED PLUG: This appliance has a polarized plug, (one blade is wider than the other). As a safety feature to reduce the risk of electrical shock, this plug is intended to fit in a polarized outlet only one way. -
Page 4: Parts And Features
Parts and Features 1. Crumb Tray 2. Upper & Lower Heating Elements 3. Rack Support Guides 4. Rotisserie Spit Support & Drive Socket 5. Control Panel 6. Door Handle 7. Curved Glass Door 8. Tray/Rack Handle 9. Rotisserie Fork with Thumbscrew 10. -
Page 5: Control Panel
ROTISSERIE – Roasts a variety of meats and poultry that are very tender and juicy inside, and browned to perfection outside. ROTISSERIE HANDLE – Used for removing the Rotisserie Spit from the Oven after your roast is done. NOTE: Sugar and salt based foods have a tendency to stick to all surfaces and are very hard to clean. -
Page 6: Rotisserie Cooking
5. Insert the pointed end of the Spit into the Drive Socket located on the right- hand side of the Oven wall. Make sure the square end of the Spit rests in the Spit Support, located on the left-hand side of the oven wall. -
Page 7: Roasting Guide
*Times are for Rare, add 15 minutes for Medium and 30 minutes for Well Done. ROASTING Roast your favorite cut of meat to perfection. The Oven can cook up to an 8 pound chicken or turkey and up to a 6 pound roast. A guide has been provided to assist you with roasting times. -
Page 8: Broiling Guide
BROILING/TOP BROWNING For best results, it is recommended that you preheat the Oven for 5 minutes on MAX, trim excess fat from meat and dry any moisture that may be on the food. CAUTION: Never leave Oven unattended while in use. - Page 9 Bake your favorite cookies, cakes, pies, brownies, etc. The bakeware that will fit in the Oven are: a bundt pan, 6 cup muffin pan, 9-inch pie pan, 9-inch loaf pan, or an Angel Food cake pan. We do not recommend the use of roasting bags or plastic or glass containers in the oven.
-
Page 10: Slow Cooking
1. Set the Temperature Control to 225°F. 2. Turn the Function Control to Bake/Roast. 3. Place food to be cooked in a covered casserole dish and place it within the Oven. 4. Place the Bake Rack in the lower Rack Support Guide, facing up. - Page 11 4. Tighten down the thumbscrew. Insert the pointed end of the Spit into the right side of the Oven and place the left side of the Spit into the Spit Support. 5. Place the Drip Pan in the Oven in the lowest position to catch the drippings.
- Page 12 4. Tighten down the thumbscrew, and insert the pointed end of the Spit into the right side of the oven and place the left side of the Spit into the Spit Support. 5. Place the Drip Pan in the Oven in the lowest position to catch the drippings.
- Page 13 Peach Melba Pie Control Settings: Temperature: 400°F Function: Bake/Roast Rack Position: Bottom Rack Orientation: Face Up 2 9-inch prepared pie crusts 1 lb. frozen peach slices 10 oz frozen raspberries, thawed and drained 1/4 c sugar 1. Line a 9-inch pie plate with one of the piecrusts. 2.
- Page 14 2. Spread each slice with about 1 tablespoon of Pesto (Please refer to Pesto recipe) 3. Top each slice of bread with tomato or pepper, and then with cheese. 4. Return to oven and toast 5-7 minutes, or until the cheese is melted and lightly browned Makes 6 open-faced sandwiches.
- Page 15 4. Place Broil Rack onto the Drip Pan. 5. Place fish on the Broil Rack. 6. Slide Drip Pan into the Oven at the top position. If fish touches the elements, place the Drip Pan in the lower Rack position.
-
Page 16: Customer Assistance
If you have a claim under this warranty, please call our Customer Assistance Number. For faster service please have model, series, and type numbers ready for operator to assist you. These numbers can be found on the bottom of your Countertop Oven. MODEL: _________________ TYPE: _______________ SERIES: _________________...
Need help?
Do you have a question about the 168947 and is the answer not in the manual?
Questions and answers
what year was this oven manufactured?