Table of Contents
Advertisement
Quick Start Owner's Manual
Manual Rápido Del Comienzo
Manuel d'utilisation du propriétaire
Schnelles Hinweisbuch
Manuale rapido di utilizzazione
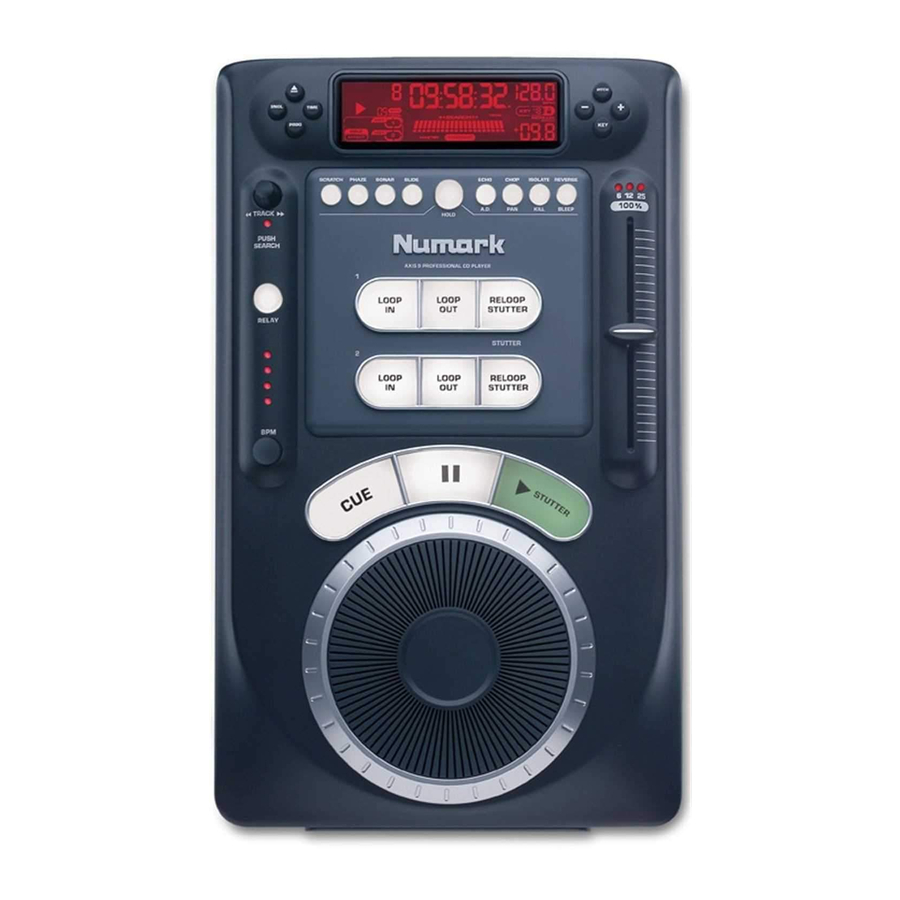
PROFESSIONAL CD PLAYER
BOX CONTENTS
CD PLAYER
POWER CABLE
AUDIO CABLE
FADER START CABLE
CONTENIDO DE LA CAJA
LECTOR DE CD
CABLE DE LA CORRIENTE ALTERNA
CABLE AUDIO
CABLE DEL FADER START
(FRANÇAIS)
Contenu de la boîte
Lecteur de CD
Cable d'alimentation
Cable audio
Cable start potentiomètre
INHALT DER SCHACHTEL
CD PLAYER
Versorgungskabel
Audiokabel
Startkabel für Fader
CONTENUTO DELLA SCATOLA
CD PLAYER
CAVO DI ALIMENTAZIONE
CAVO AUDIO
CAVO D'INIZIO PER IL
AXIS 9
(ESPANOL)
(DEUTSCH)
(ITALIANO)
Advertisement
Table of Contents

Related Manuals for Numark Axis 9


Summary of Contents for Numark Axis 9
- Page 1 AXIS 9 PROFESSIONAL CD PLAYER Quick Start Owner’s Manual BOX CONTENTS CD PLAYER POWER CABLE AUDIO CABLE FADER START CABLE Manual Rápido Del Comienzo (ESPANOL) CONTENIDO DE LA CAJA LECTOR DE CD CABLE DE LA CORRIENTE ALTERNA CABLE AUDIO CABLE DEL FADER START Manuel d’utilisation du propriétaire...
- Page 2 Connect all stereo input sources as mixer indicated in the diagram, your microphone, last, any input devices and headphones 11. Go to http://www.numark.com for product Connect the stereo outputs to power registration. amplifier(s), tape decks, and/or other audio More information about this product may be sources.
- Page 3 PITCH- Actives and sets pitch slider range. RELOOP/STUTTER- Used for repeated play (stutter) from the loop in point, repeating a KEY- Used for various key control. previously set, and hot start. -,+ - Works as pitch bend and controls key RELAY- Used for setting Alternating play and pitch functions.
- Page 4 último, cualquier dispositivo de entrada de información según lo indicado entrada de información en el diagrama, su micrófono, y auriculares 11. Vaya a http://www.numark.com para Conecte las salidas estéreas con el enregistrar el producto. amplificador(es) del poder, las cubiertas de Más información sobre este producto se...
- Page 5 PITCH- Activa y establece las limitaciones de entrada del bucle, repetando un del resbalador Pitch. comienzo previamente fijado, y hot start. KEY- Utilizado para varios controles llave. RELAY- Utilizado para fijar el comienzo de la cancion que se alterna entre las -,+ - Funciona como Pitch Bend y controla unidades adjuntos.
- Page 6 6. Connectez toutes les sources comme indiqué mixer dans la diagramme, votre microphone et votre Finalement, articles input. casques. 11. Visitez http://www.numark.com pour la 7. Connectez les output stéreo à régistration du produit. l’amplificateur(s), les decks de cassette et/ou Plus d’informations peut être trouvées à...
- Page 7 KEY –Utilisé pour différents contrôles. RELOOP / STUTTER – utilisé pour un play répété du loop au point, en répétant un -,+ - Fonctionne comme pitch bend et préétablissement. contrôle les touches et les fonctions pitch. RELAY – Utilisé pour établir un PITCH SLIDER –...
- Page 8 Verstärkungspotentiometer auf Position “Null“ Mixer sind Zuletzt jedwelche Schließvorrichtung Schließen Sie alle Stereoeintritte wie im 11. Gehen Sie auf http://www.numark.com für die Diagramm an, das Mikrofon und die Kopfhörer Registrierung des Produktes. Schließen Sie die Stereoaustritte zum Mehr Informationen über dieses Produkt auf Verstärker (zu den Verstärker) für Kraft,...
- Page 9 PITCH- aktiviert und stellt ein die Granzen für RELOOP/STUTTER- benutzt für wiederholtes den Pitch-Kursor. Play (Stutter) vom Loop in – Punkt, repetant eine vorherige Einstellung, und Hot Start. KEY- benutzt für verschiedene Schlüsselkontrolllen. RELAY- benutzt um das Play zwischen den angelegten Einheiten zu abwechseln.
- Page 10 Connettere tutte le fonti di entrata stereo Ultimamente, qualsiasi dispositivo di tale come è indicato nel diagramma, il entrata (input) microfono e le cuffie 11. Visitare http://www.numark.com per la Connettere le entrate stereo registrazione del prodotto. all’amplificatore (agli amplificatori) di Più informazioni si possono incontrare potere, ai cassetofoni deck e/o ad altre all’indirizzo...
- Page 11 KEY – Utilizzata per vari controlli chiave. RELAY- Utilizzato per alternare il play fra le unità allegate. -,+ - Funziona come pitch bend e controlla le funzioni chiave e le funzioni pitch. BEAT SYNC con MARCHING BAR GRAPH- Segue il ritmo e misura la posizione della PITCH SLIDER –...
- Page 13 AXIS 8/9 Tabletop CD Players Reference Guide ©2002 Industries http://www.numark.com...
-
Page 15: Table Of Contents
TABLE OF CONTENTS Table of Contents Basic Operation Play, Pause, Cue, Pitch, General CD control Advanced Operations Setting Cue Points Saving Cue Points Beatkeeper Operation Adjusting Pitch/ Aligning Beats Looping Stuttering (Hot Starts) Key Lock / Key Change Effects Program Functions (A MUST READ!!!) Relay Fader Start Remote Start... -
Page 16: Basic Operation
BASIC OPERATIONS Open/Close: Press to load or eject the disc. The drawer will automatically close to protect the tray from accidental damage while open. NOTE: Tray will not open if the disc is in play. In order to program the automatic close time press and hold “PROG”... - Page 17 Time: switches the time modes on the display between elapsed playing time, remaining time on the track and remaining time on the entire CD. This setting will be remembered at power down. Single: toggles the unit to play back just one track at a time (single) or play continuously through all tracks and then start over repeating the CD infinitely (continuous).
-
Page 18: Setting Cue Points
SETTING CUE POINTS PLAY and CUE Pressing the “PLAY” button starts the disc. Pressing the “CUE” button will reset the disc to the last place where the disc was started. This is called the cue point. By alternately pressing the “PLAY” button and the “CUE” button, the disc may be returned and played from the cue point any number of times. -
Page 19: Saving Cue Points
CUE/LOOP POINT STORAGE AND RECALL To SAVE Cue and Loop points on the current CD: CD should still be in the drawer with cue and loop points set. Press “PROG” + Cue points are stored and LCD shows "CUE STORE" for 1 second. If MIDI OUT is connected to the MIDI in of another CD player’s MIDI IN, the cue point is stored on the other CD player. -
Page 20: Beatkeeper Operation
THE BEATKEEPER™ III The AXIS 9 includes the latest Numark patented Beatkeeper™ technology. The Beatkeeper™ automatically tracks beats based upon a combination of frequencies and rhythm patterns in the music. It shows BPM in the display and outputs 4-count (a.k.a. measure) information about the music in a marching bar graph. -
Page 21: Adjusting Pitch/Aligning Beats
ADJUSTING PITCH/ALIGNING BEATS Pitch Button: Activates the pitch slider and adjusts the amount of control the pitch slider has on the overall speed of music. Pressing “PITCH” will toggle the slider on and off. Range adjustments of 6, 12, 25, and 100% can be achieved by holding down “PITCH”... -
Page 22: Looping
LOOPING OPERATIONS A loop is any area of a CD that you choose to repeat seamlessly. On the AXIS 8/9 two seamless loops are possible. LOOP IN: is the point where you wish for the loop to start. The initial “CUE”... - Page 23 Note: The “LOOP OUT” point will be erased if “LOOP IN” is pressed or a new “CUE” point is set after the “LOOP OUT” point. This is important because without this point, “RELOOP” will not be possible. MOVING LOOP POINTS The “LOOP IN”...
-
Page 24: Stuttering (Hot Starts)
RELOOP/STUTTER: 2 functions depending on loop setting. “RELOOP” is only possible if “LOOP” points have been previously set. The “RELOOP” function automatically returns the music to the “LOOP IN” point and will play the loop until it is released with the “LOOP OUT” button. -
Page 25: Key Lock / Key Change
KEY LOCK / KEY CHANGE The AXIS 9 uses Numark exclusive technology to lock the key of the music in place at the current pitch position or change it from the current position. This is different than “master tempo” often found on many modern units because the key lock to the current pitch position and not automatically set to the “0”... -
Page 26: Effects
EFFECT PARAMETER PRESET: Press on the desired effect and rotate the wheel (AXIS 8) or inner touch wheel (AXIS 9) without releasing the button. When the desired parameter is reached in the display, release the button. If an effect is already playing, the new parameter will be heard upon button release. - Page 27 EFFECTS: SCRATCH – This effect makes it possible for the wheel to scratch the music while it is playing. If you move the wheel back and forth the music will stop and play slowly as the wheel is moved similar to scratching a record. There are several modes of operation for this effect.
- Page 28 ECHO – this effect adds echo to the music also based upon the Beatkeeper™. The start parameter is no echo “0”. If you move the wheel to the right the numbers will go 1-64, 1-32, 1-16, 1-8, 1-4, 1-2, and 1-1 indicating the amount of echo added to the unit.
- Page 29 Isolate - This isolation filter lets you play only a specific frequency of the music. Rotation of the wheel moves the frequency played through the audio spectrum. If you turn off the effect then on again it remembers the last set parameter.
-
Page 30: Program Functions (A Must Read!!!)
PROGRAM FUNCTIONS PLEASE READ!!!! This button provides several programmable functions depending upon the combination of buttons used. Track Sequence Programming - Depress “PROG” while the unit is stopped and “ ” will light. Select each track to be programmed then press “PROG” between selections. Press “PLAY/STUTTER”... -
Page 31: Relay
Relay time – this gives options for the amount of time used for relaying between tracks on two connected units. Options will appear to relay immediately after the track (0), with time added of 1, 2, or 3 seconds (1,2,3), or a reduction of 1,2, or 3 seconds (- 1,-2,-3). -
Page 32: Fader Start
FADER START Fader Start is achievable by attaching your CD player to a similarly equipped DJ mixer and setting the rear panel selection switch to “mixer” mode. Connect cables between the CD player and your DJ mixer. Press the button or switch on your mixer into fader start mode to activate the fader start capability. -
Page 33: Midi In-Out
MIDI IN-OUT MIDI – stands for musical instrument digital interface. Basically this means you can hook up 2 MIDI compatible devices and they will talk to each other. In this case you might connect 2 AXIS 8/9s and have them synchronize beats, add a MIDI keyboard and have it control the CD players or hook up a drum machine and play a rhythm pattern in time with the music. - Page 34 INCREASE/DECREASE: When the slave becomes the master or is released from interlock and still playing, the pitch playing will often be different than the original position of the pitch slider. The pitch slider will not function until it is brought to the new position. Move the pitch slider in the direction shown in the display.
- Page 35 MIDI IMPLEMENTATION CHART ote: further MIDI Specs may be found at our web site http://www.numark.com -23-...
-
Page 36: Updating Your Software
The unit software has been designed to be easily updateable by you through supplied CD updates from Numark. obtain the latest software version contact your local Numark Dealer or visit us on the web at http://www.numark.com.
Need help?
Do you have a question about the Axis 9 and is the answer not in the manual?
Questions and answers