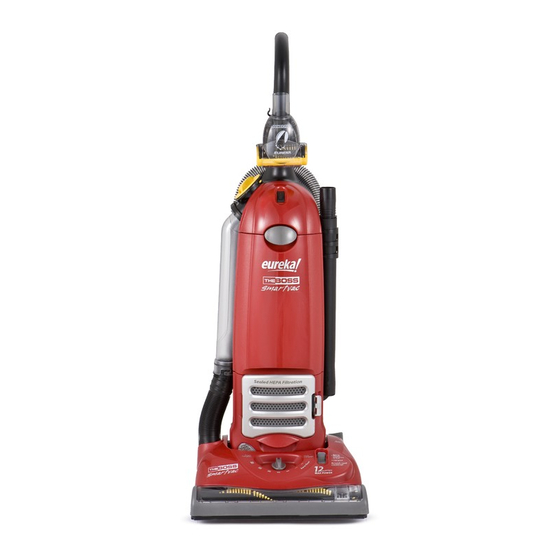
Eureka 4870 Series Owner's Manual
Household type
Hide thumbs
Also See for 4870 Series:
- Owner's manual (24 pages) ,
- Quick start manual (1 page) ,
- Owner's manual (10 pages)
Advertisement
Do
not
return
this
product
to the store,
For assembly
problems
or
questions
contact:
Eureka's
Customer Service Division toll
free at 1-800-282-2886*,
8 a.m.
to 7:30 p.m., (CST), Monday-
Friday and 10 a.m.- 6:30 p.m.
(CST) Saturday.
For replacement
of broken
or missing
items to be
shipped direct to you, call
1-800-438-7352",
8 a.m. to
4:45 p.m., Central Standard
Time, Monday through Friday.
*En Mexico flame al 5670-6169
um C
;r
Household Type
G
Series
Index
important Safeguards ............ 2
Service Information ............... 4
Assembly ............................
5-6
Use .....................................
7-8
Thermal Cut Off ............... 4 & 8
Accessories ...........................
9
Clear Tubes .................... 10-11
Brush Roll ............................
12
Brush Roll Belt ................ 12-13
Dust Bag ........................ 13-14
Filters .............................
14-15
HEPA Filter ..........................
15
Light Bulb ............................
15
Problem Solving .................. 16
Customer Order Form ......... 17
Warranty ..............................
19
Fitl in and Retain:
We suggest you record the model, type and serial numbers below, they are located on the silver rating plate on your cleaner,
and attach the receipt to the owner' guide as proof of purchase. For prompt and complete service information, ak_ays refer to
these numbers when inquiring about service.
Modem &Type
Seria! No.
www.euteka.com
Advertisement
Table of Contents

Related Manuals for Eureka 4870 Series


Summary of Contents for Eureka 4870 Series
-
Page 1: Table Of Contents
Series return this product to the store, For assembly problems questions contact: Eureka's Customer Service Division toll free at 1-800-282-2886*, 8 a.m. to 7:30 p.m., (CST), Monday- Friday and 10 a.m.- 6:30 p.m. (CST) Saturday. For replacement of broken or missing... - Page 2 T SAFEG VVhen using an electrical appliance, basic precautions should always be followed, including the following: READ ALL INSTRUCTIONS BEFORE USING THIS VACUUM CLEANER. To reduce the risk of fire, electric shock, or injury: " Do not use outdoors or on wet surfaces. "...
- Page 3 Lors de l'utilisation d'un appareil electrique, quelques precautions el6mentaires doivent 6tre obsewees, incluant les suivantes: USEZ TOUTES LES iNSTRUCTIONS AVANT D'UTILJSER VOTRE ASPJRATEUR. Pour reduire le risque de feu, de choc electrique, ou de bJessure: Ne pas utiliser a I'ext@ieur ou sur des surfaces mouiJlees. Fermez le commutateur et d_branchez I'appareil Iorsque vous ne I'utilisez pas ou avant le nettoyage...
-
Page 4: Service Information
1-800-282-2886 if you prefer, you can write to The Eureka Company, Service Division, 807 N. Main Street, BJoomington, illinois 61701, USA. in Canada write to The Eureka Company, 866 Langs Drive, Cambridge, Ontario N3H 2N7. Refer to The Eureka Limited Warranty for complete service information. -
Page 5: Assembly
HOW TO ASSEMBLE CAUTION: Assemble the cleanerbefore using, CAUTION: Moving parts. Make sure onloff switch is in off (0) position before plugging NOTE: Features may vary by modem yet aJt parts assemb{e the same. Step A Attach HandJe Step B Store Hose and Accessories CAUTION: Do not catch cord under handle. - Page 6 Store Emectricam Cord Step C Check Disposable Dust Bag Step D Remove front cover. Lift bag cover latch up and pull bag cover away from unit. Bag Cover Latch ® Cord Retainer Cord Hook Check to be sure the paper bag collar is secure with the bag adapter inside the paper bag collar.
- Page 7 When using your new vacuum you may be cleaning deep down dirt missed by your old vacuum causing the light to stay red longer. With frequent cleaning, after the first few times you use your Eureka vacuum, the red light should go on less.
-
Page 8: Cleartubes
6. After 30 minute cool down period, plug the cleaner in and push the rocker switch to the on (I) position. The cleaner should turn on. 7. If the cleaner still does not operate, take it to any Eureka Authorized Service Center for repair. -
Page 9: Accessories
How To Use Accessories NOTE: Place cleaner on floor with the handle in storage position while using accessories, Do not place cmeaner on furniture or steps. Dusting Brush is for furniture, blinds, books, lamp shades, shelves. 1. Remove hose from rear of cleaner. 2. - Page 10 How to Remove and Check CmearTubes Low suction or poor pickup may be due to a blockage in the vacuum cleaner. To Check Attachment Hose 1. Move hose/floor valve (A) to hose position. 2. Remove hose (B) and check suction at end of hose =if little or no suction, check disposable dust bag and filters.
- Page 11 How to Reassemble Clear Tubes 11. Reattach both clear tubes (J) (push and twist) to hoses (I) on cleaner. 12. insert large clear tube into large hole (K). Be sure to insert completely. Make sure the latch (D) is open so the clear tube can be fully installed. 13.
-
Page 12: Brush Roll
HOW TO MAINTAIN The instructions in this booklet serve as a guide to routine maintenance. To avoid unnecessary service calls, check the bag, belt, and brush roll often. Brush Roll The brush roll turns as it sweeps and combs the carpet nap. Remove hair and threads from the brush roll so it continues brushing the carpet. -
Page 13: Brush Roll Belt
HOW TO MAINTAIN (continued) The instructions in this booklet serve as a guide to routine maintenance. To avoid unnecessary service calls, check the bag, belt, and brush roll often. Disposable Dust Bag and FHters HowTo Replace Brush Roll Belt (continued) The disposable dust bag plays a very important role in the efficiency of a vacuum cleaner. -
Page 14: Filters
"To Remove Bag" (continued) Pull and hold lever to left, away from bag (A). Grasp cardboard bag collar (C) and pivot collar down until it snaps loose on right side. Remove bag from cleaner and discard. To Replace Bag: Locate back ledge (B). Place bag collar on ledge. Back Ledge Push up with both thumbs until bag secures on each side. -
Page 15: Dust Bag
Cleaning And Replacing Filters (continued) HEPA Fi_ter Check the HEPA filter with each disposable dust bag change. RepJace at least twice a year or after every six bag changes. "To Remove HEPA Fi_ter ° Style HF2 HEPA Door Squeeze HEPA door latch and swing open. Latch Remove HERA filter. -
Page 16: Problem Solving
Eli Call 1-800-282-2886 8 a.m. to 7:30 p.m,, (CST), Monday - Friday and 10 a.m. - 6:30 p.m. (CST) Saturday for the nearest authorized Eureka service center, [_ Cleaner Height Setting Cleaning height knob will not Hint:... - Page 19 A: Typically, packaged products and paper bags can be identified by a "Genuine Eureka Product" symbol (see illustration above). For further identification assistance, you may call our toll4ree number, 1-80g-gg2-2886, for the location of a nearby Eureka Authoriaed Warranty Station.
-
Page 20: Warranty
(3 screws) net. Than Don't Forget to Use Genuine Eureka Bags and Belts Caution: Damages caused by the use of non=genuine Eureka bags are not covered by the Eureka Limited Warranty. @2000 White Consolidated, Ltd, Part No. 70750 (4/03) Printed...
Need help?
Do you have a question about the 4870 Series and is the answer not in the manual?
Questions and answers