Table of Contents
Advertisement
Advertisement
Table of Contents

Related Manuals for Magellan Switch Up

Summary of Contents for Magellan Switch Up
- Page 1 Switch Series ™ User Manual...
- Page 2 MiTAC Digital Corp. Suite 2, 408 Victoria Road, Gladesville, NSW 2111 Australia Australia: 1800-644-033 © 2012 MiTAC International Corporation. The Magellan logo and Magellan are registered trademarks of MiTAC International Corporation and Switch is a trademark of MiTAC International Corporation. All rights reserved. All other trademarks and registered trademarks are property of their respective owners.
-
Page 3: Table Of Contents
Table of Contents Switch Fundamentals Switch ........................1 Switch Up ......................1 Switch Buttons .....................2 Power ........................2 Turning Switch On ..................2 Turning Switch Off ..................2 Turning the Backlight On / Off ..............2 Battery ........................3 Charging the Battery ................3 Multisport Mounting ...................3 Wrist Mount ....................3 Bike Mount ....................3... - Page 4 Setting the Activity Profile ...............6 Setting the Activity Profile (Shortcut) .............6 Starting the Activity Recording ...............6 Saving the Activity Recording ..............6 Start Reminder .....................7 Multisport Activity ....................7 Using a Multisport Profile .................7 Laps ........................7 Activity Profiles Activity Profile .....................8 Selecting the Active Activity Profile ............8 Customising the Activity Profile ................8 Selecting the Activity Profile to Customise ..........8 Displaying or Hiding an Activity Profile ..........8...
- Page 5 History Accessing History Menu .................12 Activity History ....................12 Viewing Activity History ................12 Viewing Activity Summary ..............12 Viewing Laps ...................12 Deleting the Activity ................12 Deleting Old Activities ................13 Deleting All Activities ................13 Activity Totals ....................13 Viewing Activity Totals ................13 Resetting Activity Totals ................13 Location History ....................13 Viewing a Marked Location..............13 Deleting All Marked Locations ...............13...
- Page 6 ANT+™ Sensors Supported sensors .....................17 Compatibility with Activity types ..............17 Settings.......................17 Accessing ANT+ Settings ................17 Sensors .......................17 Enabling ANT+ Sensors ................17 Quick Info Screen Activity Quick Info Screen ................19 Accessing the Activity Quick Info Screen ..........19 Activity Quick Info Screen Details ..............19 Navigation Quick Info Screen ................21 Accessing the Navigation Quick Info Screen ........21 Navigation Quick Info Screen Details ..............21...
- Page 7 Magellan Active Website Overview ......................24 Getting Started with Magellan Active .............24 Activity Files ......................25 Uploading Activity Files .................25 Profile .........................25 Activity Page ......................27 Exporting Activity Files ................27 Sharing an Activity ..................27 Addendum A - Switch Specifications Addendum B - Available Data Types...
-
Page 8: Switch Fundamentals
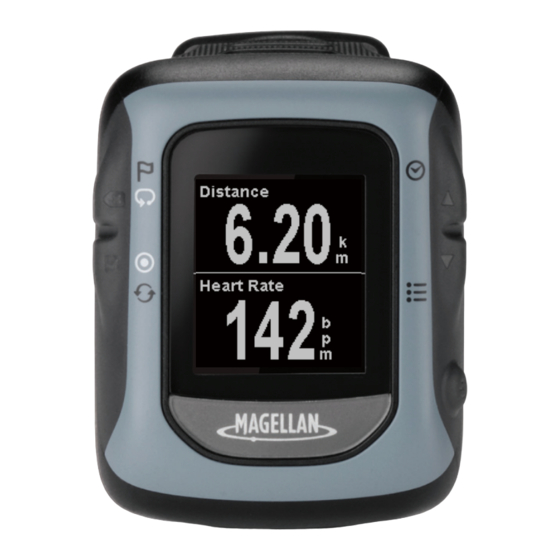
Switch Fundamentals Switch Switch Up The Magellan Switch is a crossover GPS The Magellan Switch Up contains all the watch for runners looking to track all of their features of Switch and includes barometric outdoor activities. You choose the sport and... -
Page 9: Switch Buttons
Switch Buttons Switch has five buttons, all with multiple functions. The chart below describes the different functions and how they are accessed. For ease of explanation this manual will refer to the buttons by the names displayed here. Back Down Enter Power Button... -
Page 10: Battery
Mulitisport Mount. The Multisport Mount is is rechargeable using the Switch charging/ data cable. Under normal training activities included with Switch Up and available as an optional accessory for Switch. with the backlight off, the battery should last up to 8 hours. An optional Battery Extender... -
Page 11: Gps
Switch will inform you that GPS is found and ready to record your activity. If you are experiencing problems with your Switch, visit the Magellan Active web site at Checking GPS Status active.magellangps.com/start and check the 1. Press and hold the Down button. -
Page 12: Activity Mode
Activity Mode No matter what your activity is, the Activity screens provide you with the information you require to optimise your training workout. The Activity screens can be customised for each Activity Profile and are at your fingertip during your training session. See the Activity Profile chapter for details on Customising the screens. -
Page 13: Recording An Activity
2. Use the UP and Down buttons to Recording an Activity highlight the Activity Profile and press Before the start of an activity, select the EntEr. Activity Profile that matches the activity type and desired settings of the activity you Starting the Activity Recording are performing. -
Page 14: Start Reminder
Start Reminder Laps The Start Reminder is displayed whenever you All activities begin on Lap 1. The Switch can are moving and there is no active recording or automatically step to a new lap based upon if you have stopped recording. This alert is a distance or time or a new lap can be started manually by pressing the Back button. -
Page 15: Activity Profiles
Activity Profiles The Activity Profile function of Switch provides the means by which you can select the type of activity you are performing and customise the data screens, display preferences, training alerts and Activity Pacer for each Activity Profile. Customising the Activity Profile Activity Profile Selecting the Activity Profile to Selecting the Active Activity Profile... -
Page 16: Changing The Activity Profile Name
4. Press UP or Down buttons to select the Changing the Activity Profile Name number of data items to be displayed (1 - 1. Follow the steps in “Selection the Activity 6). Press EntEr. Profile to Customise” to hide or display 5. -
Page 17: Setting An Activity Pacer
Setting an Activity Pacer Setting Recording Preferences (Auto Pause) The Activity Pacer helps complete an activity of a specified goal (distance, time, speed/pace, Auto Pause causes Switch to automatically or all of the above). Once enabled and the pause when it detects no movement and to goals are set, Switch will present data to help resume when it begins to move. -
Page 18: Setting Training Alerts
Setting Training Alerts 1. Follow the steps in “Selecting the Activity to Customise” and select the activity Training Alerts are tools to alert you when MULTI. a predefined training criteria has been met. Alerts can be set for calories burned, distance 2. -
Page 19: History
EntEr. chosen. Time, speed, pace, elevation, grade, temperature (Switch Up only), heart rate, 4. The top of the menu displays the number cadence and power summaries can be viewed of activities that have been saved. To by using the UP and Down buttons. -
Page 20: Deleting Old Activities
Deleting Old Activities Resetting Activity Totals 1. Press and hold the Down button. Activities older than one month can be deleted as a group. 2. Use the Down button to highlight 1. Press and hold the Down button. “History”. Press EntEr. 2. -
Page 21: Deleting A Marked Location
Deleting a Marked Location 1. Press and hold the Down button. 2. Use the Down button to highlight “History”. Press EntEr. 3. Highlight “Location History” and press EntEr. 4. Highlight “View Locations” and press EntEr. 5. Locations are displayed in the order that they were marked. -
Page 22: Navigation
Navigation The Navigation function provides a graphical display of your current track and locations you have saved. The current track, or ‘breadcrumbs’ for the activity, visually displays the path of your activity and provides awareness to the start of the activity as well as any locations you may have marked. There is the option of displaying simple navigation instructions back to the start of your activity or to the last marked location. -
Page 23: Accessing The Navigation Screen
Accessing the Navigation Screen Marking Location 1. Press and hold the Down button until the Whenever the Switch has GPS satellite signal popup menu is displayed. it can capture your current location. This location can be “marked” and stored in Switch 2. -
Page 24: Ant+™ Sensors
ANT+™ Sensors Switch is compatible with ANT+™ sensors to provide additional information about your activity. Supported sensors Options : • Heart rate • Bike Spd & Cadence - Speed and cadence can be provided by separate sensors or by • Foot pod a combined speed and cadence sensor. • Bike speed/cadence Select the option that matches your • Bike speed... - Page 25 6. If the sensor chosen is not compatible with the active Activity Profile, a warning will appear. The sensor can still be enabled, the warning is a reminder that the sensor is not compatible with the current activity type selected. 7.
-
Page 26: Quick Info Screen
Quick Info Screen The Quick Info screen displays some important information that the user will find useful whenever using Switch. It is displayed in two variations, Activity and Navigation depending upon the mode Switch is in when accessed. Activity Quick Info Screen Accessing the Activity Quick Info Screen 1. - Page 27 Information Icon Details Activity Recording Status Not recording Recording Recording Stopped Activity Type Displays the icon and name of the current TRAIL activity type selected. Heart Rate Monitor Heart Rate Monitor not connected. Heart Rate Monitor connected. Foot Pod Sensor Foot Pod Sensor not connected.
-
Page 28: Navigation Quick Info Screen
Navigation Quick Info Screen Accessing the Navigation Quick Info Screen 3. While viewing the Navigation Screen press and hold the UP button until the Quick Info screen is displayed. 4. To exit the Quick Info screen press the Back button. Navigation Quick Info Screen Details Information Icon... -
Page 29: Settings
ANT+ Settings : See chapter on ANT+ Sensors . ANT+ Source : See chapter on ANT+ Sensors . Feedback : Set type of feedback used for alerts and button presses. Switch - sound on or off. Switch Up - sound, vibration, or off. -
Page 30: Training Zones
EntEr. Model : [Informational] Displays Switch or HR Zones : Provides means to set up and use Switch Up. Heart Rate Zones for each activity type. Serial Number : [Informational] Displays the Options : Set the heart rate zone method unique serial number for the device. -
Page 31: Magellan Active Website
Magellan Active Website active.magellangps.com Overview Getting Started with Magellan Active We built Magellan Active to help you get the 1. Go to active.magellangps.com/start. most out of your Magellan fitness devices. 2. Click “Getting Started,” within the Magellan Active offers a rich activity upload Magellan Active section. -
Page 32: Activity Files
Switch. successfully uploaded. Also select if you want you activities to be “Public” or 1. Log in to your Magellan Active account. “Private”. 2. Connect Switch to your personal 6. Click “Upload”. - Page 33 All of the data for the activity are displayed, including a map with line of your activity. . Even the data for the individual laps can be displayed by clicking on the lap from the listing of laps below the graph. When the lap is displayed, click on the “Activity/Lap Selector” button to view a different lap or return to the Activity page.
-
Page 34: Activity Page
Activity Page Your Profile page displays your recent activities but you can also view all of your activities from the Activity Page. Click on the Activities link in the Navigation Bar to view your Activity Page. Exporting Activity Files Sharing an Activity Activities that you have uploaded can be 1. -
Page 35: Addendum A - Switch Specifications
Display Type ..................High Resolution, Monochrome Display Dimensions (WxH) ............. 2.1 x 2.4 cm Display Resolution ................144 x 168 (pixels) Weight ....................69 grams (Switch) 71 grams (Switch Up) Water Resistance ................50 metres Battery Type ..................Rechargeable Lithium-ion Battery Life .................. - Page 36 Alerts (Pace, Heart Rate) ..............Yes Auto Lap ....................Yes Customisable Activity Screen(s) ............ Yes Auto Scroll Activity Screens ............Yes Customisable Activity Profiles ............Yes (9) Quick Info Screens ................Yes Auto Pause ..................Yes Multisport Mode ................Yes Activity Pacer ..................
-
Page 37: Addendum B - Available Data Types
Metric or statue. Elevation Elevation If using Switch, elevation is measured using GPS Metric (m) or calculations, with Switch Up elevation is measured using statue (ft). the internal barometer. Elevation Avg Elevation The average elevation for the current session within the Metric (m) or activity. - Page 38 Category Measurement Description Units Elevation Lap Elev Gain The elevation gained in the current lap. Metric (m) or statue (ft). Elevation Lap Elev Loss The elevation lost in the current lap. Metric (m) or statue (ft). Elevation Lap Elev Net The net elevation (gain - loss) for the current lap.
- Page 39 Maximum rate of energy used in the previous lap. Same as Power Temperature Temperature The instantaneous temperature of the current session. Metric (°C) or Switch Up statue (°F ) only Temperature Avg Temp The average temperature for the current session.
- Page 40 Category Measurement Description Units Time Prev Elsped Time The cumulative amount of time for the previous lap. mm:ss / Includes time that the activity was stopped. hh:mm:ss Time Prev Mov Time The amount of time that the Switch was moving during mm:ss / the previous lap.
-
Page 41: Addendum C - Resting Heart Rate
Addendum C - Resting Heart Rate Measuring Your Resting Heart Rate The measurement of resting heart rate or pulse rate (the number of heart beats per minute) should be taken after a few minutes upon waking while still lying in bed. Give your body some time to adjust to the change from sleeping before taking your pulse (2-5 minutes).
Need help?
Do you have a question about the Switch Up and is the answer not in the manual?
Questions and answers