Table of Contents
Advertisement
Advertisement
Table of Contents

Related Manuals for Garmin Geko 101


Summary of Contents for Garmin Geko 101
- Page 1 Geko 101 ™ ® Personal Navigator owner’s manual...
- Page 2 Information in this document is subject to change without notice. Garmin reserves the right to change or improve its products and to make changes in the content without obligation to notify any person or organization of such changes or improvements.
- Page 3 We don’t know about the noise, but fun and simplicity is what the Geko 101 is all about. To get the most out of your new Geko 101, take the time to read through this Owner’ s Manual to understand the operating features of the unit. This manual has been designed to provide all that you need to know to operate your Geko 101.
-
Page 4: Table Of Contents
GPS was made available to civilians for use in aviation, marine surveying and general outdoor/recreation markets. Today, millions of people utilize GPS technology to hunt, fi sh, hike, fl y, cruise, sail and geocache. To learn more, read Garmin’ s ‘GPS Guide for Beginners’ available through the Garmin website. -
Page 5: Introduction
WARNING: If you choose to use the Geko 101 in a vehicle, it is the sole responsibil- ity of the owner/operator of the Geko 101 to secure the GPS unit so that it will not cause damage or personal injury in the event of an accident. Do not mount the Geko 101 over airbag panels or in a place where the driver or passengers are likely to have an impact with it in an accident or collision. -
Page 6: Fcc Compliance Statement
Statement Software License Agreement The Geko 101 complies with Part 15 of the FCC interference limits for Class B digital devices FOR HOME OR OFFICE USE. These limits are designed to provide reasonable protection against harmful interference in a residential installation, and are more stringent than “outdoor” requirements. -
Page 7: Installing The Batteries
Battery Compartment NOTE: If your Geko 101 is stored for an extended period of time or if the batteries are completely discharged you may lose all data stored (such as waypoints). Follow the battery manufacturer’s instructions on the proper care and handling of the batteries. -
Page 8: Buttons
Introduction Geko 101 Buttons UP button DOWN button button LCD Display (with backlight) The UP/DOWN buttons: • Highlight options on pages and menus • Adjust display contrast on Satellite Page • Zoom out (UP) and in (DOWN) on Map Page •... -
Page 9: Main Pages
Main Pages All of the information needed to operate the Geko 101 is found on four main ‘pages’ (or display screens). These pages are the Satellite, Map, Navigation, and Menu. Simply press the PAGE button to switch between pages. Satellite... -
Page 10: Map Page
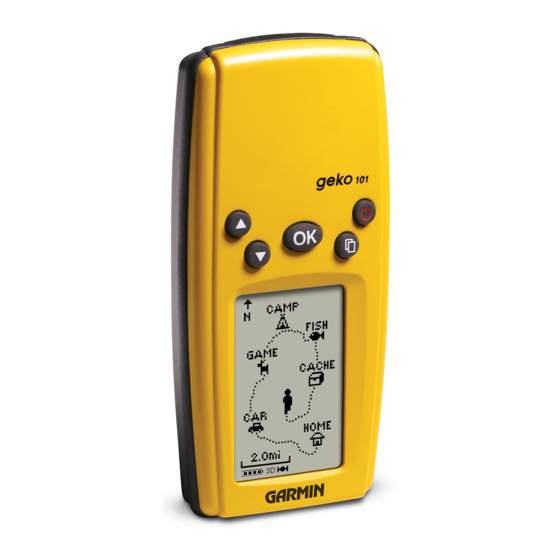
Waypoint names and symbols are also shown on the map. To help you better visualize the ‘real world’, Geko 101 automatically rotates the map as you move, so that waypoints that are ahead of you are always displayed in front of the animated fi... -
Page 11: Map Page Options
Map Page Options The Map Page Options allow you to use the Map Page for customizing the Map Page. The following options are available: • Map Setup: Allows you to adjust the map settings including: Orient Map (Ahead or Northward): When ‘AHEAD’ is selected, the top of the map is oriented in the direction you are currently moving. -
Page 12: Map Page Options
The Geko 101 draws an electronic breadcrumb trail or ‘track log’ on the Map Page as you travel. The track log starts recording as soon as the Geko 101 gets a location fi x. To make use of the track log, select the ‘PAN TRACK LOG’ option to show a pointer which moves along the track log when you press the button to see the four choices ‘TRACBACK’, ‘GOTO’, ‘MARK’... -
Page 13: Navigation Page
UP and DOWN buttons are used to cycle through different trip data. The Geko 101 is not a compass! You must be moving in order for it to track your movement. NOTE: The direction arrow, desti- nation symbol, bearing informa-... -
Page 14: Navigation Page Options
Navigation Page Options The Navigation Page allows you to display 13 types of different data, such as ‘Eleva- tion’, ‘Speed’, etc. Data Field Options By pressing the UP or DOWN button, you can cycle through the Data fi elds at the bottom of the Navigation Page: Average Speed—the average speed traveled since last trip reset. -
Page 15: Menu Page
Menu Page Basics The Menu Page gives you access to the Geko 101’ s essential features. With the Menu Page you can create (Mark) and select waypoints, change the time settings, adjust units of measure, and access the system setup features. -
Page 16: Mark
Menu Page Mark Waypoint Page The EDIT LOCATION Page allows you to change the symbol for the waypoint. The EDIT LOCATION Page displays on-screen instruc- tions explaining how to edit the waypoint location. (Continued from previous page) (UP button to move right to left, DOWN button to move left to right). When you reach the position place you want to change, stop and press the OK button. -
Page 17: Waypoints Page
WAYPOINTS Page The Waypoints Page organizes all of your waypoints in alphabetical order for easy selec- tion by name or by proximity, or, if you choose, allows you to delete all waypoints. To select a waypoint: 1. From the MENU Page press the UP or DOWN button to highlight ‘WAYPOINTS’, then press the OK button. -
Page 18: Review Waypoint Page
Menu Page Review Waypoint Page The REVIEW WAYPOINT Page allows you to delete a waypoint. You can start a GOTO from the REVIEW WAYPOINT Page. Review Waypoint Page The Review Waypoint Page allows you to change the waypoint symbol, name, elevation and location (just as on the Mark Waypoint Page). -
Page 19: Projecting A Waypoint
Using the Project waypoint feature, the Geko 101 can create a waypoint at a specifi ed distance and bearing using an existing waypoint as a reference. You can also change the waypoint name, symbol and elevation on this page. Projecting a waypoint: 1. -
Page 20: Time
Daylight Savings Time. When you select 12 hour time formatting, the clock will read like a standard clock with 12 hour AM and 12 hour PM cycles. The 24 hour option sets the Geko 101 to display a 24 hour cycle (Military Time). To change the time format: 1. -
Page 21: Daylight Savings Time
Daylight Savings Time Daylight savings time can be set to ‘Automatic’ (using the built-in almanac to automati- cally change the clock settings when daylight savings goes into or out of effect). You can choose ‘Yes’ to manually add daylight savings or ‘No’ to remain on standard time. To change the daylight saving fi... -
Page 22: Units
A map datum is a reference model of the earth’ s shape. Every map uses a map datum which is usually listed in the title block of the map. The default datum in the Geko 101 is WGS 84 (World Geodetic Survey, 1984). You should only change the datum if you are using maps or charts that specify a different datum. -
Page 23: Units Page
4. Press the PAGE button to return to the MENU page. Units of Measure The Geko 101 allows you to select statute (the default setting), nautical, or metric units of measure for all speed and distance readouts. To change the Units of Measure: 1. -
Page 24: North Reference
Magnetic North is the direction in which a compass needle points. The Geko 101 bearings will correspond to the compass if the Geko 101 is set to magnetic north. Due to errors introduced when map makers fl atten the earth’ s sphere onto paper, not all of the grid lines drawn on the map point exactly to the north pole, so the north indicated by the grid lines is called ‘Grid North’. -
Page 25: System Page
The GPS receiver is always ‘ON’ when it’ s in ‘NORMAL’ mode. The normal mode is more responsive to sudden turns or change of speed/acceleration. When the Geko 101 is in ‘BATTERY SAVE’ mode, the GPS receiver turns on and off alternatively to conserve power. -
Page 26: Light Timeout
Menu Page System Page You can set the backlight to stay on all the time, but watch your battery power! Light Timeout The ‘LIGHT TIMEOUT’ option allows you to set the display backlight timeout (stays on, 15 or 30 seconds, and 1 or 2 minutes) and to adjust the display contrast. To change the light timeout: 1. -
Page 27: Appendices
Up to 12 hours in Battery Save mode (with alkaline batteries) Specifi cations subject to change without notice. The temperature rating for the Geko 101 may exceed the usable range of some batteries. Alkaline batteries can rupture at high temperatures. Modifi cations or other applications will void the product warranty. -
Page 28: Standard Accessories
Lanyard Attaches to the back of the unit for convenient carrying. Marine Mounting Kit Allows the Geko 101 to be mounted on any fl at surface. Suction Cup Mounting Kit Allows the Geko 101 to be mounted on windshield. Training Video, NTSC Vehicle Mounting Kit Allows the Geko 101 to be mounted on the dash. -
Page 29: Index
Accessories 22 Arrival Time 8 Auto Zoom On/Off 5 Average Speed 8 Backlight 20 Backlighting 2 Batteries 1, 19, 21 Battery Save Mode 19 Battery usage icon 1 Bearing 8 Buttons DOWN 2 OK 2 PAGE 2 POWER 2 UP 2 Cautions v Change Daylight Savings fi... -
Page 30: Index
Index Index Main Pages 3 Map Datums 16–17 Map Page 4–6 Options 5 Mark Page 9–10 Max Speed 8 Menu Page 9 Navigation Page 7–8 Options 7 Nearest waypoints 11 North Reference 18 OK Button 2 Orient Map 5 PAGE Button 2 Position Format 16 POWER Button 2 Projecting a Waypoint 13... -
Page 31: Warranty
This GARMIN product is warranted to be free from defects in materials or workmanship for one year from the date of purchase. Within this period, GARMIN will at its sole option, repair or replace any components that fail in normal use. Such repairs or replacement will be made at no charge to the customer for parts or labor, provided that the customer shall be responsible for any transportation cost. - Page 32 Visit the Garmin web site at www.garmin.com. © Copyright 2003 Garmin Ltd. or its subsidiaries Garmin International, Inc. 1200 East 151 Street, Olathe, Kansas 66062, U.S.A. Garmin (Europe) Ltd. Unit 5, The Quadrangle, Abbey Park Industrial Estate, Romsey, SO51 9DL, U.K.
Need help?
Do you have a question about the Geko 101 and is the answer not in the manual?
Questions and answers