Table of Contents
Advertisement
Available languages
Available languages
OWNER'S MANUAL
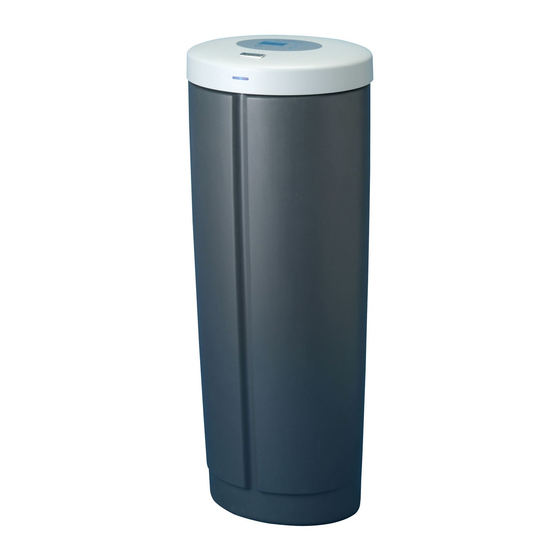
Central Water
Whole Home
Filtration System
MODEL NO. 625.382080
Caution:
Read and follow all safety rules and operating
instructions before first use of this product.
Questions
?
Visit www.KenmoreWater.com
or call toll free 1-800-426-9345
(M - F, 7 AM - 6 PM CST)
Repair or Parts ? Call toll free 1-800-469-4663
See back cover for other Sears service numbers.
SAVE THIS MANUAL
• Warranty
• Installation
• How It Works
• Care Of
• Specifications
• Repair Parts
System tested and certified
by NSF International
against
NSF/ANSI
Standard
42
for the reduction
of chlorine
taste and odor,
and certified
to NSF/ANSI
Standard
372.
Sears
Brands
Management
Corporation,
Hoffman
PRINTED IN U.S.A.
www.KenmoreWater.com
Estates,
IL
60179
U.S.A.
Part No. 7333705
(Rev. D 2/26/13)
Advertisement
Table of Contents

Related Manuals for Kenmore 625.382080


Summary of Contents for Kenmore 625.382080
- Page 1 OWNER'S MANUAL Central Water Whole Home Filtration System MODEL NO. 625.382080 Caution: Read and follow all safety rules and operating instructions before first use of this product. • Warranty Questions • Installation Visit www.KenmoreWater.com or call toll free 1-800-426-9345 (M - F, 7 AM - 6 PM CST) •...
- Page 2 WARRANTY ON THE KENMORE CENTRAL WATER WHOLE HOME FILTRATION SYSTEM ONE YEAR LIMITED WARRANTY ON CENTRAL WATER WHOLE HOME FILTRATION SYSTEM When installed, operated and maintained according to all instructions supplied with the product, if this Central Water Whole Home Filtration System fails due to a defect in material or workmanship within one year from the date of purchase,...
- Page 3 Unpack and Check Shipment ..............Installation Requirements ................ Installation .................. 7-11 How a Central Water Filtration System Works ............Programming the Central Water System ............Start Up Procedure ................Customizing Features / Options ..............14-16 Care of Your Central Water Filtration System ............
- Page 4 INSPECT SHIPMENT Your Central Water Whole Home Filtration System is Keep the small parts in the parts bag until you are ready to install them. shipped complete in one carton. Remove all items from your shipping carton. NOTE: Codes in the state of Massachusetts require Check all items against the packing list below.
- Page 5 LOCATION REQUIREMENTS Consider the following when selecting an installation • A nearby drain is needed to carry away Clean Rinse location for the Central Water Whole Home Filtration discharge water. Use a floor drain, laundry tub, System. sump, standpipe, or other options (check your local codes).
- Page 6 PLUMBING CODES VALVE DRAIN REQUIREMENTS All plumbing must be completed in accordance with Using the flexible drain hose (included), measure and national, state and local plumbing codes. cut to the length needed. Flexible drain hose is not allowed in all localities (check your plumbing codes).
- Page 7 TURN OFF WATER SUPPLY LEVEL IF NECESSARY 1. Close the main water supply valve, near the well pump or water meter. 2. Open all faucets to drain water from the house pipes. NOTE: Be sure not to drain water from the water heater, as damage...
- Page 8 INLET- OUTLETPLUMBINGOPTIONS 3 VALVE BYPASS Install a single bypass valve (provided) to the plumbing, as shown in Fig. 8 OR if desired, a 3 valve bypass sys- tem (parts not included) can be installed, as shown in Figure 7. Bypass valves allow you to turn off water to the Central Water Whole...
- Page 9 ASSEMBLE INLET AND OUTLET PLUMBING Measure, cut, and loosely assemble pipe and fittings from the main water pipe to the inlet and outlet ports of the Central Water Whole Home Filtration System valve. Be sure to keep fittings fully together, and pipes squared and straight.
- Page 10 METALWATERPIPEGROUNDING METAL PIPE GROUNDING (parts not included) IMPORTANT: This Central Water Whole Home Filter has a non-metallic valve system. Ground Wire Installing it on metal plumbing will break electrical continuity, which may interrupt grounding for the home. You must restore electrical continuity in your metal...
- Page 11 TEST FOR LEAKS TURN ON THE CENTRAL WATER WHOLE HOME FILTRATION SYSTEM 1. Make sure the single bypass valve (or 3 valve bypass, if installed) is in the bypass position, with the handle During installation, the Central Water Whole Home pushed in (See Figure 10).
- Page 12 Display Central Water Whole Home Filtration System button CLEAN DOWN button CLEAN ENTER Figure 11 button button When the transformer is initially plugged into the electri- CODE cal outlet, the model code (dF 1) and a test number (example: J2.0), are briefly shown in the faceplate dis- play.
- Page 13 IMPORTANT: Run the start up cycle immediately after com- pleting installation, before using any water the home. During the start up cycle: The filtration media in this Central Water Whole Home Throughout the start up cycle you will hear the valve Filtration System contains a small number of harmless...
- Page 14 STARTA CLEANRINSECYCLE RECHARGE To manually start a Clean Rinse cycle, press and hold the CLEAN button for a few seconds, until "RECHARGE NOW" flashes in the display. This Clean Rinse cycle takes 3 minutes (unless the factory settings for backwash and fast rinse times have been changed, as shown below).
- Page 15 SETTING THE FREQUENCY OF AUTOMATIC CLEAN RINSE CYCLES The Central Water Whole Home Filtration System will automatically initiate Clean Rinse cycles based on how much water has been filtered through the sys- tem. The default is to run a Clean Rinse cycle after 3,000 gallons have been filtered.
- Page 16 OPERATING IN MANUAL CLEAN RINSE MODE Clean Rinse cycles will run automatically, unless the automatic Clean Rinse function has been disabled. If this function has been disabled, it will be nec- essary to manually initiate Clean Rinse cycles. It is recommended that should Clean...
- Page 17 POWER OUTAGE MEMORY VACATIONS EXTENDED PERIODS NO WATER USE If electrical power to the Central Water Whole Home Filtration System is lost, "memory" built into the con- If your Central Water Whole Home Filtration System troller circuitry will keep all settings several hours.
- Page 18 PROTECT THE CENTRAL WATER FILTRATION DRAIN ALL WATER FROM CENTRAL WATER SYSTEM FROM FREEZING FILTRATION SYSTEM If the Central Water Whole Home Filtration System is installed where it could freeze (summer cabin, lake home, etc.), you must drain all water from it to stop possible freeze damage.
- Page 19 PROBLEM CAUSE CORRECTION Water has black or gray (NEW SYSTEM) Start up procedure Run start up procedure (See Page 13) or run color has not been completed consecutive Clean Rinse cycles (See Page 14) until water color returns to normal. (NOT A NEW SYSTEM) Normal abra- Manually...
- Page 20 PROBLEM CAUSE CORRECTION "RECHARGE OFF" is The automatic Clean Rinse function If you want the Clean Rinse function to run flashing in the display has been disabled (See Page 16) automatically, press and release the CLEAN button until display no longer reads "RECHARGE OFF"...
- Page 21 RESETTING TO FACTORY DEFAULTS To reset the electronic controller to its factory default CODE for all settings (time, frequency of automatic Clean Rinse cycles, etc.): 1. Press the SELECT button and hold it until the display changes twice to show "SET CODE" and the flashing model code.
- Page 22 SPECIFICATIONS Model No. 625.382080 Model Code Rated Service Flow Rate 6.0 gpm Pressure Drop at Rated Service Flow 10 psig (68.9 kPa) 15 psig (103.4 kPa)* Pressure Drop at 9.6 gpm...
- Page 23 _11-7/8"_ 3_3/4,,- / _:/_,)_ 13-1/2" TOP VIEW IN - OUT 35-3 /8" 27-7/8" Figure 24 SIDE VIEW FRONT VIEW BACK ELECTRONIC CONTROLLER TRANSFORMER 60Hz 24VAC 120VAC 24VDC MOTOR TURBINE SENSOR _._ NC ? NO POSITION SWITCH Figure Questions? Call Kenmore Water Line 1-800-426-9345 or visit...
- Page 24 Valve Assembly See Pages 26 & 27 for parts 16 _ Questions? Call The Kenmore Water Line 1-800-426-9345 or visit KenmoreWater.com...
- Page 25 Key No. Part No. Description Assembly, Replacement Mineral Tank, with • 7302623 media, associated components & outer shroud tank (includes Key Nos. 1 through 7112963 Distributor O-Ring Kit (includes Key Nos. 1-3) O-Ring, 2-7/8" x 3-1/4" O-Ring, 13/16" x 1-1/16" O-Ring, 2-3/4"...
- Page 26 Questions? Call The Kenmore Water Line 1-800-426-9345 or visit KenmoreWater.com...
- Page 27 Key No. Part No. Description 7224087 Screw, #8-32 x 1" (2 req.) 7286039 Motor (incl. 2 ea. of Key No. 50) 7231393 Motor Plate 0900857 Screw, #6-20 x 3/8" (3 req.) 7171250 Bearing 7283489 Cam & Gear 7331282 Drain Hose Adaptor Kit (incl.
- Page 28 Your Home For expert troubleshooting and home solutions advice: managemylife Our Home For repair of carry-in items like vacuums, lawn equipment, and electronics, call anytime for the location of your nearest Sears Parts & Repair Service Center 1-800-488-1222 (U.S.A.) 1-800-469-4663 (Canada) www.sears.com www.sears.ca...
- Page 29 DEL PROPIETARIO Sistema central de filtrado de agua para toda la casa MODELO No. 625.382080 Precauci6n: Antes de usar este producto por primera vez, lea y siga toclas las reglas de seguri- dad y las instrucciones de operaci6n. • Garantfa _Tiene preguntas? •...
- Page 30 GARANTJA PARA EL SISTEMA CENTRAL I(ENMORE DE FILTRADO DE AGUA PARA TODA LA CASA GARANTJA LIMITADA DE UN AI_iO PARA EL SISTEMA CENTRAL KENMORE DE FILTRADO DE AGUA PARA TODA LA CASA Cuando se haya instalado, operado y mantenido conforme a todas las instrucciones suministradas con el pro-...
- Page 31 Desempaque y revise el env[o ..............Requisitos de instalaci6n ................ Instalaci6n .................. 7-11 C6mo funciona un sistema central de filtrado de agua ..........Programaci6n del sistema central de filtrado de agua ..........Procedimiento de arranque ............... Caracteristicas/opciones de personalizaci6n ............14-16 Cuidado del sistema central...
- Page 32 INSPECCIONE EL ENVJO El sistema central de filtrado de agua para toda Conserve las piezas peque_as dentro de la bolsa de piezas casa se envia completo en una caja de cart6n. Retire hasta que est6 listo para instalarlas. todos los articulos de la caja de cart6n del envio.
- Page 33 REQUISITOS DE UBICACION Considere Io siguiente al seleccionar una ubicaci6n para • Se necesita tener un desagLie cerca para descargar instalar el sistema central de filtrado de agua para toda agua del ciclo de limpieza. Use un desagLie de piso, la casa.
- Page 34 CODIGOS DE PLOMERJA REQUISITOS PARA EL DESAGOE DE LA VALVULA Toda la plomeria debe instalarse en cumplimiento Use la manguera flexible de desagLie (incluida), mldala c6rtela a la Iongitud necesaria. No en todas las Iocalidades de los c6digos de plomeria nacional, estatal y local.
- Page 35 CIERRE EL SUMINISTRO DE AGUA NIVELE SI ES NECESARIO 1. Cierre la v_lvula principal del suministro de agua, cerca de la bomba de la cisterna o el medidor de agua. 2. Abra todos los grifos para desaguar la tuberia la casa. NOTA: Cerci6rese de no desaguar el calentador...
- Page 36 OPCIONESDE PLOMERIAPARA ENTRADA DERIVACION DE 3 VALVULAS SALIDA Instale una v61vula de derivaci6n (que se incluye) a la plomeria, como se ilustra en la Fig. 8, O BIEN, si Io desea, puede instalar un sistema de derivaci6n 3 v61vulas (no se incluyen las piezas), como se ilustra la Fig.
- Page 37 ARME LA PLOMERIA DE ENTRADA Y SALIDA Mida, torte y arme sin apretar los tubos y las uniones del tubo de agua principal a los puertos de entrada salida de la v61vula del sistema central de filtrado agua para toda la casa.
- Page 38 CONEXION A TIERRAPORTUBERJA CONEXION A TIERRA POR TUBERJA METALICA METALICADEAGUA (no se incluyen las piezas) IMPORTANTE: Este sistema central de filtrado de agua Alambre para toda la casa tiene un sistema de conexi6n a tierra v61vulas no met61icas. Su instalaci6n una tuberia met61ica cortar6...
- Page 39 PRUEBE PARA DETECTAR FUGAS ENCIENDA EL SISTEMA CENTRAL DE FILTRA- DO DE AGUA PARA TODA LA CASA 1. Compruebe que la v61vula de una derivaci6n (o la v61vula de 3 derivaciones, si se instala) est6 en la Durante la instalaci6n, es posible que el cableado posici6n...
- Page 40 Pantalla Central Water Whole Home Filtration System Bot6n SUBIR CLEAN Bot6n BAJAR Bot6n CLEAN Bot6n ENTER Figura (Limpiar) (Aceptar) Cuando se enchufe inicialmente el transformador a un CODE tomacorriente el6ctrico, aparecer6 brevemente un c6digo de modelo y un nOmero de prueba (ejemplo: J2.0) en la pantalla...
- Page 41 IMPORTANTE: Ponga en marcha el ciclo de arranque pronto como termine la instalaci6n, antes de usar el agua de la casa. Durante el ciclo de arranque: Los medios filtrantes de este sistema central de filtrado Durante el ciclo de arranque oir6 que la v61vula cam- de agua para toda la casa contienen...
- Page 42 INICIE UN CICLO DE LIMPIEZA Para iniciar manualmente un ciclo de limpieza, mantenga oprimido bot6n CLEAN (Limpiar) durante unos segundos, hasta que destelle la frase "RECHARGE NOW" (Recargar ahora) en la pantalla. Este ciclo de limpieza Ileva 3 minutos (a menos que se haya cambiado la configuraci6n de f6brica para retrolavado...
- Page 43 COMO FIJAR LA FRECUENCIA DE LOS CICLOS DE LIMPIEZA AUTOMATICA El sistema central de filtrado de agua para toda la casa iniciar6 autom6tica- mente los ciclos de limpieza en base a cu6nta agua se haya filtrado en el sistema. El valor predeterminado es ejecutar un ciclo de limpieza...
- Page 44 COMO OPERAR EN MODO DE LIMPIEZA MANUAL Los ciclos de limpieza se ejecutar6n autom6ticamente, a menos se haya desactivado la funci6n de limpieza. Si se ha desactivado dicha funci6n, ser6 necesario iniciar manualmente los ciclos de limpieza. Se recomienda ejecutar un ciclo de limpieza Io menos...
- Page 45 MEMORIA PARA CORTES DE ELECTRICIDAD VACACIONES Y PERIODOS PROLONGADOS SIN USO DE AGUA Si se interrumpe la electricidad del sistema central filtrado de agua para toda la casa, la "memoria" Si su sistema central de filtrado de agua para toda integrada a los circuitos del controlador...
- Page 46 DESAGOE TODO EL SISTEMA CENTRAL PROTEJA EL SISTEMA CENTRAL DE FILTRADO DE AGUA CONTRA EL CONGELAMIENTO FILTRADO DE AGUA Si se instala el sistema central de filtrado de agua para toda la casa en un lugar donde podria congelarse (cabafia de verano, vivienda junto a un lago, etc.), deber6...
- Page 47 PROBLEMA CAUSA CORRECCION El color del agua es (SISTEMA NUEVO) No ha finalizado Ejecute el procedimiento de arranque (vea la negro o gris procedimiento de arranque p6gina 13) o ejecute ciclos de limpieza consec- utivos (vea la p6gina 14) hasta que el color del agua vuelva a ser normal.
- Page 48 PROBLEMA CAUSA CORRECCION Destella "RECHARGE Se ha desactivado la funci6n Si desea que la funci6n de limpieza se active OFF" (Recarga des- limpieza autom6tica. (Vea la p6gina 16.) autom6ticamente, optima y suelte el bot6n activada) en la pantalla CLEAN (Limpiar) hasta que desaparezca la frase "RECHARGE OFF"...
- Page 49 REAJUSTE A LOS VALORES DE FABRICA Para reajustar el controlador electr6nico a todos los CODE valores predeterminados en la f6brica (hora, la frecuencia de los ciclos de limpieza autom6tica, etc.): 1. Mantenga oprimido el bot6n SELECT (Seleccionar) hasta que cambie dos veces la pantalla para mostrar...
- Page 50 NSF/ANSI El desempefio real puede variar de acuerdo alas condiciones locales del agua. ESPECIFICACIONES Modelo No. 625.382080 C6digo del modelo Caudal para servicio nominal 6.0 gpm (22.7 Ipm) 10 PSIG (68.9 kPa) Caida de presi6n con un caudal para servicio...
- Page 51 11-7/8 pulg. ENT. 13-1/2 3-3/4 pulg. pulg. SAL. VISTA SUPERIOR ENT. - SAL. ,,L • 35-3/8 pulg. 27-7/8 pulg. Figura 24 VISTA LATERAL VISTA FRONTAL PARTE POSTERIOR DEL CONTROLADOR ELECTRONICO TRANSFORMADOR --0- 60 Hz 24 VCA 120 VCA _ MOTOR DE 24 VCC SENSOR DE TURBINA...
- Page 52 Conjunto de la v,_lvula Vea las piezas en las p6ginas 26 y 27 16 _ _.Tiene preguntas? Llame a la linea de ayuda de Kenmore Water al 1-800-426-9345 o visite el sitio web KenmoreWater.com.
- Page 53 Clave No. Pieza No. Descripci6n Conjunto, tanque de minerales de reemplazo • 7302623 c/medios filtrantes, componentes asociados y recubrimiento externo del tanque (incluye claves No. 1 a 13.) 7112963 Juego de juntas t6ricas para el distribuidor (se incluye claves No. 1 a 3) Junta t6rica, 2-7/8 x 3-1/4...
- Page 54 _.Tiene preguntas? Llame a la Ifnea de ayuda de Kenmore Water al 1-800-426-9345 o visite el sitio web KenmoreWater.com.
- Page 55 Clave No. Pieza No. Descrlpci6n 7224087 Tornillo 8-32 x 1 pulg. (se necesitan 7286039 Motor (se incl. 2 c/u de la clave No. 50) 7231393 Placa del motor 0900857 Tornillo 6-20 x 3/8 pulg. (se necesitan 7171250 Cojinete 7283489 Leva y engranaje Juego de adaptador para manguera de desagLie...
- Page 56 Your Home For expert troubleshooting and home solutions advice: managemylife Our Home For repair of carry-in items like vacuums, lawn equipment, and electronics, call anytime for the location of your nearest Sears Parts & Repair Service Center 1-800-488-1222 (U.S.A.) 1-800-469-4663 (Canada) www.sears.com www.sears.ca...
Need help?
Do you have a question about the 625.382080 and is the answer not in the manual?
Questions and answers