Table of Contents
Advertisement
Advertisement
Table of Contents

Related Manuals for Polaroid FDM-0715 - 7


Summary of Contents for Polaroid FDM-0715 - 7
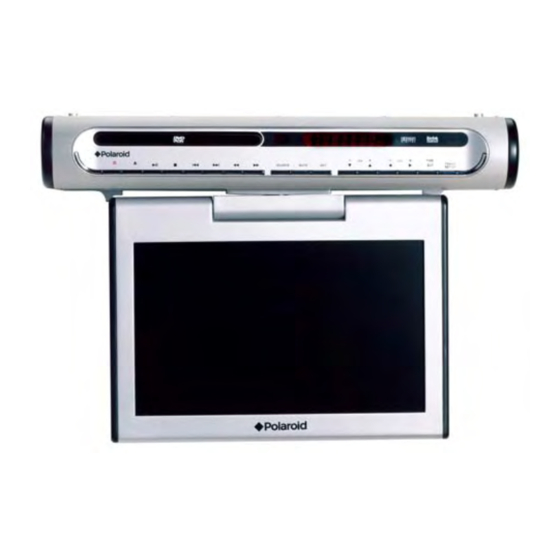
- Page 1 7” Under-the-Cabinet LCD TV with DVD Player FDM-0715 User’s Manual 20060302...
-
Page 2: Important Safety Instruction
Important Safety Instructions CAUTION: TO REDUCE THE RISK OF ELECTRIC SHOCK, DO NOT REMOVE COVER (OR BACK). NO USE-SERVICEABLE PARTS INSIDE. REFER SERVICING TO QUALIFIED SERVICE PERSONNEL. The lightning flash with arrowhead symbol, within an equilateral triangle, is intended to alert the user to the presence of un-insulated “dangerous voltage”... -
Page 3: Important Safety Instructions
Important Safety Instructions 1) Read these instructions. 2) Keep these instructions. 3) Heed all warnings. 4) Follow all instructions. 5) Do not use near water. 6) Clean only with dry cloth. 7) Do not block any ventilation openings. Maintain well ventilated conditions around the product, Do not put product on bed, sofa or anything that blocks ventilation. - Page 4 Important Safety Instructions CAUTION: USE OF ANY CONTROLS, ADJUSTMENTS, OR PROCEDURES OTHER THAN THOSE SPECIFIED HEREIN MAY RESULT IN HAZARDOUS RADIATION EXPOSURE. Region code information DVD players and discs are coded by region. If the region number described on the DVD disc does not correspond to the region number of this product, this product cannot play the disc.
-
Page 5: Fcc Notice
FCC Notice NOTE: This equipment has been tested and found to comply with the limits for a Class B digital device, pursuant to part 15 of the FCC Rules. These limits are designed to provide reasonable protection against harmful interference in a residential installation. -
Page 6: Table Of Contents
Table of Contents Important Safety Instruction---------------------------------------------------------------------- FCC Notice---------------------------------------------------------------------------------------------- Table of Contents------------------------------------------------------------------------------------- Characteristic Features ---------------------------------------------------------------------------- Disc Information -------------------------------------------------------------------------------------- Front Panel --------------------------------------------------------------------------------------------- Rear Panel and Display Panel-------------------------------------------------------------------- Remote Control --------------------------------------------------------------------------------------- Preparation ------------------------------------------------------------------------------------------- Using the Remote Control------------------------------------------------------------------------- System Connections -------------------------------------------------------------------------------- Connecting To External AV Signal Source ----------------------------------------------------- Connecting To TV Signal Input Source--------------------------------------------------------- Connecting To the Antenna -------------------------------------------------------------------------------- Connecting To the Power Adapter ------------------------------------------------------------------------... -
Page 7: Characteristic Features
Characteristic Features This product incorporates DVD player, Special Functions Supports Multi-language. LCD display, TV receiver and radio function in one system. It is designed Advanced Playing Function for convenient use in the kitchen. Compatibility Please refer to page 30 for the Plays: DVD, CD and JPEG discs. -
Page 8: Disc Information
Disc Information Disc Formats Supported By This Player PLAYBACK TIME/ DISC LOGO DIAMETER PLAYABLE SIDES 133 min (SS-SL) 242 min (SS-DL) 12cm 266 min (DS-SL) 484 min (DS-DL) 41 min (SS-SL) 75 min (SS-DL) 82 min (DS-SL) 150 min (DS-DL) 12cm 74 min 20 min... -
Page 9: Front Panel
Front Panel Front Panel Drawing Under DVD mode, press once to go to POWER Button beginning of the current track/chapter. Press to enter or exit the STANDBY Press twice to go to the previous mode. track/chapter. Disc Tray Used to load disc. Button Press to go to the next track under DVD EJECT Button... - Page 10 Front Panel 16. ▲/CH+ Button (SEEK +) Button Under radio mode, press once to fine Press to select items in the setup menu. tune frequency forward. Press for about Press to select channels or radio stations 1.5 seconds to search radio stations forward under TV or radio mode.
-
Page 11: Rear Panel And Display Panel
Rear Panel and display panel Rear Panel Drawing 1. ANT INPUT jack 4. Left/Right AUDIO input jack Connected to external antenna to Connection for audio input. receive the TV program in TV mode. 5. VIDEO input jack 2. FM 75Ωcoaxial antenna jack Connection for video input. -
Page 12: Remote Control
Remote Control Preparation Using Of Remote Control Point the remote control towards the Refer to the drawing and remove the main unit when operating. The remote empty battery receptacle. control works best at a distance less than 7m and at an angle of up to 60°to the front of the unit. - Page 13 Remote Control Remote Control Drawing - 13 -...
- Page 14 Remote Control /SEEK – Button 1. POWER Button Under radio mode, press once to fine Press to access to or exit the tune frequency backward. Press for STANDBY mode. about 1.5 seconds to search radio stations backward automatically. 2. SUBTITLE Button Under DVD mode, press to activate fast Press to select a subtitle language or to backward playback.
- Page 15 Remote Control EJECT Button 28. TIME Button Press to open or close the disc tray. Press to set the time when the time is displayed on the display panel. Use the 20. AUDIO Button buttons to select the editing Press to access various audio position of hour or minute, use the languages, when the DVD disc contains buttons to adjust the value of the hour...
-
Page 16: System Connections
System Connections • Do not connect the power cord until all other connections have been made. • Each time you restart the unit, it remembers the last function used. • Please make all the connections before installing the unit in the kitchen. Connecting To External AV Signal Source Connections should be made as follows: Connect the L/R audio cables according to the marks on the rear panel of the unit:... -
Page 17: Connecting To The Antenna
System Connections Connecting To Antenna Connect the supplied AM/FM antennas to listen to the radio. • In order to improve the signal, move AM loop antenna away from system and other equipment. • Extend FM antenna fully. • Keep the FM antenna as horizontal as possible after connection. •... -
Page 18: Connecting To The Power Adapter
System Connections Connecting To the Power Adapter This unit is powered via the switching power adapter (supplied). See the below figure for details: 1. Connect the AC adapter to jack marked with “DC 12V IN” on the rear panel of the unit. -
Page 19: Radio Function
Radio Function Radio Function Operation Press the FM/AM button on the remote control or the SOURCE button on the front panel to enter FM or AM radio mode. Then press the SEEK+/- button for about 1.5 seconds on the remote control or front panel to start searching forward/backward from the current frequency. -
Page 20: Tv Function
TV Function Basic Operation Connect the antenna to the antenna jack on the rear panel. After connecting the antenna, connect the power supply cord. If the player is in standby mode, press the POWER button on the front panel to turn on the power. Press the TV button on the remote control to shift to TV mode. - Page 21 TV Function TV SETUP SIGNAL CATV CHANNEL SKIP BLUE SCREEN FINE TUNING AUTO MEMORY ◄ PICTURE EXIT ► Use the ▼, ▲ buttons to select the item you want to set. Use the ►, ◄ buttons to select the item and enter it. First use the ▼, ▲...
- Page 22 TV Function SEARCHING CH:001 ◄ EXIT: 089.75MHz The auto memory will take a few minutes. The unit will search channels from the lowest channel to the highest channel in the standard channel list. When tuning operations are complete the unit will exit and store the channels by sequence in the memory.
- Page 23 TV Function Power off To set the playback end time of the signal source, use number buttons to input the desired time in sequence of hour, minute. Press the ►, ◄ direction buttons to shift between am and pm. When the playback of the signal source is over, the player will enter standby mode.
-
Page 24: Av Function
AV Function AV Function The player has an additional AV input so it can function as a monitor for a DVD player, video cassette player, satellite receiver, video game, etc. When an AV source is connected, press the AV button on the remote control to enter external input AV mode. Picture Parameter Setup Press the SETUP/SET button once on remote control to enter PICTURE setup menu, and screen will display as shown:... -
Page 25: Play Operation
Play Operation Preparation Install the unit in the kitchen; refer to page 30 for details. After connecting the unit to the AC power, turn on the unit’s power by pressing the POWER button on the front panel or the remote control. Press the DVD button on the remote control or the SOURCE button to shift to DVD mode. - Page 26 Play Operation Title & Chapter Normally there are several titles in a DVD disc, and several chapters (sections) in a title. You can select any title or chapter quickly by entering the relevant number. CD Playback The player will play all tracks on a CD disc by default. You can use the (PREV/NEXT skip) buttons, or number buttons to select a track.
-
Page 27: Playback Functions
Playback Functions Stop During playback, press the STOP button once on the remote control to stop playback of a disc. Press the PLAY button and the DVD Player will resume playback of the disc from the point where it was stopped. Pause Press the PAUSE button once on remote control or front panel to pause playback. - Page 28 Playback Functions Slow Playback Press the SLOW button to activate slow playback. ◆ There is no slow playback for CD discs. Previous and Next Press the PREV button once to return to the currently playing Chapter or Track. Press it twice and playback will start from the previous Chapter or Track. Press the NEXT button and playback of the disc will start from the next Chapter or Track.
-
Page 29: System Setup
System Setup DVD Setup You can customize the set up menu to your own preference. Press the DVD SETUP button on the remote control to display the setup menu. The menu will include “General Setup”, “Speaker Setup”, “Dolby Digital Setup”, “Video Setup”, and “Preference Setup”. -
Page 30: Lcd Setup
System Setup Dynamic Use this item to adjust linear dynamic compression rate to get different signal compression effects. Video Setup Sharpness Use this setting to adjust the sharpness level Brightness Use this setting to adjust the brightness level. Contrast Use this setting to adjust the contrast level. Preference Page Note: For preference setting, the unit must be in the stop mode. -
Page 31: Installing The Unit In Kitchen
Installing the unit in Kitchen Note: Before installing the unit in the kitchen, please make all the connections. Installing the unit under a cabinet The player unit may be installed in the kitchen with or without the spacers. The suggested mounting position of the unit is under a wall cabinet. See drawings below: NOTE: The dimensions of the player: 3.1”H X 13.6”W X 11.2”D There should be at least 1.4”... - Page 32 Installing the unit in Kitchen Mark the position of the 4 holes by using the supplied paper template. Drill four holes with diameter of 8mm. You can use the connecting steel panel to check the holes. If the cabinet door overhangs the shelf and obstructs the unit, adjust the unit or the shelf height for clearance.
-
Page 33: Troubleshooting
Troubleshooting SYMPTOM CHECK ITEM • Make sure a disc is loaded. • Make sure the disc is loaded with label side up. • Disc should be clean, not dirty or warped. • The player cannot Player’s region code should be the same as the region play. -
Page 34: Specifications
Confidential unpublished works. 1992 -1997 Dolby Laboratories, Inc. All rights reserved. For service, support and warranty information, visit www.polaroid.com or in the US call 1-866-289-5168 and in Canada call 1-866-301-7922. “Polaroid” and “Polaroid Pixel” are registered trademarks of Polaroid Corporation, Waltham, MA USA.
Need help?
Do you have a question about the FDM-0715 - 7 and is the answer not in the manual?
Questions and answers