
Subscribe to Our Youtube Channel
Related Manuals for IBM Infoprint 6500-v05


Summary of Contents for IBM Infoprint 6500-v05
- Page 1 Infoprint 6500 Form No. G544-5978-00 Line Matrix Printers Models 6500-v05, -v5P, -v10, -v1P, -v15, and -v20 Maintenance Information Manual...
- Page 2 Requests for IBM publications should be made to your IBM representative or to the IBM branch office serving your locality. Publications are not stocked at the address given below.
-
Page 3: Table Of Contents
About This Manual ..............................26 Printing Conventions In This Manual .......................... 27 Related Documents..............................28 About The Printer................................29 The IBM Infoprint 6500 Printer Family ..........................29 How To Identify The Printer ............................30 Printer Configuration Code............................31 Forms Handling ................................32 Important Maintenance Notes ............................. - Page 4 Controller Board Status LEDs At Power Up ........................229 Troubleshooting A New Installation ..........................230 Printer Configuration ..............................230 Documentation ................................230 RibbonMinder**................................231 RibbonMinder Operation ............................231 The Ribbon Log................................. 235 Downloading Microcode From IBM First.......................... 236 Clear NVRAM .................................. 237...
- Page 5 Table of Contents Loading Flash Memory ..............................238 Loading Through The Serial Or Parallel Port ......................239 Loading Through the Network Interface Card (NIC) ....................248 Reprogramming the Security Key............................ 250 Shuttle Electrical Shorts Test............................252 Hammer Bank Power Cable Shorts Test......................... 253 Cable Shorts Test ................................
- Page 6 Fan Assembly, Cabinet Exhaust ..........................330 Fan Assembly, Card Cage ............................331 Fan Assembly, Hammer Bank ..........................332 Hammer Spring Assembly ............................333 IBM Coax/Twinax Expansion Board.......................... 337 Magnetic Pick-up (MPU) Assembly........................... 338 Memory Modules and Security Key .......................... 339 Motor Assembly, Paper Feed............................ 342 Motor Assembly, Platen Open ..........................
- Page 7 A Installing And Relocating The Printer ...............437 Installing And Configuring The Infoprint 6500 Printer ...................... 437 Relocating The Infoprint 6500 Printer ..........................437 B Communication Adapters ..................438 Contents ..................................438 Ethernet Interface Assembly............................439 Ethernet Troubleshooting Tips............................439 IBM Coax/Twinax Expansion Board ..........................444...
- Page 8 Table of Contents C Power Cords And Adapters..................445 D ASCII Codes ......................447 E SureStak** Power Stacker ..................451 Contents ..................................451 Introduction ..................................452 How To Operate The Power Stacker..........................453 Stacker Problems ................................459 Removing The Power Stacker ............................465 Installing The Power Stacker ............................
- Page 9 Table of Contents Cables....................................511 Printing Rates .................................. 512 G Metric Conversion Tables ..................515 Length ..................................515 Torque and Force..............................516 Mass and Density..............................516 Temperature................................517 Power ..................................517 H Torque Table ......................518 I Abbreviations ......................520...
-
Page 10: Energy Star
Any reference to an IBM product, program, or service is not intended to state or imply that only that IBM product, program, or service may be used. Any functionally equivalent product, program, or service that does not infringe any IBM intellectual property rights may be used instead. - Page 11 Any references in this information to non-IBM Web sites are provided for convenience only and do not in any manner serve as an endorsement of those Web sites. The materials at those Web sites are not part of the materials for this IBM product and use of those Web sites is at your own risk.
-
Page 12: Communication Statements
Properly shielded and grounded cables and connectors must be used in order to meet FCC emission limits. IBM is not responsible for any radio or television interference caused by using other than recommended cables and connectors or by unauthorized changes or modifications to this equipment. - Page 13 Properly shielded and grounded cables and connectors must be used in order to reduce the potential for causing interference to radio and TV communications and to other electrical or electronic equipment. Such cables and connectors are available from IBM authorized dealers. IBM cannot accept responsibility for any interference caused by using other than recommended cables and connectors.
- Page 14 Communication Statements Japanese JEITA Statement Taiwan Warning: This is a Class A product. In a domestic environment this product may cause radio interference in which case the user will be required to take adequate measures. Australia/New Zealand Attention: This is a Class A Product. In a domestic enviroment this product may cause radio interference in which case the user may be required to take adequate measures.
- Page 15 18. September 1998 (bzw. der EMC EG Richtlinie 89/336): Dieses Gerät ist berechtigt in Übereinstimmung mit dem deutschen das EG-Konformitätszeichen - CE - zu führen. Verantwortlich für die Konformitätserklärung nach Paragraph 5 des EMVG ist die IBM Deutschland Informationssysteme GmbH, 70548 Stuttgart.
-
Page 16: European Union (Ec) Electromagnetic Compatibility Directives
Properly shielded and grounded cables and connectors must be used to reduce the potential for causing interference to radio and TV communication and to other electrical or electronic equipment. IBM cannot be responsible for any interference caused by using other than recommended cables and connectors. -
Page 17: Electrical Safety
For your safety and to protect valuable equipment, always read and comply with all information highlighted under notes and notices: <#> This symbol indicates the presence of a hazard that could cause death or serious injury. Danger and Caution notices are numbered to help you find the translated versions in the IBM 6500 Safety Notices booklet. DANGER <#>... - Page 18 Safety And Notices <#> This symbol indicates a part or assembly that is hot enough to burn you. CAUTION <#> This symbol indicates a part or assembly that is sharp enough to cut you. CAUTION ATTENTION Attention indicates the possibility of damage to a device, program, system, or data. IMPORTANT Important indicates information vital to proper operation of the printer.
-
Page 19: Trademarks And Service Marks
Trademarks and Service Marks Trademarks and Service Marks The following terms are trademarks of IBM Corporation in the United States or other countries or both, and are designated by one asterisk ( * ) in this manual: AS/400 Infoprint Intelligent Printer Data Stream... - Page 20 Trademarks and Service Marks LinePrinter Plus, LP+ Printronix, Inc. MS-DOS Microsoft Corporation MTOS Industrial Programming, Inc. Printronix, Inc. PKZIP PKWARE, Inc. Printronix Printronix, Inc. PSA3 Printronix, Inc. Quality Micro Systems, Inc. RibbonMinder Printronix, Inc. SureStak Printronix, Inc. Torx Camcar/Textron Inc. Underwriter’s Laboratories, Inc.
-
Page 21: Safety Inspection
Preparation Safety Inspection Safety devices to protect customers, operators, and service personnel from injury are installed in all IBM printers. Use this inspection guide as an aid in identifying possible unsafe conditions in an Infoprint* 6500 printer. Do the inspection steps outlined in this section before the normal inspection for Maintenance Agreement Qualification, or any time you are instructed to make a safety inspection. -
Page 22: Inspect Mechanical Parts
Inspect Mechanical Parts 1. Have the operator take the printer off-line. 2. Power off the printer. 3. Unplug the printer power cord from the customer’s power outlet. Inspect Mechanical Parts Top Cover And Cabinet Doors 1. Inspect the top cover: a. -
Page 23: Inspect Electrical Parts
Inspect Electrical Parts Inspect Electrical Parts Safety Ground Path 1. Make sure the printer power cord is unplugged. 2. Cabinet Model: Remove the paper guide assembly (page 348). Pedestal Model: Remove the top cover assembly (page 327). 3. Make sure the ground cable from the circuit breaker power leads is undamaged and firmly attached to the ground lug on the wall of the card cage, as shown in Figure 1. - Page 24 Inspect Electrical Parts AC Power Primary Earth Ground On/Off Switch P101 +5V Remote N AC FAIL N STBY +5V RET / LOGIC GND +5V RET / LOGIC GND +5V RET / LOGIC GND +5V RET / LOGIC GND +8.5V +8.5V +48V +48V PSA3 Controller...
- Page 25 Inspect Electrical Parts Customer Power Source Service Check Use an ECOS Electrical Safety Tester (P/N 6339695) in the United States or a similar safety tester in other countries. NOTE: The ECOS tester will trip ground fault detector protected outlets. This is a good test of the ground fault detector. Reset the outlet as needed.
-
Page 26: Preface
THIS MANUAL IS INTENDED FOR USE BY TRAINED SERVICE PERSONNEL ONLY. About This Manual This is a field service maintenance manual for IBM Infoprint 6500 line matrix printers. Refer to the Table of Contents or the Index to locate the maintenance information you need. -
Page 27: Printing Conventions In This Manual
Printing Conventions In This Manual How To Order Parts Go to the Parts Catalog on page 390, which contains drawings of all printer assemblies. Locate the part you need. Following each illustration is a list of the parts shown and their part numbers. When locating parts, note the following: •... -
Page 28: Related Documents
IBM Infoprint 6500 Line Matrix Printer: Warranty Manual, Non-Americas G550-0424 IBM Infoprint 6500 Line Matrix Printer: Safety Manual, Worldwide G550-0418 IBM Infoprint 6500 Line Matrix Printer: Softcopy SOLW and User Documentation, Worldwide GK3T-9926 Printing Systems SOLW Customer Notice, Worldwide G550-0423... -
Page 29: About The Printer
About The Printer The entire system architecture of an IBM Infoprint 6500 line matrix printer is contained on a single controller board. The use of permanent SDRAM, replaceable flash memory, and PCI expansion slots on the controller board permits rapid access to stored printer emulations and fast processing of print data. -
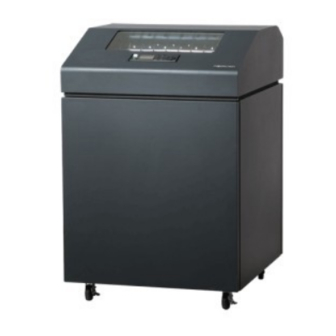
Page 30: How To Identify The Printer
How To Identify The Printer Table 1. The Infoprint 6500 Printer Family Print Speed of Model Number Enclosure Hammer Bank Draft Mode Text 6500-v05 500 LPM * Floor Cabinet 28 Hammers 6500-v5P 500 LPM Pedestal 28 Hammers 6500-v10 1000 LPM... -
Page 31: Printer Configuration Code
Printer Configuration Code Printer Configuration Code Every Infoprint printer has a configuration code which specifies the type of cabinet, the controller board revision level, the V8 ASIC revision level, and the MECA ASIC revision level. The configuration is included in the configuration printout. Figure 4 shows how to interpret the printer’s configuration code. -
Page 32: Forms Handling
Table 2. For more information about the power stacker, refer to Appendix E on page 451. Table 2. The Paper Stackers on Cabinet Models Fixed Paper Fence and Power Paper Printer Type Passive Paper Stacker Stacker 6500-v05 Standard Available 6500-v10 Standard Available 6500-v15 Standard Option... -
Page 33: Important Maintenance Notes
Important Maintenance Notes Important Maintenance Notes To ensure the best performance of the printer, remember these important maintenance principles when you service it: ATTENTION Failure to observe these guidelines can result in damage to the equipment. • Do not adjust the platen gap unless the original shuttle frame assembly or platen has been replaced with a new or rebuilt unit, or unless you are instructed to do so in a troubleshooting procedure. -
Page 34: Controls And Indicators
Electrical Controls: Figure 5 Controls And Indicators Electrical Controls: Figure 5 Key or Indicator Function MENU If the printer is in NOT READY mode, this key puts the printer into PROGRAM mode. If the configuration menus are locked, the LCD indicates the operator panel is locked. CONFIG Prints the current configuration. - Page 35 Electrical Controls: Figure 5 Key or Indicator Function START Puts the printer in READY mode. This key also clears fault conditions, exits PROGRAM mode menus, moves paper back to the print position after VIEW is pressed, and restores the print position after a form is ejected.
- Page 36 Electrical Controls: Figure 5 Rotated 180 Degrees (Off) (On) Status Lamp Power Switch Figure 5. This figure shows the locations of the electrical controls on floor cabinet and pedestal model printers.
-
Page 37: Mechanical Controls: Figure 6
Mechanical Controls: Figure 6 Mechanical Controls: Figure 6 Control or Indicator Function Paper Supports Help prevent paper jams by supporting the paper between the tractors. The supports are positioned manually by sliding them along the tractor shafts. Forms Thickness Lever Sets the platen for paper and forms of different thicknesses. - Page 38 Mechanical Controls: Figure 6 Paper Supports Right Tractor Left Tractor Tractor Lock Tractor Lock Vertical Position Knob Forms Thickness Lever and Scale Platen Stop Ribbon Loading Path Diagram Figure 6. This figure shows the locations of the mechanical controls on on floor cabinet and pedestal model printers.
-
Page 39: Diagnosing Problems
Diagnosing Problems Introduction This chapter lists fault messages and symptoms, and gives procedures for troubleshooting printer malfunctions. You must operate the printer to check its performance and you may have to reconfigure it. This manual does not cover printer operation or configuration, so always have the User’s Manual handy when you troubleshoot. Troubleshooting At A Glance ... -
Page 40: Start Of Call
Chapter Start Of Call Start Of Call Are you here because of an Go to Troubleshooting Display error message? Messages, page 42. Did the status lamp come on and READY Power on the printer and appear on the observe the operator panel for IML was display? (If the following sequence of... -
Page 41: How To Troubleshoot
How To Troubleshoot <3> Hazardous voltages are present in the printer with the power cord connected to the power source. Switch off printer power and unplug the printer power cord before proceeding. <4> Do not connect or disconnect any communication port, teleport, attachment connector, or power cord during an electrical storm. -
Page 42: Troubleshooting Display Messages
Chapter Troubleshooting Display Messages Troubleshooting Display Messages If a fault condition occurs in the printer, three things happen: • The status indicator on the operator panel flashes on and off. • A message describing the fault condition appears on the LCD. •... - Page 43 Do the following: 8. Save the printer configuration values. (Refer to the User’s Manual .) 9. Clear NVRAM (page 237). 10. Download and install the latest code from IBM First (page 231).
- Page 44 DO NOT make the printer READY, but proceed immediately to the next step. 12. Download and install the latest code from IBM First (page 231). 13. Power on the printer in download mode and load flash memory (page 238).
- Page 45 Display Messages Table 3. Message List Operator Panel Message Explanation Corrective Action 002 FORM JAMMED Attention message: the printer 1. Clear jams. Load paper. CLEAR AND RELOAD FORM cannot detect paper motion. 2. Press FORM FEED several times and check that forms feed Inspect the paper path for jams.
- Page 46 12. Save the printer configuration values. (Refer to the User’s Manual .) 13. Clear NVRAM (page 237). 14. Download and install the latest code from IBM First (page 231). 15. Power on the printer in download mode and load flash memory (page 238).
- Page 47 Display Messages Table 3. Message List Operator Panel Message Explanation Corrective Action 006 HOST SYSTEM Host attention message: the host Not a printer problem. REQUEST ATTENTION computer or printer controller requires attention. 007 FM HEADER ERROR Applications software has violated Not a printer problem.
-
Page 48: Communications Failures
Chapter Troubleshooting Display Messages Table 3. Message List Operator Panel Message Explanation Corrective Action 012 STRUCTURED FLD ERROR Application software has violated Not a printer problem. Have the system administrator correct structured data field parameters. applications data or configuration. 013 ACTIVATE LOST The printer detects a twinax 1. - Page 49 Display Messages Table 3. Message List Operator Panel Message Explanation Corrective Action 015 COMMUNICATION CHECK The line is not active on a twinax 1. Power off and unplug the printer. Check the twinax host data CHECK CABLE interface. cable connection and twinax I/O cable connection at the CT board.
- Page 50 Chapter Troubleshooting Display Messages Table 3. Message List Operator Panel Message Explanation Corrective Action 017 STACKER JAM This message is triggered if there 1. Open the cabinet rear door and check for obstructions preventing CHECK STACKER is paper inside the throat of the elevator movement.
- Page 51 7. Save the printer configuration values. (Refer to the User’s Manual .) 8. Clear NVRAM (page 237). 9. Download and install the latest code from IBM First (page 231). 10. Power on the printer in download mode and load flash memory (page 238).
- Page 52 DO NOT make the printer READY, but proceed immediately to the next step. 11. Download and install the latest code from IBM First (page 231). 12. Power on the printer in download mode and load flash memory (page 238).
- Page 53 Display Messages Table 3. Message List Operator Panel Message Explanation Corrective Action 024 SERIAL PARITY ERROR The printed output may contain 1. Make a configuration printout. Verify that the printer matches host random ? (question mark) serial configuration settings for Data Protocol, Baud Rate, Data characters.
- Page 54 Chapter Troubleshooting Display Messages Table 3. Message List Operator Panel Message Explanation Corrective Action 028 COMMUNICATIONS CHECK Poll timeout error. The printer was Power off and unplug the printer Check data cable connection and CALL SYSTEM OPERATOR not polled for one minute over a host system.
- Page 55 7. Save the printer configuration values. (Refer to the User’s Manual .) 8. Clear NVRAM (page 237). 9. Download and install the latest code from IBM First (page 231). 10. Power on the printer in download mode and load flash memory (page 238).
- Page 56 DO NOT make the printer READY, but proceed immediately to the next step 11. Download and install the latest code from IBM First (page 231). 12. Power on the printer in download mode and load flash memory (page 238).
- Page 57 Display Messages Table 3. Message List Operator Panel Message Explanation Corrective Action 032 FORMS JAMMED TIMEOUT On a coax interface, a timeout 1. Clear the paper jam. Press STOP. CLEAR AND RELOAD FORMS message is sent to the host if 2.
- Page 58 12. Save the printer configuration values. (Refer to the User’s Manual .) 13. Clear NVRAM (page 237). 14. Download and install the latest code from IBM First (page 231). 15. Power on the printer in download mode and load flash memory (page 238).
- Page 59 Display Messages Table 3. Message List Operator Panel Message Explanation Corrective Action 041 BUFFER OVERFLOW The print buffer has overflowed on 1. Make a configuration printout. Verify that the printer matches the a serial interface. The printed host serial interface configuration settings for Data Protocol, Baud output may contain random * Rate, Data Bits, Stop Bits, Parity, Data Terminal Ready, and (asterisk) characters.
- Page 60 5. Clear NVRAM (page 237). code from IBM First (page 231), 6. Download and install the latest code from IBM First (page 231). then power on in download mode and load the flash memory (page 7. Power on the printer in download mode and load flash memory 238).
- Page 61 Manual .) 238). 6. Clear NVRAM (page 237). 7. Download and install the latest code from IBM First (page 231). 8. Power on the printer in download mode and load flash memory (page 238). a. If you encounter loading problems, go to the appropriate error code for resolution.
- Page 62 4. Save the printer configuration values. (Refer to the User’s Manual .) 5. Clear NVRAM (page 237). 6. Download and install the latest code from IBM First (page 231). 7. Power on the printer in download mode and load flash memory (page 238).
- Page 63 7. Save the printer configuration values. (Refer to the User’s Manual .) 8. Clear NVRAM (page 237). 9. Download and install the latest code from IBM First (page 231). 10. Power on the printer in download mode and load flash memory (page 238).
- Page 64 Chapter Troubleshooting Display Messages Table 3. Message List Operator Panel Message Explanation Corrective Action 057 CLOSE PLATEN (continued) 12. Power on the printer in download mode and load flash memory (page 238). 13. If you encounter the failure after replacing the controller board, reinstall the original controller board and contact your DDS and Second Level Support.
- Page 65 9. Save the printer configuration values. (Refer to the User’s Manual .) 10. Clear NVRAM (page 237). 11. Download and install the latest code from IBM First (page 231). 12. Power on the printer in download mode and load flash memory (page 238).
- Page 66 7. Clear NVRAM (page 237). above 40° Celsius (104° 8. Download and install the latest code from IBM First (page 231). Fahrenheit) or is dirty enough to 9. Power on the printer in download mode and load flash memory create blockage of the cabinet fan (page 238).
- Page 67 8. Power on the printer. If the problem reappears, the controller board or microcode is suspect. Do the following: 9. Save the printer configuration values. (Refer to the User’s Manual .) 10. Clear NVRAM (page 237). 11. Download and install the latest code from IBM First (page 231).
- Page 68 DO NOT make the printer READY, but proceed immediately to the next step. 13. Download and install the latest code from IBM First (page 231). 14. Power on the printer in download mode and load flash memory (page 238).
- Page 69 8. Save the printer configuration values. (Refer to the User’s Manual .) 9. Clear NVRAM (page 237). 10. Download and install the latest code from IBM First (page 231). 11. Power on the printer in download mode and load flash memory (page 238).
- Page 70 Chapter Troubleshooting Display Messages Table 3. Message List Operator Panel Message Explanation Corrective Action 069 DATA CLEARED This message appears when data No action required. are cleared out of printer after the CANCEL key has been pressed.
- Page 71 Do the following: area. 9. Save the printer configuration values. (Refer to the User’s Manual .) 10. Clear NVRAM (page 237). 11. Download and install the latest code from IBM First (page 231).
- Page 72 DO NOT make the printer READY, but proceed immediately to the next step. 13. Download and install the latest code from IBM First (page 231). 14. Power on the printer in download mode and load flash memory (page 238).
- Page 73 4. Save the printer configuration values. (Refer to the User’s Manual .) 5. Clear NVRAM (page 237). 6. Download and install the latest code from IBM First (page 231). 7. Power on the printer in download mode and load flash memory (page 238).
- Page 74 4. Save the printer configuration values. (Refer to the User’s Manual .) 5. Clear NVRAM (page 237). 6. Download and install the latest code from IBM First (page 231). 7. Power on the printer in download mode and load flash memory (page 238).
- Page 75 8. Save the printer configuration values. (Refer to the User’s Manual .) 9. Clear NVRAM (page 237). 10. Download and install the latest code from IBM First (page 231). 11. Power on the printer in download mode and load flash memory (page 238).
- Page 76 Display Messages Table 3. Message List Operator Panel Message Explanation Corrective Action 083 INTAKE FAN CHECK * 13. Power on the printer in download mode and load flash memory SEE USERS MANUAL (continued) (page 238). If you encounter the failure after replacing the controller board, reinstall the original controller board and contact your DDS and Second Level Support.
- Page 77 Display Messages Table 3. Message List Operator Panel Message Explanation Corrective Action 084 POWER 48V CHECK * a. If the printer comes to READY, go to step 13. SEE USERS MANUAL (continued) b. If the 084 message appears, power off , unplug the printer, and go to step 8.
- Page 78 Display Messages Table 3. Message List Operator Panel Message Explanation Corrective Action 084 POWER 48V CHECK * Plug in the printer and power it on. If the operator panel lights SEE USERS MANUAL (continued) up, the PS +5V is working. If the CCF runs momentarily (about 2 seconds), the PS +48V is working.
- Page 79 Display Messages Table 3. Message List Operator Panel Message Explanation Corrective Action 084 POWER 48V CHECK * SEE USERS MANUAL(continued) <3> Hazardous voltages are present in the printer with the power cord connected to the power source. Switch off printer power and unplug the the printer power cord before proceeding.
- Page 80 Display Messages Table 3. Message List Operator Panel Message Explanation Corrective Action 084 POWER 48V CHECK * SEE USERS MANUAL (continued) Disconnect Plug under Expected Fan result if Expected Operator test. All others are Comments +48 V is OK Panel Result connected.
- Page 81 Display Messages Table 3. Message List Operator Panel Message Explanation Corrective Action 084 POWER 48V CHECK * SEE USERS MANUAL (continued) Disconnect Plug under Expected Fan result if Expected Operator test. All others are Comments +48 V is OK Panel Result connected.
- Page 82 5. Save the printer configuration values. (Refer to the User’s Manual .) 6. Clear NVRAM (page 237). 7. Download and install the latest code from IBM First (page 231). 8. Power on the printer in download mode and load flash memory (page 238).
- Page 83 Display Messages Table 3. Message List Operator Panel Message Explanation Corrective Action 086 CONTROL 15V CHECK Controller voltage failure. 1. Make a configuration printout and note the customer’s code load SEE USERS MANUAL (if possible). 2. Power down and unplug the printer. 3.
- Page 84 NOTE: If Level 2 directs you to replace the controller board remember that you must power up in download mode, obtain the latest code from IBM First (page 231), then load flash memory (page 238). 11. Power on the printer. If the problem persists, replace the shuttle...
- Page 85 Do the following: 8. Save the printer configuration values. (Refer to the User’s Manual .) 9. Clear NVRAM (page 237). 10. Download and install the latest code from IBM First (page 231).
- Page 86 DO NOT make the printer READY, but proceed immediately to the next step. 12. Download and install the latest code from IBM First (page 231). 13. Power on the printer in download mode and load flash memory (page 238).
- Page 87 7. Save the printer configuration values. (Refer to the User’s Manual .) 8. Clear NVRAM (page 237). 9. Download and install the latest code from IBM First (page 231). 10. Power on the printer in download mode and load flash memory (page 238).
- Page 88 2. Save the printer configuration values. (Refer to the User’s Manual .) 3. Clear NVRAM (page 237). 4. Download and install the latest code from IBM First (page 231). 5. Power on the printer in download mode and load flash memory (page 238).
- Page 89 12. Save the printer configuration values. (Refer to the User’s Manual .) 13. Clear NVRAM (page 237). 14. Download and install the latest code from IBM First (page 231). 15. Power on the printer in download mode and load flash memory (page 238).
- Page 90 5. Save the printer configuration values. (Refer to the User’s Manual .) 6. Clear NVRAM (page 237). 7. Download and install the latest code from IBM First (page 231). 8. Power on the printer in download mode and load flash memory (page 238).
- Page 91 3. Save the printer configuration values. (Refer to the User’s Manual .) 4. Clear NVRAM (page 237). 5. Download and install the latest code from IBM First (page 231). 6. Power on the printer in download mode and load flash memory (page 238).
- Page 92 3. Save the printer configuration values. (Refer to the User’s Manual .) 4. Clear NVRAM (page 237). 5. Download and install the latest code from IBM First (page 231). 6. Power on the printer in download mode and load flash memory (page 238).
- Page 93 3. Save the printer configuration values. (Refer to the User’s Manual .) 4. Clear NVRAM (page 237). 5. Download and install the latest code from IBM First (page 231). 6. Power on the printer in download mode and load flash memory (page 238).
- Page 94 3. Save the printer configuration values. (Refer to the User’s Manual .) 4. Clear NVRAM (page 237). 5. Download and install the latest code from IBM First (page 231). 6. Power on the printer in download mode and load flash memory (page 238).
- Page 95 3. Save the printer configuration values. (Refer to the User’s Manual .) 4. Clear NVRAM (page 237). 5. Download and install the latest code from IBM First (page 231). 6. Power on the printer in download mode and load flash memory (page 238).
- Page 96 3. Save the printer configuration values. (Refer to the User’s Manual .) 4. Clear NVRAM. (page 237) 5. Download and install the latest code from IBM First (page 231). 6. Power on the printer in download mode and load flash memory (page 238).
- Page 97 3. Save the printer configuration values. (Refer to the User’s Manual .) 4. Clear NVRAM (page 237). 5. Download and install the latest code from IBM First (page 231). 6. Power on the printer in download mode and load flash memory (page 238).
- Page 98 3. Save the printer configuration values. (Refer to the User’s Manual .) 4. Clear NVRAM (page 237). 5. Download and install the latest code from IBM First (page 231). 6. Power on the printer in download mode and load flash memory (page 238).
- Page 99 3. Save the printer configuration values. (Refer to the User’s Manual .) 4. Clear NVRAM (page 237). 5. Download and install the latest code from IBM First (page 231). 6. Power on the printer in download mode and load flash memory (page 238).
- Page 100 3. Save the printer configuration values. (Refer to the User’s Manual .) 4. Clear NVRAM (page 237). 5. Download and install the latest code from IBM First (page 231). 6. Power on the printer in download mode and load flash memory (page 238).
- Page 101 3. Save the printer configuration values. (Refer to the User’s Manual .) 4. Clear NVRAM (page 237). 5. Download and install the latest code from IBM First (page 231). 6. Power on the printer in download mode and load flash memory (page 238).
- Page 102 3. Save the printer configuration values. (Refer to the User’s Manual .) 4. Clear NVRAM (page 237). 5. Download and install the latest code from IBM First (page 231). 6. Power on the printer in download mode and load flash memory (page 238).
- Page 103 4. Save the printer configuration values. (Refer to the User’s Manual .) 5. Clear NVRAM (page 237). 6. Download and install the latest code from IBM First (page 231). 7. Power on the printer in download mode and load flash memory (page 238).
- Page 104 6. Save the printer configuration values. (Refer to the User’s Manual .) 7. Clear NVRAM (page 237). 8. Download and install the latest code from IBM First (page 231). 9. Power on the printer in download mode and load flash memory (page 238).
- Page 105 3. Save the printer configuration values. (Refer to the User’s Manual .) 4. Clear NVRAM (page 237). 5. Download and install the latest code from IBM First (page 231). 6. Power on the printer in download mode and load flash memory (page 238).
- Page 106 8. Save the printer configuration values. (Refer to the User’s Manual .) 9. Clear NVRAM (page 237). 10. Download and install the latest code from IBM First (page 231). 11. Power on the printer in download mode and load flash memory (page 238).
- Page 107 Operator Panel Message Explanation Corrective Action 125 PAP FIFO UNDERFLOW * 12. Download and install the latest code from IBM First (page 231). SEE USERS MANUAL (continued) 13. Power on the printer in download mode, and load flash memory (page 238).
- Page 108 4. Clear NVRAM (page 237). Record the message and return it 5. Download and install the latest code from IBM First (page 231). with the defective board. After 6. Power on the printer in download mode and load flash memory replacing the controller board, DO (page 238).
- Page 109 3. Save the printer configuration values. (Refer to the User’s Manual .) 4. Clear NVRAM (page 237). 5. Download and install the latest code from IBM First (page 231). 6. Power on the printer in download mode and load flash memory (page 238).
- Page 110 3. Save the printer configuration values. (Refer to the User’s Manual .) 4. Clear NVRAM (page 237). 5. Download and install the latest code from IBM First (page 231). 6. Power on the printer in download mode and load flash memory (page 238).
- Page 111 3. Save the printer configuration values. (Refer to the User’s Manual .) 4. Clear NVRAM (page 237). 5. Download and install the latest code from IBM First (page 231). 6. Power on the printer in download mode and load flash memory (page 238).
- Page 112 3. Save the printer configuration values. (Refer to the User’s Manual .) 4. Clear NVRAM (page 237). 5. Download and install the latest code from IBM First (page 231). 6. Power on the printer in download mode and load flash memory (page 238).
- Page 113 3. Save the printer configuration values. (Refer to the User’s Manual .) 4. Clear NVRAM (page 237). 5. Download and install the latest code from IBM First (page 231). 6. Power on the printer in download mode and load flash memory (page 238).
- Page 114 3. Save the printer configuration values. (Refer to the User’s Manual .) 4. Clear NVRAM (page 237). 5. Download and install the latest code from IBM First (page 231). 6. Power on the printer in download mode and load flash memory (page 238).
- Page 115 3. Save the printer configuration values. (Refer to the User’s Manual .) 4. Clear NVRAM (page 237). 5. Download and install the latest code from IBM First (page 231). 6. Power on the printer in download mode and load flash memory (page 238).
- Page 116 3. Save the printer configuration values. (Refer to the User’s Manual .) 4. Clear NVRAM (page 237). 5. Download and install the latest code from IBM First (page 231). 6. Power on the printer in download mode and load flash memory (page 238).
- Page 117 4. Save the printer configuration values. (Refer to the User’s Manual .) 5. Clear NVRAM (page 237). 6. Download and install the latest code from IBM First (page 231). 7. Power on the printer in download mode and load flash memory (page 238).
- Page 118 4. Save the printer configuration values. (Refer to the User’s Manual .) 5. Clear NVRAM (page 237). 6. Download and install the latest code from IBM First (page 231). 7. Power on the printer in download mode and load flash memory (page 238).
- Page 119 5. Save the printer configuration values. (Refer to the User’s Manual .) 6. Clear NVRAM (page 237). 7. Download and install the latest code from IBM First (page 231). 8. Power on the printer in download mode and load flash memory (page 238).
- Page 120 4. Save the printer configuration values. (Refer to the User’s Manual .) 5. Clear the NVRAM. 6. Download and install the latest code from IBM First (page 231). 7. Power on the printer in download mode and load flash memory (page 238).
- Page 121 3. Save the printer configuration values. (Refer to the Setup Guide .) 4. Clear NVRAM (page 237). 5. Download and install the latest code from IBM First (page 231). 6. Power on the printer in download mode and load flash memory (page 238).
- Page 122 4. Save the printer configuration values. (Refer to the User’s Manual .) 5. Clear NVRAM (page 237). 6. Download and install the latest code from IBM First (page 231). 7. Power on the printer in download mode and load flash memory (page 238).
- Page 123 8. Save the printer configuration values. (Refer to the User’s Manual .) 9. Clear NVRAM (page 237). 10. Download and install the latest code from IBM First (page 231). 11. Power on the printer in download mode and load flash memory (page 238).
- Page 124 Display Messages Table 3. Message List Operator Panel Message Explanation Corrective Action 146 RIBBON INK OUT RibbonMinder** software has Install a new IBM ribbon. CHANGE RIBBON determined that the ribbon is out of ink.
- Page 125 Fahrenheit). If the printer is 11. Clear NVRAM (page 237). located in such an environment, 12. Download and install the latest code from IBM First (page 231). relocate it to a cooler, cleaner area, or reduce the size and duration of the print jobs.
- Page 126 DO NOT make the printer READY, but proceed immediately to the next step. 14. Download and install the latest code from IBM First (page 231). 15. Power on the printer in download mode and load flash memory (page 238).
- Page 127 4. Save the printer configuration values. (Refer to the User’s Manual .) 5. Clear NVRAM (page 237). 6. Download and install the latest code from IBM First (page 231). 7. Power on the printer in download mode and load flash memory (page 238).
- Page 128 8. Save the printer configuration values. (Refer to the User’s Manual .) 9. Clear NVRAM (page 237). 10. Download and install the latest code from IBM First (page 231). 11. Power on the printer in download mode and load flash memory (page 238).
- Page 129 8. Save the printer configuration values. (Refer to the User’s Manual .) 9. Clear NVRAM (page 237). 10. Download and install the latest code from IBM First (page 231). 11. Power on the printer in download mode and load flash memory (page 238).
- Page 130 Display Messages Table 3. Message List Operator Panel Message Explanation Corrective Action 164 ERROR: SDRAM The JEDEC table in the SDRAM Cycle power. If the message appears, replace the controller board. JEDEC MISSING DIMM is missing, corrupted, or defective. The printer uses this table to identify the SDRAM.
- Page 131 5. Save the printer configuration values. (Refer to the User’s Manual .) 6. Clear NVRAM (page 237). 7. Download and install the latest code from IBM First (page 231). 8. Power on the printer in download mode and load flash memory (page 238).
- Page 132 4. Save the printer configuration values. (Refer to the User’s Manual .) 5. Clear NVRAM (page 237). 6. Download and install the latest code from IBM First (page 231). 7. Power on the printer in download mode and load flash memory (page 238).
- Page 133 Display Messages Table 3. Message List Operator Panel Message Explanation Corrective Action 174 ERROR OCCURRED An interim message that displays Wait. When the asterisk (*) stops rotating, a different fault message FLUSHING QUEUES* while the printer discards host will appear: troubleshoot the final message. data it cannot use because a fault condition exists.
- Page 134 4. Save the printer configuration values. (Refer to the User’s Manual .) 5. Clear NVRAM (page 237). 6. Download and install the latest code from IBM First (page 231). 7. Power on the printer in download mode and load flash memory (page 238).
- Page 135 Display Messages Table 3. Message List Operator Panel Message Explanation Corrective Action 180 ETHERNET ADDRESS The ethernet PCBA did not 1. Verifty that there is a NIC installed. ADAPTER NOT INSTALLED initialize correctly. 2. If there is a NIC installed, power off the printer and remove the paper guide assembly or top cover assembly.
- Page 136 3. Save the printer configuration values. (Refer to the User’s Manual .) 4. Clear NVRAM (page 237). 5. Download and install the latest code from IBM First (page 231). 6. Power on the printer in download mode and load flash memory (page 238).
- Page 137 4. Save the printer configuration values. (Refer to the User’s Manual .) 5. Clear NVRAM (page 237). 6. Download and install the latest code from IBM First (page 231). 7. Power on the printer in download mode and load flash memory (page 238).
-
Page 138: Operator Panel Message 301 - 305
Operator Panel Message Explanation Corrective Action 301 RIBBON INK LOW Status message indicating the Install a new IBM ribbon. INSTALL NEW IBM RIBBON RibbonMinder feature is enabled and the ribbon ink level is 2%. 302 EXCESSIVE RIBBON WEAR Status message that displays Install a new IBM ribbon. - Page 139 Operator Panel Message Explanation Corrective Action 306 UNKNOWN RIBBON The sensor detects a bar code, Install a new IBM ribbon. INSTALL NEW IBM RIBBON but the OEM ribbon model is not permitted on this printer. 307 UNKNOWN RIBBON The sensor detects a bar code, Install a new IBM ribbon.
- Page 140 Display Messages Table 3. Message List Operator Panel Message Explanation Corrective Action B19 ERROR: This message indicates an Cycle power. If the message appears again contact the printer DC RETURNED* incorrectly assembled and tested manufacturer and report this message. machine. B20: STATUS 00% Status message informing the No action required.
- Page 141 4. Save the printer configuration values. (Refer to the User’s Manual .) 5. Clear NVRAM (page 237). 6. Download and install the latest code from IBM First (page 231). 7. Power on the printer in download mode and load flash memory (page 238).
- Page 142 4. Save the printer configuration values. (Refer to the User’s Manual .) 5. Clear NVRAM (page 237). 6. Download and install the latest code from IBM First (page 231). 7. Power on the printer in download mode and load flash memory (page 238).
- Page 143 4. Save the printer configuration values. (Refer to the User’s Manual .) 5. Clear NVRAM (page 237). 6. Download and install the latest code from IBM First (page 231). 7. Power on the printer in download mode and load flash memory (page 238).
- Page 144 2. Save the printer configuration values. (Refer to the User’s Manual .) 3. Clear NVRAM (page 237). 4. Download and install the latest code from IBM First (page 231). 5. Power on the printer in download mode and load flash memory (page 238).
- Page 145 2. Save the printer configuration values. (Refer to the User’s Manual .) 3. Clear NVRAM (page 237). 4. Download and install the latest code from IBM First (page 231). 5. Power on the printer in download mode and load flash memory (page 238).
- Page 146 2. Save the printer configuration values. (Refer to the User’s Manual .) 3. Clear NVRAM (page 237). 4. Download and install the latest code from IBM First (page 231). 5. Power on the printer in download mode and load flash memory (page 238).
- Page 147 2. Save the printer configuration values. (Refer to the User’s Manual .) 3. Clear NVRAM (page 237). 4. Download and install the latest code from IBM First (page 231). 5. Power on the printer in download mode and load flash memory (page 238).
- Page 148 2. Save the printer configuration values. (Refer to the User’s Manual .) 3. Clear NVRAM (page 237). 4. Download and install the latest code from IBM First (page 231). 5. Power on the printer in download mode and load flash memory (page 238).
- Page 149 (page 319). After replacing the controller board, DO NOT make the printer READY, but proceed immediately to the next step. 2. Download and install the latest code from IBM First (page 231). 3. Power on the printer in download mode, and load flash memory (page 238).
- Page 150 6. Save the printer configuration values. (Refer to the User’s Manual .) 7. Clear NVRAM (page 237). 8. Download and install the latest code from IBM First (page 231). 9. Power on the printer in download mode and load flash memory (page 238).
- Page 151 Display Messages Table 3. Message List Operator Panel Message Explanation Corrective Action ENERGY SAVER MODE Status message: the printer is in No action required. low-energy idle state, all fans and higher voltages are off, only +5VDC logic circuits are active. The Ethernet PCBA did not 1.
- Page 152 2. Save the printer configuration values. (Refer to the User’s Manual .) 3. Clear NVRAM (page 237). 4. Download and install the latest code from IBM First (page 231). 5. Power on the printer in download mode and load flash memory (page 238).
- Page 153 2. Save the printer configuration values. (Refer to the User’s Manual .) 3. Clear NVRAM (page 237). 4. Download and install the latest code from IBM First (page 231). 5. Power on the printer in download mode and load flash memory (page 238).
- Page 154 Explanation Corrective Action ERROR: EC PROGRAM The printer cannot find the engine 1. Download the latest code from IBM First (page 231) and load NOT VALID controller program or the flash memory (page 238). If the message occurs again, replace validation checksum is corrupt.
- Page 155 8. Save the printer configuration values. (Refer to the User’s Manual .) 9. Clear NVRAM (page 237). 10. Download and install the latest code from IBM First (page 231). 11. Power on the printer in download mode and load flash memory (page 238).
- Page 156 6. Save the printer configuration values. (Refer to the User’s Manual .) 7. Clear NVRAM (page 237). 8. Download and install the latest code from IBM First (page 231). 9. Power on the printer in download mode and load flash memory (page 238).
- Page 157 DO NOT make the printer READY, but proceed immediately to the next step. 9. Download and install the latest code from IBM First (page 231). 10. Power on the printer in download mode, and load flash memory (page 238).
- Page 158 6. Save the printer configuration values. (Refer to the User’s Manual .) 7. Clear NVRAM (page 237). 8. Download and install the latest code from IBM First (page 231). 9. Power on the printer in download mode and load flash memory (page 238).
- Page 159 4. Save the printer configuration values. (Refer to the User’s Manual .) 5. Clear NVRAM (page 237). 6. Download and install the latest code from IBM First (page 231). 7. Power on the printer in download mode and load flash memory (page 238).
- Page 160 6. Save the printer configuration values. (Refer to the User’s Manual .) 7. Clear NVRAM (page 237). 8. Download and install the latest code from IBM First (page 231). 9. Power on the printer in download mode and load flash memory (page 238).
- Page 161 4. Save the printer configuration values. (Refer to the User’s Manual .) 5. Clear NVRAM (page 237). 6. Download and install the latest code from IBM First (page 231). 7. Power on the printer in download mode and load flash memory (page 238).
- Page 162 4. Save the printer configuration values. (Refer to the User’s Manual .) 5. Clear NVRAM (page 237). 6. Download and install the latest code from IBM First (page 231). 7. Power on the printer in download mode and load flash memory (page 238).
- Page 163 DO NOT make the printer READY, but proceed immediately to the next step. 10. Download and install the latest code from IBM First (page 231). 11. Power on the printer in download mode, and load flash memory (page 238).
- Page 164 Display Messages Table 3. Message List Operator Panel Message Explanation Corrective Action NOT READY Printer state message: printer is No action required. offline, not in communication with host. ONLINE Poll time-out of the controller unit. Check cable connection and host system. (Refer to line problem CU TIMED OUT The printer was not polled for one determination procedures, as recommended by the host system.)
- Page 165 Operator Panel Message Explanation Corrective Action P00 ERROR: Firmware error on the controller 1. Download the latest code from IBM First (page 231). If the SYSTEM FAULT board. message appears, replace the flash memory with blank flash containing boot code.
- Page 166 2. Save the printer configuration values. (Refer to the User’s Manual .) 3. Clear NVRAM (page 237). 4. Download and install the latest code from IBM First (page 231). 5. Power on the printer in download mode and load flash memory (page 238).
- Page 167 238). Manual .) 7. Clear NVRAM (page 237). 8. Download and install the latest code from IBM First (page 231). 9. Power on the printer in download mode and load flash memory (page 238). a. If you encounter loading problems, go to the appropriate error code for resolution.
- Page 168 Display Messages Table 3. Message List Operator Panel Message Explanation Corrective Action P69 ERROR: 11. Power on the printer in download mode and load flash memory EC STOPPED AT STATE XXXX (page 238). (continued) 12. If you encounter the failure after replacing the controller board, reinstall the original controller board and contact your DDS and Second Level Support.
- Page 169 Display Messages Table 3. Message List Operator Panel Message Explanation Corrective Action SPX NOT NEEDED The user has attempted to use the 1. Remove the SPX from the RJ-12 Debug Port. OPTIONS ENABLED SPX to turn on printer options that 2.
-
Page 170: Troubleshooting Other Symptoms
Display Messages Troubleshooting Other Symptoms <3> Hazardous voltages are present in the printer with the power cord connected to the power source. Switch off printer power and unplug the printer power cord before proceeding. <4> Do not connect or disconnect any communication port, teleport, attachment connector, or power cord during an electrical storm. -
Page 171: Communication Problems
Communication Problems Communication Problems Many host-printer communication problems are complex. With the exception of a defective interface cable, most communications problems are not a result of a hardware failure. They usually result from an incompatible configuration of the host computer system, network (LAN, print server, controller, multiplexer, etc.), or the printer. Sometimes the print application program itself is at fault. - Page 172 Communication Problems Table 4. Common Communications Problems Problem Interface Common Causes Prints incorrect characters - Host/Printer interface cable pinouts incompatible serial - Host/Printer/Network configuration -or- - Set DTR = READY BUFFER NOT FULL; RTS = TRUE - Interface cable defective - Printer logic - Incorrect printer configuration.
- Page 173 Communication Problems Table 4. Common Communications Problems Problem Interface Common Causes Cannot access the printer through ethernet If the ethernet port is not enabled, the following message will occur PMU over an Ethernet Interface when you try to connect to a printer: “The network address given in the printer properties was reached, but the printer port is busy.
-
Page 174: Device Handshaking
Communication Problems Table 4. Common Communications Problems Problem Interface Common Causes Cannot access the printer through ethernet 12. Press STOP to exit the menu and put the printer in the NOT PMU over an Ethernet Interface READY state. (continued from previous page) 13. - Page 175 Communication Problems When the printer is first turned on, it resets itself to the following default serial communication parameters: PARAMETER DEFAULT VALUE Baud 9600 Data Bits Parity NONE Stop Bits Use the Serial Port configuration menu to change serial interface parameters. (Refer to the User’s Manual .)
-
Page 176: General Symptom List
6. Save the printer configuration values. (Refer to the User’s Manual .) 7. Clear NVRAM (page 237). 8. Download and install the latest code from IBM First (page 231). 9. Power on the printer in download mode and load flash memory (page 238). - Page 177 General Symptom List Table 5. General Symptom List Symptom Corrective Action CLEAR JAM message will not clear 1. Power off and unplug the printer. Remove the paper guide assembly or pedestal top cover. Make and paper does not move sure connector P107/PAPR M is fully seated in connector J107 on the controller board. For -v20 models, check connector J103 on the controller board.
- Page 178 CLEAR JAM message will not clear 9. Clear NVRAM (page 237). and paper does not move 10. Download and install the latest code from IBM First (page 231). (continued) 11. Power on the printer in download mode and load flash memory (page 238).
- Page 179 7. Save the printer configuration values. (Refer to the User’s Manual .) 8. Clear NVRAM (page 237). 9. Download and install the latest code from IBM First (page 231). 10. Power on the printer in download mode and load flash memory (page 238).
-
Page 180: Operator Panel
(page 319). After replacing the controller board, do NOT make the printer READY, but proceed immediately to the next step. 9. Download and install the latest code from IBM First (page 231). 10. Power on the printer in download mode and load flash memory (page 238). - Page 181 DO NOT make the printer READY, but proceed immediately to the next step. 7. Download and install the latest code from IBM First (page 231). 8. Power on the printer in download mode and load flash memory (page 238).
- Page 182 9. Save the printer configuration values. (Refer to the User’s Manual .) 10. Clear NVRAM (page 237). 11. Download and install the latest code from IBM First (page 231). 12. Power on the printer in download mode and load flash memory (page 238).
- Page 183 (page 319). After replacing the controller board, DO NOT make the printer READY, but proceed immediately to the next step. 4. Download and install the latest code from IBM First (page 231). 5. Power on the printer in download mode and load flash memory (page 238).
- Page 184 DDS and Second Level Support. Printer loops IML 1. If the printer is using the Ethernet NIC, download the latest code from IBM First (page 231). 2. Go to “Printer does not complete IML” (page 185).
- Page 185 4. Save the printer configuration values. (Refer to the User’s Manual .) 5. Clear NVRAM (page 237). 6. Download and install the latest code from IBM First (page 231). 7. Power on the printer in download mode and load flash memory (page 238).
- Page 186 Symptom Corrective Action Printer Power On Resets (POR) by 1. Download the latest code from IBM First (page 231). Power on the printer in download mode and itself load flash memory (page 238). 2. Verify that the customer’s power supply is within the specification of the printer.
-
Page 187: Power Stacker
General Symptom List Table 5. General Symptom List Symptom Corrective Action Power Stacker Printer does not detect presence of 1. Check that the power stacker is enabled under the Printer Control menu. (Refer to the User’s power stacker Manual.) If the power stacker enable/disable option does not appear in the menu, go to the next step. - Page 188 Printer does not detect presence of 8. Clear NVRAM (page 237). power stacker 9. Download and install the latest code from IBM First (page 231). 10. Power on the printer in download mode and load flash memory (page 238). -or- a.
- Page 189 General Symptom List Table 5. General Symptom List Symptom Corrective Action Stacker chatters at upper or lower limit 1. Power off and unplug the printer. Unload paper. 2. Open the rear cabinet door, press the elevator disable switch and manually move the elevator up and down, through its entire range of motion.
- Page 190 General Symptom List Table 5. General Symptom List Symptom Corrective Action Stacker does not stack properly 1. Power off and unplug the printer. 2. Check for and remove any obstructions preventing elevator movement. -or- 3. Check for misaligned stacker rails Adjust the stacker rails if they are not vertical and parallel. Stacker elevator does not move 4.
- Page 191 General Symptom List Table 5. General Symptom List Symptom Corrective Action Stacker limit switch check NOTE: This procedure tests the upper and lower limit switches on the right vertical rail. These magnetic switches are normally closed. You can quickly check their functionality with a small, powerful magnet.
- Page 192 General Symptom List Table 5. General Symptom List Symptom Corrective Action Stacker motor check NOTE: This procedure tests the four stacker motors and their cables. You will usually be referred to this procedure from other troubleshooting procedures. When you have completed this procedure, return to the procedure that sent you here.
-
Page 193: Print Quality
4. Check the ribbon for folds or tears. Check that the ribbon guides are tight and the ribbon tracks straight across them. Rewind or install an approved IBM ribbon. If the ribbon does not track straight across the ribbon guides, adjust the ribbon guides. If the ribbon guides are loose, tighten them. If the ribbon guides are damaged, replace them. - Page 194 14. Save the printer configuration values. (Refer to the User’s Manual .) 15. Clear NVRAM (page 237). 16. Download and install the latest code from IBM First (page 231). 17. Power on the printer in download mode and load flash memory (page 238).
- Page 195 9. Save the printer configuration values. (Refer to the User’s Manual .) 10. Clear NVRAM (page 237). 11. Download and install the latest code from IBM First (page 231). 12. Power on the printer in download mode and load flash memory (page 238).
- Page 196 9. Save the printer configuration values. (Refer to the User’s Manual .) 10. Clear NVRAM (page 237). 11. Download and install the latest code from IBM First (page 231). 12. Power on the printer in download mode and load flash memory (page 238).
- Page 197 General Symptom List Table 5. General Symptom List Symptom Corrective Action Randomly misplaced dots (continued) 17. Plug in the printer and power it on. Run a print test. If the problem occurs, replace the shuttle frame assembly. Incorrect output 1. Check the printer configuration for the proper values of CPI, LPI, print quality, forms length, and width.
- Page 198 12. Save the printer configuration values. (Refer to the User’s Manual .) 13. Clear NVRAM (page 237). 14. Download and install the latest code from IBM First (page 231). 15. Power on the printer in download mode and load flash memory (page 238).
- Page 199 Symptom Corrective Action Vertical misalignment of characters: 16. Download and install the latest code from IBM First (page 231). 1. Dots or characters move up or 17. Power on the printer in download mode and load flash memory (page 238).
-
Page 200: Printer Operation
READY, but go to the next step immediately after replacing the controller board. 3. Download the latest code from IBM First (page 231). Plug in the printer and power it on in download mode and load flash memory (page 238). - Page 201 (page 319) if it was not replaced earlier in this procedure. After replacing the controller board, DO NOT make the printer READY, but proceed immediately to the next step. 6. Download and install the latest code from IBM First (page 231). 7. Power on the printer in download mode and load flash memory (page 238).
- Page 202 General Symptom List Table 5. General Symptom List Symptom Corrective Action Paper feeds poorly 1. Check the forms thickness lever: if it is set too tightly paper feeding can be affected. Set the forms thickness lever to match the thickness of the paper being used. 2.
- Page 203 12. Save the printer configuration values. (Refer to the User’s Manual .) 13. Clear NVRAM (page 237). 14. Download and install the latest code from IBM First (page 231). 15. Power on the printer in download mode and load flash memory (page 238).
- Page 204 5. Save the printer configuration values. (Refer to the User’s Manual .) 6. Clear NVRAM (page 237). 7. Download and install the latest code from IBM First (page 231). 8. Power on the printer in download mode and load flash memory (page 238).
- Page 205 (page 319). After replacing the controller board, DO NOT make the printer READY, but proceed immediately to the next step. 12. Download and install the latest code from IBM First (page 231). Power on the printer in download mode and load flash memory (page 238).
- Page 206 General Symptom List Table 5. General Symptom List Symptom Corrective Action TOF is lost repeatedly 1. Check that the customer is setting the forms length to match the size paper used. Set the forms length to match the length of paper being used. 2.
- Page 207 10. Save the printer configuration values. (Refer to the User’s Manual .) 11. Clear NVRAM (page 237). 12. Download and install the latest code from IBM First (page 231). 13. Power on the printer in download mode and load flash memory (page 238).
- Page 208 4. Save the printer configuration values. (Refer to the User’s Manual .) 5. Clear NVRAM (page 237). 6. Download and install the latest code from IBM First (page 231). 7. Power on the printer in download mode and load flash memory (page 238).
- Page 209 General Symptom List Table 5. General Symptom List Symptom Corrective Action Ribbon Folding or feed problems with a ribbon 1. Check that both ribbon spools are fully seated on the ribbon hubs. 2. Check that the ribbon runs between the ribbon mask and hammer bank cover. Check that the hammer bank cover is Installed correctly.
- Page 210 Do the following: 10. Save the printer configuration values. (Refer to the User’s Manual .) 11. Clear NVRAM (page 237). 12. Download and install the latest code from IBM First (page 231).
- Page 211 (page 319). After replacing the controller board, DO NOT make the printer READY, but proceed immediately to the next step. 14. Download and install the latest code from IBM First (page 231). 15. Power on the printer in download mode and load flash memory (page 238).
-
Page 212: Diagnostics
Troubleshooting A New Installation..........................page 230 Documentation ................................page 230 Printer Configuration ..............................page 230 RibbonMinder** ................................page 231 Downloading Microcode From IBM First ........................page 236 Clear NVRAM................................page 237 Loading Flash Memory..............................page 238 Reprogramming the Security Key ..........................page 250 Shuttle Electrical Shorts Test ............................ -
Page 213: Operator Print Tests
Chapter Operator Print Tests Operator Print Tests A set of print tests is included in the configuration menu structure for use as diagnostic tools. These are called the “Operator Print Tests” because they are available to the user. Use these tests to check the print quality and basic operation of the printer. The Operator Print Tests are summarized below. - Page 214 Hammer springs Hammer coils (shuttle frame assembly) • All E’s + FF A pattern of all E’s repeated for ten lines and followed by a form feed to the top of the next page. This test is useful for identifying paper motion or paper feed problems. Hammer bank cover Power supply board Paper motion sensor or cable...
-
Page 215: Selecting And Running Tests
Chapter Operator Print Tests Selecting And Running Tests To run Operator Print Tests use the printer configuration menus, as shown below: Step Press Displayed Result Notes Load paper and power on the printer. STOP NOT READY Printer must be in NOT READY mode to access the tests. -
Page 216: Customer Engineer (Ce) Tests
Selecting And Running Tests Customer Engineer (CE) Tests A set of printer tests is included in the configuration menu structure for use as maintenance tools. These are called “Customer Engineer Tests” (CE Tests) because they are for your use; they are not available to the user through his documentation. You will use these tests in various troubleshooting and adjustment procedures. - Page 217 Chapter Customer Engineer (CE) Tests NOTE: From previous ENTER key to move down page SCROLL ↑ to move to next item PRINTER MANAGEMENT Diagnostic Port Serial Ethernet (If installed) Serial Serial Serial Serial Serial Serial Serial Select Port Baud Rate Word Length Stop Bits Parity...
- Page 218 Selecting And Running Tests The CE Tests shown in Figure 7 are summarized below: Printer Mechanism Tests • Burn In Test Use of this test is not recommended . This test is used by the manufacturer to burn in the printer before it is shipped to the customer and has no value as a maintenance tool.
- Page 219 Selecting And Running Tests Clear Error Log This menu selection enables you to delete the stored contents of the error log. The error log automatically records certain unit check conditions in a buffer in NVRAM that stores up to 50 messages. The most recent message is stored at the top of the list, the oldest message at the bottom of the list.
-
Page 220: Selecting And Running Ce Tests
Selecting And Running Tests Selecting And Running CE Tests To run CE Tests you use the printer configuration menus, as shown below: Step Press Displayed Result Notes Load paper and power on the printer. STOP NOT READY Printer must be in NOT READY mode to access the tests. -
Page 221: Boot Diagnostics Menu
Selecting And Running Tests Boot Diagnostics Menu Printer boot-up software contains a menu structure that you can access by holding down the EJECT and STOP keys while powering up the printer. These menus are not intended for the end user, but provide useful information for manufacturing and maintenance personnel. - Page 222 Selecting And Running Tests BOOT DIAGNOSTICS NOTE: PRESS ENTER > = ENTER key to move down < = SCROLL ↑ to move to next item ENTER < < DIAGNOSTICS MENU DIAGNOSTICS MENU VERSION CONTROL FILE SYSTEM > > Continued on next page <...
- Page 223 Selecting And Running Tests < DIAGNOSTICS MENU DIAGNOSTICS MENU DIAGNOSTICS MENU MISC. TOOLS < EXCEPTION VIEWER EXIT DIAGNOSTICS From previous > > ENTER page B30: STATUS INITIALIZING... < < < < MISC. TOOLS MENU MISC. TOOLS MENU MISC. TOOLS MENU MISC.
-
Page 224: Hex Code Printout
Selecting And Running Tests Hex Code Printout A hex code printout (“hex dump”) prints every ASCII character received from the host computer with its corresponding two-digit hexadecimal code. Hex dumps are used to troubleshoot printer data reception problems by comparing the printed hex data to the data sent from the host. - Page 225 Selecting And Running Tests Step Press Displayed Result Notes ENTER HEX PRINT MODE Asterisk (*) indicates this choice is now active. ENABLE* STOP NOT READY Returns printer to NOT READY mode. RETURN + ENTER OPERATOR MENU Relocks the ENTER key. UNLOCKED START READY...
-
Page 226: Printer Information Menu
Selecting And Running Tests Printer Information Menu You can view various printer statistics, such as hours of usage, and refer to these figures for preventive maintenance purposes. Printer statistics accumulate continuously; they do not reset when you power off the printer. All of the printer statistics are set to zero at the factory after burn-in testing. -
Page 227: Displaying Printer Information
Selecting And Running Tests Print Strokes The cumulative number of back-and-forth shuttle strokes the printer has made during normal operation. The range is 0 to 4,000,000,000 shuttle strokes. 11 Inch Pages The cumulative number of pages the printer has printed. The range is 0 to 363,000,000 pages. Displaying Printer Information You can get printer information by using the configuration menus, as shown below: Step... -
Page 228: Soft Vs. Hard Reset
Soft Reset Soft vs. Hard Reset Resetting the printer returns it to a previous configuration. There are two kinds of reset. Soft Reset A soft(ware) reset clears printer memory then loads the power-up configuration into memory. (The procedure for saving configurations is described in the User’s Manual .) It is called a soft reset because no hardware is tested. -
Page 229: Controller Board Status Leds At Power Up
Hard Reset (“Cycle Power”) Controller Board Status LEDs At Power Up At power up printer software turns on the amber status LED at the rear of the card cage. (Figure 10.) If a hardware problem is detected at power up the amber LED will blink continuously. At power up printer hardware also turns on the green LED. -
Page 230: Troubleshooting A New Installation
Printer Configuration Troubleshooting A New Installation Customers with new printers sometimes report “problems” that reflect unfamiliarity with the printer and manuals rather than true fault conditions. If a customer reports general printer problems and the printer was recently installed, check the following: Printer Configuration Many customers have difficulty configuring new printers for operation with their computer system. -
Page 231: Ribbonminder
Ribbon ink consumption continuously displays on the printer operator panel LCD, decrementing as ink is consumed. At the default settings, when ribbon life reaches 2% the message changes to “301 RIBBON INK LOW / INSTALL NEW IBM RIBBON.” The operator panel status lamp flashes, but the printer continues to accept new print jobs until ribbon life reaches 0%, at which time the printer stops printing and enters the fault state. - Page 232 RibbonMinder Operation the selections at that level. Pressing the ENTER key selects an item and the system inserts an asterisk ( * ) to indicate that this is now the default option. NOT READY PRINTER CONTROL PRINTER CONTROL PRINTER CONTROL Ribbon End Point Ribbon Action Interface Selection...
-
Page 233: Ribbon Action
Factory default is Stop At RBN End. When the ribbon life reaches 0%, the message “146 RIBBON INK OUT / INSTALL NEW IBM RIBBON” displays on the operator panel. The status lamp flashes, the alarm sounds (if enabled), printing stops, and the printer enters the fault state. - Page 234 (if enabled), and the display switches to the “302 EXCESS RBN WEAR / INSTALL NEW IBM RIBBON” message. The ribbon serial number is added to the depleted ribbon log (page 235). This fault cannot be cleared by pressing START.
-
Page 235: The Ribbon Log
Recognized.” The Ribbon Log is a permanent record; it cannot be cleared. The location and format of the Ribbon Log is shown below. NOT READY Ribbon Log OPERATOR PRINT TESTS Installed Ribbon = IBM, Ribbon Name, 55%, Normal Ribbon History = IBM, Ribbon Name = 45 Printer Demonstration * IBM, Ribbon Name2 = 33 Print Error Log... -
Page 236: Downloading Microcode From Ibm First
Downloading Microcode From IBM First This section explains how to obtain microcode for the 6500 printer. This process is done through the Lotus Notes IBM First R5 data base. 1. Create a directory named 6500 on the laptop to hold your 6500 code downloads. (If you do not know how to create directories, see someone familiar with PCs.) -
Page 237: Clear Nvram
Clear NVRAM This procedure will erase any custom configuration sets the customer may have saved and may change the hammer phasing and paper out dots values. 1. If possible, make a configuration printout of all configurations. (Refer to the User’s Manual .) 2. -
Page 238: Loading Flash Memory
Loading Flash Memory Flash memory is contained in a SIMM (single in-line memory modules) located on the controller board. Printer control languages (the “emulations”) and printer operating system software are loaded into flash memory at the factory, but you will install this software in the following situations: The customer needs to upgrade printer software. -
Page 239: Loading Through The Serial Or Parallel Port
6. Disconnect all data input cables from the printer interface. 7. Connect a parallel data printer cable to the LPT1 port or a serial data printer cable to the COM1 port of an IBM-compatible computer running the PC-DOS, MS-DOS, or Windows (3.1x, 95, 98, Me, NT, 2000, or XP) operating system. - Page 240 Loading Through The Serial Or Parallel Port To load the file through the LPT2 port on the computer, enter the following command: filename .exe -pb2 <Enter> NOTE: On a printer with a PSA3 controller board, when you power up in download mode (step 11) the printer is ready to accept data from all ports.
- Page 241 Loading Through The Serial Or Parallel Port Table 6. Flash Memory Message Guide Required Message Explanation Action CLEARING PROGRAM The program successfully loaded into printer RAM and None FROM FLASH the checksum matched. The old program is now being deleted from flash memory. DIAGNOSTIC The printer passed its memory and hardware None...
- Page 242 (Refer to the User’s Manual .) 2. Clear NVRAM (page 237). 3. Download and install the latest code from IBM First (page 231). 4. Power on the printer in download mode and load flash memory (page 238). a. If you encounter loading...
- Page 243 Loading Through The Serial Or Parallel Port Table 6. Flash Memory Message Guide Required Message Explanation Action ERROR: FLASH The printer encountered an error trying to program Download the program again: Power DID NOT PROGRAM flash memory. off the printer and start over at step 11.
- Page 244 (Refer to the User’s Manual .) 2. Clear NVRAM (page 237). 3. Download and install the latest code from IBM First (page 231). 4. Power on the printer in download mode and load flash memory (page 238). a. If you encounter loading...
- Page 245 Loading Through The Serial Or Parallel Port Table 6. Flash Memory Message Guide Required Message Explanation Action ERROR: PROGRAM The printer requires more SDRAM memory in order to Use a smaller emulation program. NEEDS MORE DRAM run the downloaded program. ERROR: PROGRAM The printer requires more flash memory in order to run Add flash memory or use a smaller...
- Page 246 (Refer to the User’s Manual .) 3. Clear NVRAM (page 237). 4. Download and install the latest code from IBM First (page 231). 5. Power on the printer in download mode and load flash memory (page 238). a. If you encounter loading...
- Page 247 Loading Through The Serial Or Parallel Port Table 6. Flash Memory Message Guide Required Message Explanation Action ERROR: SECURITY KEY 7. Power on the printer in download NOT DETECTED mode and load flash memory (continued) (page 238). 8. If you encounter the failure after replacing the controller board, reinstall the original controller board and contact your DDS and...
-
Page 248: Loading Through The Network Interface Card (Nic)
NOTE: If you have a problem loading code, call your Level 2 Support Group for assistance. 2. Set the printer power switch to O (Off). 3. Plug an ethernet cross-over cable (IBM P/N 09J7206, or equivalent from a local computer/electronics shop) into the NIC and your laptop. - Page 249 Loading Through the Network Interface Card (NIC) 7. At the C:\download> prompt type: filename.exe<Enter> (Where filename is the six-digit microcode P/N) This will expand the file and create the .prg file needed in the next step. 8. Note the filename, which is a six digit number plus .prg. This .prg file is the file you will download into the NIC.
-
Page 250: Reprogramming The Security Key
Reprogramming the Security Key The security key on the PSA3 controller board can be reprogrammed with a Software Program Exchange (SPX) module: • P/N 39U2691 — Field Kit, SPX, IBM MES, Code V/IGP • P/N 39U2695 — Field Kit, SPX, IBM MES, IPDS The SPX is an intelligent module that plugs into the debug port on the back of printers equipped with the PSA3 “Hurricane”... - Page 251 Debug Port Figure 11. This figure shows where to insert the SPX. 7. When the security key is reprogrammed, the display will read: “REMOVE SPX THEN PRESS ENTER” 8. Remove the SPX from the debug port at the rear of the printer. 9.
-
Page 252: Shuttle Electrical Shorts Test
Shuttle Electrical Shorts Test This procedure checks for metallic debris and checks for hammer coils shorting to the shuttle frame. The hammer driver circuit board attached to the shuttle frame assembly can attract metal objects because of the magnets in the hammer bank. -
Page 253: Hammer Bank Power Cable Shorts Test
Hammer Bank Power Cable Shorts Test This test determines if the hammer bank power cable is shorted. 1. Prepare the printer for maintenance (page 313). 2. Cabinet Model: Remove the paper guide assembly (page 348). Pedestal Model: Remove the top cover assembly (page 327). 3. -
Page 254: Cable Shorts Test
Cable Shorts Test This test determines if a cable has a short to ground or a pin-to-pin short (also called a wire-to-wire short). Such shorts can be caused by cables resting on or moving across sharp edges. The edges over time can wear away the plastic shielding of the cable, exposing the copper wire inside. - Page 255 IMPORTANT When making continuity checks, touch the meter leads to the test points for at least 2 - 3 seconds so that your meter will have time to display correctly. 7. At one end of the cable, touch one of the pins with the positive (usually red) meter lead while the common lead (usually black) is still touching a ground point.
-
Page 256: Main Wire Harness Test Diagnostic
Main Wire Harness Test Diagnostic This is a procedure for extended testing of various printer components. 1. Prepare the printer for maintenance (page 313). 2. Cabinet Model: Remove the paper guide assembly (page 348). Pedestal Model: Remove the top cover assembly (page 327). 3. - Page 257 Exhaust Fan (in cabinet models) Magnetic Pick-up Unit (MPU) • Shuttle Motor Intermediate Cable • Hammer Bank Power and Logic Intermediate Cables • Operator Panel Assembly Intermediate Cable • Power Stacker Logic and Power (Intermediate) Cables...
-
Page 258: Power Supply Operational Check
Power Supply Operational Check This procedure shows you how to use power supply tester 10R4059, to quickly and safely monitor the output voltages of the printer power supply from outside the card cage. You will be able to turn on and off the +48 volt and +8.5 volt outputs at the tester’s remote Monitor Block. - Page 259 Power Supply Tester Load Block — Can become warm when used continuously Pin 1 Power Supply Board Pin 1 Pin 1 Connector P101 Stacker Power Cable (Only on cabinet models with the Controller Board power stacker) Connector J101 Figure 12. Connecting the Power Supply Tester...
- Page 260 7. Plug the printer’s power cord into the AC power outlet and the printer. 8. Insert the negative (-) lead of the voltmeter into the ground (GND) test jack on the Monitor Block. If the negative lead does not fit into the GND test jack, touch the negative lead to the ground (GND) pad. (Figure 13.) 9.
- Page 261 +5 V Test Point NTEMPHI Test Point +8.5 V Test Point +48 V Test Point Monitor Block Ground (GND) Pad Push Button: Push to activate +8.5 V and +48 V and place an electrical Rubber Foot load on +5 V. GND Test Jack: Insert Negative (-) Lead Here Figure 13.
-
Page 262: Locations
Fan Assembly, Hammer Bank ...................... page 416, Figure 46, item 22 Hammer Spring Assembly .......................... page 334, Figure 16 IBM Coax/Twinax Expansion Board....................page 421, Figure 48, item 1 Magnetic Pick-up (MPU) Assembly....................page 409, Figure 43, item 1 Memory Modules and Security Key ......................page 341, Figure 18... - Page 263 Chapter Locations Of Components And Assemblies Motor Assembly, Platen Open ...................... page 416, Figure 46, item 12 Motor Assembly, Ribbon Drive...................... page 416, Figure 46, item 17 Operator Panel Assembly, Cabinet Model ..................page 396, Figure 37, item 1 Operator Panel Assembly, Pedestal Model ..................page 398, Figure 38, item 1 Paper Guide Assembly ........................
-
Page 264: Circuit Diagrams, Circuit Boards, Cables, And Switches
Power Distribution Diagram ............................page 267 Main Wire Harness Test Tables, PSA3 Controller Board .................... page 268 PSA3 Controller ................................page 269 Power Supply: 6500-v05, -v5P, -v10, and i1P ......................... page 277 Power Supply: 6500-v15 ............................... page 278 Power Supply: 6500-v20 ............................... page 279 IBM Coax/Twinax Expansion Board for PSA3 Controllers .................... - Page 265 Chapter Contents Cable Assembly, Card Cage Fan..........................page 292 Cable Assembly, Operator Panel..........................page 293 Cable Assembly, Exhaust Fan ............................. page 294 Cable Assembly, Hammer Bank Logic......................... page 295 Cable Assembly, Hammer Bank Power ........................page 296 Cable Assembly, Dual Hammer Bank Power........................ page 297 Cable Assembly, MPU ..............................
-
Page 266: Interconnection Diagram
Interconnection Diagram AC Power Primary Earth Ground On/Off Switch +5V Remote PSA3 Controller RibbonMinder Sensor HBL =... -
Page 267: Power Distribution Diagram
Power Distribution Diagram AC Power Primary Earth Ground On/Off Switch P101 +5V Remote N AC FAIL N STBY +5V RET / LOGIC GND +5V RET / LOGIC GND +5V RET / LOGIC GND +5V RET / LOGIC GND +8.5V +8.5V +48V +48V PSA3 Controller... -
Page 268: Main Wire Harness Test Tables, Psa3 Controller Board
Main Wire Harness Test Tables, PSA3 Controller Board P106 Connector P107 Connector MOTOR NOTES: 19 17 15 13 11 9 7 5 3 1 19 17 15 13 11 9 7 5 3 1 All Motors: Let the motor cool to room Connectors are viewed temperature before you test it. -
Page 269: Psa3 Controller
PSA3 Controller CAUTION: Do not try to remove or replace the NVRAM. The NVRAM contains a lithium battery that can explode if replaced incorrectly. NVRAM is replaced only at the factory. Motor Sensor Right Motor Sensor Left J107 J106 PF 1 Power Supply PLAT 1 RIB R1... - Page 270 PSA3 Controller (continued) 0 Ohm 0.125W EC BOOT STRAP EC Diagnostics J120 0.1W Hammer Bank Logic C167 DB TXD J108 +10V SW C167 DB RXD HMR DAT COIL µ 50 MHz HMR DAT RET PPR TRIG HMR CLK PPR MOVING HMR CLK RET FT EVENT CMD DAT...
- Page 271 PSA3 Controller (continued) 2-Pin Jumpers RibbonMinder Sensor J122 BC DATA LED CTRL VCC1 External Power 4.7 K EXT 5V 0.1 W J102 µ 1000 PF 4.7 K 0.1 W µ 1000 PF 500 Ohm LOGIC HIGH CHASSIS GND...
- Page 272 PSA3 Controller (continued) Diagnostic Port Host RS232 J201 DB TXD DB RXD 470PF On-Line Verifier J109 EXT 5V V TXC C V RXD C Shuttle Drive J116 Paper Stacker J117 SHUT A SHUT B STK R NW SHUT C Operator Panel STK DATA J110 N FP DATA AVAIL...
- Page 273 PSA3 Controller (continued) Host RS422 Paper Feed Motor 2.7K J103 0.1W PF 4 SOFT ID PF 3 PF 2 DIFF TXD+ PF 1 DIFF TXD- 1 2 3 DIFF RXD+ DIFF RXD- Software Security Key Phase Driver Port J115 UD 1 UD 2 VCC +48V Not Used...
- Page 274 PSA3 Controller (continued)
- Page 275 PSA3 Controller (continued)
- Page 276 PSA3 Controller (continued) Centronics Connector J112 N STROBE N ACK BUSY PAPER EMPTY SELECT N INIT N AUTOFEED N FAULT VCC1 4.7K 0.1W NDPSEL EXT 5V N SELECT IN HOST LOGIC H NDPEN 0.1W CHASSIS GND...
-
Page 277: Power Supply: 6500-V05, -V5P, -V10, And I1P
Power Supply: 6500-v05, -v5P, -v10, and -v1P Cable Assembly AC In P101 Power Supply AC Common N TEMP White Chassis Ground N STDBY Orange LOAD +5V RTN Black = FAST-ON TERMINAL +5V RTN Black +48V RTN Brown LOAD = RING TERMINAL... -
Page 278: Power Supply: 6500-V15
Power Supply: 6500-v15 (Line Filter Area) AC Input AC COMMON CHASSIS GND P101 NACFAIL (Not AC Fail) Cable Assembly NSTBY (Not Standby) AC In +5 Volts Power Supply +5 Volts +5 Return / Logic GND LOAD +5 Return / Logic GND +48 / +8.5 Return = FAST-ON TERMINAL +48 / +8.5 Return... -
Page 279: Power Supply: 6500-V20
Power Supply: 6500-v20 (Line Filter Area) AC Input AC Common Chassis Ground Cable Assembly AC In Power Supply (Phase Driver Control) UD 1 UD 2 P101 +2.5V reference (Phase Driver Power) NACFAIL (Not AC Fail) LOAD UD 3 NSTBY (Not Standby) UD 4 +5 Volts = FAST-ON TERMINAL... -
Page 280: Ibm Coax/Twinax Expansion Board For Psa3 Controllers
IBM Coax/Twinax Expansion Board for PSA3 Controllers Twinax Connection TWINAX PHASE A TWINAX PHASE B Coax Connection COAX DATA 9400 pF, 1500 V Built-in COAX SHIELD capacitor coax shield to frame ground µ 500V... -
Page 281: Surestak Power Stacker Pcba
SureStak Power Stacker PCBA Limit Switches and Test Test Elevator Motor SKP DB TXD N RESET SKP DB RXD STK FULL SWT N 42V FAIL FULL SWT RET PMD SIG LIMIT SIG STK LIMIT SWT PAP IN SIG FULL SIG LIMIT SWT RET BEAM SIG EL PHA 1... -
Page 282: Cable Routing, Cabinet Model
Cable Routing, Cabinet Model... -
Page 283: Cable Routing, Pedestal Model
Cable Routing, Pedestal Model... -
Page 284: Cable Assembly, Centronics I/O
Cable Assembly, Centronics I/O 14H5287 PIN 1 NOTE: If you replace this NOTE: cable assembly, you must If you replace the I/O cable install the ferrite clamp. assembly, you must install See Appendix F. the ferrite clamp. See Appendix E. PIN 1... -
Page 285: Cable Assembly, Centronics/Dataproducts Adapter
Cable Assembly, Centronics/Dataproducts Adapter 14H5522... -
Page 286: Cable Assembly, +5V Remote Power
Cable Assembly, +5V Remote Power 14H5589 To Controller Board... -
Page 287: Cable Assembly, Twinax Auto-Termination
Cable Assembly, Twinax Auto-Termination 38F8254 NOTE: If the printer has a PSA3 controller and power stacker, Smart-T Cable Extension 75P2813 is also required (see the next page). Jack White Gray Shield Resistance Chart Ohms 1, 2, 3, 4 Shield Shield 1, 4 2, 3 Jack... -
Page 288: Cable Extension, Smart-T
Cable Extension, Smart-T NOTE: If the printer has a PSA3 controller 75P2813 and power stacker, this cable extension is also required. (See also Figure 51 on page 427.) Pin 1 Pin 1... -
Page 289: Cable Assembly, Ps I/O, 2000
Cable Assembly, PS I/O, 2000 NOTE: This cable is used only on the 6500-v20. 75P1614 To Power Supply To Controller Board... -
Page 290: Cable Assembly, Ac In, Power Supply
Cable Assembly, AC In, Power Supply Part of AC Kit: 14H5289 To Circuit Breaker To Power Supply J1... -
Page 291: Cable Assembly, Ac Power Input
Cable Assembly, AC Power Input Part of AC Kit: 14H5289 To Circuit Breaker Input Power Connector... -
Page 292: Cable Assembly, Card Cage Fan
Cable Assembly, Card Cage Fan 14H5285 PIN 1 PIN 1... -
Page 293: Cable Assembly, Operator Panel
Cable Assembly, Operator Panel 14H5300 PIN 8 (Brown) PIN 1 (Gray) PIN 8 (Brown) PIN 1 (Gray) To Controller Board To Operator Panel... -
Page 294: Cable Assembly, Exhaust Fan
Cable Assembly, Exhaust Fan 14H5286 PIN 1 PIN 1... -
Page 295: Cable Assembly, Hammer Bank Logic
Cable Assembly, Hammer Bank Logic IMPORTANT: Use this cable on all Infoprint 6500 printers except the 6500-v20. 14H5279 To Shuttle NOTE: A cable protector is included on newer cable assemblies, which protects the shuttle end of the cable from chafing and abrasion. To Controller Board A bag of 10 protectors is available under part number 75P8157, which also includes installation... -
Page 296: Cable Assembly, Hammer Bank Power
Cable Assembly, Hammer Bank Power To Controller Board To Shuttle IMPORTANT: Use this cable on all Infoprint 6500 Wire Table printers except the 6500-v20. On the 39U2533 6500-v20 use 54P1455, shown on P105 the next page. -
Page 297: Cable Assembly, Dual Hammer Bank Power
Cable Assembly, Hammer Bank Power To Power Supply To Shuttle IMPORTANT: Wire Table Use this cable on the 6500-v20 printer. On all other Infoprint 6500 02N6214 printers use 39U2533, shown on the previous page. -
Page 298: Cable Assembly, Mpu
Cable Assembly, MPU 14H5329 PIN 2 PIN 3 PIN 1 PIN 1... -
Page 299: Cable Assembly, Ribbon Guide
Cable Assembly, Ribbon Guide 39U2539 — Left 39U2540 — Right Pin Connection P106 (LRP) / P107 (RRP) Wire Color Pin 1 Black Pin 2 Black Left Guide = P106 / LRP Right Guide = P107 / RRP Pin 2 Pin 1... -
Page 300: Cable Assembly, Ribbon Motor, Extension
Cable Assembly, Ribbon Motor, Extension 63H7464... -
Page 301: Cable Assembly, Shuttle Motor Drive
Cable Assembly, Shuttle Motor Drive 14H5330 To Shuttle To Controller Board... -
Page 302: Frame Cable, Power Stacker
Frame Cable, Power Stacker 10R3912... -
Page 303: Logic Cable, Power Stacker
Logic Cable, Power Stacker 10R4590... -
Page 304: Power Cable, Power Stacker
Power Cable, Power Stacker 57P1376 P1101 P1101... -
Page 305: Vertical Rail Cable, Power Stacker
Vertical Rail Cable, Power Stacker 10R3913... -
Page 306: Elevator I/O Cable, Power Stacker
Elevator I/O Cable, Power Stacker 10R4053... -
Page 307: Fan Assembly, Hammer Bank
Fan Assembly, Hammer Bank 14H5159 P107 / HBF... -
Page 308: Magnetic Pickup (Mpu) Assembly
Magnetic Pickup (MPU) Assembly 57G1476... -
Page 309: Switch Assembly, Paper Detector
Switch Assembly, Paper Detector Standard: 14H5281 Black Back Forms Kit: 02N7169... -
Page 310: Switch Assembly, Platen Interlock
Switch Assembly, Platen Interlock 14H5280... -
Page 311: Removals And Adjustments
Part numbers for replacement parts are listed in the Parts Catalog, which begins on page 390. Tools And Materials You need the following tools and materials to service the printer: Item Part No. IBM Line Matrix Printer Configuration Utility Disk 63H7379 1-30 Inch-pound Torque Screwdriver 16F1661 ESD Wrist Strap 6405959 Feeler Gauge, Flat, 0.010 inch... - Page 312 Chapter About This Chapter Item Part No. Grip Ring Pliers 9900317 Lubricant, Bearing, IBM #20 117397 DIP Module Extracting Tool 9900764 Nut Driver, 1/4 inch Nut Driver, 5/16 inch Open End Wrench, 7/32 inch 1650843 Open End Wrench, 5/16 inch...
-
Page 313: Preparing The Printer For Maintenance
Preparing The Printer For Maintenance Preparing The Printer For Maintenance Always do the following steps before you do any maintenance procedure: <3> Hazardous voltages are present in the printer with the power cord connected to the power source. Switch off printer power and unplug the printer power cord before proceeding. <4>... -
Page 314: Restoring The Printer To Operation
Chapter About This Chapter Restoring The Printer To Operation When you are finished servicing the printer, restore it to operation by following these steps: 1. Connect the host data cable to the printer interface. 2. Load paper. 3. Plug the AC power cord into the power source. 4. -
Page 315: Removal And Replacement Procedures
Fan Assembly, Card Cage ............................page 331 Fan Assembly, Hammer Bank ..........................page 332 Hammer Spring Assembly ............................page 333 IBM Coax/Twinax Expansion Board......................... page 337 Magnetic Pick-up (MPU) Assembly.......................... page 338 Memory Modules and Security Key .......................... page 339... - Page 316 Chapter Removal And Replacement Procedures Motor Assembly, Platen Open ..........................page 344 Motor Assembly, Ribbon Drive..........................page 346 Operator Panel Assembly ............................page 347 Paper Guide Assembly ............................page 348 Paper Ironer ................................page 349 Platen ..................................page 350 Platen Stop Assembly (and Forms Thickness Lever) ....................page 354 Resistors, Terminating .............................
-
Page 317: Belt, Paper Feed Timing
Belt, Paper Feed Timing Belt, Paper Feed Timing Removal 1. Prepare the printer for maintenance (page 313). 2. Cabinet Model: Remove the paper guide assembly (page 348). Pedestal Model: Remove the top cover assembly (page 327). 3. Remove the timing belt cover by squeezing the front and back to release the plastic tabs from the slots in the side plate (page 400, Figure 39, item 7). -
Page 318: Belt, Platen Open
Chapter Removal And Replacement Procedures Belt, Platen Open Removal 1. Prepare the printer for maintenance (page 313). 2. Cabinet Model: Remove the paper guide assembly (page 348). Pedestal Model: Remove the top cover assembly (page 327). Remove the platen open belt cover by squeezing the top and bottom to release the plastic tabs from the slots in the side plate (page 413, Figure 45, item 24). -
Page 319: Circuit Board: Psa3 Controller
Circuit Board: PSA3 Controller Circuit Board: PSA3 Controller ATTENTION To prevent electrostatic damage to electronic components, wear a properly grounded static wrist strap when handling circuit boards, the shuttle frame assembly, and any other electronic component. Removal 1. Make a configuration printout of all configurations. (Refer to the User’s Manual.) 2. - Page 320 Chapter Removal And Replacement Procedures Installation ATTENTION To prevent electrostatic damage to electronic components, wear a properly grounded static wrist strap when handling circuit boards, the shuttle frame assembly, and any other electronic component. 1. If this is a replacement controller board, install the Flash Memory SIMM and Security Key on the new controller (page 339). 2.
-
Page 321: Circuit Board: Power Supply
Circuit Board: Power Supply Circuit Board: Power Supply <4> To prevent injury from electric shock, wait at least one minute after powering off before removing the power supply board. CAUTION ATTENTION Do not touch components on the board during removal or installation. Lift and handle the board only by the loops provided for this purpose. -
Page 322: Circuit Breaker
Chapter Removal And Replacement Procedures Circuit Breaker Removal 1. Prepare the printer for maintenance (page 313). 2. Open the printer cover. 3. Remove the card cage fan (page 331). 4. Disconnect the four circuit breaker electrical leads. (Cabinet Model: See Figure 47, page 419. Pedestal Model: See Figure 41, page 404.) 5. -
Page 323: Connector Shells
Connector Shells Connector Shells Some of the printer cable connectors are grouped inside connector shells (P/N 14H5288) that plug into connectors J106 and J107 on the controller board. The procedure below explains how to remove and install cable assemblies from any connector shell in the printer. - Page 324 Chapter Removal And Replacement Procedures P106 Connector Configuration (Top View: As seen 19 17 15 13 11 9 7 5 3 1 when plugged into the controller board.) PLAT M Pin No. LRIB M Key Tab 20 18 16 14 12 10 8 6 4 2 Typical 2-Wire...
-
Page 325: Cover Assembly, Hammer Bank / Ribbon Mask
Cover Assembly, Hammer Bank / Ribbon Mask Cover Assembly, Hammer Bank / Ribbon Mask Removal 1. Prepare the printer for maintenance (page 313). 2. Remove the shuttle frame assembly (page 362). 3. Lift the thick plate of the hammer bank cover assembly at one end, and peel the cover away from hammer bank magnets. (See Figure 15, page 325.) Installation ATTENTION... -
Page 326: Cover Assembly, Shuttle
Cover Assembly, Shuttle Cover Assembly, Shuttle Removal 1. Prepare the printer for maintenance (page 313). 2. Remove the ribbon. (Refer to the User’s Manual .) 3. Loosen the shuttle cover screws (page 400, Figure 39, item 2). 4. Grasping the edges of the shuttle cover assembly, tilt up the rear edge and lift the shuttle cover assembly out of the printer. Installation 1. -
Page 327: Cover Assembly, Top, Pedestal Model
Cover Assembly, Top, Pedestal Model Cover Assembly, Top, Pedestal Model Removal 1. Prepare the printer for maintenance (page 313). 2. Remove the operator panel (page 347). 3. Remove the #2 Phillips screw in the lower left front corner of the top cover and the screw just to the right of the operator panel bracket. -
Page 328: Dashpot
Dashpot Dashpot This procedure applies only to cabinet models. Removal <3> Two persons may be required to do this procedure. Prop or hold the top cover securely open while disengaging the dashpot. CAUTION 1. Prepare the printer for maintenance (page 313). 2. -
Page 329: Ethernet Interface Assembly
Ethernet Interface Assembly Ethernet Interface Assembly Removal ATTENTION To prevent electrostatic damage to electronic components, wear a grounded static wrist strap when you handle circuit boards. 1. Prepare the printer for maintenance (page 313). 2. Cabinet Model: Remove the paper guide assembly (page 348). Pedestal Model: Remove the top cover assembly (page 327). -
Page 330: Fan Assembly, Cabinet Exhaust
Fan Assembly, Cabinet Exhaust Fan Assembly, Cabinet Exhaust This procedure applies only to cabinet models. Removal 1. Prepare the printer for maintenance (page 313). 2. Open the cabinet doors and the printer cover. 3. Remove the paper stacker. (See Figure 36, page 394.) 4. -
Page 331: Fan Assembly, Card Cage
Fan Assembly, Card Cage Fan Assembly, Card Cage Removal 1. Prepare the printer for maintenance (page 313). 2. Cabinet Model: Remove the paper guide assembly (page 348). Pedestal Model: Remove the top cover assembly (page 327). 3. Disconnect the fan cable connector: Cabinet Model, Figure 46, page 416. -
Page 332: Fan Assembly, Hammer Bank
Fan Assembly, Hammer Bank Fan Assembly, Hammer Bank Removal 1. Prepare the printer for maintenance (page 313). 2. Remove the ribbon. (Refer to the User’s Manual .) 3. Remove the shuttle cover assembly (page 326). 4. Pedestal Model: Remove the top cover assembly (page 327). 5. -
Page 333: Hammer Spring Assembly
Hammer Spring Assembly Hammer Spring Assembly Removal 1. Prepare the printer for maintenance (page 313). 2. Remove the shuttle frame assembly (page 362). 3. Carefully vacuum the shuttle frame assembly. 4. Remove the hammer bank cover assembly (page 325). ATTENTION Hammer springs and hammer tips are fragile. - Page 334 Hammer Spring Assembly NOTE: The 6500-v15 hammer bank is shown here. Although the number of hammer springs and mounting screws varies among printer models, removal and installation are the same for all hammer spring assemblies. Discard old screws. Figure 16. This figure shows how to remove a hammer spring assembly from the hammer bank.
- Page 335 Using a Torx T-10 bit adapter, torque each screw to 14 inch-pounds (1.58 N•m). Tighten the center screw(s) first. (See Figure 17, page 336.) NOTE: Use the 1-30 inch-pound Torque Screwdriver, IBM part number 16F1661. 5. Install the hammer bank cover assembly (page 325).
- Page 336 Hammer Spring Assembly NOTE: The hammer spring assembly shown here is for a 6500-v15 printer. Although the number of hammer springs and mounting screws varies among printer models, removal and installation are the same on all models. New Hammer Spring Assembly Gently press down on the mounting base and hold the hammer spring in position as you install the screws.
-
Page 337: Ibm Coax/Twinax Expansion Board
IBM Coax/Twinax Expansion Board IBM Coax/Twinax Expansion Board Removal ATTENTION To prevent electrostatic damage to electronic components, wear a properly grounded static wrist strap when handling circuit boards, the shuttle frame assembly, and any other electronic component. 1. Prepare the printer for maintenance (page 313). -
Page 338: Magnetic Pick-Up (Mpu) Assembly
1. Install the MPU assembly by screwing it into the MPU bracket (page 409, Figure 43). NOTE: In the next step use the 1-30 inch-pound Torque Screwdriver, IBM part number 16F1661. 2. Using a feeler gauge, adjust the gap between the MPU assembly and the flywheel to 0.010 ± .001 inch (0.254 ± 0.025 mm). -
Page 339: Memory Modules And Security Key
Memory Modules and Security Key Memory Modules and Security Key ATTENTION To prevent electrostatic damage to electronic components, wear a properly grounded static wrist strap when handling circuit boards, the shuttle frame assembly, and any other electronic component. Removal 1. Make a configuration printout of all saved configurations. (Refer to the Setup Guide.) 2. - Page 340 Memory Modules and Security Key Code Loads Part Number ANSI Code V / IGP IPDS 39U2464 39U2467 39U2468 * This is also the Base ASCII-only security key Installation 1. Put on a static wrist strap and ground the lead to an unpainted part of the printer frame. Touch the printer frame with the hand wearing the wrist strap before you touch memory modules or the controller board.
- Page 341 Memory Modules and Security Key SDRAM soldered to controller board PSA3 Controller Board IMPORTANT: The controller board does not support EDO RAM. J9: Security Key Notched End Memory Requirements for Emulation Options on this side Flash Memory: IPDS IPDS J11: 72-pin Flash Memory SIMM: IPDS ANSI ANSI...
-
Page 342: Motor Assembly, Paper Feed
Motor Assembly, Paper Feed Motor Assembly, Paper Feed Removal 1. Prepare the printer for maintenance (page 313). 2. Cabinet Model: Remove the paper guide assembly (page 348). Pedestal Model: Remove the top cover assembly (page 327). 3. Remove the timing belt cover by squeezing the top and bottom to release the plastic tabs from the slots in the side plate (page 400, Figure 39). - Page 343 6. Reduce tension to 12 pounds (53.4 N) and torque the motor mount bolts to 18 ± 2 inch-pounds (2.03 ± 0.23 N•m). Use the 1-30 inch-pound Torque Screwdriver, IBM part number 16F1661. NOTE: Belt tension is correct if the belt deflects 1/8 inch midway between the pulleys.
-
Page 344: Motor Assembly, Platen Open
Motor Assembly, Platen Open Motor Assembly, Platen Open Removal 1. Prepare the printer for maintenance (page 313). 2. Cabinet Model: Remove the paper guide assembly (page 348). Pedestal Model: Remove the top cover assembly (page 327). 3. Cabinet Model: Remove the card cage fan (page 331). 4. - Page 345 Motor Assembly, Platen Open Installation 1. Position the platen open motor assembly with the wires toward the rear (page 416, Figure 46, item 12). 2. Install the 5/16 inch lower motor mount screw and torque it to 30 inch-pounds (3.39 N•m). (See page 416, item 15.) 3.
-
Page 346: Motor Assembly, Ribbon Drive
Motor Assembly, Ribbon Drive Motor Assembly, Ribbon Drive Removal 1. Prepare the printer for maintenance (page 313). 2. Remove the ribbon. (Refer to the Setup Guide. ) 3. Remove the screws and washers that secure the ribbon drive motor to the base casting at the lower right and upper left corners of the motor (page 416, Figure 46). -
Page 347: Operator Panel Assembly
Operator Panel Assembly Operator Panel Assembly NOTE: The procedure for removing and installing the operator panel is the same for cabinet and pedestal model printers. Removal 1. Prepare the printer for maintenance (page 313). 2. Open the printer cover. 3. Disconnect the RJ-11 connector P310 from J2 on the back of the operator panel. (See Figure 37, page 396.) 4. -
Page 348: Paper Guide Assembly
Paper Guide Assembly Paper Guide Assembly This procedure applies only to cabinet models. Removal 1. Prepare the printer for maintenance (page 313). 2. Open the printer cover. 3. Loosen—do not remove—the three paper guide assembly hold-down screws (Figure 19). 4. Slide the paper guide assembly to the left and lift it off the card cage. Installation 1. -
Page 349: Paper Ironer
Paper Ironer Paper Ironer <2> Over time the upper edge of the paper ironer can become sharp. To avoid cutting yourself, handle the paper ironer on the sides. CAUTION Removal 1. Remove the shuttle frame assembly (page 362). 2. Open the forms thickness lever. 3. -
Page 350: Platen
Platen Platen Removal 1. Prepare the printer for maintenance (page 313). 2. Remove the shuttle frame assembly (page 362). 3. Remove the paper ironer (page 349). 4. Remove the three 1/4 inch screws securing the paper ironer bracket assembly and remove the assembly. (See page 413, Figure 45, items 4 through 6.) 5. - Page 351 Platen Installation IMPORTANT The dowel pins protruding from the ends of the platen are the platen shafts, and are not equal in length. The platen must be installed with the longer shaft on the right side as you face the printer from the front. 1.
- Page 352 Platen Washers Platen Adjust Bracket Platen Wear Saddle Mechanism Base Platen Seat Figure 21. This figure shows how to position the platen adjust brackets on the mechanism base and wear saddles. 9. Slide the right ribbon guide assembly into the side plate and install the two 7/32 inch screws and washers. (See Figure 46, page 416, items 11, 13 and 14.) 10.
- Page 353 Platen 13. Apply bearing lubricant to the two platen shafts on both sides, between the ends of the platen and the platen adjustment brackets. 14. Install the paper ironer bracket. (See Figure 20, page 351): a. With the flat part of the bracket facing the front of the printer, place the two hooks of the upper part of the paper ironer over the platen shafts.
-
Page 354: Platen Stop Assembly (And Forms Thickness Lever)
Platen Stop Assembly Platen Stop Assembly NOTE: The forms thickness lever is part of the platen stop assembly. Removal 1. Prepare the printer for maintenance (page 313). 2. Loosen—do not remove—the 7/64 inch clamp screw and pull the platen stop assembly off the platen shaft. (See page 413, Figure 45, items 12 through15.) Installation 1. -
Page 355: Resistors, Terminating
Resistors, Terminating Resistors, Terminating For parallel interface configurations, the printer is equipped with 470 ohm pull-up terminating resistors and 1K ohm pull-down terminating resistors on the controller board. These are suitable for most applications. (See Figure 22, page 356.) If the standard terminating resistor pack is not compatible with the interface driver requirements of the host computer, other values of pull-up and pull-down resistors may be required. -
Page 356: Controller Board
Resistors, Terminating Controller Board Default: 470 Ohm Alt 1: 220 Ohm Alt 2: 1K Ohm Resistor Kit: 14H5525 Default: 1K Ohm Alt 1: 330 Ohm Alt 2: None Figure 22. This figure shows the size and location of the terminating resistors on the controller board. -
Page 357: Ribbon Guide Assembly (L/R)
Ribbon Guide Assembly (L/R) Ribbon Guide Assembly (L/R) Removal 1. Prepare the printer for maintenance (page 313). NOTE: The right ribbon guide is shown in Figure 46. The removal procedure is the same for the left ribbon guide. 2. Cut and remove the tie wrap from the tie wrap hole to free the ribbon guide cable (page 416, Figure 46). 3. -
Page 358: Ribbonminder Sensor
RibbonMinder** Sensor RibbonMinder** Sensor Removal 1. Prepare the printer for maintenance (page 313). 2. Cabinet Model: Remove the paper guide assembly (page 348). Pedestal Model: Remove the top cover assembly (page 327). 3. Remove the screw securing the RibbonMinder sensor to the base casting. (See page 413, Figure 45, items 28 and 29.) 4. -
Page 359: Shaft, Splined
Shaft, Splined Shaft, Splined IMPORTANT NOTE: In order to preserve correct alignment of the side plates, the barrier panel must remain installed and fastened during this procedure. Removal 1. Prepare the printer for maintenance (page 313). 2. Remove the static brush assembly. 3. - Page 360 Shaft, Splined 8. Install the paper supports on the splined and support shafts. (See page 411, item 4.) 9. Install the static brush assembly. 10. Return the printer to normal operation (page 314). NOTE: Align the marks on Tractor both tractors before inserting the splined shaft.
-
Page 361: Shaft, Support
Shaft, Support Shaft, Support IMPORTANT NOTE: In order to preserve correct alignment of the side plates, the barrier panel must remain installed and fastened during this procedure. Removal 1. Prepare the printer for maintenance (page 313). 2. Unlock the tractors and slide them to the far right. 3. -
Page 362: Shuttle Frame Assembly
Shuttle Frame Assembly Shuttle Frame Assembly Removal 1. Prepare the printer for maintenance (page 313). 2. Remove the ribbon. (Refer to the User’s Manual .) 3. Remove the shuttle cover assembly (page 326). 4. Disconnect the MPU cable connector (page 409, Figure 43). ATTENTION To prevent electrostatic damage to electronic components, wear a properly grounded static wrist strap when handling circuit boards, the shuttle frame assembly, and any other electronic component. - Page 363 5. Slide the side clamps over the guide shaft and torque the 5/32 inch socket head clamp screws to 30 ± 2 inch-pounds (3.39 ± 0.23 N•m). NOTE: Use the 1-30 inch-pound Torque Screwdriver, IBM part number 16F1661. 6. Torque the center captive 5/32 inch socket head screw to 30 ± 2 inch-pounds (3.39 ± 0.23 N•m).
-
Page 364: Spring, Extension, Hammer Bank
4. Unhook the extension spring from the spring lugs on the hammer bank and shuttle frame. (See Figure 43, page 409.) Installation 1. Put a dab of IBM #20 bearing lubricant on both spring lugs. ATTENTION Make sure the extension spring does not touch the MPU cable after installation. -
Page 365: Switch Assembly, Paper Detector
Switch Assembly, Paper Detector Switch Assembly, Paper Detector Removal 1. Prepare the printer for maintenance (page 313). 2. Cabinet Model: Remove the paper guide assembly (page 348). Pedestal Model: Remove the top cover assembly (page 327). 3. Remove the two screws securing the paper detector switch assembly. (See Figure 46, page 416, items 3 and 4.) 4. -
Page 366: Switch Assembly, Platen Interlock
Switch Assembly, Platen Interlock Switch Assembly, Platen Interlock Removal 1. Prepare the printer for maintenance (page 313). 2. Cabinet Model: Remove the paper guide assembly (page 348). Pedestal Model: Remove the top cover assembly (page 327). 3. Fully close the forms thickness lever (position ‘A’). 4. -
Page 367: Tractor (L/R)
Tractor (L/R) Tractor (L/R) Removal 1. Prepare the printer for maintenance (page 313). 2. Remove the splined shaft (page 359). 3. Remove the support shaft (page 361). 4. Remove the tractors. Installation 1. Using the replacement tractors, install the support shaft (page 361). 2. -
Page 368: Adjustment Procedures
List Of Adjustments Adjustment Procedures Infoprint 6500 printers are durable, low-maintenance machines, but some components and systems require occasional adjustment. Usually, you will be referred to this chapter by a troubleshooting procedure, or as part of a removal/installation procedure. List Of Adjustments Belt, Paper Feed Timing, Adjustment ........................ -
Page 369: Belt, Paper Feed Timing, Adjustment
Belt, Paper Feed Timing, Adjustment (Figure 24) Belt, Paper Feed Timing, Adjustment (Figure 24) 1. Prepare the printer for maintenance (page 313). 2. Cabinet Model: Remove the paper guide assembly (page 348). Pedestal Model: Remove the top cover assembly (page 327). 3. - Page 370 Belt, Paper Feed Timing, Adjustment (Figure 24) 1/8 inch Direction of Force Legend: Timing Belt Shield Motor Mount Bolt (2) Paper Feed Drive Motor Splined Shaft Figure 24. This figure shows how to adjust the paper feed timing belt.
-
Page 371: Belt, Platen Open, Adjustment
Belt, Platen Open, Adjustment (Figure 25) Belt, Platen Open, Adjustment (Figure 25) 1. Prepare the printer for maintenance (page 313). 2. Cabinet Model: Remove the paper guide assembly (page 348). Pedestal Model: Remove the top cover assembly (page 327). 3. Remove the platen open belt cover (1) by squeezing the top and bottom to release the plastic tabs from the slots in the side plate. - Page 372 Belt, Platen Open, Adjustment (Figure 25) 3/16 inch Legend: Belt Cover Motor Mount Screw (2) Platen Open Motor Shaft Figure 25. This figure shows how to adjust the platen open belt.
-
Page 373: Paper Scale Alignment
Paper Scale Alignment (Figure 26) Paper Scale Alignment (Figure 26) 1. Open the printer cover. 2. Load paper. 3. Connect the power cord to the AC power source. 4. Set the printer power switch to 1 (on). 5. Verify that the shuttle cover (1) is properly installed (page 326). 6. -
Page 374: Platen Gap Adjustment
Platen Gap Adjustment (Figure 27) Platen Gap Adjustment (Figure 27) IMPORTANT Only do this procedure if the original equipment shuttle frame assembly or platen has been replaced by a new or refurbished unit. 1. Prepare the printer for maintenance (page 313). 2. - Page 375 Platen Gap Adjustment (Figure 27) NOTE: Left side adjustment shown. Right side is the same. Legend: Platen Stop Knob Forms Thickness Lever Feeler Gauge (0.012 inch or 0.30 mm) Hammer Bank Cover Ribbon Mask Set Screw, 3/32 inch hex (2) Figure 27.
-
Page 376: Ribbon Guide Alignment
Ribbon Guide Alignment (Figure 28) Ribbon Guide Alignment (Figure 28) 1. Open the printer cover. 2. Load paper. 3. Install the ribbon. (Refer to the User’s Manual .) 4. Using the PRINTER MECHANISM TESTS: Shuttle Slow test (page 216), wind the ribbon fully onto the ribbon spool on the side opposite the ribbon guide you want to adjust. - Page 377 Ribbon Guide Alignment (Figure 28) Right Ribbon Guide Left Ribbon Guide Legend: Screw, Skid (2) Ribbon Steel Washer Screw, Retaining (2) Figure 28. This figure shows how to align Ribbon Guide Alignment...
-
Page 378: Adjusting The End Of Forms Distance
Adjusting The End Of Forms Distance Adjusting The End Of Forms Distance This procedure tests and sets the distance from the page perforation at which an END OF FORMS fault message is triggered. This adjustment prevents printing on the platen when the printer runs out of paper. The measurement units are dot rows. You will use the dot row patterns printed by the END OF FORMS ADJUST self-test to verify that this parameter is set correctly. - Page 379 Adjusting The End Of Forms Distance 8. The display will show “SERVICE / PRINTER MECHANISM TESTS”, the first menu item. Press Enter to enter the mechanism tests menu. 9. Press SCROLL↑ or SCROLL↓ until “PRINTER MECHANISM TESTS / END OF FORMS ADJUST” is on the display. This test will print a vertical “comb”...
- Page 380 Adjusting The End Of Forms Distance 17. Press ENTER. The number of dots will move up to the top line of the display. 18. Using the SCROLL↑ or SCROLL↓ key, adjust the XX DOTS value up or down by the number of dots you counted in step 12.
-
Page 381: Hammer Phasing Adjustment
Hammer Phasing Adjustment Hammer Phasing Adjustment You must check and adjust hammer phasing if the controller board is replaced, the shuttle frame assembly is removed, or if the MPU is replaced. The hammer phase value is a timing parameter that permits you to adjust the horizontal alignment of dots in character printing. The phase value numerical units are relative;... - Page 382 Hammer Phasing Adjustment 13. Press ENTER. The phasing index (followed by an asterisk) will move up to the top line of the display. 14. Press SCROLL ↑ or SCROLL ↓ to increase or decrease the phasing index, then press ENTER to activate the value as it prints.
-
Page 383: Coil Temperature Adjustment
Coil Temperature Adjustment Coil Temperature Adjustment This procedure applies only to models 6500-v15 and 6500-v20. Do this procedure if the printer’s original controller board, power supply board, or shuttle frame assembly have been replaced. Do not do this procedure if the controller board, power supply board,or shuttle frame assembly were removed and reinstalled as part of other maintenance tasks. -
Page 384: Dynamic Paper Tension Adjustment
Dynamic Paper Tension Adjustment Dynamic Paper Tension Adjustment This procedure helps you identify and eliminate conditions that contribute to paper jams, excessive tension on the paper feed motor, and vertical dot compression or expansion. 1. Open the printer cover. 2. Unload paper. Make sure the ribbon is installed in the printer. 3. - Page 385 Dynamic Paper Tension Adjustment 6. Close the forms thickness lever all the way (pointer at ‘A’). 7. Attach the hook of a “fish scale” force gauge through the tape you installed in step 5. (See Figure 33.) 8. Pull the paper slowly straight up through the print station for about six inches and note the maximum force exerted on the scale.
- Page 386 Dynamic Paper Tension Adjustment 11. If the average value is greater than 15 ounces, check the platen gap (page 374), adjust if necessary, and recheck the dynamic paper tension. 12. If the platen gap is correct, remove the shuttle frame assembly (page 362) and check the following: a.
-
Page 387: Tractor Belt Tension Adjustment
Tractor Belt Tension Adjustment Tractor Belt Tension Adjustment Print compression can be reduced by adjusting the tension of the tractor belts. The procedure below removes the slack that might occur in some tractors. IMPORTANT Only do this procedure when the user reports that the first print line of forms is compressed and only after adjusting the dynamic paper tension (page 384). - Page 388 Tractor Belt Tension Adjustment The arrow points to a LH (left) or a RH (right) tractor. Left tractor is shown here. Right Tractor: One Click and Test. Left Tractor: One Click and Test. Figure 34. This figure shows how to adjust the tension of a tractor belt.
-
Page 389: Ethernet Initialization
Ethernet Initialization Ethernet Initialization To initialize the ethernet interface, do the following steps: 1. Power on the printer. 2. Wait for “READY / ETHERNET ADAPTER IS READY” to display on the LCD. 3. If the printer is in the READY state, press the STOP key. The printer must be in the NOT READY state to do this procedure. 4. -
Page 390: Parts Catalog
Parts Catalog Organization Of This Chapter This chapter contains drawings of the electromechanical assemblies comprising the printer. Following each illustration is a list of the illustrated parts and their part numbers. Items marked “Ref” (reference) are not spared, or are part of another assembly, or are shown elsewhere. - Page 391 Chapter Illustrated Parts Breakdown Figure 48. IBM Coax/Twinax Expansion Board ....................... page 421 Figure 49. Ethernet Interface Assembly........................page 423 Figure 50. RS-422 Interface............................page 425 Figure 51. Twinax Extension Cable .......................... page 427 Figure 52. Dipole Antenna for Wireless NIC ......................page 429...
- Page 392 Figure 35. This illustrated parts breakdown shows the top cover, doors, casters, and shipping kit on a cabinet model.
- Page 393 Caster, with Brake Two at front 57G1486 Caster, without Brake Two at rear 39U2477 Logo, IBM Infoprint 6500 30H4008 Wire Rope, Front and Rear One on each door (Rear not shown in Figure 35) 30H3986 Re-Ship Kit, Cabinet Model, without power stacker...
- Page 394 Figure 36. This illustrated parts breakdown shows the passive paper stacker and paper chains in a cabinet model.
- Page 395 Chapter Illustrated Parts Breakdown (Figure 36) Item Part No. Description Notes 57G7176 Passive Stacker 30H3981 Guide Rail, Stacker 04H4779 Clip, Rail Screw, 6-32 x 0.875 (4) 14H5296 Spares Kit, Grommet 14H5272 Chain Assembly Kit Kit contains eight chains 57G7260 Power Cord, U.S. Grommet, Power Cord (2) Included in item 5 39U2545...
- Page 396 Figure 37. This illustrated parts breakdown shows the operator panel and cabinet details in a cabinet model.
- Page 397 Chapter Illustrated Parts Breakdown (Figure 37) Item Part No. Description Notes 39U2478 Operator Panel, Cabinet Includes mounting hardware 10R4007 Operator Panel Overlay, English 10R4008 Operator Panel Overlay, French 10R4009 Operator Panel Overlay, German 10R4010 Operator Panel Overlay, Spanish 10R4011 Operator Panel Overlay, Italian 10R4012 Operator Panel Overlay, Dutch 10R4013...
- Page 398 Figure 38. This illustrated parts breakdown shows the main assemblies of a pedestal model and the shipping kit.
- Page 399 Chapter Illustrated Parts Breakdown (Figure 38) Item Part No. Description Notes 39U2479 operator panel Assembly, Ped, V3 Screw, Captive (2) 39U2482 Lid Assembly, Pedestal Screw (2) 14H5300 Cable Assembly, operator panel 39U2480 Pedestal Kit, Grey 39U2481 Field Kit, Caster Kit, Ped 39U2507 Window, Top Cover 39U2482...
- Page 400 Figure 39. This illustrated parts breakdown shows the inside covers and card cage of a cabinet model.
- Page 401 Chapter Illustrated Parts Breakdown (Figure 39) Item Part No. Description Notes 39U2542 Shuttle Cover Assembly Air Shroud Assembly. Includes items 2 and 11. Screw, Captive (2) 10-24x.62 with O-ring, .125x.250x.06 Screw, Thread Forming (4) 6-32x.25 Barrier Shield 57P1746 Paper Path, V3 All cabinet models Screw, w/Lock Washer (3) 6-32x.25 and #6 Flat Washer...
- Page 402 See Figure 41, page 404. Figure 40. This illustrated parts breakdown shows the inside covers and card cage of a pedestal model.
- Page 403 Chapter Illustrated Parts Breakdown (Figure 40) Item Part No. Description Notes 39U2542 Shuttle Cover Assembly Air Shroud Assembly. Includes items 2 and 8. Screw, Captive (2) 10-24x.62 with O-ring, .125x.250x.06 Screw, Thread Forming (4) 6-32x.25 Barrier Shield Power Supply Shield Taped to card cage along upper edge 57G1468 Belt, Timing, 050P, 100 Teeth...
- Page 404 From Figure 40, page 402. Rotated 180 degrees. To IEC 320 AC To Connector P1 Power Input (White Wire) (Connector J301, White Wire) To IEC 320 AC Power Input (Connector J301, Black Wire) To Connector P1 (Black Wire) Figure 41. This illustrated parts breakdown shows the card cage fan assembly and circuit breaker on a pedestal model.
- Page 405 Chapter Illustrated Parts Breakdown (Figure 41) Item Part No. Description Notes Nut, 6-32 (1) Upper right fan corner only 57G1440 Card Cage Fan Assembly Air flow is into card cage Fan Guard Screw, w/Lock Washer (4) 6-32x.1.75 Card Cage, Pedestal 14H5571 Circuit Breaker Baffle, Power Supply, Ped...
- Page 406 Two places: Exploded to show assembly. Do not remove the holddown clamps and screws. To J03 (MPU) To J02 (Shuttle Motor) To the Terminator Board on the Shuttle Frame Assembly Figure 42. This illustrated parts breakdown shows the shuttle assembly and the circuit boards inside the card cage.
- Page 407 Chapter Illustrated Parts Breakdown (Figure 42) Item Part No. Description Notes 39U2494 Ribbon Mask/Hammer Bank Cover Assy, 500 Model v05 and v5P 39U2495 Ribbon Mask/Hammer Bank Cover Assy, 1000 Model v10 and v1P 39U2496 Ribbon Mask/Hammer Bank Cover Assy, 1500 Model v15 39U2508 Ribbon Mask/Hammer Bank Cover Assy, 2000...
- Page 408 Item Part No. Description Notes 14H5330 Shuttle Motor Cable Assembly 39U2533 Hammer Bank Power Cable Assembly Use on all except 6500-v20 02N6214 Hammer Bank Power Cable Assembly 6500-v20 only 14H5288 Housing, Connector Kit (P106/P107) P107, Motor Sensor, Right 14H5287 Centronics I/O Cable Assembly See also page 284.
- Page 409 Chapter Illustrated Parts Breakdown Spring Lug (Do not remove grease) <21> Make sure the extension spring does not touch the MPU cable after installation. Spring Lug (Do not remove grease) See detail for 0.010 ± .001 inch (0.254 ± .025 mm) flywheel clearance Figure 43.
- Page 410 (Figure 43) Item Part No. Description Notes 57G1476 Magnetic Pickup Assy (MPU) Screw, Socket Cap, 6-32x.38 30H3985 Spring, Hammer Bank 14H5329 Cable Assembly, MPU MPU Cable Connector (P03) 10R4587 Anti-Rotation Spring Constraint Model v20 only...
- Page 411 Chapter Illustrated Parts Breakdown IMPORTANT: The barrier panel is removed in this illustration to more clearly illustrate the mounting hardware of the tractor shafts. In order to preserve correct alignment of the side plates, however, the barrier panel must remain installed and fastened if the splined or support shafts are removed or replaced.
- Page 412 (Figure 44) Item Part No. Description Notes Screw, Socket Cap, 6-32x.312 Trilob (Self- Tapping) (2) Plate, Tractor Shaft, Left 54P1474 Bearing, Ball, Sealed 39U2537 Paper Support (2) 54P1475 Tolerance Ring,.37X.25,.006 THK,SS 39U2510 Splined Shaft Assembly (Blue Handle) Screw, Socket Cap, 6-32x.312 Trilob (Self- Tapping) Plate, Tractor Shaft, Right 57P1181...
- Page 413 Chapter Illustrated Parts Breakdown NOTE: Black tape faces paper motion detector. NOTE: Models 6500-v15 and -v20 only. Install item 27 in front of item 3; that is, on the shuttle side. All other models do not use this item. NOTE: Item 25: Platen Hardware Kit 9 10...
- Page 414 (Figure 45) Item Part No. Description Notes Setscrew Part of item 25 Bracket, Platen (2) Part of item 25 57G1469 Ironer Assembly, Reverse Paper Feed Screw, Thread Forming (3) 6-32x.25 54P1476 Ironer Bracket/Plate Field Kit Plate, Ironer Part of item 5 10R4285 Platen Assembly Washer, Flat (2)
- Page 415 Chapter Illustrated Parts Breakdown Item Part No. Description Notes 57G1514 Platen Pulley, Driven Screw, Socket Cap, 6-32x.44 Part of item 21 57G1467 Belt, Timing, 312W, 87 Teeth Platen Open Belt 54P1379 Platen/Paper Feed Cover Kit Platen open belt cover shown in Figure 45.
- Page 416 Install screws here. Top View Route cable under Hammer Bank Fan base casting 20 21 See detail above Figure 46. This illustrated parts breakdown shows the motors, cooling fans, and the paper detector switch.
- Page 417 Chapter Illustrated Parts Breakdown (Figure 46) Item Part No. Description Notes 57G1440 Fan Assembly Air flow is into card cage Screw, w/Lock Washer (3) Two 6-32x1.75 on botton One 6-32x0.50 on top left 14H5281 Paper Detector Switch Assy Standard switch 02N7169 Paper Detector Switch Assy Black Back forms...
- Page 418 Item Part No. Description Notes Screw, w/Lock Washer (2) 6-32x1.25 14H5159 Hammer Bank Fan Assembly, All Except v20 Air flow is up. 54P1454 Hammer Bank Fan Assembly, Model v20 Air flow is up. Screw, Socket Cap, 10-24x.75 Post, Platen Belt Spring Spring, Platen Belt...
- Page 419 Chapter Illustrated Parts Breakdown See inside detail below. To IEC 320 AC Power Input (Connector J301, Black Wire) To IEC 320 AC Power Input (Connector J301, White Wire) Black Wire To Connector P1 (Black Wire) To Connector P1 (White Wire) Black Wire White Wire Card cage fan and...
- Page 420 (Figure 47) Item Part No. Description Notes 14H5571 Circuit Breaker IEC 320 AC Power Connector Connector J301 Chassis Ground Stud Connector P1 To power supply board connector J1 Cable Assy, AC-In, Power Supply Part of Field Kit, AC Assy 14H5289...
- Page 421 Chapter Illustrated Parts Breakdown IMPORTANT: Leave this slot empty if the printer has a power stacker. Figure 48. This illustrated parts breakdown shows the IBM coax/twinax expansion board.
- Page 422 (Figure 48) Item Part No. Description Notes 39U2757 Spare PCBA, PCI-CT, V3 39U2758 Spare PCBA, PCI-CT, V3, Advance Exchange Plate, PCI Cover Card Cage Screw Controller Board...
- Page 423 IMPORTANT: Leave this slot empty if the printer has a power stacker. Figure 49. This illustrated parts breakdown shows the ethernet interface assembly.
- Page 424 (Figure 49) Item Part No. Description Notes 75P2812 Spare PCBA, PCI-NETWORK 17R7301 Spare PCBA, PCI-NTWRK, Advance Exchange 39U2514 Spare PCBA, PCI Wireless Plate, PCI Cover Rear of Card Cage Screw Controller Board...
- Page 425 See detail at right Pin 10 Figure 50. This illustrated parts breakdown shows the RS-422 interface.
- Page 426 (Figure 50) Item Part No. Description Notes 75P1621 PCBA, RS422 ADAPTER, DB9/DB25 10R4588 Screwlock Kit, Female (2) 75P1625 Cable Assembly, RS-422, I/O RS-422 Connector, 9-Pin Connector J15 Note that there is no Pin 10. If Pin 10 is present, remove it. Controller Board Connector J201, RS-232, 9-Pin Cover Plate...
- Page 427 Figure 51. This illustrated parts breakdown shows the twinax extension cable required if the printer has a PSA3 controller board, a twinax interface, and the power stacker.
- Page 428 (Figure 51) Item Part No. Description Notes 01P5948 Twinax Auto-Termination Cable (“Smart-T”) 75P2813 Cable, Extension, Smart-T Required in printers with the power stacker so the twinax auto-termination cable will clear the stacker elevator. (See also page 288.) PCI-CT Twinax Connector PCI-CT Coax Connector...
- Page 429 Cabinet Model Pedestal Model Figure 52. This illustrated parts breakdown shows the dipole antenna and cable used with the optional wireless NIC.
- Page 430 (Figure 52) Item Part No. Description Notes 10R3183 Antenna, Rubber Duck, Dipole, S24 75P2249 Cable, MMCX-BNC, 10 inch, S24...
-
Page 431: Preventive Maintenance
Preventive Maintenance Contents Cleaning The Printer ..............................page 432 Cleaning The Exterior .............................. page 432 Cleaning The Interior..............................page 433 Cleaning The Shuttle Frame Assembly........................page 434 Cleaning The Card Cage Fan Assembly........................page 436... -
Page 432: Cleaning The Printer
Cleaning The Printer Aside from normal replenishment of paper and ribbons, the only preventive maintenance required for the printer is periodic cleaning. Because operating conditions vary widely, the user must determine how often to clean the printer. There is no guarantee that the user will clean the printer regularly, however, so you should clean the printer whenever you are called to service it. -
Page 433: Cleaning The Interior
Cleaning The Interior 1. Power off the printer. 2. Disconnect the AC power cord from the power source. 3. Open the printer cover. 4. Remove paper from the printer. 5. Remove the ribbon. 6. Using a soft-bristled, non-metallic brush, wipe paper dust and ribbon lint off the tractors, shuttle cover assembly, base casting, and ribbon guides. -
Page 434: Cleaning The Shuttle Frame Assembly
Cleaning The Shuttle Frame Assembly 1. Remove the shuttle cover assembly (page 326). 2. Remove the shuttle frame assembly (page 362). 3. Remove the paper ironer (page 349). <2> Over time the upper edge of the paper ironer can become sharp. To avoid cutting yourself, always handle the paper ironer on the sides. - Page 435 NOTE: The 6500-v15 hammer bank is shown here. The procedure is the same for all hammer banks. Hammer Tip Figure 54. This figure shows a hammer tip for cleaning. ATTENTION The hammer bank contains a strong magnet. To prevent damage to the hammer tips, do not let the hammer bank cover assembly snap into place as the hammer bank magnet attracts it.
-
Page 436: Cleaning The Card Cage Fan Assembly
Cleaning The Card Cage Fan Assembly 1. Cabinet Models: Remove the paper guide assembly (page 348). Pedestal Model: Remove the top cover assembly (page 327). 2. Vacuum the card cage fan assembly and surrounding areas to remove paper particles, dust, and lint. (See Figure 55.) 3. -
Page 437: A Installing And Relocating The Printer
Installing And Relocating The Printer Installing And Configuring The Infoprint 6500 Printer Installation and configuration of the printer are covered in the IBM Infoprint 6500 Line Matrix Printer: User’s Manual, English , Form No. S544-5957. Installation, configuration, and troubleshooting of the Network Print Server are covered in three documents: •... -
Page 438: B Communication Adapters
Communication Adapters Contents Ethernet Interface Assembly ............................ page 439 Ethernet Troubleshooting Tips ..........................page 439 IBM Coax/Twinax Expansion Board......................... page 444... -
Page 439: Ethernet Troubleshooting Tips
Appendix B Ethernet Interface Assembly Ethernet Interface Assembly The ethernet LAN option is a 10/100Base-T network interface card (NIC) that can be installed at the factory or ordered as a field kit. The NIC plugs directly into a PCI slot on the PSA3 controller board. This NIC does not have LEDs or DIP switches. (See Figure 49 on page 423.) NOTE: To remove and install the ethernet interface, see page 329. - Page 440 Tip 2: Ethernet Port Not Enabled, PMU Not Communicating Problem: if the ethernet port is not enabled, under the Debug menu the following message will occur when trying to connect to a printer: “The network address given in the printer properties was reached, but the printer port is busy. This may occur when another user is accessing the same printer, or when another logical printer is connected to the same address.”...
- Page 441 This will ensure that you can re-enter the address information when you are done. You must write this information down because there is no way to set up a second ethernet connection. 1. Obtain an ethernet cross-over cable from a computer or electronics shop, or order one using IBM P/N 09J7206. 2. Power up the laptop computer.
- Page 442 17. Disconnect the laptop. Repeat steps 3through 5b. 18. Select “Obtain an IP Address Automatically.” 19. Click on OK. 20. Reboot the laptop and all should be back to normal. Tip 4: Telnet to the Printer Only do this procedure after you have successfully pinged the NIC by following the steps in Tip 4 above. 1.
- Page 443 If still no, go to Tip 2. If it still fails, replace the NIC. For TCP/IP IPDS communication problems, do the following steps: 1. Print the ethernet test page from the printer. 2. Go to the heading TCP SOCKET PRINT MANAGER. 3.
-
Page 444: Ibm Coax/Twinax Expansion Board
5. Connect the ethernet crossover cable from the laptop to the printer’s ethernet port, if you have not already done so. 6. On the laptop, from the GENERAL tab select the Print Test Page button at the bottom of the window. IBM Coax/Twinax Expansion Board This is the CT interface. To remove and install this board, see page 337. -
Page 445: C Power Cords And Adapters
Description 1332167 Line Cord, IBM, Japan 1838573 Line Cord, IBM, 12 Feet, United States, 220 Volt 1838574 Line Cord, 220V 6 Feet Non-Lock, United States, Canada Power Cord, 110V 12 Feet Non-Lock, United States, Canada, Brazil, Cayman Islands, Costa Rica,... - Page 446 DP Adapter 21F4342 Cable, AS/400*, RS-232, IBM 38F8254 Twinax Auto-Termination Cable 57G7261 Power Cord, 6 Feet, Non-Lock, United States, Canada,110 Volt 58F2861 Conn, Cable, RISC System/6000*, IBM 63H7362 Cable, RISC System/6000* 63H7364 Cable, AS/400, RS-232 63H7366 Cable, PC Parallel 63H7368...
-
Page 447: D Ascii Codes
ASCII Codes Character Decimal Character Decimal Character Decimal Character Decimal & < >... - Page 448 Appendix D Character Decimal Character Decimal Character Decimal Character Decimal é â ä à å ç ê ë è ï î ì Ä Å É æ Æ ô ö ò Ç û ü ù...
- Page 449 Appendix D Character Decimal Character Decimal Character Decimal Character Decimal ÿ Ö Ü ° £ á í ó ú ñ Ñ » • ª ¢ ¿ ¥ « – ¡...
- Page 450 Appendix D Character Decimal Character Decimal Character Decimal Character Decimal º ¿ NOTE: For the hardware handshake XON/XOFF commands: XON = Ctrl Q (DC1) XOFF = Ctrl S (DC3)
-
Page 451: E Surestak** Power Stacker
SureStak Power Stacker Contents Introduction .................................. page 452 How to Operate the Power Stacker..........................page 453 Stacker Operator Panel..............................page 454 Using The Power Stacker ............................page 455 Loading and Starting the Power Stacker........................page 457 Stacker Problems................................. page 459 Stacker First Inspection.............................. -
Page 452: Introduction
Appendix E Introduction Introduction The SureStak** Power Stacker is a factory-installed option for high speed cabinet model printers that mechanically directs the paper from the print area to the paper stack. The power stacker is mounted in the rear of the cabinet and has its own operator panel. -
Page 453: How To Operate The Power Stacker
How To Operate The Power Stacker Figure 56 shows the locations of the principal components of the power stacker. Paper Throat Pinch Rollers Stacker Operator Panel Elevator Lift Handle Elevator Disable Elevator Switch Assembly Paper Length Indicator Wire Paper Tent In Pull Out Paddle Shaft Paper Tray... -
Page 454: Stacker Operator Panel
Appendix E How To Operate The Power Stacker Stacker Operator Panel The stacker operator panel is behind the rear door of the cabinet. (Figure 57.) ON/OFF Indicator Lamp On Line Indicator Lamp ON LINE Key PAPER ADVANCE Key ELEVATOR UP Key ELEVATOR DOWN Key Figure 57. -
Page 455: Using The Power Stacker
Using The Power Stacker 1. Set the printer power switch to | (On). 2. Open the rear door of the cabinet. 3. On the stacker operator panel, press ON LINE to take the printer offline (NOT READY). (Figure 57.) 4. Press the ELEVATOR UP key and wait for the elevator assembly to reach the top of its travel. (Figure 57.) 5. - Page 456 Appendix E How To Operate The Power Stacker 6. Push or pull the paddle shaft toward the front or the rear of the printer and set the paper length by aligning indicator notch on the bearing bracket with the paper length indicator. (Length range: 5 to 12 inches.) (Figure 59.) Paddle Shaft Paper Length Indicator Bearing Bracket...
-
Page 457: Loading And Starting The Power Stacker
Loading and Starting the Power Stacker 1. Press the PAPER ADVANCE key on the the stacker operator panel and hand feed the paper down into the paper throat. Continue to advance the paper until it reaches the wire tent and there are 3 to 5 extra sheets in the stacker. Make sure the paper passes through the throat of the paper stacker. - Page 458 Appendix E How To Operate The Power Stacker 3. Press the ON LINE key on the front or rear operator panel to put the printer in the online state. The stacker elevator will descend to its lowest position. (Figure 61.) Figure 61.
-
Page 459: Stacker Problems
Stacker Problems The power stacker augments the paper feed system of the printer. The most frequently occurring problems in the paper feed system are paper jams. Because of the electromechanical nature of the system, other problems that can occur are worn or poor electrical connections and cabling, worn or defective feed motors, worn or damaged mechanical components, or incorrect installation of the stacker assembly. -
Page 460: Stacker Confidence Check
Appendix E Stacker Problems a. Check the stacker limit switches (page 191). b. Move the elevator up and down using the ELEVATOR UP and ELEVATOR DOWN keys on the rear operator panel. While the elevator is moving, press the ELEVATOR UP or ELEVATOR DOWN key. Elevator motion should stop. c. -
Page 461: Removing The Power Stacker
6. Using the rear operator panel, press the PAPER ADVANCE (down arrow) key until three or four pages feed through the stacker throat. a. Check the LCD on the front operator panel for faults. If there is a fault, the paper out detector is failing and needs to be checked and cleaned. - Page 462 Appendix E Stacker Problems 8. Check all four stacker motors for 15.2 ± 1.5 Ohms resistance per phase. All four motors are the same: Measure pin 1 to pin 2 for Phase A Measure pin 3 to pin 4 for Phase B pin 1 = red pin 2 = yellow pin 3 = orange...
- Page 463 Table 7. Power Stacker Problems Symptom Origin of Symptom Explanation Solution 1. The stacker elevator may be obstructed. The message will always occur if the user presses the ELEVATOR UP key on the stacker operator panel to move 019 STACKER FAULT Message on operator panel the elevator and the elevator is CHECK STACKER...
- Page 464 Appendix E Stacker Problems Table 7. Power Stacker Problems Symptom Origin of Symptom Explanation Solution This procedure tests the four stacker motors and their cables. You will usually be referred to this procedure Stacker motor check Other troubleshooting from other troubleshooting page 192 procedures.
-
Page 465: Removing The Power Stacker
Removing The Power Stacker 1. Set the printer power switch to O (off). 2. Unplug the power cord. 3. Unload paper from the stacker area. (Refer to the User’s Manual.) 4. Remove the paper tent (if present). (Figure 62.) Paper Tray Paper Tent Figure 62. - Page 466 5. Cut the tie wrap (if present) and remove the paper fence. (Figure 63.) Paper Fence Figure 63. This figure shows how to remove the paper fence.
- Page 467 6. Remove the screws, washers, and standoff from the stacker operator panel. (Figure 64.) Standoff Washer Long Screw Washer Short Screw Figure 64. This figure shows how to remove an early stacker operator panel from the cabinet frame.
- Page 468 7. Remove four cables from the stacker operator panel, and remove the stacker operator panel. (Figure 65.) Ejection Lever Logic Cable (P104) Power Cable Elevator I/O Cable (P102) Remove the Tie Wrap Rail Cable (P107) Figure 65. This figure shows how to remove the cables from the rear of the stacker operator panel.
- Page 469 8. Remove the two 10-32 x 5/32 inch buttonhead screws and washers securing the vertical rails to the upper frame cross- member at the rear of the cabinet. (Figure 66.) 9. Remove the two Torx T-10 screws securing the stacker base to the cabinet floor. (Figure 66.) 10.
- Page 470 11. Pull the paper tray out until the holes in the rails permit access to the M3 buttonhead screws. (Figure 67) 12. Loosen one turn—do not remove—the M3x6 screws securing the vertical rails to the stacker base. Each rail is secured by two screws.
- Page 471 13. Lower the elevator assembly to its lowest position. 14. Remove the two 4-40 x 1/4 inch screws securing the elevator I/O cable to the elevator assembly and disconnect the stacker I/O cable. (Figure 68.) Do not grasp the stacker in this area to lift it.
- Page 472 NOTE: It may be easier to wear gloves for the next step. 15. Slide the entire stacker assembly slightly to the right to clear the air exhaust duct. Tilt the vertical rails toward the front of the printer until they clear the upper frame cross-member. Slide the stacker assembly to the rear and angle it out of the cabinet, as shown in Figure 69.
-
Page 473: Installing The Power Stacker
Installing The Power Stacker NOTE: This procedure is for complete installation of the power stacker, including cable assemblies and the stacker operator panel. 1. Set the printer power switch to O (off). 2. Unplug the power cord. 3. Remove paper. 4. - Page 474 5. Connect the power stacker logic cable P103 to connector J117 on the controller board. (Figure 71.) 6. Disconnect the power supply cable from connector J101 on the controller board. (Figure 71.) 7. Connect power supply cable connector P101 to the stacker power cable, then connect the stacker power cable to connector J101 on the controller board.
- Page 475 10. Pull the paper tray out until the holes in the rails permit access to the M3 buttonhead screws. (Figure 72.) 11. Loosen one turn—do not remove—the M3x6 screws securing the vertical rails to the stacker base. Each rail is secured by two screws.
- Page 476 12. Position the elevator assembly at the bottom of the vertical rails. (Figure 73.) 13. Connect the elevator I/O cable to the elevator assembly and install the two 4-40 x 1/4 inch screws, as shown in Figure 73. Do not grasp the stacker in this area to lift it.
- Page 477 ATTENTION The power stacker assembly mounts to the rear upper frame cross-member and the cabinet floor. It is a snug fit. During installation, grasp the stacker by the vertical rails and take care to avoid scratching painted surfaces or damaging the stacker. NOTE: It may be easier to wear gloves for the next step.
- Page 478 16. Connect the stacker cables to the rear of the stacker operator panel assembly and make sure the ejector levers close over the connectors. (Figure 75.) 17. Press rail cable connector P107 into the operator panel until the ejectors close, then tie wrap the ejectors to the connector. (Figure 75, detail.) Ejection Lever Logic Cable (P104)
- Page 479 18. Apply the double-sided tape to one end of the operator panel standoff. Remove the paper backing and hold the standoff inside the cabinet while you insert the upper mounting screw and washer through the hole in the frame. Use the screw as a guide to align the standoff with the hole, then press the standoff against the inside wall and push the upper screw in as far as it will go.
- Page 480 NOTE: It may be easier to wear gloves for the next three steps. 21. Work the stacker base rearward and engage the upper brackets of the vertical rails under the upper frame cross-member. (Figure 77b.) 22. Align the holes in the vertical rail brackets with the holes in the upper frame cross-member. (Figure 77c and Figure 78.) 23.
- Page 481 24. Install finger tight the 10-32 x 5/32 inch buttonhead screw and washer securing the left vertical rail to the upper frame cross-member. (Do not install the right hand screw yet.) (Figure 78.) 25. Install and tighten the two Torx T-10 screws securing the stacker base to the cabinet floor. (Figure 78.) 26.
- Page 482 27. Install finger tight the 10-32 x 5/32 inch buttonhead screw and washer securing the right vertical rail to the upper frame cross-member. (Figure 78.) 28. Move the elevator assembly up and down on the vertical rails until it travels smoothly with no binding. 29.
- Page 483 33. Install the paper fence. (Figure 80.) Stacker Base Paper Fence Figure 80. This figure shows how to install the paper fence in the cabinet.
- Page 484 34. If the paper you will use is not wider than 15.5 inches (39.5 cm) install the wire paper tent in the pull out paper tray. (Figure 81.) If the paper is wider than 15.5 inches (39.5 cm) leave the paper tent out of the printer. Note the positions of the alignment tab and the paper fence.
-
Page 485: Replacing The Constant Force Spring
Replacing The Constant Force Spring 1. Remove the stacker assembly from the printer (page 465). ATTENTION In the next step, do not over-tighten the tie wraps or string. Tighten the tie wraps or string just enough to hold the elevator up. 2. - Page 486 The constant force spring is powerful and under high tension. Protect your hands with gloves. To avoid pinching or cutting your fingers, grip the spring and drum firmly in the next two steps. Coil the spring slowly and carefully. Do not let the spring twist or crimp. CAUTION 3.
-
Page 487: Replacing The Timing Belts
Replacing The Timing Belts 1. Remove the stacker assembly from the printer (page 465). 2. Raise the elevator assembly to its highest position and secure it to the vertical rails using tie wraps or string. (Figure 82, page 485.) 3. If you are removing the left timing belt, remove the screw and washer from the pulley at the bottom of the left vertical rail, and remove the pulley. - Page 488 5. Loosen the two setscrews on the motor pulley and remove the pulley. Unplug the motor cable, if necessary. (Figure 85.) Go to step 6. Timing Belt Motor Setscrew Pulley Setscrew Figure 85. This figure shows how to remove the pulley from the timing belt motor. 6.
- Page 489 7. Remove two Allen screws from the belt clamp that secures the timing belt to the stacker frame. (Figure 87.) Allen Screw Belt Clamp Allen Screw Belt Clamp Figure 87. This figure shows how to remove the timing belt clamps.
- Page 490 8. Remove the timing belt by working it around the vertical rail and constant force spring. (Figure 88.) NOTE: Left timing belt is shown. Right is the same. Timing Belt Figure 88. This figure shows how to remove the timing belt. 9.
-
Page 491: Replacing The Roller Drive Shaft
Replacing The Roller Drive Shaft 1. Remove the stacker assembly from the printer (page 465). 2. Unhook the right bearing pivot plate’s extension spring from the tab on the elevator. (Figure 89.) 3. Using an M-2 Allen wrench, remove the screw securing the right bearing pivot plate to the elevator. (Figure 89.) Right Bearing Pivot Plate Extension... - Page 492 4. Move the idler shaft enough to expose the lower mount screw of the power stacker stepper motor. (Figure 90.) 5. Cut and remove the upper tie wrap securing the stepper motor wires to the elevator. (Be careful not to cut a motor wire.) 6.
- Page 493 9. Remove the roller drive shaft, taking care to retain the bearing at the left end of the shaft and the collar at the right end of the shaft. (Figure 91.) 10. Remove the bearing and collar from the old roller drive shaft and retain these items for installation on the new roller drive shaft.
-
Page 494: Illustrated Parts Breakdown
List of Illustrations Illustrated Parts Breakdown The Illustrated Parts Breakdown (IPB) consists of exploded drawings of the power stacker assembly and subassemblies. Parts are listed next to each drawing. Only replaceable parts are assigned part numbers. If a part or assembly is damaged but does not have a part number, replace the entire power stacker assembly. - Page 495 List of Illustrations See page 498. NOTE: The stacker operator panel and stacker cables are not illustrated but are listed on page 497. 3 4 5 Figure 92. This illustrated parts breakdown shows how the vertical rails attach the elevator to the stacker base and tray.
- Page 496 List of Illustrations (Figure 92) Item No. Part No. Description Notes Washer, 5/16 X .200 X .030, Stainless Steel Screw, Hex Skt Btn Hd, Zinc M3X8mm Washer, Shim, .125 ID X .010 inch Thick Timing Belt Tensioner Assy, Pwr Stkr 39U2535 Paper Deflector (Black) Clip-On Bearing...
- Page 497 List of Illustrations Item No. Part No. Description Notes 24H8973 Cable 24H9004 Stacker Hardware Kit Kit not illustrated Screw, Shoulder, 8-32 Part of item 36 54P1541 Switch Assy, Reed Limit, V3 Not illustrated; attaches to right vertical rail 54P1478 Switch Assy, Rocker, V3 Shown in Figure 93 39U2550 Operator Panel Assembly, Rear, Black...
- Page 498 List of Illustrations See page 500. From page 495. page 502. See page 500. See page 500. Figure 93. This illustrated parts breakdown is an exploded view of the stacker elevator, showing the motors, rollers, and paddles.
- Page 499 List of Illustrations (Figure 93) Item Part No. Description Notes 24H9004 Stacker Hardware Kit Kit not illustrated 54P1478 Switch Assy, Rocker, V3 24H8978 Anti-Static Brush Shear Grommet Part of item 36 Cap Nut Part of item 36 10R4840 Drive Shaft Assy (Roller Drive Shaft) Includes items 14, 70, 75, and 80 24H8988 Drive Roller...
- Page 500 List of Illustrations From page 498. From page 498. Flag Connector Connector Flag Figure 94. This illustrated parts breakdown is an exploded detail view of a motor bracket with its infrared LED and an elevator bracket with its rectifier and LED.
- Page 501 List of Illustrations (Figure 94) Item Part No. Description Notes 24H9004 Stacker Hardware Kit Kit not illustrated Clip-On Bearing Part of item 36 24H8999 Holder, LED, Round 24H9000 Holder, LED, Flat LED, IR, T-1, 3/4 Photodarlington, NPN, Rectifier...
- Page 502 List of Illustrations From page 498. Rotated 180 Degrees Connector Figure 95. This illustrated parts breakdown is an exploded detail view of the paper motion detector.
- Page 503 List of Illustrations (Figure 95) Item Part No. Description Notes 24H9004 Stacker Hardware Kit Kit not illustrated 24H9000 Holder, LED, Flat 24H8990 Photodarlington, NPN, Rectifier Retaining Ring, External, 0.093 inch Part of item 115 Screw, Panhead, Type B, 2 x 3/16 Part of item 36 Shaft, Paper Detector Switch, Long Part of item 115...
-
Page 504: F Printer Specifications
Printer Specifications Contents Ribbon Specifications..............................page 505 Ordering Ribbons ................................page 505 Paper Specifications ..............................page 507 Printer Dimensions and Weight............................. page 508 Environmental Characteristics ............................page 509 Electrical Characteristics............................... page 510 Interfaces ..................................page 511 Cables ................................... page 511 Printing Rates................................ -
Page 505: Ribbon Specifications
IBM Printing Supplies are distributed through Priority Fulfillment Services (PSFweb) and a worldwide network of dealers. Please contact one of the following numbers to place an order for IBM 6500-v ribbons or to locate an IBM Printing Supplies Dealer in your area:... -
Page 506: Warranty Information
6500-v Models EMEA IBM Supplies Fulfillment Operations (ISFO) at 31-43-350 2756 (within the Netherlands call: 043-350 2756.) Toll free numbers to ISFO have been established in the following countries: Belgium 0800 71950 Germany 0800 18 18 005 Denmark 800 15534... -
Page 507: Paper Specifications
Test readability of greater than 4-part forms. • Recycled paper not recommended with stacker. Paper Drive Two adjustable tractors with 6-pin engagement Slew Rate Fast Slow 6500-v05 12 ips 10.4 ips 6500-v5P 12 ips 10.4 ips 6500-v10 20 ips 10.4 ips... -
Page 508: Labels
Labels Labels On Backing: One-part continuous perforated fan-fold back form. Labels must be at least 1/6 inch (0.42 cm) from the fan-fold perforation. Backing adhesive must not squeeze out during printing. Sheet Size: 3 to 17 inches (7.62 to 43.18 cm) wide*, including the two standard perforated tractor feed strips. A maximum sheet length of 16 inches (40.64 cm) between top and bottom perforations.** Thickness Not to exceed 0.025-inch (0.064 cm), including backing sheet. -
Page 509: Environmental Characteristics
Temperature Environmental Characteristics Temperature Operating: 50° to 104° F (10° to 40°C) up to 5000 feet (1524 meters), 50° to 90° F (10° to 32°C) up to 8000 feet (2438 meters) Storage: -40° to 158° F (- 40° to 70°C) Relative Humidity Operating: 15% to 80% (noncondensing) -
Page 510: Electrical Characteristics
(Energy (Energy Model Amperes (±10%) (±10%) (Operating) (Operating) Saver Saver Mode) Mode) 6500-v05 AC 100 - 200V 50 - 60 Hz 3.5A 350W 1195 AC 200 - 240V 50 - 60 Hz 1.6A 350W 1195 6500-vP5 AC 100 - 200V... -
Page 511: Interfaces
ASCII Serial/Parallel: The 6500-v printer is connected to personal computers and controllers via industry standard EIA-232-E and PC-parallel printer cables. For Dataproducts interfaces, you will need to obtain a Dataproducts cable. Contact your IBM service representative to order the following: •... -
Page 512: Printing Rates
Noise Levels • 20 ft. RS-232 • 40 ft. RS-232 RISC System/6000: For RS-232 attachment to the IBM RISC System/6000, the following are required: • IBM Async cable EIA-232/V.24 • Printer/terminal interposer EIA-232 • Serial Cable Kit (PN 12H1204) Coax/Twinax Interface Feature: Contact your IBM service representative for attachment requirements. - Page 513 Noise Levels Table 8. 6500-v Nominal Print Rates of Text PERFORMANCE PRINT QUALITY Uppercase Only Descenders & Underline LPM DOT DENSITY CHARACTERS DOT MATRIX (DPI) PER INCH Note 2 Note 1 1000 1500 2000 1000 1500 2000 CORRESPONDENCE 7(13) x 9+3 90 (180) x96 6(11) x 9+3 (9) x 9+3...
- Page 514 Noise Levels Table 9. 6500-v Nominal Print Rates of Graphic Images PERFORMANCE PRINT QUALITY Plot Mode IPM DOT DENSITY CHARACTERS DOT MATRIX (DPI) PER INCH Note 2 1000 1500 2000 Note 1 CORRESPONDENCE 7(13) x 9+3 90 (180) x 96 6(11) x 9+3 (9) x 9+3 5(9) x 7+2...
-
Page 515: G Metric Conversion Tables
Metric Conversion Tables Length Multiply To Obtain foot 0.3048* meter foot 30.48* centimeter foot 304.8* millimeter inch 0.0254* meter inch 2.54* centimeter inch 25.4* millimeter meter 3.280840 foot centimeter 0.03280840 foot millimeter 0.003280840 foot meter 39.37008 inch centimeter 0.3937008 inch millimeter 0.03937008 inch... -
Page 516: Torque And Force
Torque and Force Torque and Force Multiply To Obtain inch-pound 0.11298 Newton-meter foot-pound 1.3558 Newton-meter Newton-meter 8.8511 inch-pound Newton-meter 0.7376 foot-pound pound 4.4482 Newton Newton 0.22481 pound Mass and Density Multiply To Obtain pound* 0.4535924 kilogram ounce* 28.34952 gram kilogram 2.204622 pound gram... -
Page 517: Temperature
Temperature Temperature From Use Formula temperature Celsius (tc) temperature Fahrenheit (tf) tf = 1.8tc + 32 temperature Fahrenheit temperature Celsius (tc) tc = (tf -32)/1.8 (tf) Power Multiply To Obtain Btu (International Table) 0.2930711 Watt hour Watt 3.412141 Btu (International Table) hour Watt 0.001359621... -
Page 518: H Torque Table
Torque Table The table below establishes the torque requirements for routine installation of threaded fasteners. These requirements apply to fasteners made of steel, at a minimum engagement of 3.5 threads, including chamfer and countersink. For the most accurate torquing, apply anti-seize compound to fastener threads before you torque the fastener. Fastener sizes are listed as Numbered Size - Threads Per Inch . - Page 519 Carbon Steel Fasteners (ANSI B18.6.3 - 1972) Into Medium Carbon Steel Into Alum. or Brass Into Steel Into Weld/Press Fasteners Fastener Size 25,000 psi ultimate 60,000 psi ultimate Studs or Nuts 100,000 psi tensile strength tensile strength ultimate tensile strength Fastener Sizes Torque for Routine Tightening of Threaded Fasteners 4-40 UNC &...
-
Page 520: I Abbreviations
Abbreviations NOTE: Signal abbreviations with the first letter “N” are negative true. Abbreviation Definition KΩ 1,000 Ohms MegΩ 1,000,000 Ohms µF microfarad (10 farad) µs microsecond (10 second) µsec microsecond (10 second) A0, A1, etc. Address 0, Address 1, etc. Alternating Current Access Acknowledge... - Page 521 BCOM Buffered Communication Bi-phase Communications Processor BHSC Buffered Hammer Shift Clock Buffered, Low True BNLD Buffered, Low True, Lower Driver Bits Per Second Busy British Thermal Unit Buffered Upper Driver Cathode Card Cage Card Cage Fan Customer Engineer CHNG Change Circuit Clock Cover Open...
- Page 522 Clear to Send Current Cover Open Switch D0, D1, etc. Data Bit 0, Data Bit 1, etc. Data Direct Current, Data Controller (a functional unit of the controller board) Data Carrier Detect DIAG Diagnostic DIFF Differential DIMM Dual Inline Memory Module DHIO Dual Hammerbank Input/Output Direct Memory Access...
- Page 523 ElectroMagnetic Interference EMIT Emitter EPROM Electrically Programmable Read-Only Memory Error Electrostatic Discharge Exhaust, Extra Exhaust Exhaust Fan Expansion EXPND Expand Feed Form Feed FIFO First In, First Out Fault FLTR Filter Front Panel (Operator Panel) FTIC Fire Timer Integrated Circuit Ground Hammer Bank Hammer Bank ASIC...
- Page 524 Hammer Driver HDIC Hammer Driver Integrated Circuit HDPH Hammer Driver Phase Hammer Bank Logic, Signals and Power Hardware Integrated Circuit Identification Intelligent Graphics Processor Initial Microcode Load INST Instruction Interrupt Inches Per Minute Input/Output Interrupt Request Jack connector JEDEC Joint Electron Device Engineering Council. An organization that sets standards for electronic devices and components.
- Page 525 LRIB Left Ribbon Left Ribbon Guide Rear Paddle Motor, Power Stacker Front Paddle Motor, Power Stacker Motor MAIN Maintenance Jack, RS-232 (Optional) MECA Mechanism Engine Control ASIC MECH Mechanism microfarad (10 farad) Mounting Hole MOSFET Metal Oxide Semiconductor Field Effect Transistor Motor Magnetic Pickup (Unit) millisecond (10...
- Page 526 On Line Verify Operand + 5 V DC Pin connector P(1), P(2), etc. Parallel data 1, data 2, etc. Programmable Array Logic Paper PAPR Paper PARM Parameter PCBA Printed Circuit Board Assembly Printed Circuit Board Peripheral Component Interconnect Paper Detector Printer Error, Paper Empty Peripheral Device picofarad (10...
- Page 527 Paper Motion Detect (Switch) Part Number Paper Out Paper Out Detector Switch Paper PROM Programmable Read-Only Memory Power Supply PSA3 Manufacturer’s designation of the controller board used in Infoprint 6500 printers Power Supply + 5 Volt Pointer, Printer Pulse Width Modulation Power Right Ribbon...
- Page 528 Right Ribbon Guide Ribbon and Shuttle Processor Reset RTPU Real-Time Processing Unit Request to Send Receive Data SNA Character Stream SDRAM Synchronous Dynamic Random Access Memory Security (Key) Select Sense, Sensor Structured Field Signal Ground Shuttle Hall (Effect) Shuttle Motor SHUT Shuttle SHUTL...
- Page 529 STAT Status STBY Standby Power Stacker Switch, Software SYNC Synchronize Task Control Block TEMP Temperature Top of Form (first print line) Test Point Transistor-Transistor Logic Transmit Data UART Universal Asynchronous Receiver/Transmitter UDPH Upper Drive Phase UNDEF Undefined USART Universal Synchronous/Asynchronous Receiver/Transmitter Volts Volts, Alternating Current Volts, Direct Current...
- Page 530 Write With Without Transmit...
- Page 532 Index Numerics 029 8344 DIAGNOSTIC FAILED, 54 031 END OF FORMS TMEOUT - LOAD FORMS, 55 001 END OF FORMS - LOAD FORMS, 43 032 FORMS JAMMED TIMEOUT - CLEAR AND RELOAD FORMS, 57 002 FORM JAMMED - CLEAR AND RELOAD FORM, 45 04 VIEW FORMS - PRESS VIEW KEY, 46 003 FORMS EJECTED - PRESS EJECT, 46 041 BUFFER OVERFLOW, 59...
- Page 533 200 SOFTWARE ERROR* - RECYCLE POWER, 137 131 UNEXPECTED INTERRUPT - SEE USERS MANUAL, 113 301 RIBBON INK LOW - INSTALL NEW IBM RIBBON, 138 134 INVALID COMMAND* - SEE USERS MANUAL, 114 302 EXCESSIVE RIBBON WEAR - INSTALL NEW IBM RIBBON, 138...
- Page 534 Index 990 MACHINE CHECK, 139 B13 ERROR: NOT COMPATIBLE*, 139 B19 ERROR: DC RETURNED*, 140 B20: STATUS 00% - DOWNLOAD MODE, 140 A97 GRAPHIC CHECK ERROR - PRESS STOP THEN START, 139 B21: STATUS - PRINTER RESET, 140 Abbreviations, 520 B22 ERROR: DECOMPRESS SIZE*, 141 Acoustic noise level, 509 B23 ERROR: DECOMPRESS CKSUM*, 142...
- Page 535 Index Cable connectors and shells replacement, 337, 444 replacement, 323 Code Cable shorts test, 254 downloading from IBM First, 236 Cables, 511 Coil temperature adjustment, 383 interconnection diagram, 266 Communications failures, 211 Call, start of, 40 Components and assemblies, locations of, 262...
- Page 536 Index operator print, 213 NO DRAM DETECTED, 157, 243 printer information menu, 226 NVRAM FAILURE, 157, 244 DIAGNOSTICS PASSED, 241 PROGRAM NEEDS MORE DRAM, 245 Diagrams PROGRAM NEEDS MORE FLASH, 245 cable interconnection, 266 PROGRAM NOT COMPATIBLE, 245 Dimensions, printer, 508 PROGRAM NOT VALID, 158, 245 DO NOT POWER OFF SECURITY KEY NOT DETECTED, 246...
- Page 537 ERROR OCCURRED FLUSHING QUEUES*, 247 LOADING PROGRAM FROM PORT XX%, 247 IBM 6500-i printer family, 29 LOADING PROGRAM INTO FLASH, 247 IBM Coax/twinax expansion board, replacement, 337, 444 RESETTING...PLEASE WAIT, 247 Information menu, printer, 226 RESTORING BOOT CODE, 248 Input voltage, Voltage, 510...
- Page 538 Messages cabinet models, 34 clearing, 42 Metric measurement, conversion tables, 515 Microcode Labels downloading from IBM First, 236 specifications, 508 Mnemonics, 520 LAN interface assemblies, replacement, 329 Models in 6500-i printer family, 29 LEDs, controller board status, 229 Models, printer, 29, 30...
- Page 539 Index Order ribbons, 505 platen open motor, replacement, 344 Platen replacement, 350 PLEASE WAIT ... - RESET IN PROGRESS, 168 P00 ERROR: SYSTEM FAULT, 165 Power P05 DIAGNOSTIC TEST PASSED, 165 cords and adapters, 445 P60 ERROR: DRAM AT ADDRESS, 166 cycle, how to, 228 P69 ERROR: EC STOPPED AT STATE XXXX, 167 on/off verification, 25...
- Page 540 213 hammer bank fan assembly, 330, 332 shipping, 437 hammer spring, single hammer bank, 333 specifications, 504 IBM Coax/twinax expansion board, 337, 444 thermal printing technology, 213 LAN interface assemblies, 329 weight, 508 magnetic pick-up assembly, 338 Printer information menu...
- Page 541 Index Requirements Self-tests humidity, 509 customer engineer (CE), 216 Reset, soft vs. hard, 228 operator print, 213 RESETTING...PLEASE WAIT, 168, 247 printer information menu, 226 Resistors, terminating SENDING PROGRAM TO EC PROCESSOR, 248 location of, 356 SERVICE -, 168 RESTORING BOOT CODE, 168, 248 Service checks Restoring the printer to operation, 314 customer’s power source, 25...
- Page 542 Index Spare parts and part numbers, 390 Start up sequence, 229 Specifications Status LEDs on the controller board, 229 cables, 511 Support shaft interfaces, 511 replacement, 361 labels, 508 Switch paper, 507 paper detector switch assembly, replacement, 365 printer, 504 platen interlock switch assembly, replacement, 366 ribbon, 505 power, replacement, 322...
- Page 543 Index power on, 226 printing, 226 Tools and materials needed to service the printer, 311 TOP OF FORM SET, 169 Torque conversion to or from metric, 515 table, 518 values for fasteners, 313 Tractor replacement, 367 Troubleshooting communications failures, 211 display messages, 42 how to, 41 message list, 42...
- Page 544 © Copyright IBM Corp., 2005 ® G544-5978-00 *07G544597800*...
Need help?
Do you have a question about the Infoprint 6500-v05 and is the answer not in the manual?
Questions and answers