Kyocera TASKalfa 620 Operation Manual
620/820 operation guide (basic)
Hide thumbs
Also See for TASKalfa 620:
- Service manual (521 pages) ,
- Operation manual (212 pages) ,
- Quick manual (2 pages)

Related Manuals for Kyocera TASKalfa 620


Summary of Contents for Kyocera TASKalfa 620
-
Page 1: Operation Guide
620/820 OPERATION GUIDE Please read this Operation Guide before using this machine. Keep it close to the machine for easy reference. - Page 2 This Operation Guide is for models 620 and 820. In this guide, 620 refers to the 62 cpm (copies per minute) model and 820 to the 82 cpm model. NOTE: This Operation Guide contains information that corresponds to using both the inch and metric versions of these copiers.
- Page 3 Take Advantage of Advanced Functions For information on basic copying, refer to Chapter 3 of the Operation Guide. Selecting Image Quality Adjusting Density Auto Zoom Enjoy crisp, high-quality copies, even Freely adjustable copy density level. Reduce or enlarge original images to of photographs.
- Page 4 Read more about these sophisticated functions in Chapter 1 of the Advanced Operation Guide. Auto Paper Selection Offset Mode Combine Mode Automatic selection of paper to Handy option to stack sets in Combine two or four originals on a match the original. alternating orientations.
- Page 5 Continuous Scan Proof Mode Repeat Copy Copy high-volume originals in a Copy a test sheet before a Produce more copies as needed after single copy job. high-volume job. making the initial copies. Backing Sheets for Transparencies Auto Image Rotation EcoPrint (Economy Printing) Mode Use paper as backing sheets when Automatically match the orientation of Use toner more efficiently as...
- Page 6 Programming Multi-Part Jobs Simply specify your series of special and zooming or border erase for load the originals, and voila! copying needs-such as cover pages, particular pages... Automated copying of your detailed internal cover pages... jobs. Read more about these handy document/output management functions in Chapter 2 of the Advanced Operation Guide.
- Page 7 Features for Easier Copying Job Accounting Mode: Refer to Weekly Timer: Refer to Chapter 3 of Language Setting: Refer to Chapter 3 of the Advanced Operation the Advanced Operation Guide. Selecting the Language on Guide. page 2-20. Auto Power on/off. Use department codes to manage Choose the correct message display total copy volume.
-
Page 9: Legal And Safety Information
Legal and Safety Information Please read this information before using your copier. This chapter provides information on the following topics: • Legal Information...viii • Energy Star Program...ix • Safety Conventions in This Guide...x • Caution Labels...xii • Installation Precautions...xiii • Precautions for Use...xiv... -
Page 10: Legal Information
Kyocera Mita Corporation is prohibited. Any copies made of all or part of this guide, any copyrightable subject must contain the same copyright notice as the material from which the copying is done. -
Page 11: Energy Saving Control Function
Energy Saving Control Function The device comes equipped with a Low Power Mode where energy consumption is reduced after a certain amount of time elapses since the device was last used, as well as an Off Mode where the device automatically turns itself off after there is no activity within a set amount of time. -
Page 12: Safety Conventions In This Guide
Safety Conventions in This Guide Please read this Operation Guide before using the copier. Keep it close to the copier for easy reference. The sections of this guide and parts of the copier marked with symbols are safety warnings meant to protect the user, other individuals and surrounding objects, and ensure correct and safe usage of the copier. - Page 13 symbol indicates that the related section includes information on actions which must be performed. Specifics of the required action are indicated inside the symbol..[Alert of required action] ..[Remove the power plug from the outlet] ..[Always connect the machine to an outlet with a ground connection] Please contact your service representative to order a replacement if the safety warnings in this Operation Guide are illegible or if the guide itself is missing.
-
Page 14: Caution Labels
Caution Labels Caution labels have been attached to the copier at the following locations for safety purposes. Be sufficiently careful to avoid fire or electric shock when removing a paper jam or when replacing toner. Label 1, 2 Label 8, 9 High temperature inside. -
Page 15: Installation Precautions
Installation Precautions Environment Caution Avoid placing the copier on or in locations which are unstable or not level. Such locations may cause the copier to fall down or fall over. This type of situation presents a danger of personal injury or damage to the copier. Avoid locations with humidity or dust and dirt. -
Page 16: Precautions For Use
If the floor is delicate against casters, when this product is moved after installation, the floor material may be damaged. During copying, some ozone or chemical is released, but the amount does not cause any ill effect to one’s health. If, however, the copier is used over a long period of time in a poorly ventilated room or when making an extremely large number of copies, the smell may become unpleasant. -
Page 17: Other Precautions
Do not damage, break or attempt to repair the power cord. Do not place heavy objects on the cord, pull it, bend it unnecessarily or cause any other type of damage. These types of situations present a danger of fire or electrical shock. Never attempt to repair or disassemble the copier or its parts as there is a danger of personal injury fire, electrical shock or damage to the laser. -
Page 18: Cautions When Handling Consumables
Do not touch electrical parts, such as connectors or printed circuit boards. They could be damaged by static electricity. Do not attempt to perform any operations not explained in this guide. Caution: Use of controls or adjustments or performance of procedures other than those specified herein may result in hazardous radiation exposure. - Page 19 Laser Safety (Europe) Laser radiation could be hazardous to the human body. For this reason, laser radiation emitted inside this machine is hermetically sealed within the protective housing and external cover. In the normal operation of the product by the user, no radiation can leak from the machine. This machine is classified as Class 1 laser product under IEC 60825.
-
Page 20: Safety Instructions Regarding The Disconnection Of Power
Safety Instructions Regarding the Disconnection of Power Caution: The power plug is the main isolation device! Other switches on the equipment are only functional switches and are not suitable for isolating the equipment from the power source. VORSICHT: Der Netzstecker ist die Hauptisoliervorrichtung! Die anderen Schalter auf dem Gerät sind nur Funktionsschalter und können nicht verwendet werden, um den Stromfluß... - Page 21 SAFETY OF LASER BEAM (USA) 1. Safety of laser beam This copier has been certified by the manufacturer to Class 1 level under the radiation performance standards established by the U.S.DHHS (Department of Health and Human Services) in 1968. This indicates that the product is safe to use during normal operation and maintenance.
- Page 22 Safety Instructions Regarding the Disconnection of Power Caution: The power plug is the main isolation device! Other switches on the equipment are only functional switches and are not suitable for isolating the equipment from the power source. Attention: Le débranchement de la fiche secteur est le seul moyen de mettre l’appareil hors tension.
- Page 24 xxii...
-
Page 25: Introduction
Introduction This Operation Guide contains the following chapters: 1 Part Names Identifies copier parts and operation panel keys. 2 Preparing to Copy Explains how to load paper and originals. 3 Basic Operation Describes the procedures for basic copying. 4 Optional Equipment Introduces the convenient optional equipment available for this copier. -
Page 26: Guides Included
Guides Included The following guides are included with this copier. Refer to the proper guide for your needs. Operation Guide (This Guide) Describes how to load paper, basic copier operations, and troubleshooting. Advanced Operation Guide Covers copying details in depth as well as default settings. Conventions in This Guide The following conventions are used depending on the nature of the description. -
Page 27: Table Of Contents
Contents Take Advantage of Advanced Functions ..................i Legal and Safety Information ........................vii Legal Information ........................viii Energy Saving Control Function ....................ix Energy Star (ENERGY STAR ) Program ................... ix ® Safety Conventions in This Guide ....................x Caution Labels .......................... xii Installation Precautions ......................xiii Precautions for Use ........................ - Page 28 Troubleshooting ..................... 6-1 Solving Malfunctions ........................ 6-2 Responding to Error Messages ....................6-4 Clearing Paper Jams ....................... 6-9 Appendix ..................... Appendix-1 Specifications ......................Appendix-2 Index ........................Index-1 xxvi...
-
Page 29: Part Names
Part Names This chapter identifies copier parts and operation panel keys. • Copier...1-2 • Operation Panel...1-6 • Touch Panel...1-7... -
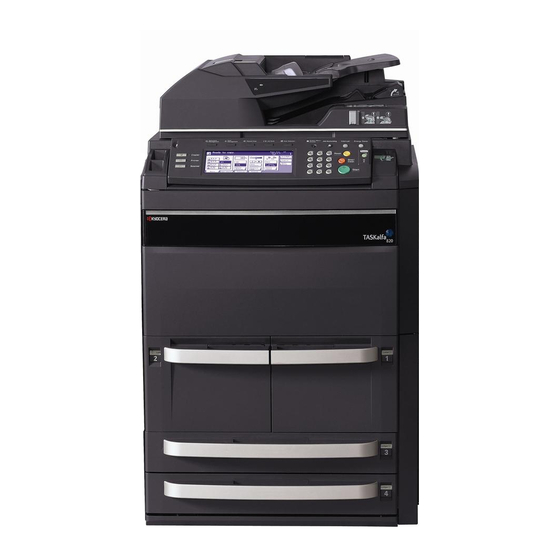
Page 30: Copier
Part Names Copier Operation Panel Operation Panel Lock Lever Document Processor Cassette 1 Cassette 2 Cassette 3 Cassette 4 MP Tray (multi-purpose tray) Paper Width Guides 10 MP Tray Extension 11 Right Cover 12 Handles... - Page 31 Part Names 13 Main Power Switch 14 Main Power Switch Cover 15 Document Processor Bottom Cover 16 Original Size Indicator Plates 17 Platen 18 Front Cover 19 Output Tray (Option) 20 Handles 21 Power Cord...
-
Page 32: Document Processor
Part Names Document Processor 22 Original Table 23 Original Width Guides 24 Cleaning Cloth Compartment 25 Original Loaded Indicator 26 Document Processor Top Cover 27 Ejection Guide 28 Document Processor Angle Adjustment Lever 29 Original Eject Table... -
Page 33: Internal Parts
Part Names Internal Parts 30 Toner Container 31 Toner Container Release Lever 32 Paper Conveyor 33 Knob A1 34 Lever A2 35 Knob A3 36 Duplex Unit 37 Paper Feeder 38 Paper Width Guides 39 Paper Width Adjusting Tab 40 Paper Length Guide 41 Paper Length Adjusting Tab... -
Page 34: Operation Panel
Part Names Operation Panel Mixed Size originals Paper Size Ready to copy. 11x8½" 100% 4 in 1 11x 8½" Plain Margin Left 11x 8½" Auto % Recycled Bord Erase 11x 17" MP tray Sheet Auto Staple 100% Plain Plain Density Left Top 8½x11"... -
Page 35: Touch Panel
Part Names Touch Panel [Basic] Screen Paper Size Ready to copy. 11x8½" Press [Basic] to display 100% this screen. 4 in 1 11x 8½" Plain Margin Left 11x 8½" Auto % Recycled Bord Erase 11x 17" MP tray Sheet Auto Staple 100%... - Page 36 Part Names...
-
Page 37: Preparing To Copy
Preparing to Copy This chapter explains the preparations required before using the copier. • Loading Paper...2-2 • Specifying Media Type and Paper Size for the Cassettes and MP Tray...2-8 • Loading Originals...2-16 • Selecting the Language...2-20... -
Page 38: Loading Paper
Preparing to Copy Loading Paper Load paper in the four cassettes, the MP tray and/or the optional side feeder. For details on the types of paper supported, refer to Paper in the Appendix of the Advanced Operation Guide. Before Loading Paper When you open a new package of paper, follow the instructions as below to fan through the paper prior to loading. - Page 39 Preparing to Copy Align the paper flush against the right side of the cassette as you load it. IMPORTANT: Before loading the paper, be sure that it is not curled or folded. Paper that is curled or folded may cause paper jams. Ensure that the loaded paper does not exceed the level indicated.
- Page 40 Preparing to Copy Holding the paper width adjusting tab, move the paper width guide to fit the paper. NOTE: Paper sizes are marked on the cassette. To switch between inch and metric paper sizes, slide the size adjustment switch. Holding the paper width adjustment tab, move the paper width guide to anywhere that the paper size scale is not indicated.
-
Page 41: Loading Paper In The Mp Tray
Preparing to Copy Insert the appropriate paper size card in the slot to indicate the size of the paper inside. Gently push the cassette back in. Loading Paper in the MP Tray The MP tray supports special paper (45 to 200 g/m²) in addition to standard and recycled paper. Up to 100 sheets of standard paper (80 g/m²) may be loaded in the MP tray. - Page 42 Preparing to Copy Adjust the paper width guides to fit the width of the paper. Insert the paper along the paper width guides into the tray until it stops. Ensure that the paper width guides are flush against the edges of the paper. IMPORTANT: Before loading postcards and other types of thick paper that may be curled, straighten out the paper.
- Page 43 Preparing to Copy Open the right cover. NOTE: When the right cover is open, the paper lifter will not descend if you press the switch for the paper lifter. It is easier to load new paper with the top cover open. Align the paper flush against the left side in the back of the feeder as you load it.
-
Page 44: Specifying Media Type And Paper Size For The Cassettes And Mp Tray
Preparing to Copy Specifying Media Type and Paper Size for the Cassettes and MP Tray After loading paper in the cassettes 1 or 2 or the optional side feeder (cassette 5), specify the media type. Refer to Specifying the Media Type on page 2-9 for details. After loading paper in the cassettes 3 or 4, specify both the media type and the paper size. -
Page 45: Specifying The Media Type
Preparing to Copy Press [ ] or [ ] to choose Paper size System Menu / Counter [Cassette 3] or Paper size [Cassette 4]. Press [Change #] to begin changing Machine Default settings. Default menu Setting mode Auto cassette switching On / All types of paper Paper size (Cassette 3) 11x 17"... -
Page 46: Changing Settings
Preparing to Copy Use the numeric keys to enter the Enter the administrator number . four-digit management code. By default, the management code is 6200 for the 62 cpm model and 8200 for the 82 cpm model. Press [ ] or [ ] to choose from Media System Menu / Counter Type (Cassette 1) through Media Type (Cassette 5). -
Page 47: Auto Detect
Preparing to Copy Specifying the Paper Size for the MP Tray Specify the paper size when using the MP tray. Select the paper size from the following. Setting Method Unit Paper Sizes Auto Detect Inch 11 × 17", 8 × 14", 11 × 8 ", 8 ×... - Page 48 Preparing to Copy Other Standard Sizes Specify special standard sizes. Press the System Menu/Counter key. Press [MP tray Setting]. System Menu / Counter System Menu Copy Language Accounting Default MP tray Setting Management Machine Document Register Print Default Management Orig. Size Report Press [Others Standard] and then System Menu / Counter...
-
Page 49: Size Entry
Preparing to Copy Size Entry Specify the required paper size. Press the System Menu/Counter key. Press [MP tray Setting]. System Menu / Counter System Menu Copy Language Accounting Default MP tray Setting Management Machine Document Register Print Default Management Orig. Size Report Press [Size Entry]. - Page 50 Preparing to Copy Press [+] or [-] to specify the horizontal System Menu / Counter size. With the metric models, you may enter the size directly using the numeric MP tray Setting Back keys by pressing [#-Keys]. Paper Size Media Type "...
- Page 51 Preparing to Copy Select the Media type. System Menu / Counter Select Media Type Back Thick Plain Labels Cardstock Custom 1 paper Transp- Recycled Color Envelope Custom 2 arency Rough Preprinted Prepunched Custom 3 High Vellum Bond Letterhead Custom 4 Quality Press [Close].
-
Page 52: Specifications
Preparing to Copy Loading Originals Loading Originals in the Document Processor The document processor automatically scans each sheet of multiple originals individually. Both sides of two-sided originals are scanned automatically. The document processor supports the following types of originals. Items Specifications Weight 45 g/m²... -
Page 53: Original Placement Indicator
Preparing to Copy Adjust the original width guides to fit the originals. Place the originals. Put the side to be copied (or the first side of two-sided originals) face-up. Slide the leading edge into the document processor as far as it will go. - Page 54 Preparing to Copy Loading Originals on the Platen To copy books, magazines, or other originals that cannot be loaded in the document processor, open the document processor and place the original directly on the platen. Adjust how the document processor opens by using the document processor angle adjustment lever.
- Page 55 Preparing to Copy Metric models Close the document processor. For originals over 4 cm thick, leave the document processor open during copying. IMPORTANT: Do not push the document processor forcefully when you close it. Excessive pressure may crack the platen glass. Shadows may be copied around the edges and in the middle of open-faced originals such as books.
-
Page 56: Selecting The Language
Preparing to Copy Selecting the Language Select the language displayed on the touch panel. The following languages are available. Languages Inch models English, French (Francais), Spanish (Español) and Japanese ( Metric models English, German (Deutsch), French (Français), Spanish (Español) and Italian (Italiano) Press the System Menu/Counter key. -
Page 57: Basic Operation
Basic Operation This chapter explains the following operations. • Basic Copying Procedures...3-2 • Selecting Image Quality...3-4 • Adjusting Density...3-5 • Reducing/Enlarging...3-6 • Duplex Mode...3-11 • Split Mode...3-14 • Collate Mode...3-16 • Interrupt Mode...3-17 • Job Reservation...3-18 • Low-Power Mode...3-19 • Sleep Mode...3-20 Refer to the Advanced Operation Guide for additional functions. -
Page 58: Basic Copying Procedures
Basic Operation Basic Copying Procedures Follow the steps as below for basic copying. Open the main power switch cover and move the main power switch to on (| position). After the copier has warmed up, the Start indicator will turn green. Place the originals in the document processor or on the platen. - Page 59 Basic Operation NOTE: You can adjust the angle of the operation panel as shown by releasing the operation panel lock lever. After adjustment, lock the lever again. When adjusting the angle of the operation panel, do not place your hands or fingers underneath the operation panel.
-
Page 60: Selecting Image Quality
Basic Operation Selecting Image Quality Choose the image quality suited to the type of original. Image Quality Mode Description Text+Photo For originals with both text and photographs. Photo For originals primarily consisting of photographs. Text For originals primarily consisting of text. Place the originals in the document processor or on the platen. -
Page 61: Adjusting Density
Basic Operation Adjusting Density Adjust the density automatically or manually. [Manual] is selected as the default setting mode. When selecting [Manual], follow the steps as below. Place the originals in the document processor or on the platen. Press the density adjustment key Paper Size Ready to copy. -
Page 62: Reducing/Enlarging
Basic Operation Reducing/Enlarging Adjust the magnification to reduce or enlarge the original image. The following zoom modes are available. • Auto Zoom: Automatically reduces or enlarges the original image suited to the selected paper size. • Manual Zoom: Reduces or enlarges the original image in 1 % increments between 25 and 400 % (25-200 % with the document processor). -
Page 63: Manual Zoom
Basic Operation Manual Zoom Reduces or enlarges the original image in 1 % 25 % increments between 25 and 400 % (25-200 % with the document processor). Follow the steps as below to use manual zoom. 400 % Place the originals in the document Paper Size Ready to copy. -
Page 64: Preset Zoom
Basic Operation Preset Zoom Reduces or enlarges at preset magnifications. Zoom Level Inch models 200 % (5 × 8 " 11 × 17"), 154 % (5 × 8 " 8 × 14"), 129 % (8 × 11" 11 × 17"), 121 % (8 ×... - Page 65 Basic Operation XY Zoom Select vertical and horizontal magnifications individually. Reduce or enlarge original images in 1 % increments between 25 and 400 % (25-200 % with the Height document processor). Follow the steps as below to use XY zoom. Width Place the originals in the document Paper Size...
- Page 66 Basic Operation Press the Start key to start copying. 3-10...
-
Page 67: Duplex Mode
Basic Operation Duplex Mode Use Duplex mode to create two-sided copies from a variety of originals, including facing pages (such as books or magazines) and two-sided originals. Originals Copies One-sided to Two-sided Produces two-sided copies from one-sided originals. In case of an odd number of originals, the back side of the last copy will be blank. - Page 68 Basic Operation NOTE: The following paper sizes are supported in Two-sided to Two-sided mode. Supported Paper Sizes Inch models 11 × 17", 8 × 14", 11 × 8 ", 8 × 11", 5 × 8 ", 8 × 13" and 8 ×...
- Page 69 Basic Operation Select the desired Duplex mode. Paper Size Ready to copy. 100% Duplex Shortcut Back 1 sided 1 sided Able to copy 1 sided (separate) 1 sided 2 sided 2 sided copy using 1 sided orig 2 sided 2 sided Book original or 2 sided origin 1 sided 2 sided...
-
Page 70: Split Mode
Basic Operation Split Mode Use Split mode to create single-sided copies from two-sided originals or originals with facing pages (such as books or magazines) as follows. Two-sided to One-sided Copies each side of a two-sided original onto two individual sheets. Original Copies The following binding options are available. - Page 71 Basic Operation Press [Duplex]. Paper Size Ready to copy. 100% Paper Original Duplex Combine Selection Size Mixed Size Continuous Density Zoom Originals Scan Original Margin/ Form Page # Down Image Centering Overlay Collate/ Border Cover Booklet Offset Erase Basic User choice Program Function Select the desired Split mode.
-
Page 72: Collate Mode
Basic Operation Collate Mode By using the document processor, scans multiple originals to deliver complete sets of copies as required according to page number. Follow the steps as below to use Collate mode. Originals Copies Press [Function]. Paper Size Ready to copy. 100% 11x 8½"... -
Page 73: Interrupt Mode
Basic Operation Interrupt Mode Interrupt copying is useful to pause one copy job and copy other originals with different copy settings. After you complete the urgent job, you can resume the interrupted copy job with the settings as they were. Follow the steps as below to use interrupt copying. -
Page 74: Job Reservation
Basic Operation Job Reservation Use Job Reservation mode to scan Now copying . another original and queue the job while processing the current job. The reserved Output Tray Orig. Page Count/Set job will be started after the current job is completed. -
Page 75: Low-Power Mode
Basic Operation Low-Power Mode To activate Low-Power mode, press the Energy Saver key. On the operation panel, only the Energy Saver, Power, and Main Power indicators will remain lit. To resume copying, perform one of the following actions. The copier returns to a copy-ready condition. •... -
Page 76: Sleep Mode
Basic Operation Sleep Mode To activate Sleep mode, press the Power key. On the operation panel, only the Main Power indicator will remain lit. The copier will use much less power than Low-Power mode. To resume copying, press the Power key again. The copier will be ready to copy in 30 seconds. -
Page 77: Optional Equipment
Optional Equipment This chapter introduces optional equipment available for the copier. • Overview of Optional Equipment...4-2 • Side Feeder...4-3 • Document Finisher...4-3 • Key Counter...4-3 • Printer Kit...4-4 • Scanner Kit...4-4 • Security Kit...4-4... -
Page 78: Overview Of Optional Equipment
Optional Equipment Overview of Optional Equipment The following optional equipment is available for the copier. Multi-Job Tray Key Counter Printer Kit Scanner Kit Security Kit Document Finisher Folding Unit Side Feeder... -
Page 79: Side Feeder
Optional Equipment Side Feeder The side feeder has a capacity of 4,000 sheets measuring 11 × 8 " (A4 and B5). It can be used in conjunction with the copier's built-in cassettes to provide a generous supply of paper for copying. Large Size Side Feeder The side feeder has a capacity of 4,000 sheets measuring 11×... -
Page 80: Printer Kit
Optional Equipment How to Insert the Key Counter Insert the key counter securely into the key counter slot. NOTE: When the key counter function is activated, copies can only be made when a key counter is inserted into the copier. If the key counter is not inserted securely, Insert key counter will be displayed. -
Page 81: Maintenance
Maintenance This chapter describes cleaning and toner replacement. • Cleaning the Copier...5-2 • Replacing the Toner Container...5-4... -
Page 82: Cleaning The Copier
Maintenance Cleaning the Copier Clean the copier regularly to ensure optimum copy quality. Caution For safety, always unplug the power cord before cleaning the copier. Cleaning the Document Processor and Platen Open the document processor. Using a soft cloth dampened with alcohol or mild detergent, wipe the platen and the backside of the document processor. - Page 83 Maintenance Remove the cloth from the cleaning cloth compartment. Open the document processor and wipe the bottom slit glass (A). Holding the green lever, open the document processor bottom cover. Wipe the top slit glass (B) and the white roller (C). Close the document processor bottom cover.
-
Page 84: Replacing The Toner Container
Maintenance Replacing the Toner Container Promptly replace the toner container Paper Size Ready to copy. when the touch panel displays Add Add toner to resume copying . 100% toner. Plain Replace the toner container only if this Auto % messages appears. Recycled MP tray Auto... - Page 85 Maintenance Let go of the toner container release lever and pull the used toner container until it can be removed. Holding the toner container handle, push the toner container release lever to the left again and gently remove the container. Place the used toner container in the plastic disposal bag provided.
- Page 86 Maintenance Tap the top of the toner container at least ten times. Turn the toner container upside-down and tap the top of the toner container at least ten times. Holding the toner container in both hands, shake it vertically at least ten times to distribute the toner evenly.
- Page 87 Maintenance Turn the toner container upside-down and shake it from side to side at least five times. IMPORTANT: Do not install the toner container before shaking it sufficiently. This may cause errors due to incomplete toner replenishment. Insert the new toner container into the copier. There will be an audible 'click' when the container is inserted in the correct position.
- Page 88 Maintenance...
-
Page 89: Troubleshooting
Troubleshooting This chapter explains how to solve problems with the copier. • Solving Malfunctions...6-2 • Responding to Error Messages...6-4 • Clearing Paper Jams...6-9... -
Page 90: Solving Malfunctions
Troubleshooting Solving Malfunctions The table below provides general guidelines for problem solving. If a problem occurs with your copier, check the checkpoints and perform procedures indicated on the following pages. If the problem persists, contact your Service Representative. Symptom Checkpoints Corrective Actions Reference Page... - Page 91 Troubleshooting Symptom Checkpoints Corrective Actions Reference Page Copies are not clear. Did you choose the appropriate Image Select an appropriate Image Quality page 3-4 Quality mode for the original? mode. Copies are dirty. Is the platen or document processor Clean the platen or the document page 5-2 dirty? processor.
-
Page 92: Responding To Error Messages
Troubleshooting Responding to Error Messages If the touch panel displays any of these messages, follow the corresponding procedure. Error Messages Checkpoints Corrective Actions Reference Page Close ### cover. Is the indicated cover open? Close all covers securely. — Check the cover. Are any covers open? Close all covers securely. - Page 93 Troubleshooting Error Messages Checkpoints Corrective Actions Reference Page Reposition original. Is the orientation of the specified Change the orientation of the original. — paper different from that of the If you press the Start key without original? changing the original, the original will be copied at the current size.
- Page 94 Troubleshooting Error Messages Checkpoints Corrective Actions Reference Page The left tray exceeds Is the maximum storage capacity of Remove paper from the output tray — capacity. Remove paper, the output tray exceeded? and press the Start key to resume and press "Start" key. copying.
- Page 95 Troubleshooting Error Messages Checkpoints Corrective Actions Reference Page Now restoring stored data — Performing hard disk maintenance. — in HDD. Wait until the process is completed. (Please wait. Now maintaining stored data.) The waste toner box — Contact your Service Representative —...
- Page 96 Troubleshooting Error Messages Checkpoints Corrective Actions Reference Page Paper cassette is out of — The cassette in use has a problem — order. Select another and is temporarily unavailable. paper cassette. Contact your Service Representative or Authorized Service Center (Paper cassette is out of promptly.
-
Page 97: Clearing Paper Jams
Troubleshooting Clearing Paper Jams If a paper jam occurs, the touch panel Paper misfeed. will display Paper misfeed and the copier will stop. Refer to these 1.Open right cover , and remove pap 2.Open cassette 1. procedures to remove the jammed 3.Remove paper . - Page 98 Troubleshooting Precautions of the Paper Jam • Do not reuse jammed paper. • If the paper tears during removal, be sure to remove any loose scraps of paper from the copier. Scraps of paper left in the copier could cause subsequent jamming. •...
- Page 99 Troubleshooting Remove the jammed paper. If the paper tears, remove any loose scraps from the copier. Push the cassette 1 back in securely. Push the indicated position to close the right cover. Cassette 2 Follow the steps as below to clear paper Paper misfeed.
- Page 100 Troubleshooting Pull out the cassette 2. Remove the jammed paper. If the paper tears, remove any loose scraps from the copier. While the cassette 2 is out, pull out cassette 1. Open the front cover. Pull the lever C1 and remove the paper feeder. 6-12...
- Page 101 Troubleshooting Open the cover C2. Remove the jammed paper. If the paper tears, remove any loose scraps from the copier. Close the cover C2 and return the paper feeder to its original position. Push it securely into place. Push the cassettes 1 and 2 back in securely. Close the front cover.
- Page 102 Troubleshooting Push the indicated position to close the right cover. Pull out the cassette in use. Remove the jammed paper. If the jammed paper is left inside the copier, pull out the cassette and remove the jammed paper. If the paper tears, remove any loose scraps from the copier.
-
Page 103: Mp Tray
Troubleshooting MP Tray Follow the steps as below to clear paper Paper misfeed. jams in the MP tray. 1.Remove paper from Multi purpose tray . Remove all paper from the MP tray. Reload the paper in the MP tray. Inside the Right Cover Follow the steps as below to clear paper Paper misfeed. - Page 104 Troubleshooting Remove the jammed paper. If the paper tears, remove any loose scraps from the copier. Push the indicated position to close the right cover. Optional Side Feeder Follow the steps as below to clear paper Paper misfeed. jams inside the side feeder. 1.Remove paper from between Copier and Side Paper Deck .
- Page 105 Troubleshooting Remove the paper jammed in the connecting slot of the side feeder. If the paper tears, remove any loose scraps from the copier. Attach the side feeder to the copier by returning it to the original position. Open the top cover of the side feeder. Remove the jammed paper.
-
Page 106: Paper Conveyor
Troubleshooting Paper Conveyor Follow the steps as below to clear paper Paper misfeed. jams in the paper conveyor. 1.Turn left-side green knob A 1 to the left 2.Remove any paper from the eject section 3.Turn Green Lever A2 left until it stops 4.Turn right-side green knob A 3 to the left 5.Pull out Conveying Unit A 2 Open the front cover. - Page 107 Troubleshooting Pull the lever A2 and slowly pull out the paper conveyor. Warning High voltage is present in the charger section. Take sufficient care when working in this area, as there is a danger of electrical shock. Caution The fixing unit is extremely hot. Take sufficient care when working in this area, as there is a danger of getting burned.
- Page 108 Troubleshooting Close the cover A4. Open the cover A5. Remove the jammed paper. If the paper tears, remove any loose scraps from the copier. Push A6 and close the cover A5 securely. Open the cover A7 and remove the jammed paper. If the paper tears, remove any loose scraps from the copier.
-
Page 109: Duplex Unit
Troubleshooting Restore the paper conveyor to its original position and push it back in securely. Return the lever A2 to its original position. Close the front cover. Duplex Unit Follow the steps as below to clear paper Paper misfeed. jams in the duplex unit. 1.Pull out Duplex Unit B 1 Open the front cover. -
Page 110: Document Processor
Troubleshooting Open the bottom cover of the duplex unit (B2) and remove the jammed paper. If the paper tears, remove any loose scraps from the copier. Close the cover B2. Open the cover B3 and remove the jammed paper from there. If the paper tears, remove any loose scraps from the copier. - Page 111 Troubleshooting Remove the jammed paper. If it is difficult to remove the original, turn the feed dial. The original will be pushed to a place where it is easier to remove. If the original tears, remove any loose scraps from the copier.
-
Page 112: Optional Document Finisher
Troubleshooting Holding the green lever, open the document processor bottom cover. Remove the jammed originals. If the original tears, remove any loose scraps from the copier. Close the document processor bottom cover. Close the document processor and reload the originals in the original table. Optional Document Finisher If a misfeed occurs in the document finisher, refer to the document finisher Operation Guide to remove the jam. - Page 113 Appendix This appendix lists the copier specifications. • Copier...Appendix-2 • Copying Performance...Appendix-3 • Optional Side Feeder...Appendix-3 • Optional Document Finisher...Appendix-4 • Environmental Specifications...Appendix-4 Appendix-1...
-
Page 114: Specifications
Appendix Specifications NOTE: These specifications are subject to change without notice. Copier Copying System Indirect electrostatic system Originals Supported Sheets, books, and three-dimensional objects (maximum size: A3) Copy Sizes Cassettes 1 and 2 11 × 8 " and A4 Cassette 3 and 4 11 ×... -
Page 115: Appendix
Appendix Copying Performance Copying Speed Platen (1:1) 62 cpm model 11 × 17"/A3: 31 sheets/min × 14"/B4: 37 sheets/min 11 × 8 "/A4: 62 sheets/min × 11"/A4R: 43 sheets/min B5: 60 sheets/min B5R: 47 sheets/min 82 cpm model 11 × 17"/A3: 41 sheets/min ×... -
Page 116: Specifications
Appendix Optional Document Finisher Number of Trays Supported Paper Sizes Trays A (Without 11 × 17", 8 × 14", A3, B4 and Folio: 1500 sheets stapling) 11 × 8 ", 8 × 11", 5 × 8 ", A4, A4R, B5, B5R, A5R, B6R and A6R: 3000 sheets Trays B 11 ×... -
Page 117: Index
Index Index Cover mode ii Adjusting Density 3-5 Adjusting density i Auto Density mode 3-5 Document finisher 4-3 Manual Density mode 3-5 Paper jams 6-24 Advanced functions i Specifications Appendix-4 Auto Density mode 3-5 Document processor 1-2 Auto image rotation iii Cleaning 5-2 Auto Low-Power mode 3-19 Loading originals 2-16... - Page 118 Index How to insert the key counter 4-4 Original size indicator plates 1-3, 2-18 Knob A1 1-5, 6-18 Original table 1-4 Knob A3 1-5, 6-18 Original width guides 1-4, 2-17 Output management iv Output tray 1-3, 3-3 Overview of optional equipment 4-2 Large Size Side feeder 4-3 Specifications Appendix-3 Legal and safety information...
- Page 119 Index Reducing/Enlarging 3-6 Repeat copy iii Replacing toner container 5-4 Resolution Appendix-3 Responding to error messages 6-4 Right cover 1-2, 6-15 Scanner kit 4-4 Security kit 4-4 Selecting image quality i, 3-4 Photo 3-4 Text 3-4 Text+Photo 3-4 Selecting the language 2-20 Shared Data Box iv Side feeder 4-3 Loading paper 2-6...
-
Page 120: Index
Index Index-4... - Page 121 For best results and machine performance, we recommend that you use only our original supplies for your products.
- Page 123 ©2008 is a trademark of Kyocera Corporation...
- Page 124 First edition 2008.11 Printed in China 302KP56030...
Need help?
Do you have a question about the TASKalfa 620 and is the answer not in the manual?
Questions and answers